
Cloud Station is a known file sharing program that permits users to sync files between multiple client computers and a centralized Synology product/s. The Synology product has to be chosen as the host server, while the various client computers and devices have to be selected as the client devices for a seamless sync of data to occur.
Prior to syncing your data across the host and client devices, you first need to install the Synology Cloud Station Server software on the host Synology product. Besides, the Cloud station drive for your device clients has to be installed on the client computer/device intended to use for syncing.
In short, this program is a file-syncing app that enables us to sync files on our Synology NAS with our physical devices. This article will illustrate installing the Cloud Station Server and Cloud Station Drive on your Solus operating system. Besides, we shall highlight the Synology Driver Server, the new application that has replaced the phased-out Synology Cloud Station Drive.
Note: The Synology Cloud Station Server has been phased out and succeeded by the Synology Drive Server. We recommend upgrading to this new application as it contains all the original primary functionalities and more.
Installing Synology Cloud Station Drive on Solus OS
This section will illustrate a step-by-step guideline on installing the Synology Cloud Station Drive on your Solus OS. Therefore, to get started, follow the steps provided herein:
Step 1: Using the Ctrl+Alt+T shortcut, launch the terminal. Once the terminal window has been launched, proceed to step 2 below:
Step 2: Execute the subsequent line of code on your terminal. You can copy and paste it on your terminal to avoid conflicting errors that might arise due to spelling errors.
sudo eopkg bi --ignore-safety https://raw.githubusercontent.com/solus-project/3rd-party/master/network/download/synology-cloud-station-drive/pspec.xml
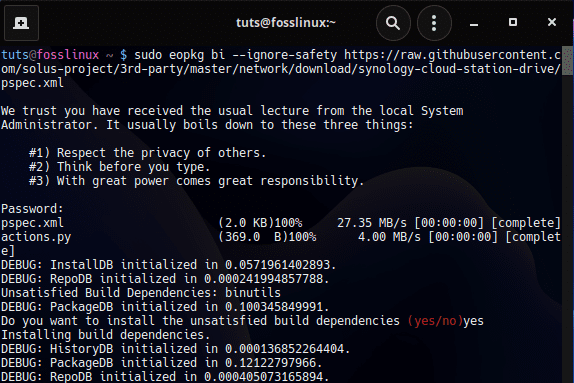
Download Solus Installer
The above command will download the Synology Cloud Station Drive binary file provided by the Solus development team into your Solus OS.
Step 3: Once it has been downloaded, use the eopkg command to install it by executing the line of code provided herein:
sudo eopkg it synology-cloud-station-drive*.eopkg
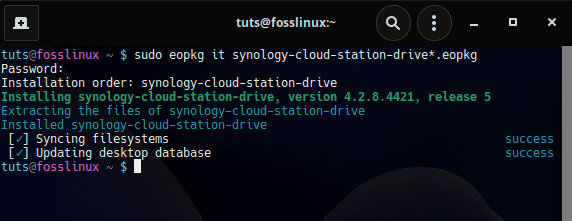
Install cloud station drive
Be patient as the command above executes, as it might take a while, depending on your system specs. Once it completes, move to step 4
Step 4: Log out, then in again. This step is aimed at effecting the changes made to your Solus OS.
Note: You can alternatively remove the Cloud Station Drive file we installed previously by executing this line of code:
sudo rm synology-cloud-station-drive*.eopkg
That’s it. Synology Cloud Station Drive has been installed successfully on our Solus OS.
How to use Synology Cloud Station Drive to sync data with your device
Now that we have installed the Cloud Station Drive, we shall briefly look at how to use it to sync data on your device.
To do so, follow these steps:
- Launch the Cloud Station Drive
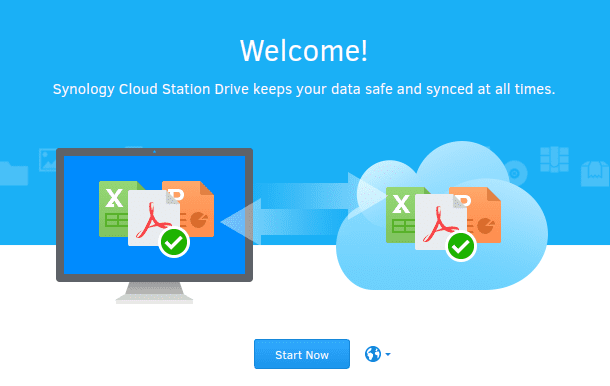
Synology Cloud Station Drive welcome screen
- Once the application runs, click the ‘Start Now’ button to proceed.
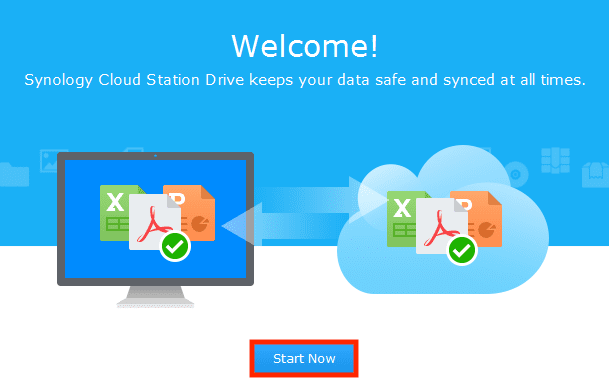
Click Start Now
- Enter the address of the Synology NAS running Cloud Station (or QuickConnect ID) and the login and password. Then, use the search icon on the right to search for IP addresses within your LAN. Once you are done, click, Next.
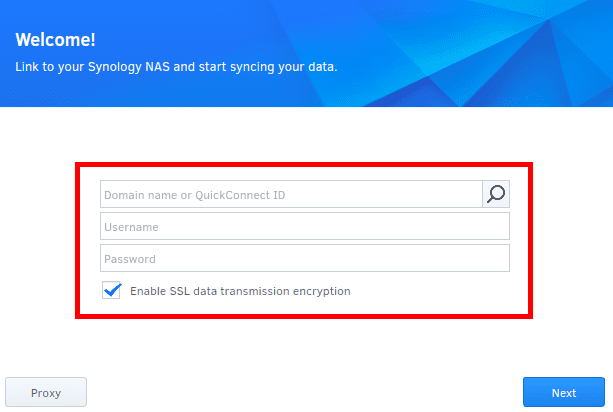
Input details to log in
Note: Before connecting to the Synology Cloud Station drive, A Synology NAS is required for a successful connection. Therefore before proceeding, please ensure you install the Cloud Station server in your Synology NAS before proceeding with the remaining steps.
- Choose the folders you intend to sync with your Synology NAS by selecting the Edit icons. If you wish to edit and configure the sync settings, click the ‘Advanced’ button.
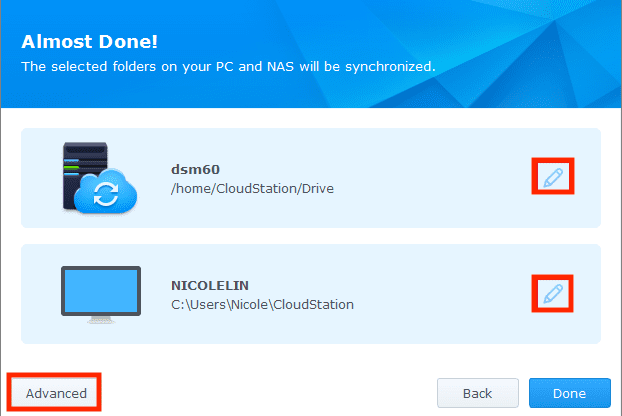
Click Edit icons and Advanced section.
- In the next section, uncheck the folders you don’t intend to sync with Synology NAS. Once done, Click ‘Apply’ to proceed.
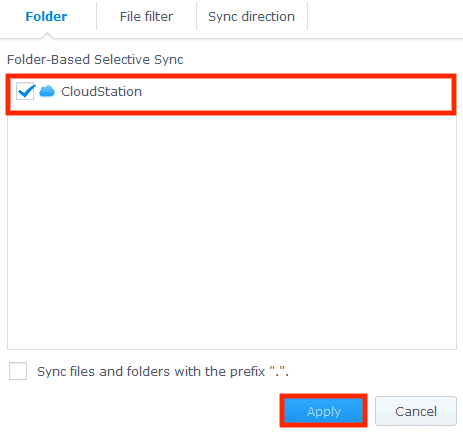
Select folders to sync
- Next, you can choose the maximum file size or block the file name and types you don’t want to sync.
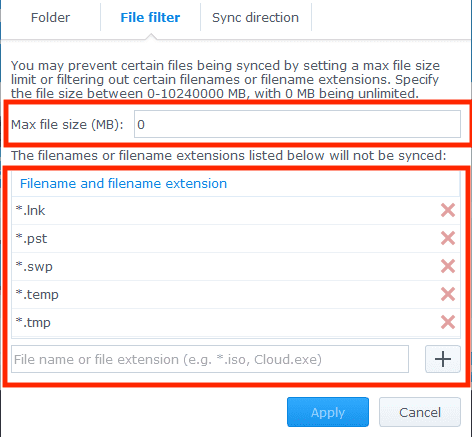
Choose file size, type, and extension
- Choose whether to sync data bidirectionally or download it directly from the Synology NAS. Once done, click ‘Apply’ to proceed.
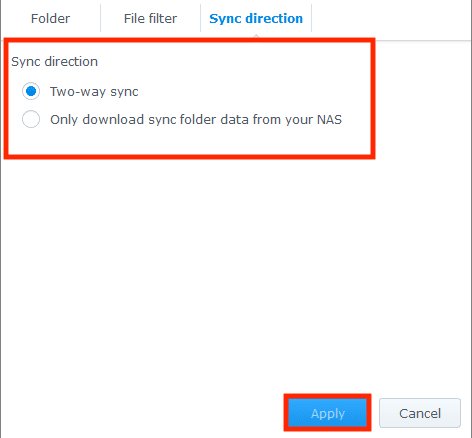
Choose how to sync
- Click ‘Done’ if you are confident with the settings you have made to complete the setup process.
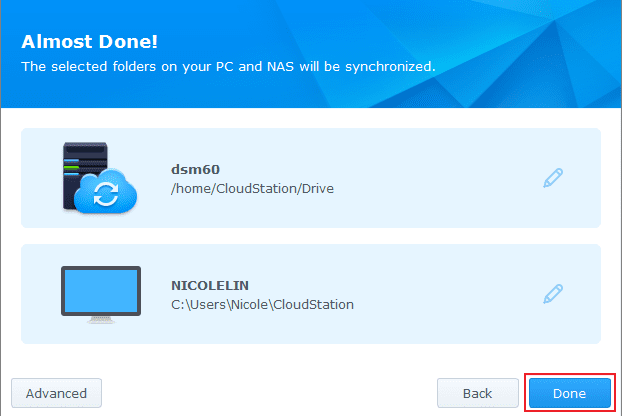
Click Done
- Once the setup is done, check your Synology Cloud Station Drive to see if the synced files are displayed. At first, you will encounter tips on how to navigate the station drive. To see more information, click the ‘Online tutorials’ section. Alternatively, if you don’t want to see the tips notification window again, press the ‘Don’t show this again’ window.

Tips
That’s it. You can enjoy using the Synology Cloud Station Drive in your Solus operating system.
Synology Drive Server
The Synology Drive Server is a complete alternative for file syncing, management, and sharing. This application replaced the famous Cloud Station Drive that has been extensively covered in this article guide. Upgrading to the Synology Drive Server will offer you optimal performance besides experiencing new features. The package consists of three parts: Synology Drive, Synology Drive ShareSync, and Synology Drive Admin Console. Users may see Synology Drive as a file portal and access it via online browsers, desktop programs, and mobile apps once the administrator has activated Synology Drive Server. The administrator may set up sync jobs to other Synology NAS systems using Synology Drive ShareSync.
Features of the Synology Drive Server
- Server for client synchronization across many platforms
- File sharing between offices using Synology NAS systems
- Creates links for safe and secure file sharing with Synology Office integrated file management on a website.
Specifications
- Optimized for DSM 7.0 or later
- For Synology Drive Server 3.0 and below:
Synology Drive Server is compatible with all Cloud Station apps, including Cloud Station Backup, Cloud Station Drive, Cloud Station ShareSync, and DS cloud. The apps will still function even after Cloud Station Server has been updated to Synology Drive Server. The desktop applications for Synology Drive Client and Synology Drive ShareSync work with Cloud Station Server. They can continue to operate with a link to the Cloud Station Server. - For Synology Drive Server 3.0 and later:
Cloud Station Suite apps are no longer supported by Synology Drive Server 3.0 and later. To ensure compatibility when using any Cloud Station Suite programs (Cloud Station Server, Cloud Station Backup, Cloud Station Drive, Cloud Station ShareSync, or DS cloud), you must shift to their Synology Drive Suite equivalents. To ensure compatibility, connected Synology Drive client programs, such as Synology Drive Client and Synology Drive ShareSync, must be upgraded to version 3.0 or above.
Download the Synology Drive Client tool in one of the following methods before synchronizing data between your Synology NAS and your local computers:
- In a new browser tab, navigate to Synology Drive and select the Account icon > Client > Download client.
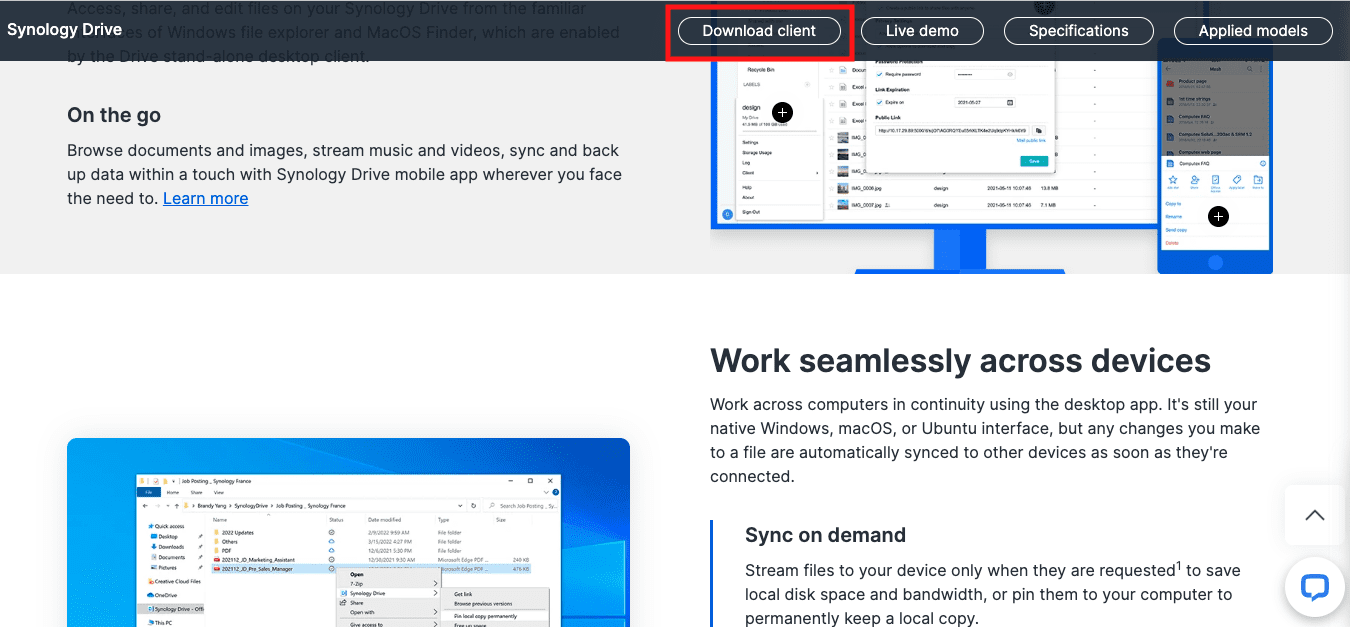
Click Download Client
- Navigate to the Synology Package Center and select the ‘Utilities’ category to download the Synology Drive Client.
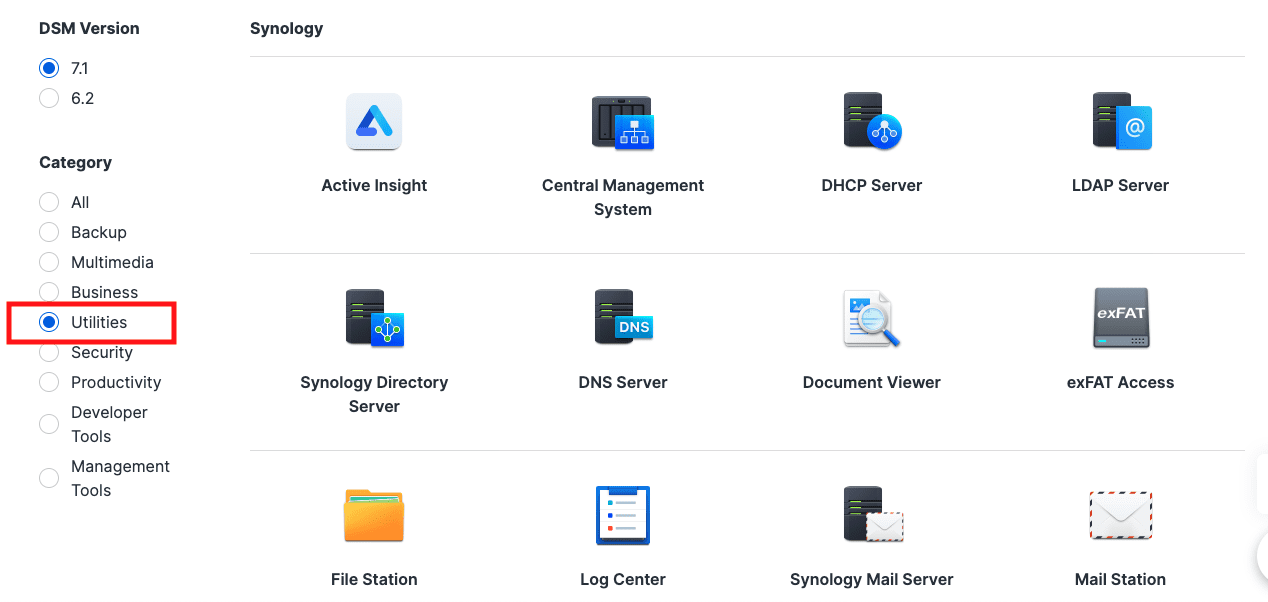
Select Utilities
Alternatively, Launch the terminal and execute the following command to download the Synology Driver Client onto your Solus OS.
sudoeopkg bi --ignore-safety https://raw.githubusercontent.com/L0g0ff/3rd-party/master/network/download/synology-drive-client/pspec.xml
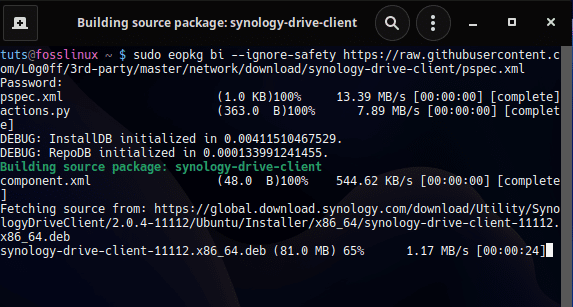
Download Synology Drive client installer
Once done, execute this command to install it.
sudoeopkg it synology-drive-client*.eopkg
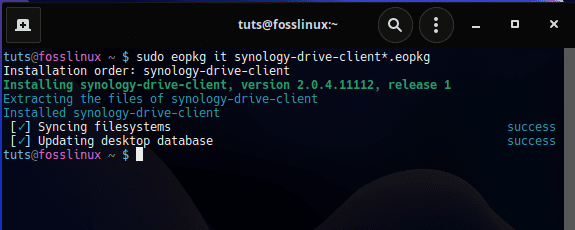
Install Synology Drive Client
If, by chance, you want to uninstall the application, then execute the following line of code:
sudormsynology-drive-client*.eopkg
Before exploring files in Synology Drive on mobile devices, download the Synology Drive app from the App Store or Google Play. To access online editing and collaboration features, install Synology Office from Package Center.
Setting up the Synology Drive Server has to be done by an administrator. He sets up the Synology Drive web portal to provide access to end-users. If you are an admin, tail these steps to set up the Synology Drive Server connection:
Step 1: Navigate to the Control Panel > Login Portal > Applications
Step 2: Configure connection settings to permit a customized port or alias to access the Synology Drive.
Step 3: Once you have configured the settings, end-users can type the command address provided below on their browsers to access the Synology Drive.
http://private IP of your NAS/Drive/
Once the web address is provided, it is solely up to the end-user to launch the Synology Drive. You can do so by following the steps provided herein:
Step 1: Go to the main menu and choose the Synology drive
Step 2: Launch your favorite browser and input the following address:
http://private IP address of your NAS/Drive/
That’s it. Enjoy using Synology Drive Server.
Additional Tips:
Below are additional tips that can come in handy when using this application to sync your files.
How to download a previous synced file version
Follow the steps herein to download a previous file version that had been synced.
- Launch the Synology Cloud Station Drive
- Right-click on the intended file, select ‘Synology Cloud Station,’ then choose ‘Browse previous versions.’
- Select one of the previous versions of your liking and click the ‘Download’ button.
How to restore a previous synced file version from the Cloud Station Server
First, navigate to the cloud station server and follow the steps provided below:
- Click on ‘Version History’ on the left panel of the Cloud station server
- Locate the folder or file you intend to restore.
- Now choose the file you want to retrieve and click the ‘Action’ drop-down menu and select ‘Browse previous versions’
- Select the file version you want to restore, then click the ‘Restore’ button to restore it. Alternatively, you can choose the ‘Download’ button to download the previous version you selected.
Note: Restoring the file in question will overwrite the current version; therefore, if you don’t intend to overwrite the current version, then proceed and download the file.
Conclusion
This brief installation guide has illustrated how you can install the Synology Cloud Station Drive in Solus. It is vital to consider that the Synology Cloud Station Drive has been phased out and replaced by the Synology Driver Server, which has also been covered in this article guide.
1 comment
Hi Kiran
Thank you very much for your manual, but unfortunately I get the error message “sudo: eopkg: command not found”. My Linux version is MINT20. What goes wrong?
Thanks for your help.
Adi