
Antergos is derivative from another popular distro ‘Arch Linux.’ Since its launch in 2012, the distribution is one of the fastest-growing distributions. The best part of the distribution is how nice it looks.
Some credits go to the juicy looking icons. Thanks to the Numix projects where the icon themes are sourced from.
Antergos uses the GNOME desktop environment by default settings. You do get the option to choose from other desktop environments, including Cinnamon, MATE, KDE Plasma 5, and Xfce desktops. Antergos is released as a rolling distribution, which means install it once, and it will get updates forever. There is nothing like end-of-life for a version like seen in other Linux distros, including Ubuntu, Linux Mint, elementary OS, and Fedora.
Here is how the Antergos 2016 desktop looks like with the ‘Show applications’ turned ON.
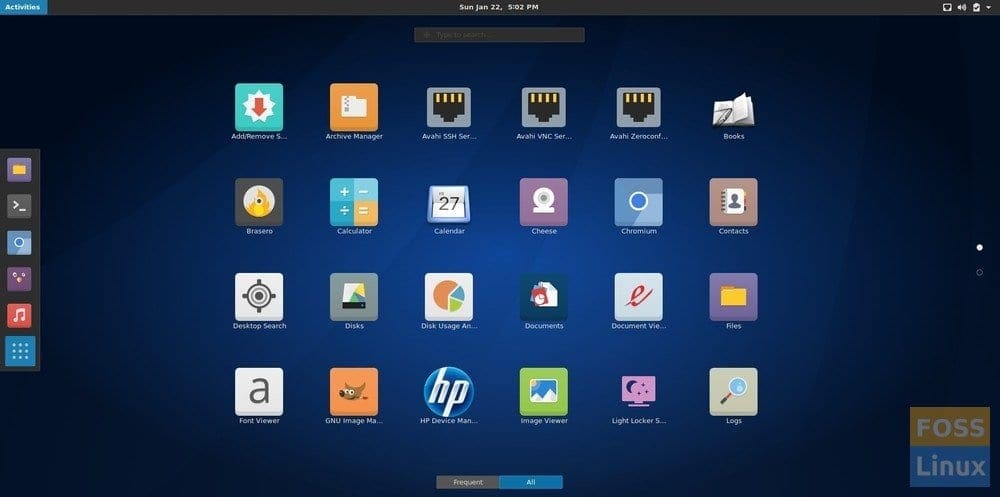
Antergos Applications Screen
And here is Antergos’s setting app.
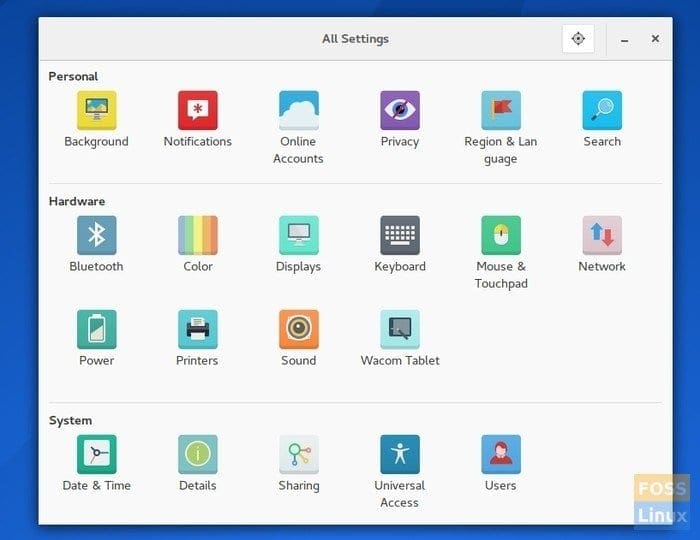
Antergos Settings App
Create Antergos Live USB flash drive on Windows
Step 1: Download the Antergos ISO image from its official website.
Step 2: Download Rufus utility for Windows. It is a portable utility, so there is nothing to install. Just download, and it’s ready for use.
Step 3: Plug-in an empty USB flash drive of at least 2 GB capacity.
Step 4: Right-click on the Rufus exe file and select ‘Run as administrator.’
Step 5: In the Rufus window, set the following settings:
(#1) Click on the CD drive icon near the checkbox ‘Create a bootable disk using ISO Image’ and select the Antergos ISO file that you downloaded, for example, mine says antergos-2016.11.20-x86_64.iso.
(#2) In the same interface, click on the drop-down list under the ‘Partition scheme and target system type,’ select the ‘MBR partition scheme for BIOS or UEFI.’
(#3) Next select file system as ‘FAT32’.
(#4) Finally, click ‘Start.’
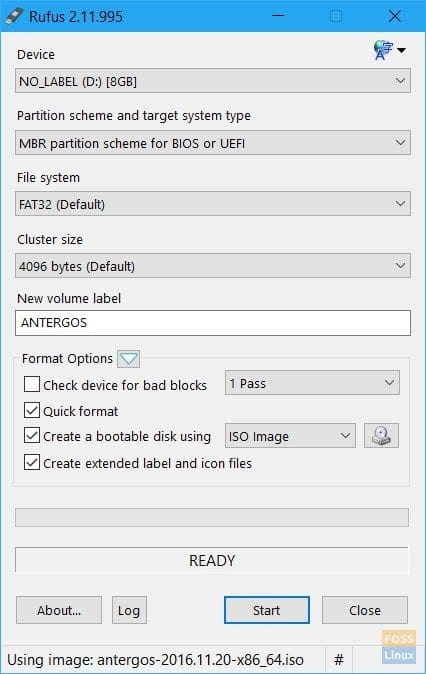
Rufus Settings
STEP 6: Keep the ISO Image mode to write when prompted and click OK.
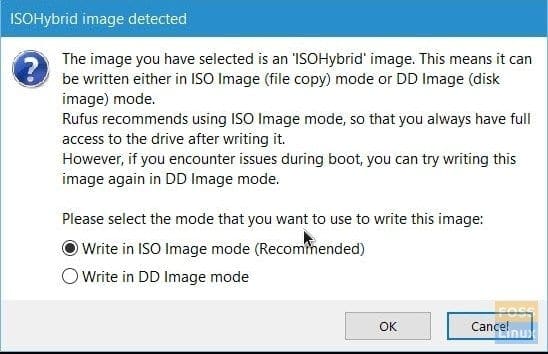
Rufus – Keep the ISO image mode
STEP 7: Wait until Rufus writes the data to the USB flash drive.
Your Antergos Live USB drive should be ready. You can boot into it and test drive Antergos. It also serves as an installation media just in case you decided to install it. Good luck!