
Privacy is something that almost all of us have concerns about. Many people switch over to Linux because of its better privacy features. In this time, where many people believe (quite rightly so) that privacy doesn’t exist anymore, Linux provides a ray of hope. Distributions like Tails OS are specifically designed for that purpose.
Safest ways to encrypt files on a Linux system
An important element of privacy is encryption. Today, we want to show you the best and most reliable methods of encryption available on the Linux platform.
1. GnuPG
GnuPG is the most used encryption tool on the Linux platform. This makes sense because its a part of the default GNU package and comes preinstalled. Also, because it has the most secure encryption algorithms at work. The way GnuPG works is that it has a public key and private key (as it uses asymmetric encryption). The public key can be sent out to everyone, using which files can be encrypted. But the private key, that only stays with you. And anything that has been encrypted with the public key can only be decrypted with the private key.
This means you’ll first need to set up the keys. Enter this command to generate a key pair:
gpg --gen-key
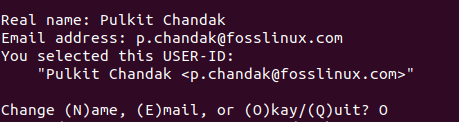
It will prompt for your real name, and working E-Mail address. Make sure that you enter an active E-mail address, as this will be associated with your public key later. Press ‘O’ when asked if you’re confident or not (but only if you are). Then it will prompt you for a password.
GPG inquiry
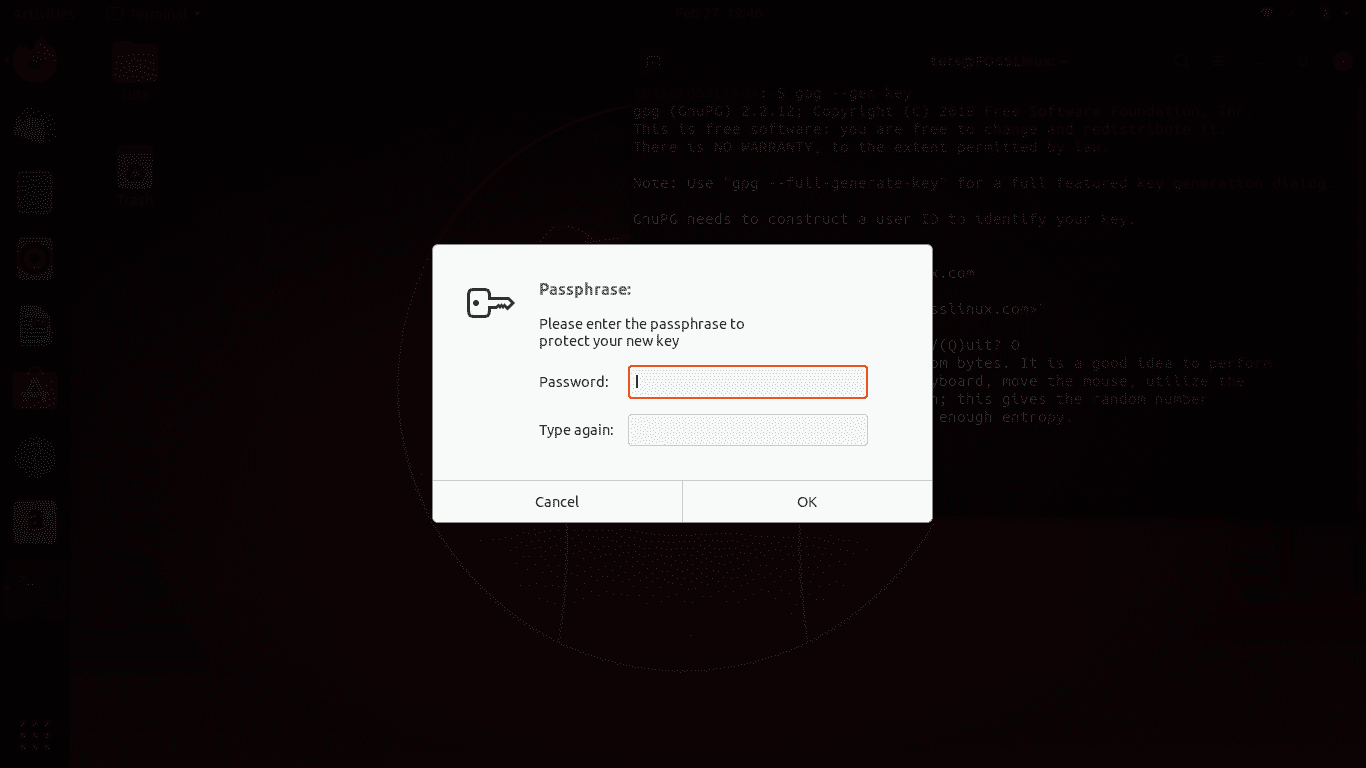
Now, make sure you enter a strong password and remember it well. Otherwise, there will be no point of this all. After this, it will have generated the public and private keys.
GPG password prompt
Usage
Now, to use GPG, you’ll first have to share your public key and need to know how to encrypt/decrypt files. First of all, to get your public key, enter this command:
gpg --armor --output mypubkey.gpg --export <E-mail that you registered>
This will generate a public key named ‘mypubkey.gpg.’ You can share this public key with anyone that needs to send you encrypted files. Or they could use that associated E-mail address of yours to encrypt data.

GPG public key file
Now learning the part to encrypt and decrypt data:
Encrypting files using someone’s public key:
To encrypt a file (assuming name as test.txt), use the command of the following structure:
gpg --output test.txt.gpg --encrypt --recipient <Receiver's E-Mail ID> test.txt
And this is why the registered E-mail ID is so important.
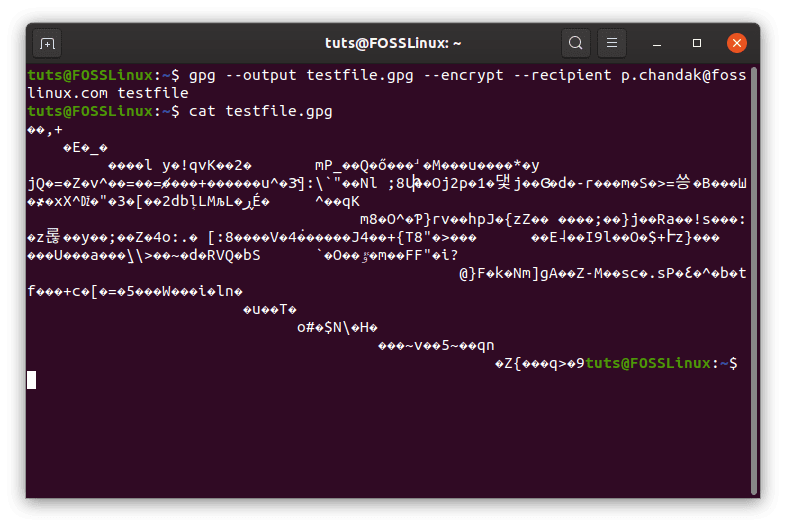
GPG encryption
As you can see from the gibberish, the file has been successfully encrypted.
Decrypt files using your private key
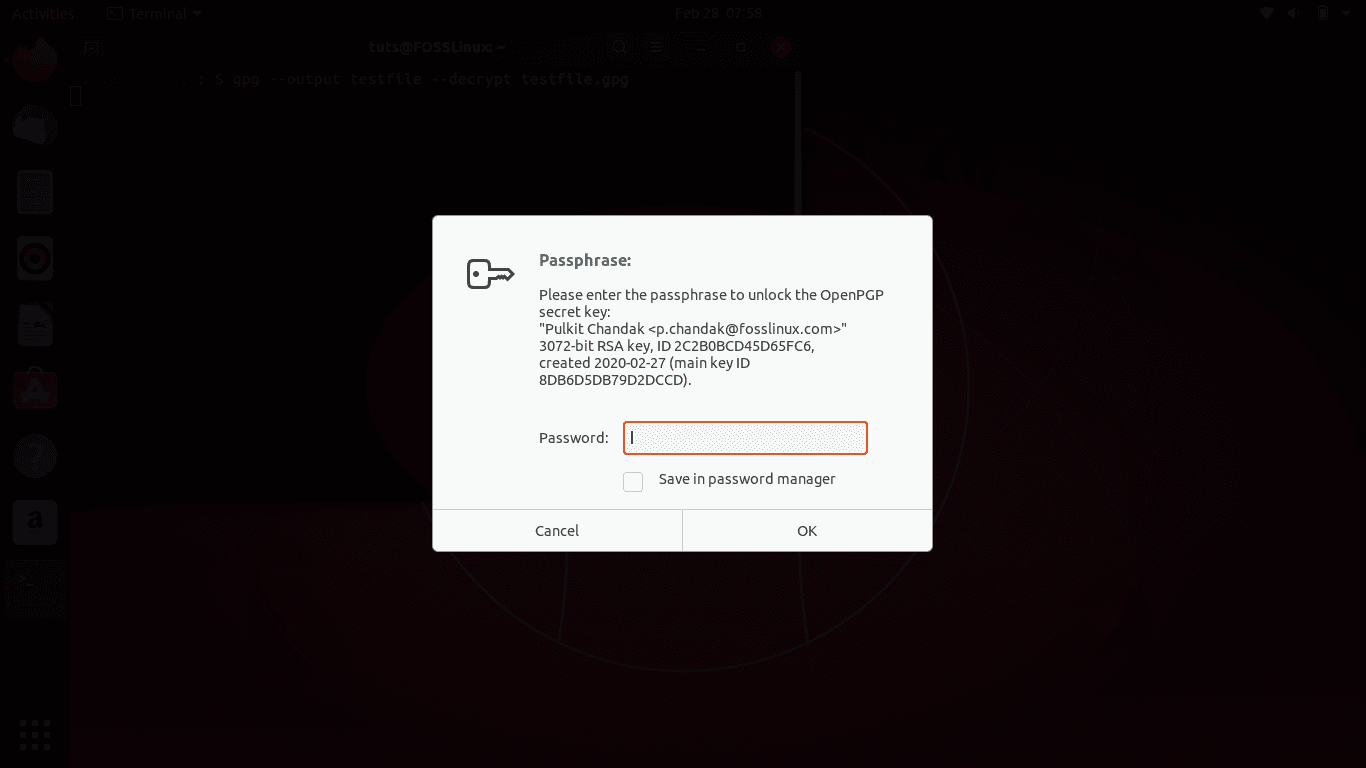
To decrypt a file (assuming the name of encrypted file to be test.txt.gpg) encrypted with your public key, you need to enter this command:
gpg --output test.txt --decrypt test.txt.gpg
This will give you a prompt you for the password that you entered while creating the keys.
Decryption password prompt
After entering the password, the resultant file of test.txt will be produced.
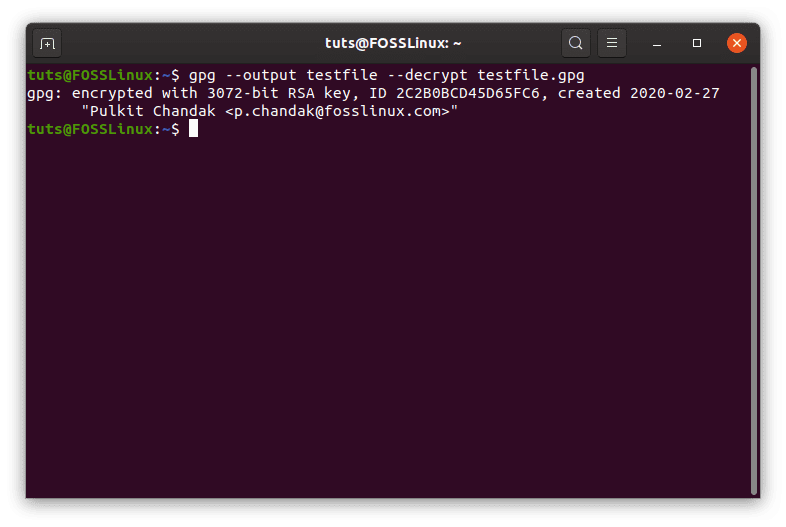
GPG decryption
2. ccrypt
ccrypt uses 256-AES for encryption as well and is substantially more straightforward. This certainly works in a lesser serious tone, so the program is ideal for not-so-important private files. For example, if you’re uploading something to the cloud storage of some service, you could use this. The usage is quite simple. To encrypt a file, then the following command:
ccencrypt <filename>
It will then prompt you for a password. Enter a password (a long and strong one), and the data will be encrypted with the extension of .cpt.
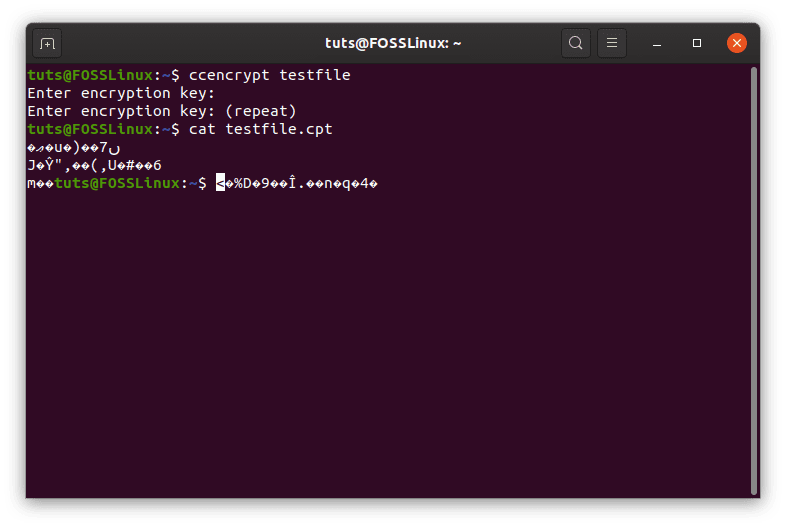
ccencrypt encryption
Now to decrypt:
ccdecrypt <filename.cpt>
You will now be prompted for the password you entered will encrypting that file. Enter the password, and the file will be decrypted.
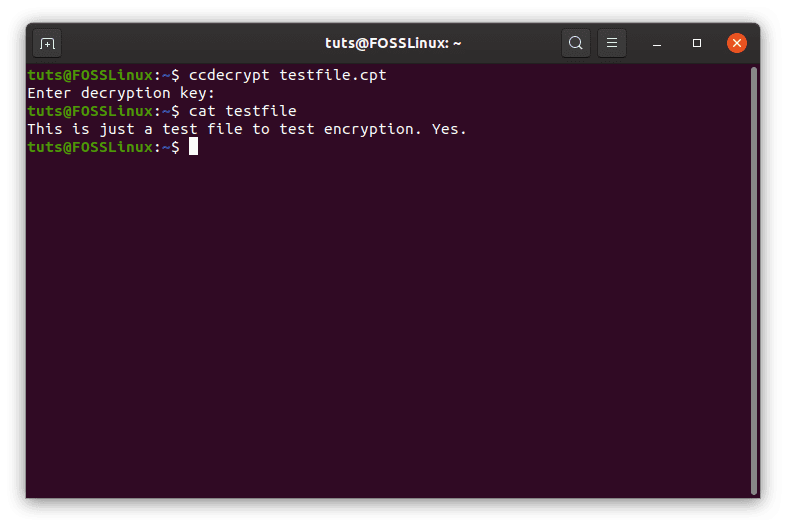
ccdecrypt decryption
To install ccrypt on Ubuntu, Debian and their derivatives, enter:
sudo apt-get install ccrypt
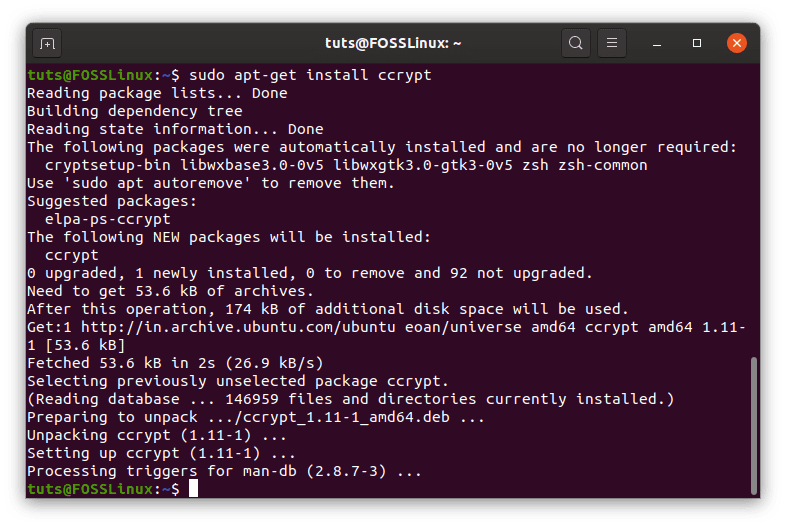
ccrypt installation
For Fedora and its spins, enter:
sudo dnf install ccrypt
Enter the corresponding command according to your distribution. If your distribution’s repositories do not have it, you can find the binaries here.
3. 7-zip
7-zip uses 256-AES encryption as well and has a very high compression ratio. This is the highlight of 7-zip. Almost everyone has heard of the infamous .zip format. The official name of 7-zip for Linux systems is p7zip (referring to Posix). It has straightforward usage, which we will tell about categorically:
Creating archive
Creating an archive consists of a command in the following format:
7z a <Required .zip archive name> <File names to be archived>
Even though this does create an archive, it still does not encrypt it. To add a password to the archive, we can use the -p switch.
7z a -p <Required .zip archive name> <File names to be archived>
This command is also used to add files to an archive. That’s right, the creation of an archive and addition of files to an archive are done through the same command.
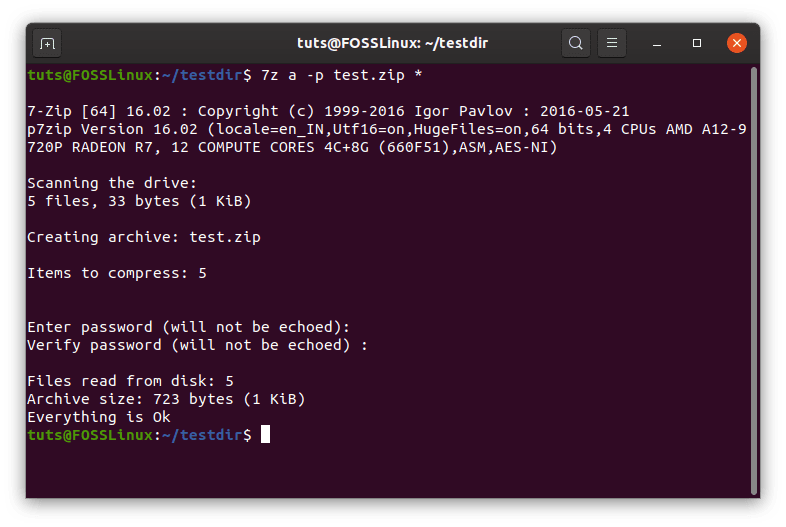
7z encryption.
This brings us to the next important detail:
Listing files of an archive
The listing command has a simple structure as well that follows this:
7z l <Archive name>
Example:
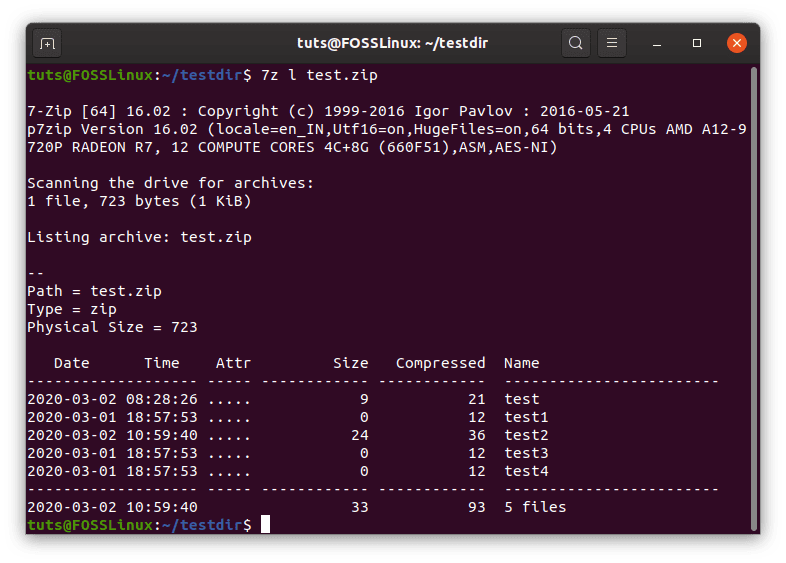
7z listing.
Decrypting an archive
Decryption is also quite a simple task. The required command follows this structure:
7z e <Archive name>
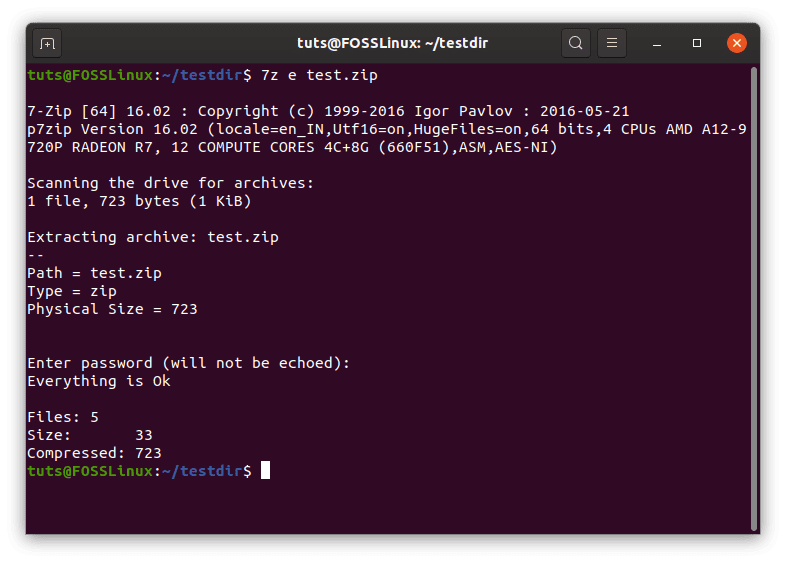
7z decryption.
That should suffice the requirements. But the command is quite more extensive, having options for renaming files inside an archive, to test its integrity, to delete files from one, etc. These can be found through the command:
man 7z
Installation
The installation of the full suite of 7z can be done through this command for Ubuntu, Debian or their derivatives:
sudo apt-get install p7zip-full
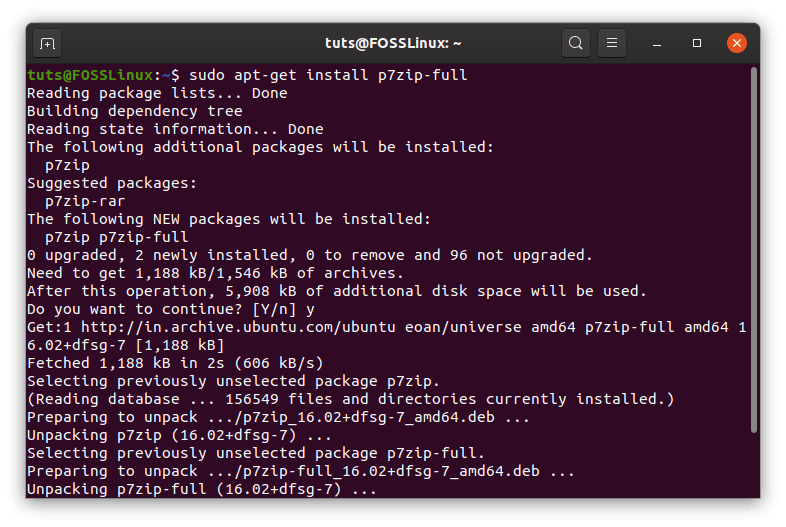
7z installation.
On Fedora and its spins:
sudo dnf install p7zip
For other distributions, the binaries can be found here (at the end of the page).
4. VeraCrypt
VeraCrypt is a unique encryption system and an interesting one at that. Its usage is straightforward, once that you set it up. What it does is create an entire virtual volume that is encrypted. This volume, when mounted the right way, can be used like just another storage device, to copy files to and from in the usual way, but once unmounted, it is no more there. The volume exists inside a blurred binary file, which no one can read. Now let us see how to set this up.
Installation
On all distributions, VeraCrypt needs to be downloaded and installed. You can find the package for your distribution here. We are going to show instructions for the graphical version here to keep things accessible for all.
On Ubuntu or Debian or any derivatives, the instructions for installation go like this (considering the file is in the Downloads directory) :
cd Downloads/
sudo dpkg -i <Downloaded package name>
There probably will be missing dependencies. To fix that, run this command:
sudo apt-get -f install
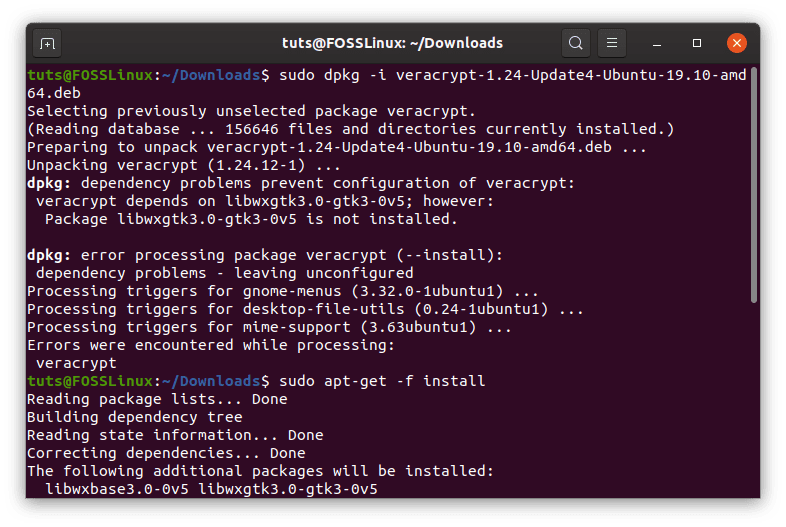
VeraCrypt install.
All good, now let us proceed to the good stuff.
Setup
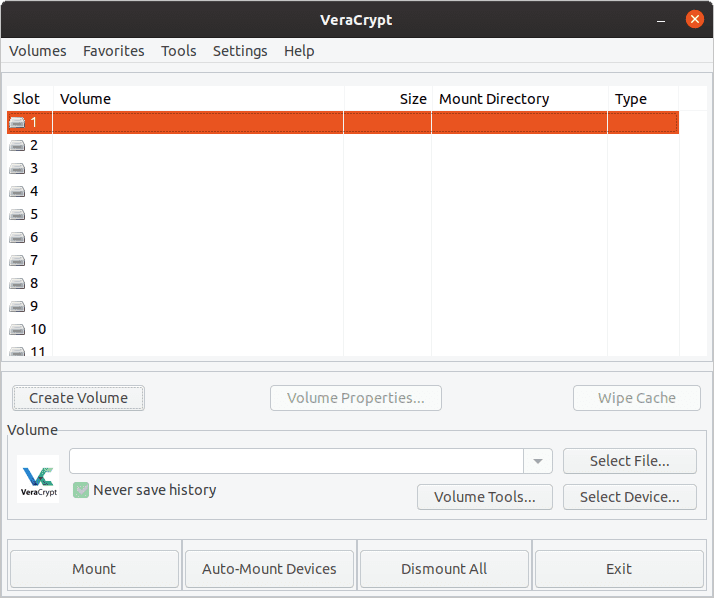
For setting up the encryption method, first of all, an empty file needs to be created. For a sample file, we’ll name it EncryptedVolume (I know, a bit on the nose). To do this, run this command:
touch EncryptedVolume
Now open up VeraCrypt. Among the listed sample volume list, choose anyone. Ideally, the first one (again, to keep things simple). Click the ‘Create Volume‘ option now. This will open up a new window.
Creation window.
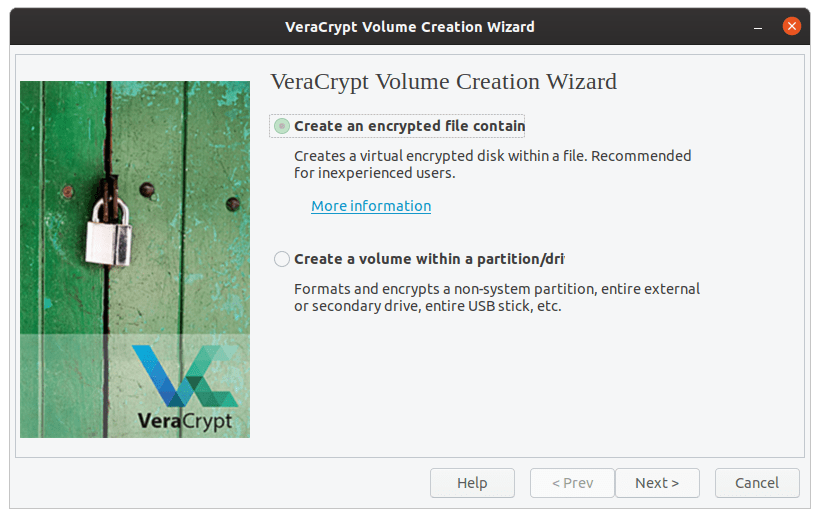
Now choose the ‘Create an encrypted file container‘ option.
Volume physical feature
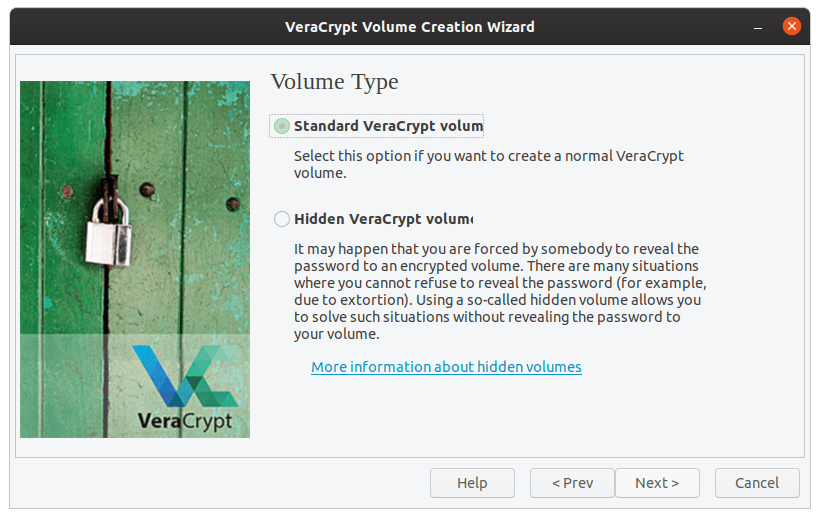
We’re going with the ‘Standard VeraCrypt volume.’
Volume type.
Click on the ‘Select file‘ box, and select the file you just made, EncryptedVolume.
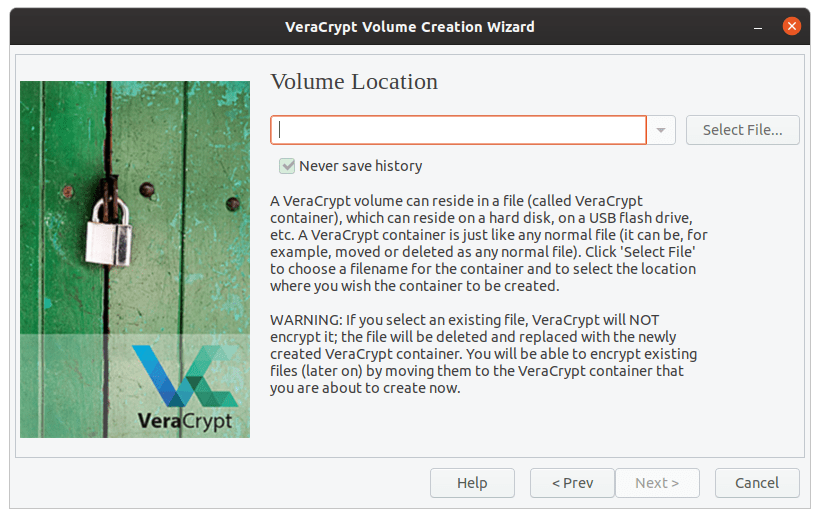
File location.
The default AES and SHA-512 encrypted is more than enough, so we’re sticking with the default again.
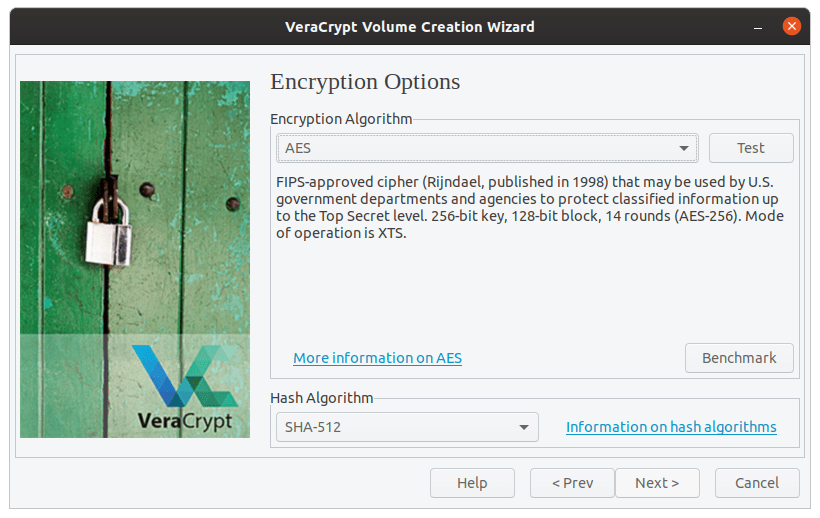
Encryption method selection.
Now enter the size of the encrypted volume according to your requirements.
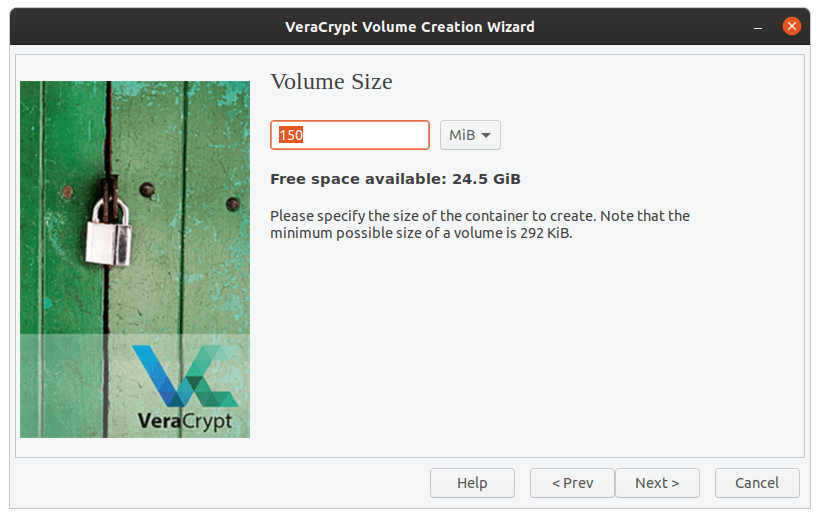
Size of volume.
This is the most crucial step, as you’ll need a good and secure password for strong encryption. The recommended password is >= 20 characters, quite rightly so.
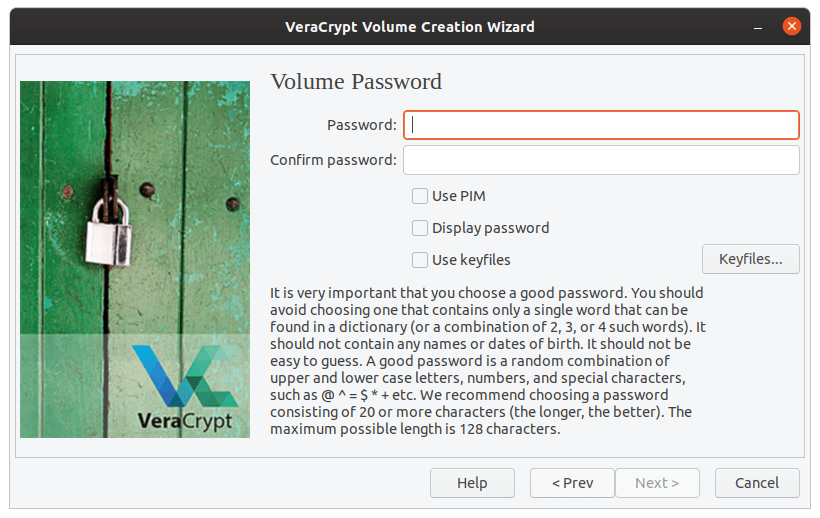
Password selection.
The default chosen filesystem (FAT) is not at all problematic. If you desire, you can select another filesystem.
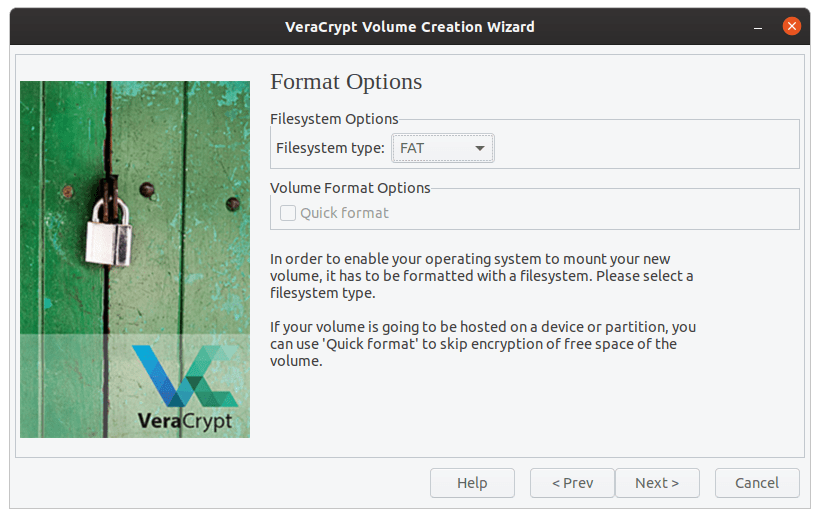
Volume filesystem selection.
This is the most fun part of the whole setup. A key is generated from the movements of the mouse cursor that you make here. Be as random as possible. When you’re done, press ‘Format.’ Click on ‘Yes‘ on the next confirmation prompt.

Key generation.
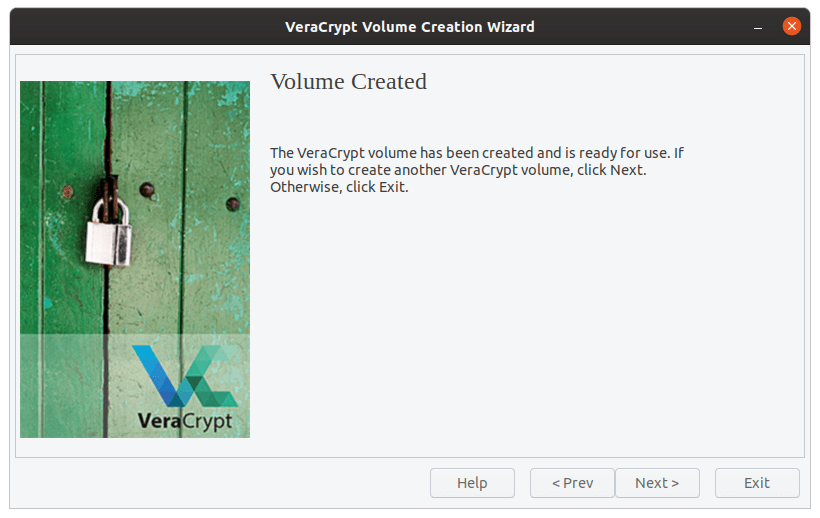
A new volume will be created. Now click ‘Exit.’
Volume created.
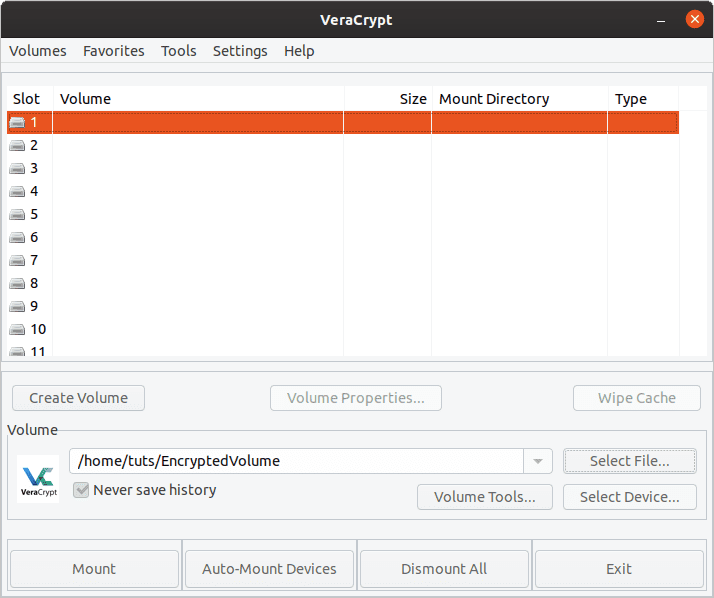
Accessing encrypted volume
Now to access the newly created encrypted volume, select the volume that you selected when you set up the encrypted volume (which we recommended, be the first one). On the lower part of the window, click the ‘Select File…‘ option, and choose the file that you created, which has now become the new encrypted volume.
Click on ‘Mount.’
Mounting encrypted volume
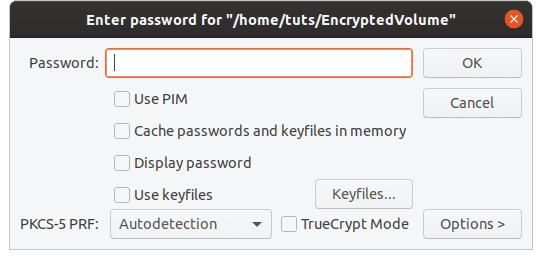
This will prompt you for the password that you used to set it up. Do not bother with the other options, and click ‘OK.’
Encrypted volume password
Now it will prompt you for the user password.
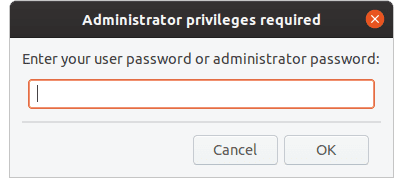
User password prompt
Now when you check your file manager, there will be another volume that will be the size of the volume that you specified in the setup. Now, this is the encrypted virtual volume. To encrypt your files, copy and paste them in this newly mounted volume. When you’re done, go back to VeraCrypt, click on ‘Dismount,’ and this volume will disappear into the EncryptedVolume file again.

Dismount
Even if you open a file from this volume, it will be copied right into the RAM and run, having no involvement of any other part of the storage device whatsoever. This will be a wholly protected ‘vault,’ which is safe, and appear as a junk file to anyone else. Pretty cool.
5. Tails OS
The final part of this article is Tails OS. This OS itself is created for privacy-oriented user experience. Its called the ‘amnesic incognito live system,’ which can only be accessed through an external USB drive on a host computer, and which is amnesic, meaning it will have nothing but the new default form on every single usage. Any change made on usage will automatically be reversed in the next boot.

Tails OS
By default, it has state of the art cryptography and security measures. Some of the factors include:
- Encryption and signing of E-mails by default using OpenPGP whenever you use the E-mail client, text editor, or the file browser
- Instant messages are protected using OTR (which stands for Off-The-Record messaging). It provides are robust encryption for the purpose
- Securely deletes files (with on option of recovery at all) using Nautilus Wipe
There are several other things, but these are just the toppings to describe their seriousness. You can find more about Tails here. Its quite a handy system to use on the go, as all you need is a system that is not currently in use. If you have the Tails OS USB drive, you can start it up, and when you’re done, no one will know. Not even that USB drive, later on.
Conclusion
Even though the Linux platform has a multitude of programs that can be used for encryption/decryption, we have shown you the best ones that are available, and that covers all kinds of encryption that’s available for a Linux system. Go ahead and choose the one for your needs. Feel free to suggest your favorite ones using the comment form below.
2 comments
Hi there – thanks for making this! I think there’s a typo in the first ccrypt command,
ccentrypt
The ironic thing is, im looking for a way to encrypt files ON the encrypted drive of tails os, do you think gpg will work? Because afterall when you restart it it wipes all the changes clean.