
OpenStack is an open-source cloud computing platform that enables organizations to control and compute large data pools, networking, and storage in a data center.
Anyone can download OpenStack’s source code, make alterations, and share it with others because the software is Open-Source. Hence, you do not need to worry about extra costs incurred while using this software.
This article will give detailed information on resizing OpenStack instances using a command line.
Installing OpenStack in Ubuntu
Before you begin the resizing process, you must first ensure that OpenStack is installed in your Ubuntu operating system. Depending on your operating system’s requirement, you will be called upon to use the MicroStack or Charmed OpenStack.
Step 1: Create a stack user
The first step is to create a stack user and assign sudo privileges. To create a stack user, use the command below:
sudo useradd -s /bin/bash -d /opt/stack -m stack
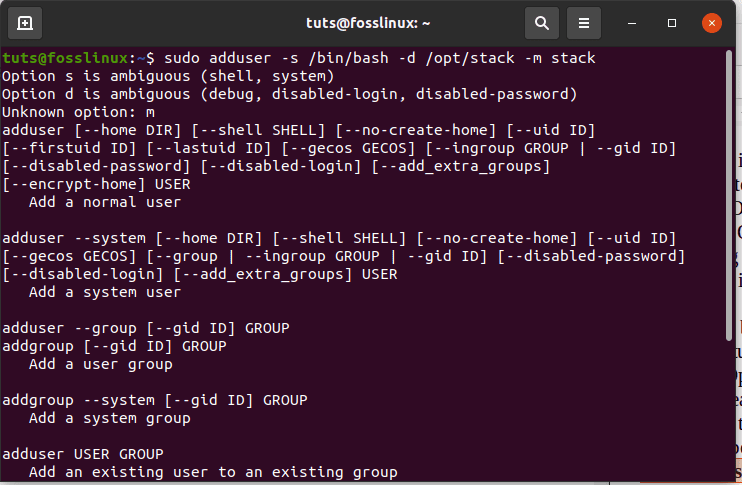
create a stack user
Run this command to assign the created user with sudo privileges
echo "stack ALL=(ALL) NOPASSWD: ALL" | sudo tee /etc/sudoers.d/stack

command to assign the created user with sudo privileges
Step 2: Installing git and DevStack
After you have successfully created the stack user, you can switch using the following command:
sudo su - stack
Step 3: Downloading DevStack
Ensure you have git installed on your operating system. If not, you can run the following command:
sudo apt install git -y
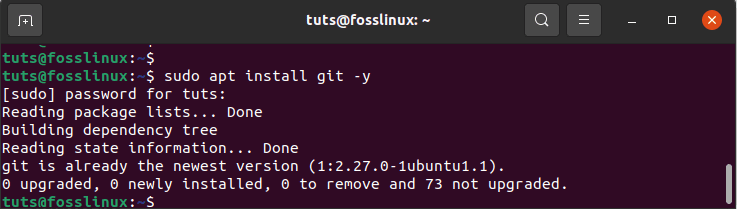
install git
After installing git, let us now clone DevStack using the following command:
git clone https://opendev.org/openstack/devstack
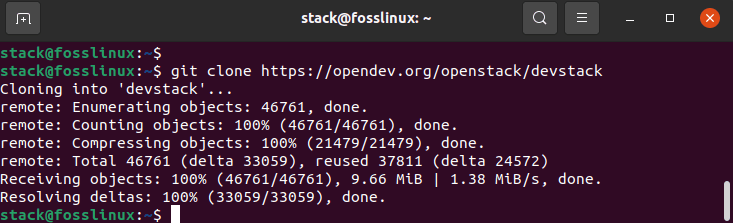
clone DevStack
Subsequently, enter into the devstack directory using the command below:
cd devstack
The downloaded devstack repo has a script that installs Openstack, configuration files, and templates into our operating system.
Step 4: Creating a local configuration file (local.conf)
Create a local.conf file that contains four password presets. Don’t be worried. Just execute the commands below,
vim local.conf
and then paste the following content:
[[local|localrc]]

# Password for KeyStone, Database, RabbitMQ and Service
ADMIN_PASSWORD=password
DATABASE_PASSWORD=$ADMIN_PASSWORD
RABBIT_PASSWORD=$ADMIN_PASSWORD
SERVICE_PASSWORD=$ADMIN_PASSWORD
# Host IP - get your Server/VM IP address from the IP address command

HOST_IP=192.168.0.22
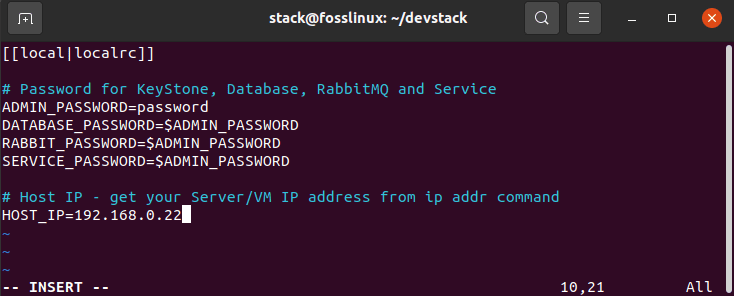
local configuration file (local.conf)
Step 5: Start the installation by running the command below.
./stack.sh
This process takes approximately 20 minutes; depending on your internet speed, sit back and relax as the installer does its thing.
When the installation process completes, the following features will have been installed:
Horizon – the OpenStack dashboard
Nova – a computing service
Glance – an imaging service
Neutron – a network service
Keystone – an identity service
Cinder – a block storage service
Placement – a placement API
When the download completes, you will see an image similar to the following.
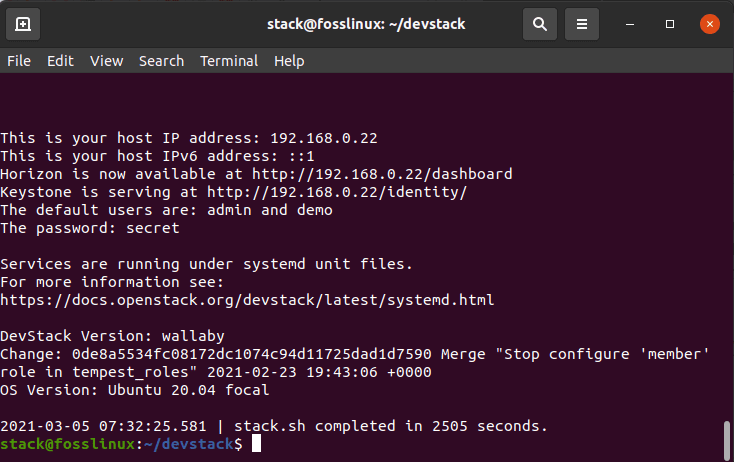
results after download completion
After completion, you can access the Openstack dashboard on your browser using the following command:
http://192.168.0.22/dashboard
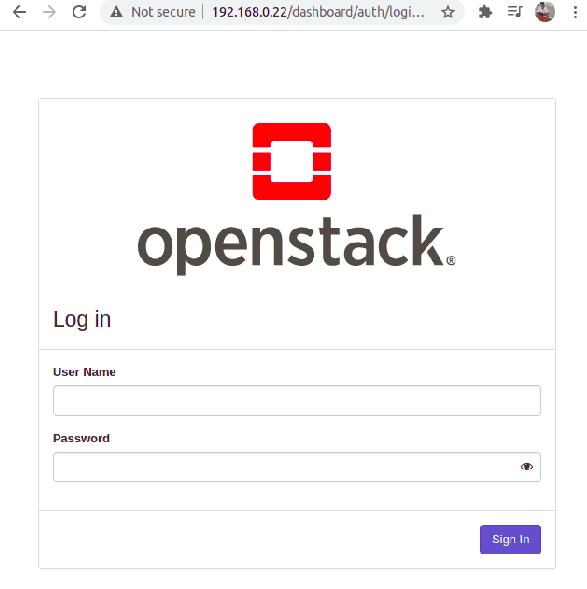
OpenStack Login Screen
Use admin as the username and the password we set initially (password) to access the OpenStack dashboard, as shown below.
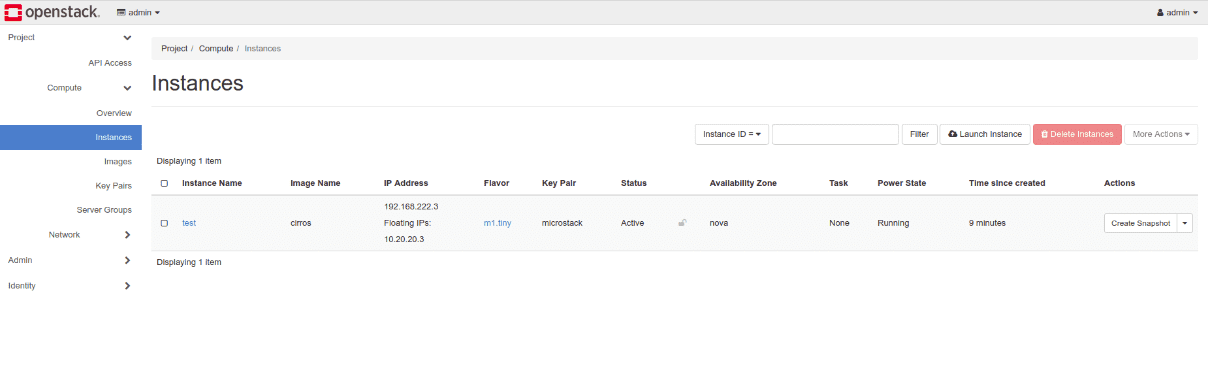
OpenStack Dashboard
Below are the specifications one can check to ascertain that the deployment method to be initiated is compatible with their Ubuntu operating systems. There are three deployment scenarios:
• Single-node deployment
• Multi-node deployment
• Datacenter cluster deployment
Single-node deployment
- Uses MicroStack
- Only a single machine is required.
- Minimum of 16GB required.
- It should be a multi-core processor.
- Root disk space should be at least 50GB.
- Your operating system should be Ubuntu 18.04 LTS and above.
- Fully compatible with upstream
- Supports Iteration development
If you are planning on trying out OpenStack, then this is the ultimate solution for you. Its installation takes a few minutes. Thus you have no reason to panic. As long as your machine has the required specs, you can try it out.
Multi-node deployment
- Uses MicroStack
- A minimum of two machines is required.
- At least 16GB of RAM.
- Each system has to have a multi-core processor.
- Minimum of 50GB space
- Requires Ubuntu 18.04 or above
- It contains all OpenStack components.
- It is compatible with upstream.
- Supports iteration development
Data Centre Cluster deployment
- Uses charmed OpenStack
- Requires bare-metal machines
- A minimum of 6 servers required
- Each server should have 8GB RAM or more.
- Each server should have BMCs, IPMI, and dual NICs.
- Ensure you have an internet gateway and a network switch
- HA architectures are supported.
- It scales up to hundreds of nodes.
This is just an outline of the specs required to determine the deployment method you will select. Let us dive deep and learn how to resize an OpenStack instance now.
How to resize an OpenStack instance
Every created instance in OpenStack is issued with a particular flavor commonly known as a resource template that aids in determining the size and capacity of the instance. Flavors are also responsible for specifying swap disk, special project access, secondary temporary storage, and metadata used in restricting usage.
The named attributes are defined to store the required values. To check the available flavors, use the command line below:
openstack flavor list
Due to the emerging computing needs, an OpenStack administrator must upgrade or downgrade a server depending on the current situation.
A good example is when the needs of the customer change. For instance, an administrator may be required to upgrade the server from 2GB to 4GB of ram.
To check the hardware specification of your server, use the command line below:
openstack server show Ubuntu
The server we are running has 2GB RAM and 20GB of the root disk. Flavor defines the resource as m1.small. Therefore, let us use this specification to upgrade the flavor’s specs to 4GB Ram and 40GB root disk.
To do this, we shall use the command:
openstack server resize
This command goes the extra mile of scaling the server to a new flavor. This command also creates a new server by copying the initial disk’s contents to a new disk. When running the OpenStack server resize, users often turn to the “No valid host was found. No valid host for resizing” error.
Let’s take a closer look at how to solve this error:
This error majorly occurs when you have one compute host. If you have such a problem, all needed is to set the same host as true in the nova configuration document. To solve the issue, execute the commands below:
sudo vi /etc/nova/nova.conf
On the configuration file, add the line: allow_resize_to_same_host = True to the DEFAULT section, as shown in the figure below.
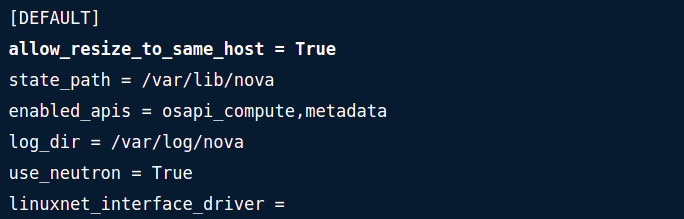
add the line: allow_resize_to_same_host on the configuration file
Alternatively, you can use the following command in the terminal to change the setting:
sudo openstack-config --set /etc/nova/nova.conf DEFAULT allow_resize_to_same_host True
To display the value set, use the following command:
openstack-config --get /etc/nova/nova.conf DEFAULT allow_resize_to_same_host True
After that, you then have to restart the OpenStack Nova services using the following command line:
sudo systemctl restart openstack-nova-${service}.service
Please note that this only works on “for services in compute API scheduler.”
When done solving the No valid host was found error, you can go ahead and retry the instance resizing process again using the command highlighted below:
openstack server resize --flavor m1.medium deb10
The first part of the command, OpenStack server resize, performs the resize duty, whereas the second part of the command flavor ml. medium deb 10 confirms the resize process’s success.
After ensuring the resize process’s success or failure, it initiates a release of the initial server allowing installation of a new server, or vice versa.
To confirm whether the server resizes were complete, use the command below:
openstack server resize --confirm deb10
There are instances where one might want to restore the resize process to the initial state. If you are a victim, execute the command below in your terminal.
openstack server resize --revert deb10
Also, note that you can use the nova resize command to resize the server. It would help if you had a server ID or name with this option, the nova resize command and a new flavor. Combining all three attributes will result in resizing an OpenStack instance.
Also, remember to include the –poll command. This command is essential to display the progress of the resize.
For example:
nova resize myCirrosServer 4 --poll
NOTE: The Nova resize command, by default, allows the guest OS to initiate a controlled shutdown before the resizing process is completed using the shutdown timeout parameter found in the nova configuration file.
To show the status of your server, you can use the command line below:
openstack server list
After completion of the resize process, the status changes to VERIFY_RESIZE. You can confirm if the resize has been completed using the code given in the server list.
For instance:
openstack server list --confirm 67bc9a9a-5928-47c4-852c-3631fef2a7e8
After running this command, there are two outcomes: the server status changes to ACTIVE, which means the server is successfully running. Second, if the resize fails, then you will have to revert the process using the command below:
openstack server resize --revert 67bc9a9a-5928-47c4-852c-3631fef2a7e8
The status will change to ACTIVE whenever the process completes successfully.