
PowerShell built upon the .NET Core framework is a powerful open-source command-line shell developed and maintained by Microsoft. It is a cross-platform (Windows, macOS, and Linux) automation and configuration tool that works well with your existing tools. It includes a command-line shell and an associated scripting language.
PowerShell is syntactically verbose and intuitive for the user. The most recent version available, PowerShell 7 (.NET Core), was made open source in August 2018 and now supports Windows, macOS, and Linux operating systems.
The article guides you on installing PowerShell on your Fedora system using a package manager, snapcraft, and inside a container.
The power of the Shell
PowerShell is a powerful tool that uses verbose syntax that is semantically clear to the end-user. In addition, most of its commands are aliased, which can come in handy in scenarios where you don’t want to write long commands.
But the power of PowerShell comes from its output pipeline. While traditional shells output strings or character streams, PowerShell outputs objects. This comes with quite a few advantages and implications on how pipelines are implemented. For example, an ls in a Bash script returns a string output of files. In contrast, Powershell returns a list of files.
Installing PowerShell on Fedora
Prerequisites
You can install PowerShell using several methods and in several package formats (RPM, DEB), like a snap, or you can deploy and run it as a container.
I recommend installing it natively, or you can even test it in a virtual environment. I will also describe how you can install it as a snap and give you steps on deploying it in a Podman or Toolbox container.
Installing PowerShell using the package manager
Microsoft repository
Installation from Microsoft repositories is straightforward as you would with any other software installed through third-party repositories.
Step 1: Add the new repository’s GPG key
$ sudo rpm --import https://packages.microsoft.com/keys/microsoft.asc
Step 2:Add repository to DNF repository list
$ curl https://packages.microsoft.com/config/rhel/7/prod.repo | sudo tee /etc/yum.repos.d/microsoft.repo
Step 3: Refresh your DNF cache to include available packages from the new repository
$ sudo dnf makecache
Step 4: Install PowerShell packages
$ sudo dnf install powershell
You can launch Powershell with the command pwsh.
$ pwsh
Run the following command to remove the Microsoft repository.
$ sudo rm /etc/yum.repos.d/microsoft.repo
Run the following command to remove PowerShell altogether.
$ sudo dnf remove powershell
RPM package
The method of using the RPM package is not too dissimilar from the Microsoft repository method. When installing the PowerShell Fedora RPM package, it adds the GPG key and the Microsoft repository implicitly. The RPM file contains the link to both the Microsoft repository and GPG key in its package metadata.
Step 1: Download the .rpm file with the version you want from the PowerShell Core GitHub repository. You can use the wget or curl command to download the file with the following command.
$ sudo wget -q https://github.com/PowerShell/PowerShell/releases/download/v7.2.0/powershell-7.2.0-1.rh.x86_64.rpm
Step 2: Run the following command to install the .rpm file.
$ sudo dnf install powershell-<version>.rhel.7.<architecture>.rpm
Make sure you substitute < version> and <architecture> with the version and architecture you downloaded. For example, powershell-7.2.0-1.rh.x86_64.rpm.
$ sudo dnf install powershell-7.2.0-1.rh.x86_64.rpm
Alternatively, you can run the install command with the PowerShell download link skipping the need to download it first.
$ sudo dnf install https://github.com/PowerShell/PowerShell/releases/download/v7.2.0/powershell-7.2.0-1.rh.x86_64.rpm
Remove PowerShell with the following command.
$ sudo dnf remove powershell
Install Powershell
APT package
You can install PowerShell on Ubuntu as an Apt package with the following steps.
Step 1: Retrieve the Microsoft Repository GPG Keys
$ sudo wget -q https://packages.microsoft.com/config/ubuntu/18.04/packages-microsoft-prod.deb
Step 2: Install the Microsoft GPG Keys with the following command.
$ sudo dpkg -i packages-microsoft-prod.deb
Step 3: Update the package list for Apt to ensure you have the latest list of packages available.
$ sudo apt-get update
Step 4: Enable the universe repositories to be able to install PowerShell
$ add-apt-repository universe
Step 5: Install PowerShell with apt-get.
$ sudo apt-get install -y powershell
Remove PowerShell with the following command
$ sudo apt-get remove powershell
Installing PowerShell as a snap package
Microsoft has created a snap version of Windows PowerShell that you can install on your Linux platform.
Step 1: Install and enable snapd with the following command.
$ sudo dnf install snapd
Step 2: Run the following command to create a symbolic link between /var/lib/snapd/snap and /snap.
$ sudo ln -s /var/lib/snapd/snap /snap
Step 3: Install PowerShell as a snap package.
$ sudo snap install powershell –classic
Uninstall PowerShell using snap with the following command.
$ sudo snap remove powershell
Note that the addition of the classic option means that the PowerShell snap package will be installed with the security confinement disabled. As such, the snap package will have full access to the rest of your system.
FUN FACT:
A turtle shell contains 60 interconnected bones.
Installing via a container
You can install PowerShell with the official Microsoft PowerShell container or a Fedora Linux toolbox container. Installing it using a container guarantees that it will work, mainly because all dependencies are bundled in it and are isolated from the host. You also get all the advantages of deploying software in a container.
Podman container
Podman is a drop-in replacement for Docker and is Open Container Initiative (OCI) compliant. Microsoft provides a PowerShell Docker container that you can run with Podman.
To use PowerShell in Podman, run the following script:
$ podman run \
-it \
--privileged \
--rm \
--name powershell \
--env-host \
--net=host --pid=host --ipc=host \
--volume $HOME:$HOME \
--volume /:/var/host \
mcr.microsoft.com/powershell \
/usr/bin/pwsh -WorkingDirectory $(pwd)
Notes:
• The script creates a Podman container for PowerShell and immediately attaches to it. It then mounts the /home and the host’s root directories into the container.
However, note that while inside the container, you can only indirectly run host commands. So as a workaround run, chroot /var/host to chroot to the root and run host commands.
Understanding the script:
- –it – creates a persistent environment that does not kick you out when you are inside a container.
- –privileged option gives extended privileges to the container.
- –name powershell sets the name of the container to powershell.
- –rm – removes the container every time you exit.
- –env-host is optional, but it sets all host environment variables to the container’s variables.
- –volume $HOME:$HOME – mounts the user home directory.
- –volume /:/var/host is optional. You can use it to mount the root directory to home /var/host.
- –net=host –pid=host –ipc=host – runs the process in the host’s namespaces. The other option is to use a separate set of namespaces for the containerized process.
- /usr/bin/pwsh -WorkingDirectory $(pwd) (optional) – enters the PowerShell container in the current directory.
You can also alias pwsh with the script to quickly access the Podman container with the pwsh command. Remove the PowerShell image with the following command.
$ podman rmi mcr.microsoft.com/powershell
Fedora Linux Toolbox Container
The installation process in a Toolbox container is similar to that of PowerShell on a host Fedora system. It follows similar steps, but in this case, it is inside a container. To get started, make sure to have the toolbox package installed.
Fedora Linux Toolbox is a powerful but simple solution to set up isolated persistent environments that do not necessarily affect your host system. The setup will create a wrapper around Podman while taking care of the majority of the options and flags to those in the previous procedure of using a Podman container. In essence, you can run any command (including dnf package manager) the same as you would directly on a Fedora host system.
Step 1: Creating the Fedora 34 Toolbox container
$ toolbox create --image registry.fedoraproject.org/f34/fedora-toolbox
Step 2: Run the Fedora 34 Toolbox container with the following command.
$ toolbox enter --container fedora-toolbox
Step 3: Download the .rpm file with the version you want from the PowerShell Core GitHub repository. You can use the wget or curl command to download the file with the following command.
$ sudo wget -q https://github.com/PowerShell/PowerShell/releases/download/v7.2.0/powershell-7.2.0-1.rh.x86_64.rpm
Step 4: Install the .rpm file with the following command.
$ sudo dnf install powershell-<version>.rhel.7.<architecture>.rpm
Make sure you substitute < version> and <architecture> with the version and architecture you downloaded. For example powershell-7.2.0-1.rh.x86_64.rpm .
$ sudo dnf install powershell-7.2.0-1.rh.x86_64.rpm
Alternatively, you can run the install command with the PowerShell download link skipping the need to download it first.
$ sudo dnf install https://github.com/PowerShell/PowerShell/releases/download/v7.2.0/powershell-7.2.0-1.rh.x86_64.rpm
Step 5: Create an alias of the container.
You can conveniently access the container using alias pwsh with toolbox run –container fedora-toolbox pwsh. You can then easily access the Toolbox container with the pwsh command.
To remove the Toolbox container, stop the Toolbox session by entering exit and then run the following:
$ podman kill fedora-toolbox
$ toolbox rm fedora-toolbox
Note that Toolbox is designed to work for development and debug but is easier to use than Podman.
Bash or PowerShell or both?
Both Bash and PowerShell are great tools that you can use interchangeably on your Linux system. If you had to settle on one, which one would it be? To illustrate, we will use examples to demonstrate an advantage of object-output in PowerShell over the traditional string-output in bash.
Bash script example I
The Bash script below is an example that outputs all processes that occupy 256MB or more in your system RAM.
$ ps -eO rss | awk -F' ' \
'{ if($2 >= (1024*256)) { \
printf("%s\t%s\t%s\n",$1,$2,$6);} \
}'
PID RSS COMMAND
A    B     C
The script uses ps to show the process status and awk as the text processing tool.
Notes:
- ps -e command output all running processes.
- -O rss command retrieves the default output of ps with the kilobytes each process uses.
- The | pipe operator uses the output of the command [ps -eO] as input for the command on the right side.
- awk -F’ ‘ declares “space” as the input field separator. For example, PID is the first, RSS is the second, and so on.
- ‘{ if($2 >= (1024*256) command is the beginning of the AWK-script that checks whether the RSS field contains a number larger than or equal to 1024*256KB (262144KB, or 256MB).
- { printf(“%s\t%s\t%s\n”,$1,$2,$6);} }’ – if the first part of the script (‘{ if($2 >= (1024*256)) is true, the command outputs the first [PID], second [ RSS ] and sixth[COMMAND] fields respectively.
Explanation:
- The ps command has to have the field you want to filter against in its output for the script to work. In our case, you have to use the -O flag with the rss field as an argument.
- Second, you have to treat the output of ps as a list of input fields, which requires knowing its order and structure. In essence, you have to know beforehand that RSS would be the second field. Meaning you have to understand how the output structure of ps would look like before you write your script.
- Third, you have to know what unit the data we were filtering against [RSS] was in, as well as what unit the processing tool [awk] would work in. This enables you to write the expression ($2 <= 1024*256).
Now, let’s look at an equivalent example in PowerShell.
PowerShell script example II
# Longer form of the powershell script
PS > Get-Process | Where-Object WorkingSet -ge 256MB
# Shorter form of the powershell script using aliases
PS > gps | ? ws -ge 256MB
NPM(K) PM(M) WS(M) CPU(s) Id SI ProcessName
------ ----- ----- ------ -- -- -----------
A        B     C     D    E   F     G
[...]
Notes:
- The Powershell script above uses semantics that is clear and self-descriptive.
- Moreover, there is no requirement for input-output reformatting, nor the unit used by the input command. This is because PowerShell does not output strings but objects.
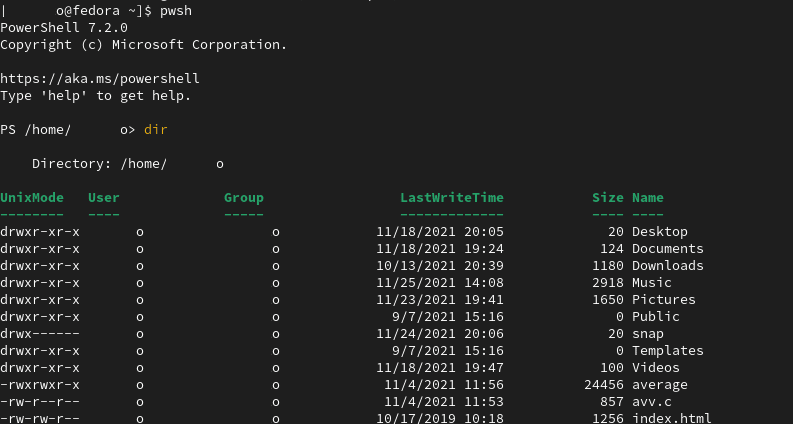
dir command pwsh
In comparison, the output of the Bash command is equal to what it displays in the terminal. However, in PowerShell, the display on the terminal is not equal to the actual information available. This is because, in PowerShell, the output display system also works with objects. In essence, it marks some properties of its output objects as printable and others not.
In conclusion, Powershell is a valuable addition to your existing Linux toolset. So why not use both bash and PowerShell!
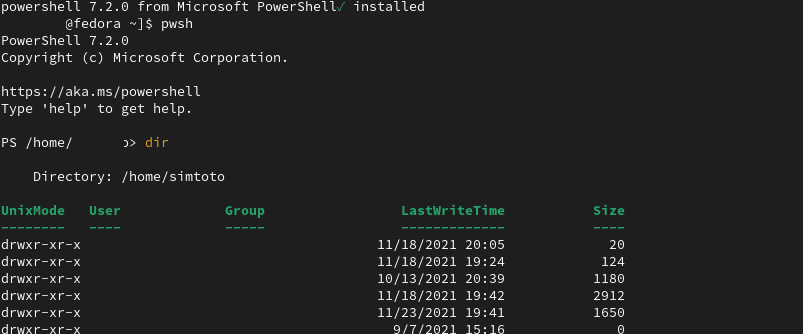
Run PowerShell
You can now run it from the command line with the ‘pwsh’ command.
[######@fedora ~]$ pwsh
Wrapping up
PowerShell Core is a powerful task-based configuration tool used for automation and shell scripting. You can perform different administrative tasks on a local or a remote computer. You can also write complex scripts to help you automate your system administration tasks.
If you have used PowerShell in the Windows operating system, you will attest to its power, but it is about to get a lot more powerful with the power of Linux operating systems.