
Today, I’d like to share with you one of my favorite tips: creating home directories for existing users in Linux. This article will explain the purpose of creating home directories, offer tips and tricks to make the process smoother, and provide troubleshooting tips for when things go awry.
Key components of a Linux Home directory
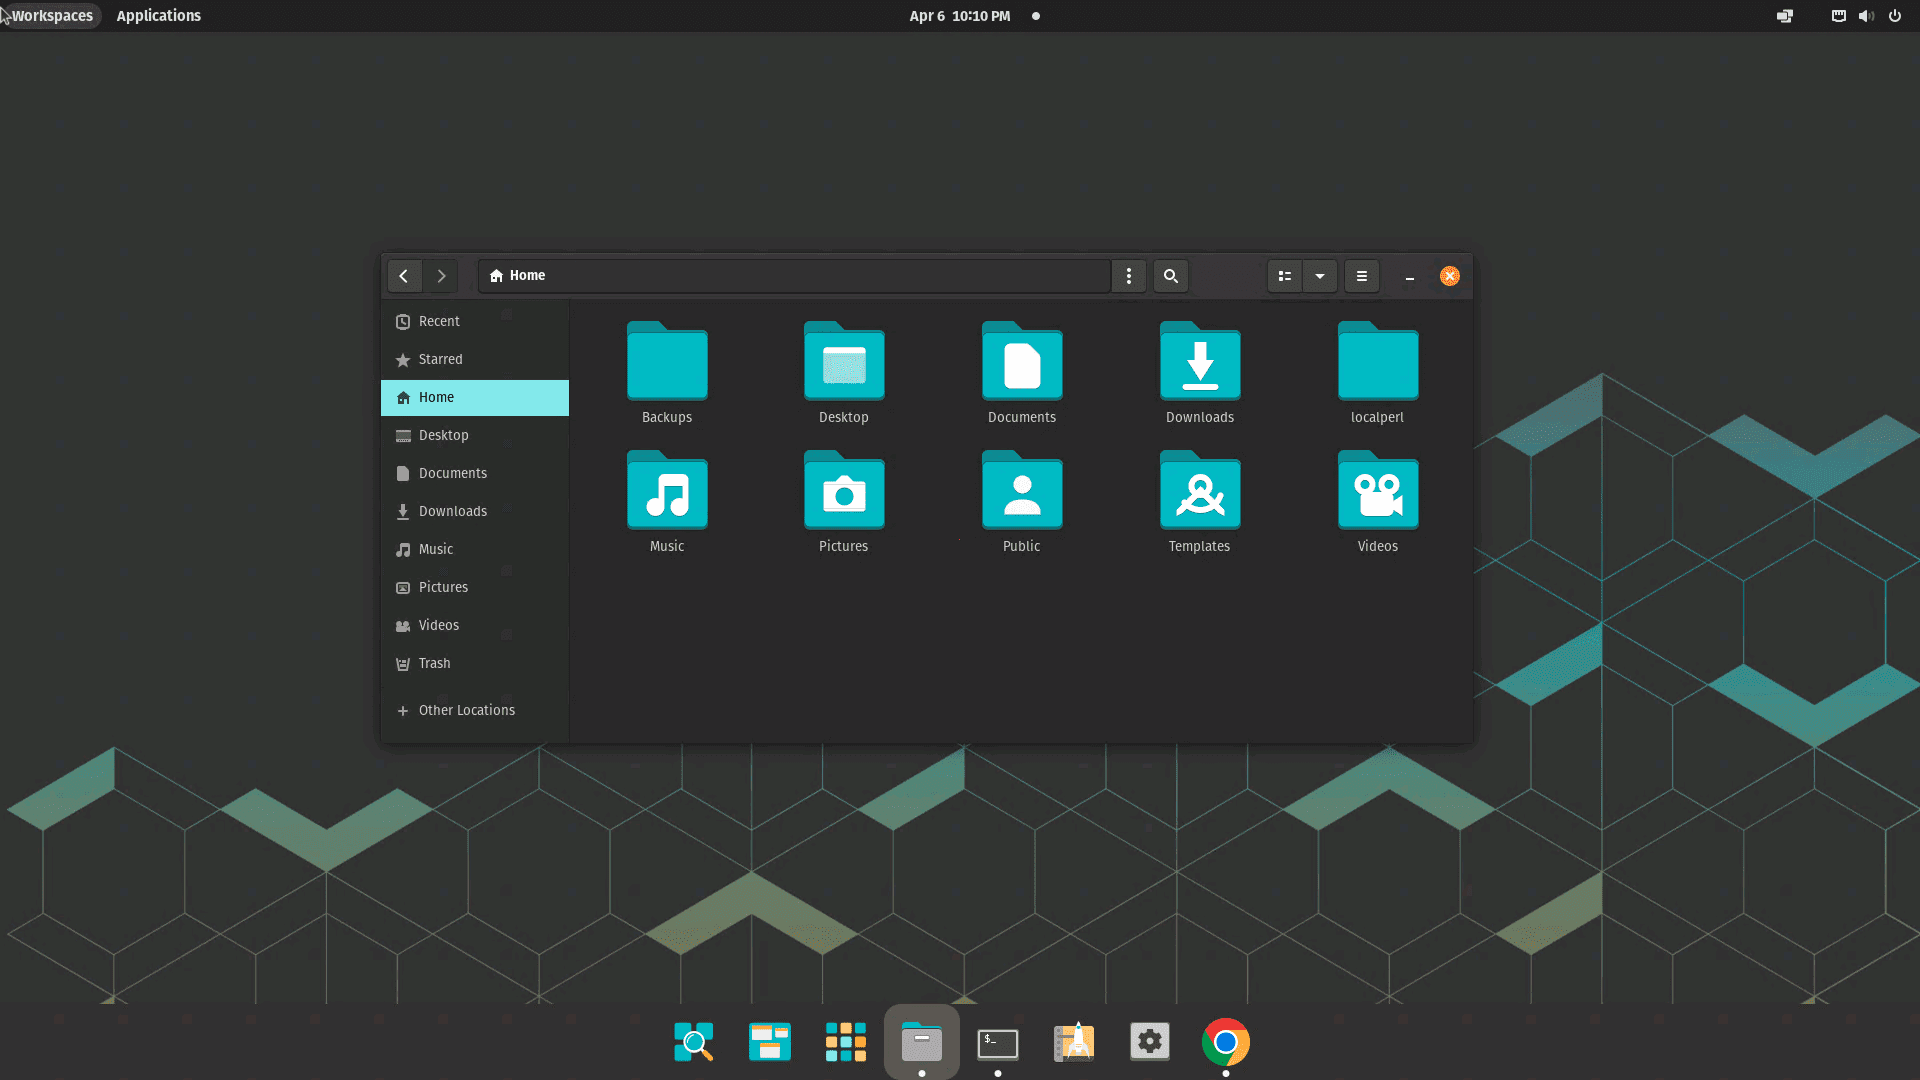
Pop_OS Home Directory Example
A home directory in a Linux system as shown in the above screenshot is a user’s personal workspace that typically contains the following:
- User files and documents: A user’s personal files, such as documents, images, music, videos, and any other data they choose to store.
- Configuration files: These are often hidden files (prefixed with a dot) that store user-specific settings for various applications and tools. Examples include .bashrc, .vimrc, and .gitconfig.
- Desktop environment files: For users with graphical desktop environments (like GNOME, KDE, or XFCE), the home directory may contain folders and configuration files related to the desktop environment, such as Desktop, Documents, Downloads, Pictures, and Music.
- Application data: Some applications store user-specific data in the home directory, often in hidden folders. These folders typically store application settings, cache, and other related data.
- Shell scripts and aliases: Users can create custom shell scripts and aliases, which can be stored in their home directory for easy access.
- SSH keys: If the user utilizes SSH for secure communication, their public and private SSH keys are usually stored in a hidden folder named .ssh.
- Temporary files: Some applications may create temporary files in the home directory, although it’s more common for these files to be stored in /tmp.
It’s important to note that the contents of a home directory may vary depending on the user’s preferences, installed applications, and system configuration.
Why create a Home directory?
The home directory serves as a user’s personal space on a Linux system. This is where users can store their personal files, configuration files, and other important data. By default, a home directory is created for each user when the account is created. However, there might be instances when you need to create a home directory for an existing user, such as when migrating users from one system to another or when a home directory gets deleted accidentally.
A home directory offers several benefits:
- Isolation: Each user has their own private space, which helps maintain privacy and keeps the system organized.
- Customization: Users can customize their environments by modifying configuration files in their home directories.
- Backup and Restore: It’s easier to back up and restore user data when it’s stored in a separate home directory.
Create Home directory for existing users in Linux
Here are some tips and tricks to make creating home directories for existing users a breeze:
1. Use the ‘usermod’ command
To create a home directory for an existing user, use the ‘usermod’ command with the ‘-m’ (move) and ‘-d’ (directory) options.
sudo usermod -m -d /home/new_directory username
Replace ‘new_directory’ with the desired home directory name and ‘username’ with the appropriate user.
For example, I would use the following command:
sudo usermod -m -d /home/New_Projects divya
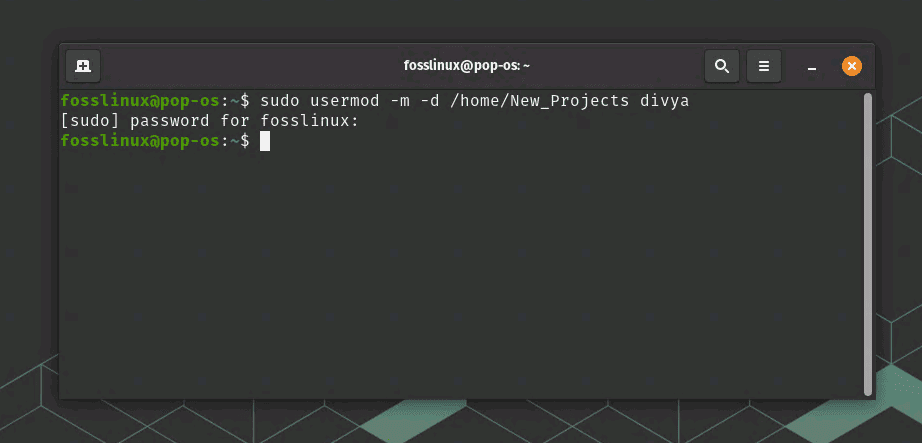
Creating New_Projects Home directories for divya
You should see no output. That’s normal behavior.
2. Use ls command to view the Home directories
You can use the ls command to view the contents of the new home directory created in Step 1:
sudo ls -la /home/New_Projects
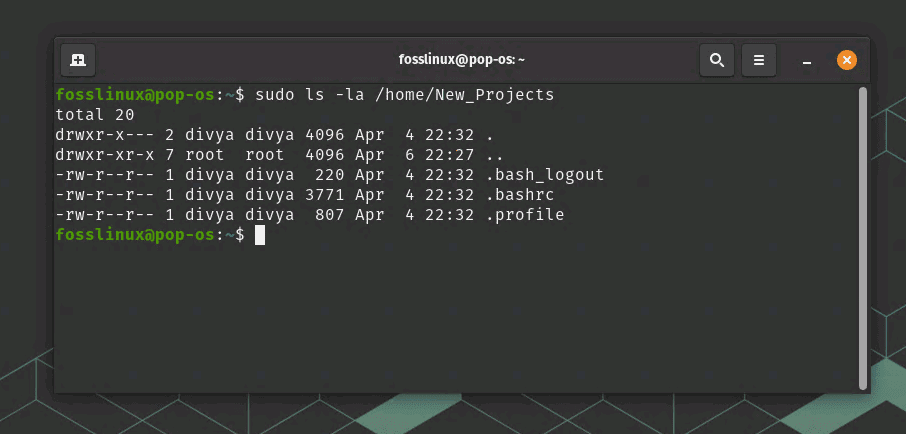
Viewing Home directory contents
The -la option will show all files and directories, including hidden ones (those starting with a dot), and display detailed information such as permissions, ownership, and modification date. As you can notice in the example screenshot above, all those directories were automatically created. However, two directories “Documents” and “Desktop,” are missing.
3. Fixing missing directories and setting appropriate permissions
It’s possible that the “Desktop” and “Documents” directories are missing because they were not present in the user’s original home directory when I moved it using the usermod command. Alternatively, they may not have been created automatically by the desktop environment or distribution-specific settings on my Pop!_OS system. If you are curious and in the same boat as me, you can manually create these directories in the user’s new home directory with the mkdir command:
sudo mkdir /home/New_Projects/Desktop
sudo mkdir /home/New_Projects/Documents
After creating the directories, ensure they have the correct ownership:
sudo chown divya:divya /home/New_Projects/Desktop
sudo chown divya:divya /home/New_Projects/Documents
You can also set the appropriate permissions if necessary:
sudo chmod 755 /home/New_Projects/Desktop
sudo chmod 755 /home/New_Projects/Documents
The user “divya” should now have the “Desktop” and “Documents” directories in their home directory, and you should see them when running:
sudo ls -la /home/New_Projects
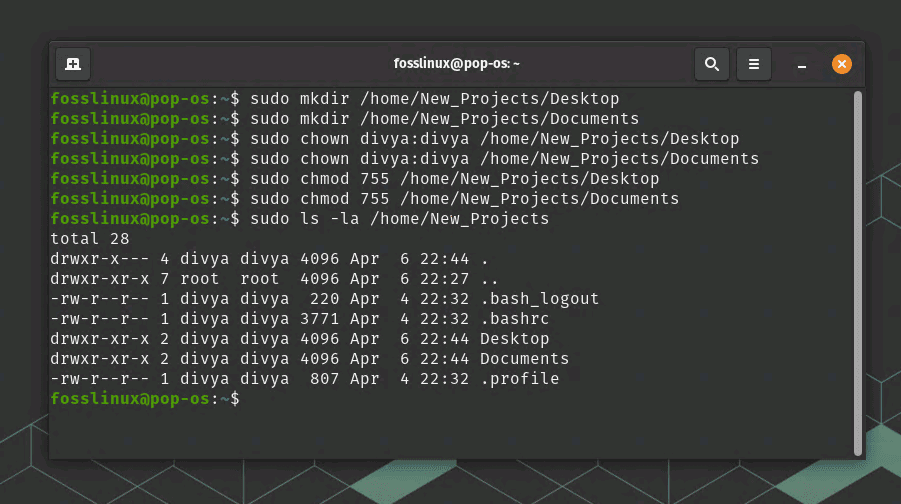
Desktop and Documents are now added
3. Copy existing data
If you want to copy the data from the user’s old home directory to the new one, use the ‘cp’ command with the ‘-a’ option to preserve file attributes:
sudo cp -a /home/old_directory/* /home/new_directory/
4. Verify the new home directory
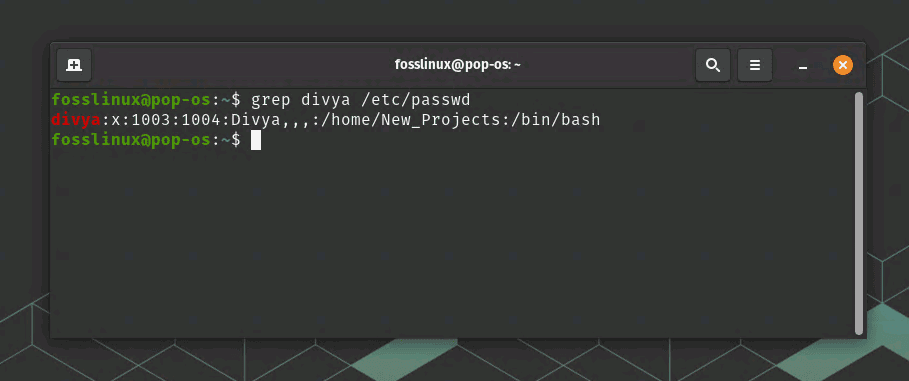
After creating the home directory, you can also verify it by checking the user’s entry in the ‘/etc/passwd’ file:
grep username /etc/passwd
So, in my illustrative example, I would use:
grep divya /etc/passwd
Here is the output showing successful home directories creation.
Home Directory created verification using grep command
Troubleshooting tips
In case you encounter issues while creating home directories for existing users, here are some troubleshooting tips:
1. Ensure the user exists: Before creating a home directory, make sure the user exists on the system. Use the ‘id’ command:
id username
2. Check for existing home directories: If the user already has a home directory, you might want to back up the data before creating a new one.
3. Verify the new home directory: After creating the home directory, verify it by checking the user’s entry in the ‘/etc/passwd’ file:
grep username /etc/passwd
4. Inspect system logs: If you still face issues, consult the system logs, like ‘/var/log/auth.log’, for more information.
Conclusion
In this article, we’ve explored the importance of home directories in Linux, offered tips and tricks to make the process easier, and provided troubleshooting tips for common issues. Creating a home directory for existing users is a valuable skill for any Linux user, and I hope these insights have been helpful. As always, remember to test your changes in a safe environment and always back up critical data before making any significant modifications to your system. Good luck, and happy Linux-ing!