
Creating a wireless access point (hotspot) on Ubuntu can be essential for various scenarios. For instance, you might find yourself in a location with only an Ethernet connection available to your computer, and the need arises to connect your phone to the internet. In such a situation, your only viable option is to set up a hotspot on your Ubuntu machine. Alternatively, you might encounter a scenario where your PC is connected via Ethernet, but you lack the Wi-Fi password.
This post will give you a step by step by step guide on creating a wireless access point on Ubuntu. We will look at two main methods:
- Creating a wireless access point from the Ubuntu GUI (easiest)
- Creating a wireless access point from the command line.
Understanding how Ubuntu creates a wireless access point
Ubuntu uses your Network Interface Card (NIC) to create a wireless access point (hotspot). That’s only possible if your NIC meets certain as you will learn in this article. Remember, this is also the chip in your PC that enables you to connect to a WIFI connection.
Therefore, if you are already connected to WIFI, your PC won’t be able to create an active hotspot because that means it will disconnect from the WIFI connection. Of course, there can be exceptions in situations where your NIC supports AP mode and your hardware allows for concurrent connections (being connected to a WiFi network while broadcasting a hotspot)
So which is the ideal way to create a wireless hotspot in Ubuntu?
One, ensure that you are connected to an ethernet connection. That way, you can use your wireless card (NIC) to create a hotspot connection while using ethernet for connecting to the internet. The other method is having two wireless cards. One is connected to the internet while the other is used to create a hotspot connection.
Tip: For this post, we have connected our PC to an ethernet connection and we will be using the internal NIC to create a wireless access point.
Method 1: Create a wireless access point from the Ubuntu GUI
Tip: If this method doesn’t work for you, please try using the command line method.
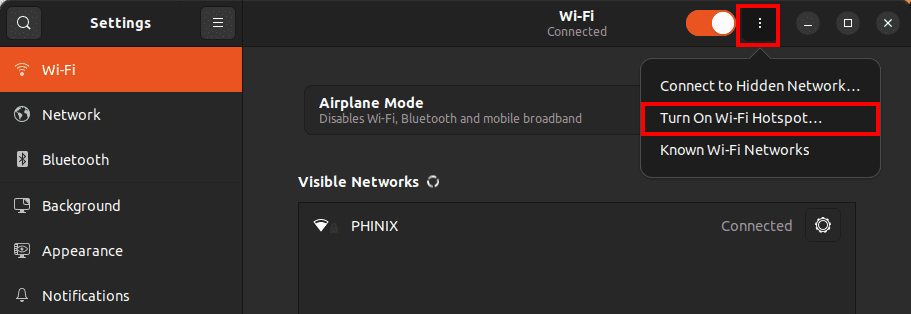
This is one of the easiest ways to create a wireless access point (hotspot) on Ubuntu. Open the Settings application and select WIFI. Click on the three dots at the top-right corner of the window as shown in the image below. You will see a pop-up window with three options:
- Connect to a hidden network
- Turn on Wi-Fi hotspot
- Known Wi-Fi networks
Create hotspot
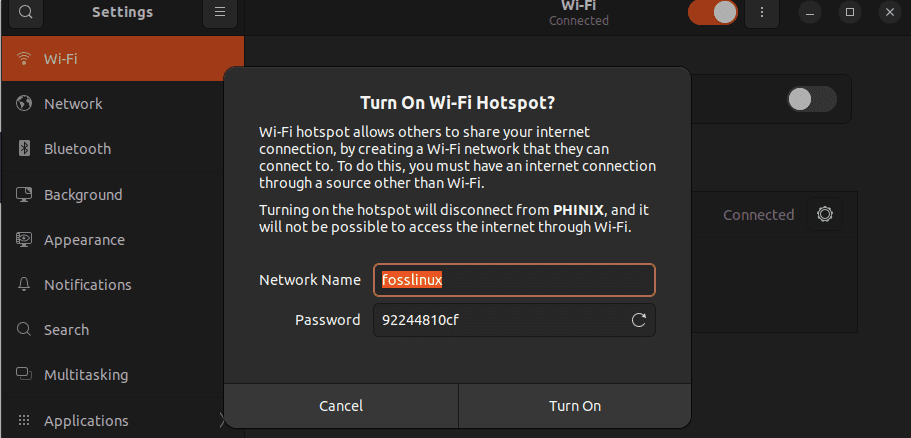
Click “TurnOn Wi-Fi Hotspots.” That will open a window which will prompt you to enter the “Network Name” and “Password.” See the image below.
Setup hotspot
Click “Turn ON” to start the wireless access point. You will see the notification “Wi-Fi Hotspot Active” and a QR code that you can scan with your mobile phone to join the network.

WiFi hotspot active
When you are done, you can click the big red button “Turn Off Hotspot” to stop the wireless access point.
Method 2: Create a wireless access point from the command line
If your PC can’t create a wireless access point from the GUI, or maybe you have two NIC cards and you want to use a specific wireless card for the hotspot, then you will need to use the terminal. There are several utilities that you can use to create a hotspot on the command line. We will look at all of them.
- Using nmcli
- Using Hostapd
Check whether your wireless card supports Access Point (AP) mode
The first thing you need to do is check whether your wireless interface card can create a wireless access point (not all are capable of that). You can easily do that using the iw utility. Follow the steps below.
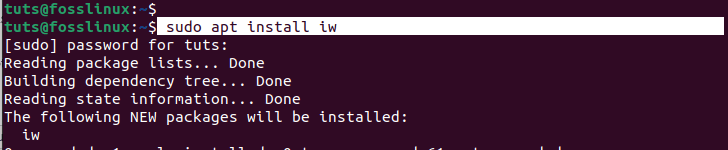
First, install the iw utility using the command below.
sudo apt install iw
Install iw
After a successful installation, use the command below to run a test on your network interface cards. It will fetch detailed information about the wireless interfaces and provide a comprehensive overview of the supported frequencies, modes, and other capabilities of the wireless network interface.
iw list
You will see so much information in your terminal but we would like you to look at one particular section – “Supported RX frame types.” If your Network Interface Card is capable of creating a wireless access point -it should have an entry called “AP” as shown in the image below.

Supported features
If your NIC supports “AP,” that means you can easily create a hotspot connection. If it doesn’t support “AP” that does not necessarily mean you cannot create a wireless access point – however, we won’t handle that in this tutorial.
Create a wireless access point with nmcli
NetworkManager is a service found in many Linux distributions including Ubuntu and it is used to configure and manage internet connections – wired and wireless and network interfaces. nmcli is a command-line client for NetworkManager that allows users to interact with NetworkManager from the command line, making it a powerful tool for managing network connections, including wired and wireless connections, VPNs, and more.
The steps below will guide you on setting up a hotspot in your Ubuntu system using nmcli.
-
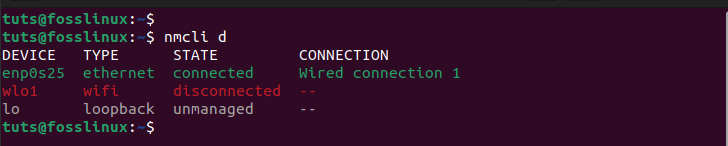
- First, you will need to know the name of your network interfaces. Execute the command below.
nmcli d
nmcli d
From the image above, you can see we only have one wireless interface card – wlo1. This is the interface we will use to create our wireless access point.
- Once you have known the name of your wireless adapter, use the command below to create a wireless access point (hotspot).
nmcli d wifi hotspot ifname <wifi_iface> ssid <ssid> password <password>
e.g.,
nmcli d wifi hotspot ifname wlo1 ssid fosslinux password 12345

Start hotspot
That will start hotspot on your Ubuntu system and you can use your phone or any device to connect to it.
- If you want to connect via QR code or you want to know the SSID and Password of the hotspot you created, use the command below.
nmcli dev wifi show-password
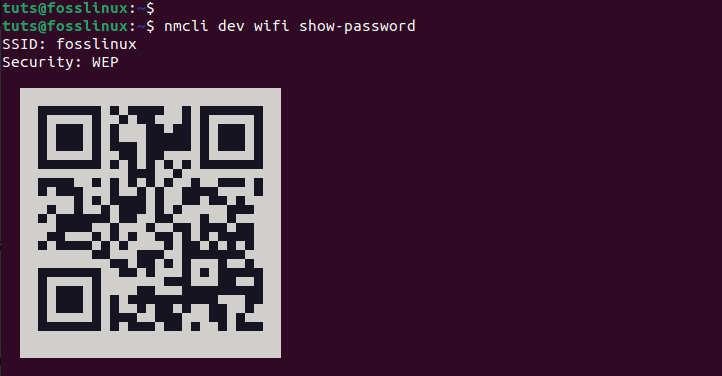
Show hotspot name and password
- If you want to disconnect the hotspot but keep the Wi-Fi interface active:
nmcli d disconnect ifname <wifi_iface>
e.g.,
nmcli d disconnect ifname wlo1

Disconnect hotspot
- First, you will need to know the name of your network interfaces. Execute the command below.
Create a wireless access point with Hostapd
Hostapd (Host Access Point Daemon) is a powerful tool that allows you to turn your Linux machine into a wireless access point. Follow these steps to set up a wireless access point using Hostapd:
1. Install Hostapd
Ensure that Hostapd is installed on your system. You can install it using the package manager of your Linux distribution. use the command below to install Hostapd on Ubuntu.
sudo apt install hostapd
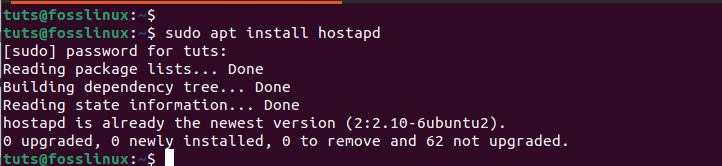
Install Hostapd
2. Create a Configuration File:
Next, we will need to create a configuration file for Hostapd. You can use a text editor like nano or vim. For this post we will use the nano editor. Execute the command below
sudo nano /etc/hostapd/hostapd.conf
Add the following basic configuration to the file, adjusting values like interface, ssid, and wpa_passphrase as needed:
interface= wlo1
# The nl80211 driver is suitable for most Wi-Fi adapters
driver=nl80211
# Your access point name
ssid=fosslinux
# The number of your Wi-Fi channel (1 to 13)
channel=11
#Select a mode for your access point (a = IEEE 802.11a, b = IEEE 802.11b, g = IEEE 802.11g)
hw_mode=g
# 1=wpa, 2=wep, 3=both
auth_algs=1
# Allow connections from all MAC addresses except those in the blacklist
macaddr_acl=0
wpa=2
wpa_key_mgmt=WPA-PSK
wpa_pairwise=TKIP CCMP
#Set a password for your access point
wpa_passphrase=123456678
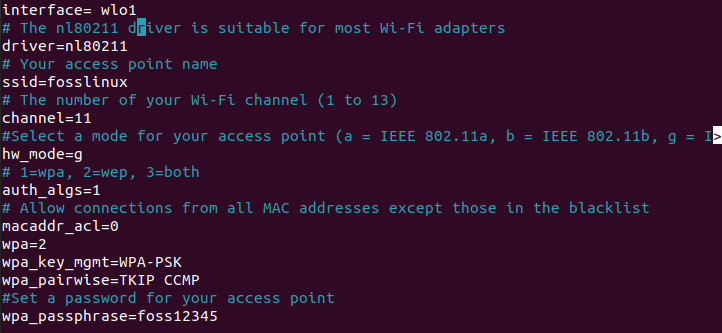
Hostapd configuration
Save the file (Ctrl + S) and exit (Ctrl + X).
3. Configure Network Interface:
Ensure that the network interface you specified in the configuration file is not managed by NetworkManager or other network tools. You can do this by editing the network interface configuration file. Use the command below:
sudo nano /etc/network/interfaces
Add the configurations below for your network interfaces. Remember, to replace the interface name “wlo1” with the name of your wireless interface. If you are well versed with subnetting, you can also tweak the network address and subnet mask.
auto wlo1
iface wlp3s0 inet static
address 192.168.1.1
netmask 255.255.255.0

Configure network interfaces
4. Start Hostapd:
Start Hostapd with the command below which points it to the configuration file you created:
sudo hostapd /etc/hostapd/hostapd.conf
5. Enable IP Forwarding:
To enable IP forwarding, which allows the access point to forward traffic between connected devices and the internet, run:
sudo sysctl net.ipv4.ip_forward=1
6. Configure NAT (Network Address Translation):
Enable NAT to allow devices connected to the access point to access the internet through your primary network interface. For example:
sudo iptables -t nat -A POSTROUTING -o eth0 -j MASQUERADE
7. Create a DHCP Server:
You will need to install and configure a DHCP server which will be responsible for assigning IP addresses to devices that connect to your wireless access point (hotspot). One such utility is the dnsmasq:
sudo apt install dnsmasq
Install DNSmasq
You now need to create a configuration file. Use the command below to create the dnsmasq.conf file.
sudo nano /etc/dnsmasq.conf
Paste the configurations below. Please note, that these settings should follow the network address assigned in the network interfaces configuration file. If you did not use 192.168.1.1, then you should tweak these configurations.
interface=wlan0
dhcp-range=192.168.1.2,192.168.1.20,255.255.255.0,24h
8. Restart Services:
Restart Hostapd and the networking services to apply the changes:
sudo service hostapd restart
sudo service networking restart
And that’s it! You have successfully created a wireless access point (hotspot) using Hostapd. Now, your machine should be functioning as a wireless access point. Devices can connect to the specified SSID with the provided passphrase, and they will receive IP addresses from the DHCP server. Remember, you can adjust the configuration files as needed for your specific network setup.
Conclusion
This post has given you a comprehensive guide on setting up a wireless access point on Ubuntu. We have looked at different methods like using the Ubuntu Graphical Interface which is the easiest and using command line tools like nmcli and hostapd. The latter (Hostapd) can be quite technical and you should be cautious when executing any commands. Did you encounter any issues? If yes, please let us know in the comments below.
1 comment
Hi, in the hostapd.conf file, you need to remove the space before the WiFi adapter name…
“interface= wlo1” -> need to remove space character…