
Have you ever found yourself drowning in a sea of digital files scattered across various devices, wishing there was a simple way to store, access, and share them all? Welcome to the world of Network Attached Storage (NAS), a lifebuoy for those of us navigating the vast ocean of digital content. As a Linux enthusiast and an advocate for open-source solutions, I’m here to guide you through building your own NAS system with Linux. It’s like constructing your own digital library, where you are both the architect and the librarian.
Why Linux for your NAS?
Before diving into the technicalities, let’s chat about why Linux is a fantastic choice for setting up a NAS system. Linux, with its reliability, flexibility, and robustness, makes an excellent foundation for a NAS. It’s like choosing the sturdiest wood for your bookshelves; you want something that will last and can bear the weight of your vast collection. Moreover, the open-source nature of Linux means you can customize your setup without facing the steep costs often associated with proprietary software. Yes, it’s as if you’re crafting those shelves yourself, tailoring them to the exact dimensions of your room.
Choosing the right hardware
Here’s where things get interesting. You can technically convert any old computer into a NAS, but for a smoother experience, aim for:
- CPU: Any modern dual-core processor (or better). Think of the CPU like the heart of your system; you want something strong enough to pump data without breaking a sweat.
- RAM: At least 2GB, but more is better. RAM is the brain’s short-term memory. The more you have, the better your NAS will remember where things are.
- Storage: Depends on your needs. I love SSDs for the operating system for their speed and HDDs for storage because they offer more bang for your buck.
Installing Linux
With the hardware ready, it’s time to install Linux. For NAS purposes, I lean towards Ubuntu Server because of its user-friendly nature and excellent community support.
Download Ubuntu Server: Go to the official Ubuntu website and download the latest version of Ubuntu Server.
Create a bootable USB drive: Use a tool like Balena Etcher to create a bootable USB drive with the Ubuntu Server ISO.
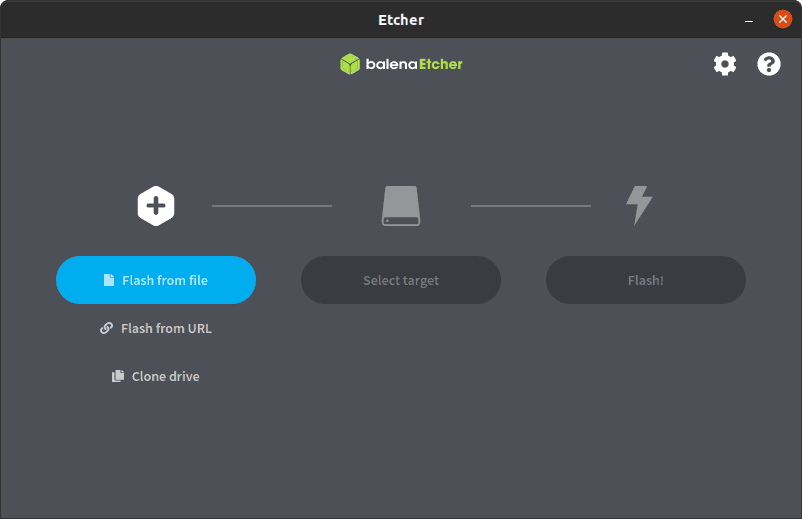
Balena Etcher
Install Ubuntu Server: Plug the USB drive into your NAS system, boot from it, and follow the on-screen instructions to install Ubuntu Server. This part is as thrilling as watching paint dry, but the end result is worth it.
Setting up network sharing
Now, let’s get to the meat of the matter: setting up network sharing. Samba is my go-to for sharing files over the network because it’s compatible with Windows, macOS, and Linux systems. It’s like making sure your library is accessible to everyone in town, regardless of the mode of transportation they use.
Installing samba on Ubuntu
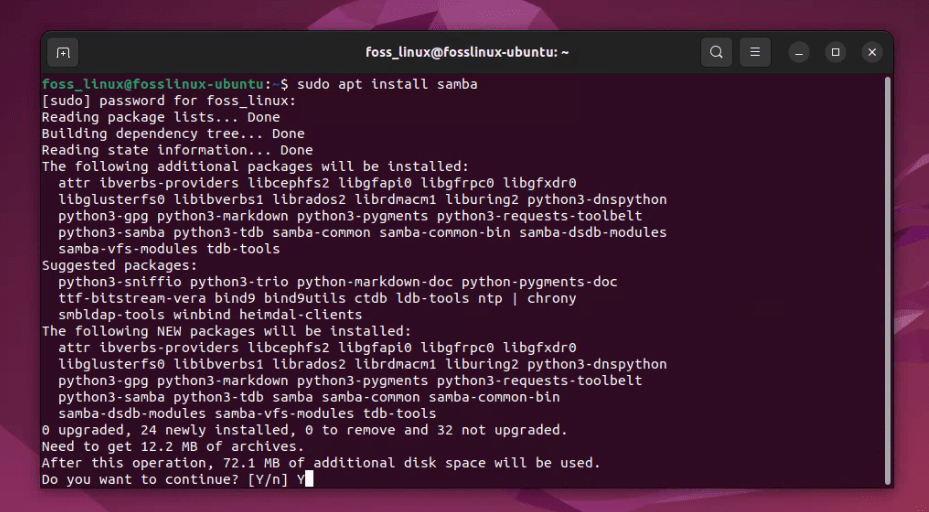
- Install Samba with the command:
sudo apt update && sudo apt install samba
- Set up your share directories. For example:
sudo mkdir -p /home/foss_linux/my_shared_folder
- Configure your Samba settings by editing the configuration file:
sudo nano /etc/samba/smb.conf
Here, you can define your share, who can access it, and their permissions.
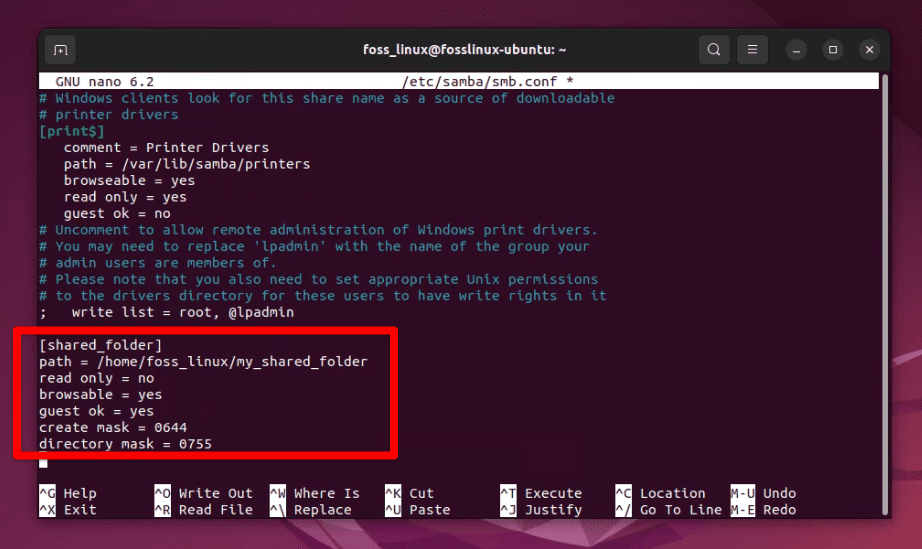
Editing the samba configuration file
- Restart the Samba service to apply the changes:
sudo systemctl restart smbd
Adding an external hard drive
One of the joys of building your own NAS system is the ease with which you can expand its storage capacity. Adding an external hard drive is a straightforward process that can give your NAS a significant boost in storage without the need to open up the case and mess with the internal hardware. Here’s how you can do it:
Selecting the right external hard drive
When choosing an external hard drive for your NAS, consider both capacity and reliability. I’ve had great experiences with drives that have a dedicated power source as opposed to those that draw power through the USB connection. They tend to be more reliable for continuous use. Also, look for drives with USB 3.0 or higher for faster data transfer rates.
Connecting the drive
Simply plug your external hard drive into a free USB port on your NAS system. Most modern Linux distributions will automatically recognize the drive and mount it temporarily, but for a NAS, you’ll want to configure it to mount automatically at boot.
Auto-mounting the drive
To ensure your external drive mounts automatically at boot, you’ll need to make an entry in the /etc/fstab file. Here’s a step-by-step process:
- Identify your external drive by running
lsblkorsudo blkid. You’ll need the UUID (Universal Unique Identifier) of the drive. - Create a mount point for your drive. For example,
sudo mkdir /mnt/external. - Edit the
/etc/fstabfile with your favorite text editor, e.g.,sudo nano /etc/fstab, and add a line following this format:UUID=your-drive-uuid /mnt/external auto nosuid,nodev,nofail,x-gvfs-show 0 0
Replace
your-drive-uuidwith the UUID of your external drive. This line tells the system to automatically mount the drive at/mnt/externalusing defaults suitable for an external drive. - Save and close the file. Then, test the configuration with
sudo mount -ato ensure there are no errors. - Finally, restart your NAS to confirm that the drive mounts automatically.
Configure Samba to Share the External Drive
- Find the Mount Point: First, you need to know where your external hard drive is mounted in the filesystem. If you followed the previous steps to auto-mount the drive, you should have a mount point like
/mnt/external. - Backup the Samba Configuration File: Before making changes, it’s a good idea to back up the existing Samba configuration file.
sudo cp /etc/samba/smb.conf /etc/samba/smb.conf.backup
- Edit the Samba Configuration: Open the Samba configuration file with a text editor, such as nano.
sudo nano /etc/samba/smb.conf
- Add a New Section for the External Drive: Scroll to the bottom of the file and add a new section for the external drive.
Here’s an example configuration:
[ExternalDrive]
path = /mnt/external
writeable = yes
browseable = yes
guest ok = yes
create mask = 0775
directory mask = 0775
This configuration does a few things:
[ExternalDrive]: This is the name of the share as it will appear on the network.path: Specifies the path to the directory you want to share, in this case, the mount point of your external drive.writeableandbrowseable: Allows the drive to be written to and browsed by network users.guest ok: Allows guest access. For security, you may want to set this tonoand configure user access instead.create maskanddirectory mask: Set the permissions for newly created files and directories.
- Save and Close: After adding your configuration, save and close the file. In nano, you can do this by pressing
Ctrl + X, thenYto confirm, andEnterto save. - Restart Samba: For the changes to take effect, restart the Samba service.
sudo systemctl restart smbd
Accessing the Share
After configuring Samba, your external drive should be accessible from other computers on your network.
- On Windows: Open File Explorer, and in the address bar, type
\\<NAS_IP_ADDRESS>\ExternalDrive, replacing<NAS_IP_ADDRESS>with the actual IP address of your NAS. You should see the contents of your external drive. - On macOS: In Finder, go to “Go” > “Connect to Server”, and enter
smb://<NAS_IP_ADDRESS>/ExternalDrive. - On Linux: You can access the share through the file manager using a similar smb URL or mount it using the command line.
Securing your NAS
Security is non-negotiable. A NAS filled with your precious data is like a treasure chest; you don’t want pirates getting their hands on it.
- Firewall: Enable UFW (Uncomplicated Firewall) with
sudo ufw enableand only allow traffic on necessary ports. - Updates: Keep your system updated. It’s the digital equivalent of eating your vegetables; not always fun, but good for you.
- Backups: Regularly back up your NAS data. Because sometimes, stuff happens.
Ensuring data safety
Data safety is like the fireproofing in your library. RAID (Redundant Array of Independent Disks) can help protect your data by storing it across multiple disks. Linux supports various RAID configurations, and choosing one depends on your priorities, be it data redundancy, speed, or a balance of both. Note that RAID is not a backup solution but a way to mitigate the risk of data loss due to hardware failure.
Regular backups
Speaking of backups, they’re the emergency plan for your digital library. Tools like rsync and Bacula make regular backups a breeze. Set up a schedule that suits you, and rest easy knowing that your data is safe.
Maintenance and monitoring
Your NAS is not a set-it-and-forget-it system. Regular updates, backups, and monitoring are crucial to keep it running smoothly. Tools like htop for monitoring system resources, smartmontools for monitoring drive health, and regular updates will help keep your system in top shape.
Final touches
Now that your NAS is up and running, take some time to explore additional features you can implement. From setting up a media server with Plex to hosting your own cloud storage with Nextcloud, the possibilities are vast. It’s like deciding which sections to include in your library beyond just books; maybe a cozy reading nook or a coffee bar?
Conclusion
Building your NAS system with Linux is a rewarding project that not only saves you money but also gives you complete control over your digital storage. Like any good DIY project, it requires some effort and a bit of learning, but the result is a highly customized, efficient, and secure system.