
The newly released Linux Mint 19.2 “Tina” is catching everyone’s attention. And in this article, FOSSLinux will show you how to update your current system to Tina in five easy-to-follow steps.
Just a couple of days back, the Linux world witnessed the release of the new Linux Mint. From what we’ve seen thus far, the creators have put a lot of effort into this release. It comes with updated desktop environments, new tools, UI changes, and much more. Here is what’s new in the Linux Mint 19.2. So, without further ado, let’s get to updating your system.
Note: Before we begin, make sure that your computer is currently running on Linux Mint 19 or 19.1, or else this method won’t work.
First Step
First of all, we recommend you to create a snapshot of your system as in case anything goes wrong during the updating process. You won’t lose any of your valuable data.
For this, you can use the Timeshift utility of Linux Mint, which you can access from the application menu. Once you have it opened, it is straightforward to create a system snapshot by the available options on the screen.
Second Step
After you’re done creating the snapshot, the next step is to prepare for the upgrade.
To do so, the screensaver has to be disabled. Furthermore, if you have any Cinnamon themes, extensions, desklets, and applets on your system, they should be upgraded from the System Settings.
Third Step
Once you’ve completed the steps mentioned above, it is now time actually to upgrade the system.
Firstly, open the Update Manager and click the Refresh button. With this, the computer will look for any updates to mintupdate and mint-upgrade-info. If found, you should proceed to apply them.
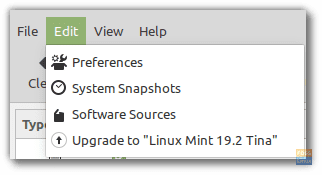
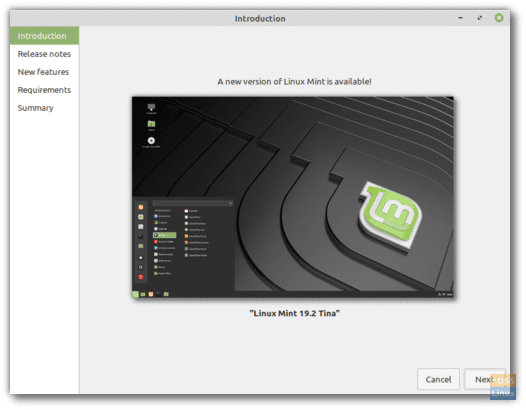
Now go to Edit and click the ‘Upgrade to Linux Mint 19.2 Tina’ option for launching the System Upgrade.
Afterward, some dialog boxes are to appear, and you should answer them according to your needs. However, make sure to opt for replacing the configuration files instead of keeping them, when asked.
Fourth Step
Note: You can skip this step if you’re using Mint 19, but it wouldn’t do any wrong if you choose not to.
Linux Mint 19.1 comes with two packages, namely xul-ext-lightning and P7zip-full, which provide calendar support in Thunderbird and the ability to create password-protected archives. You can get them by running the following command on the terminal:
apt install p7zip-full xul-ext-lightning
Afterward, you should uninstall the XScreensaver hacks if you have the Cinnamon version of Linux Mint. For doing so, run the following command:
apt remove --purge xscreensaver-data xscreensaver-data-extra xscreensaver-gl xscreensaver-gl-extra cinnamon-screensaver-webkit-plugin cinnamon-screensaver-x-plugin
Fifth Step
After reaching this stage, you should now wait for the upgrade to finish. Once it’s done, you should restart your computer for the changes to take place. You should be able to see a revamped operating system right after the reboot.
With this, our ‘updating the Linux Mint 19.2 Tina‘ journey comes to an end, and you can now enjoy your all-new Linux Mint operating system, which you can get to know more about here.