
MX Linux is a popular Linux distribution based on Debian stable. Hence as Debian shifts from one Stable release to the next, so does MX Linux come out with a new version based on the latest Debian release. Also, just like Debian, each MX release is supported for 4 – 5 years. From a technical standpoint, you don’t need to update to the latest MX version as soon as it’s out.
However, if your version of MX Linux has reached end-of-life support, or if you want to try out the latest MX release, then you have come to the right place. Here we have put together a comprehensive guide on how to update your MX Linux system. But first, let’s get a more in-depth understanding of the MX Linux release cycle.
Understanding The MX Linux Release Cycle
MX Linux has three kinds of releases:
1. Annual Release
First, you have the official version which comes out once a year, typically during the year-end. The current Official release of MX Linux is MX-19, which came out on October 21, 2019, and is based on Debian 10 (released on July 6, 2019). Note that the release number – ’19’ of MX-19 comes from the year of release. Since the first version of MX Linux came out in 2014, it was called MX-14. There are no prior versions like MX-1 or MX-2.
2. Point Releases
Secondly, you have the point releases. These releases don’t follow a particular schedule and deliver new version updates as required. At the time of writing, the current point release for MX Linux is MX 19.2, which came out on June 1, 2020. The point releases are done when a significant software change like kernel upgrades or vulnerability fixes are required.
3. Snapshot Releases
And finally, we have snapshot releases. These come out monthly and are designed to update all your software. The primary purpose of snapshot releases is to keep all your software and packages up to date so you can avoid lengthy downloads later.
MX Linux’s Semi-Rolling Release model
What does do it mean that MX-Linux follows a semi-Rolling Release Model? Conventionally, Linux distros follow two major release models – Fixed and Rolling.
Fixed Release
Under the fixed release model, the Linux Distro only receives security updates on a timely basis. Other things, such as new software packages and software updates, are held back and only released as a bundle with the latest version of the Distro, after a fixed period.
Rolling Release
In the case of a rolling release model, the Linux Distro receives updates in all areas of the operating systems as soon as they are available. This includes updates for everything, starting from the applications, desktop environment, and even the Linux Kernel.
Now, MX-Linux is often called a Semi-Rolling release because it has traits of both rolling and fixed release models. Similar to Fixed releases, the official version-updates happen every year. But at the same time, you get frequent updates for software packages and dependencies, just like with Rolling release Distros. However, according to the MX Linux forum, the developers don’t identify MX Linux as a Rolling Distro.
How to Update MX Linux
Now that you have a good enough understanding of the different MX Linux releases let’s talk about how you can update your MX Linux system to the latest version.
Updating to a New Official Release
MX Linux completely changes its base from one official release to the next. For example, MX-18 runs on Debian 9 (Stretch) whereas, MX-19 runs on Debian 10 (Buster) and also switches to the new Xfce 4.14. Because of all these changes, there is no dedicated update/upgrade option from one official release to the next one. If you want to update from MX-18 to MX-19, you will need to perform a clean install of MX-19 over the existing version.
However, even though you are performing a clean installation over your previous OS, it doesn’t necessarily mean that you will lose all your previous settings and configurations.
When installing MX Linux, you have the option to preserve data in the /home directory of the previous MX Linux version (if any) that was installed. You will find this setting under the custom disk setup option of the MX Linux Installer.
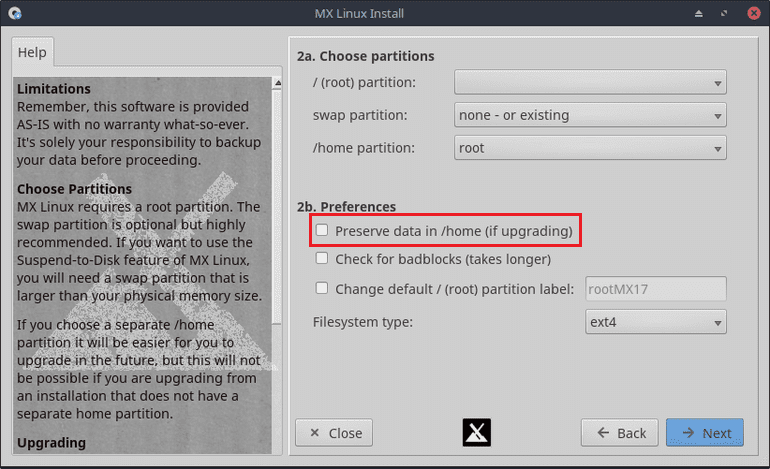
Preserve data in /home directory
Now, the programs that were installed on MX-18 stored all their settings and customization files under the /home directory. Since the installer is preserving this data, you will find almost everything intact, even after a clean install to MX-19.
Another thing to point out is that the clean install of MX-19 might not have all the programs you had on MX-18. But even still, all the settings and configuration files of those uninstalled programs are always on your /home directory. All you need to do is reinstall those programs, and they behave similarly as they did before the clean installation. This is where Aptik can be beneficial. It is essentially a tool that can help you backup/restore your favorite PPAs and Apps in Ubuntu and other Debian-based OSes.
Here is a comprehensive guide to show you how to use Aptik and reinstall all your old applications on your newly upgraded MX Linux system.
Updating to a New Point Release
Updating from one point release to the next is pretty straightforward and will take place automatically through the standard upgrade process. That being said, there are two ways to update your MX Linux system to the next point release. You can either use the GUI or update it using the command-line in the terminal. For the sake of this tutorial, we will be showing you both methods. So, without further ado, let’s get started:
Updating MX Linux Using Command-Line in the Terminal
Before starting, let’s check the version of MX Linux installed on our system. To do this, type in the following command in your terminal.
$ inxi -F
This should create a similar output, as shown in the image below.

MX Linux version in the terminal
As you can see, we are running on MX-19 Patito Feo that was released back on October 21, 2019. It’s time to update our system to the latest version. To do this, enter the following command in the terminal:
$ sudo apt-get dist-upgrade
This is going to start installing all the newest versions of all the packages installed on the system. It should also intelligently handle all the dependencies that are changing with new versions of the packages.
While updating all the packages and dependencies, you will get the following message on the terminal, asking whether you want to install the updated version shipped by your package distributor.
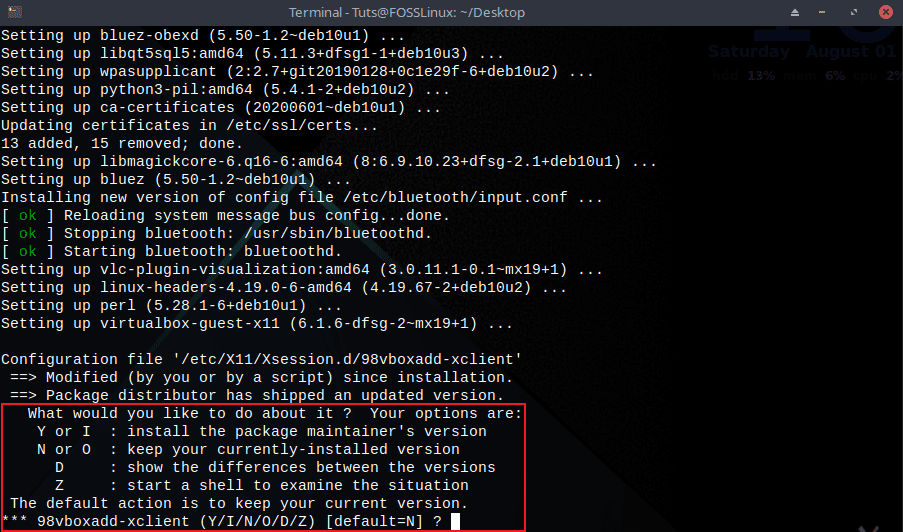
MX Linux version
Type in ‘Y’ and wait until the process is over. And voila! You have successfully upgraded from MX-19 to MX-19.2.
Updating MX Linux Using GUI
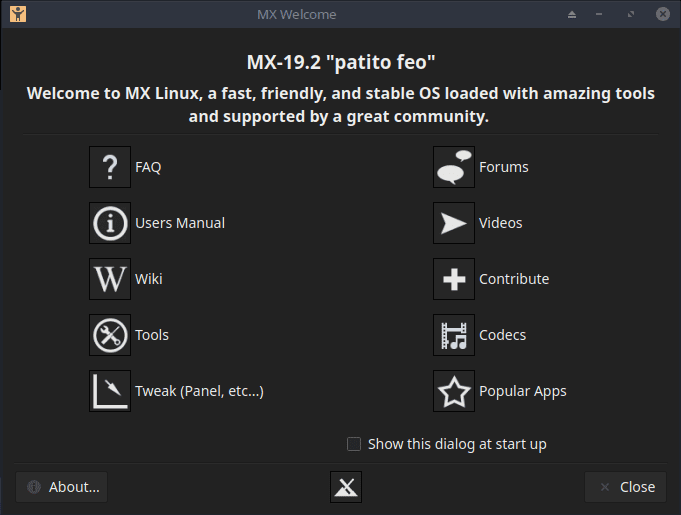
Updating MX Linux using GUI is much more straightforward and as simple as pressing a button. But first, open MX Welcome to check the version of your MX Linux that you are running.
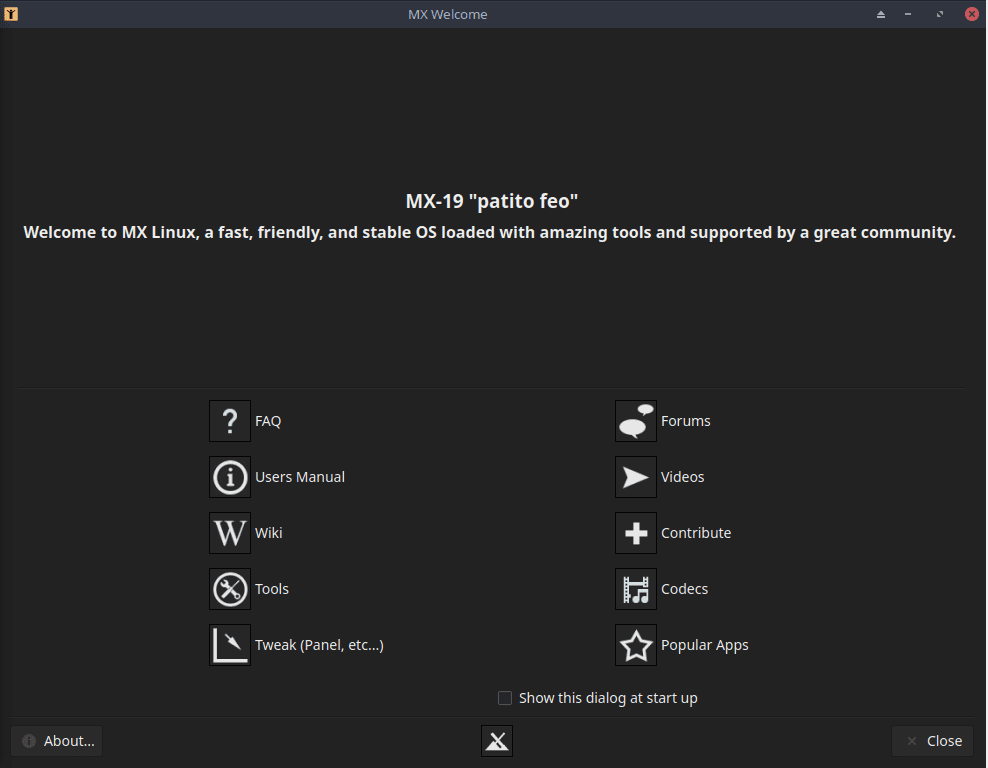
MX Welcome screen
As you can see, we are running MX-19 Patito Feo. Now, it’s time to update it to MX-19.2. To do this, go to MX Updater, as shown in the image below.
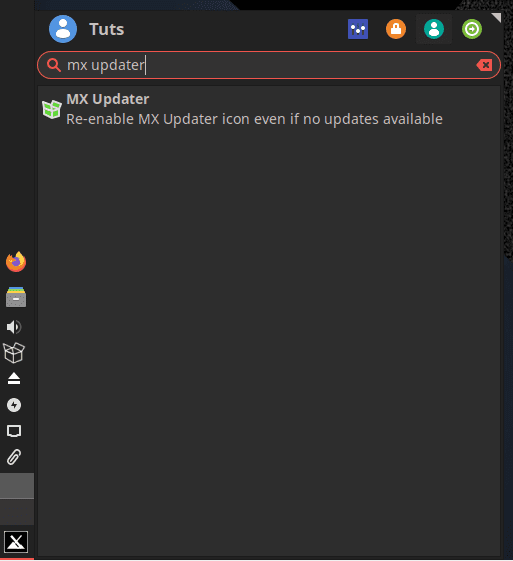
MX Updater tool
This is going to open the MX Updater, which will look like this:
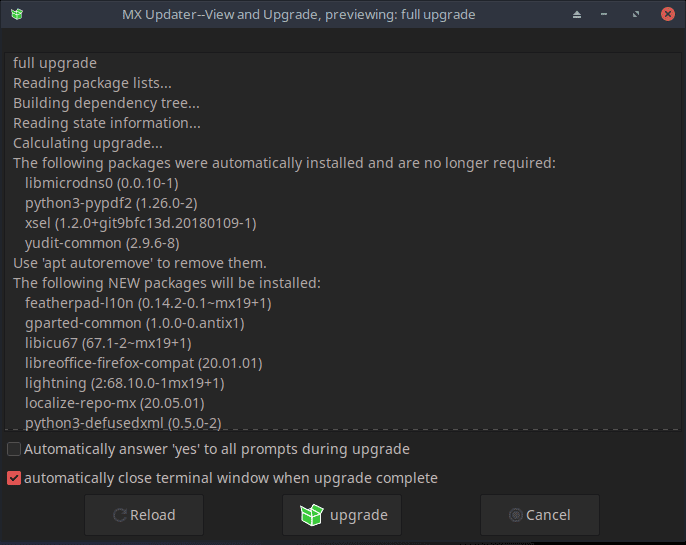
The MX Updater tool
As you can see, you get a display showing all the packages and dependencies that are going to get installed on your system. Furthermore, there are two checkboxes. The first one is asking you whether you want the updater to automatically answer ‘yes’ to all the prompts during the upgrade. You should keep this unchecked if you want to know and control what packages and dependencies are getting installed on your system. However, if you are not interested in these details, then you can “check” it. It will make the update process much faster, and you won’t have to monitor everything actively.
Once you have checked everything, click on the upgrade button with the green box. This is going to start updating your MX-19 to the latest version. Similar to before, you will get a prompt in the installer asking you whether you want to install the updated version shipped by your package distributor. Type ‘Y’ for yes, as before, and wait for the installation to finish.
Once done, recheck MX Welcome, and you should see your system updated to the latest version, i.e., MX-19.2.
Successfully updated to MX-19.2
Wrapping Up
So this was our full comprehensive guide on everything you need to know to update your MX Linux PC. I hope you found this useful and that it has helped you to upgrade from your older MX Linux system to the latest MX-19.2. Do let us know if you still have some confusion or stumbled into any issues during the update process. We would be happy to clear out any of your problems, and our discourse might even help out other readers with their questions and issues.
3 comments
I just need to put MX 19.2 patito feo OVER MX19.2 patito feo.
Whats that procedure entail??
Hi Nitish ,
I am running though a problem of black screen on my MX linux server desktop version after logging in. I tried all the options in modifying the parameter in boot section of Linux but in vain. Its really tough to solve the problem it seems, somewhere there could be driver issue for which I am struggling. Please help
W: Target Packages (test/binary-amd64/Packages) is configured multiple times in /etc/apt/sources.list.d/mx.list:8 and /etc/apt/sources.list.d/mx.list:14
W: Target Packages (test/binary-i386/Packages) is configured multiple times in /etc/apt/sources.list.d/mx.list:8 and /etc/apt/sources.list.d/mx.list:14
W: Target Packages (test/binary-all/Packages) is configured multiple times in /etc/apt/sources.list.d/mx.list:8 and /etc/apt/sources.list.d/mx.list:14
W: Target Translations (test/i18n/Translation-en_US) is configured multiple times in /etc/apt/sources.list.d/mx.list:8 and /etc/apt/sources.list.d/mx.list:14
W: Target Translations (test/i18n/Translation-en) is configured multiple times in /etc/apt/sources.list.d/mx.list:8 and /etc/apt/sources.list.d/mx.list:14
W: Target DEP-11 (test/dep11/Components-amd64.yml) is configured multiple times in /etc/apt/sources.list.d/mx.list:8 and /etc/apt/sources.list.d/mx.list:14
W: Target DEP-11 (test/dep11/Components-all.yml) is configured multiple times in /etc/apt/sources.list.d/mx.list:8 and /etc/apt/sources.list.d/mx.list:14
W: Target DEP-11-icons-small (test/dep11/icons-48×48.tar) is configured multiple times in /etc/apt/sources.list.d/mx.list:8 and /etc/apt/sources.list.d/mx.list:14
W: Target DEP-11-icons (test/dep11/icons-64×64.tar) is configured multiple times in /etc/apt/sources.list.d/mx.list:8 and /etc/apt/sources.list.d/mx.list:14
W: Target DEP-11-icons-large (test/dep11/icons-128×128.tar) is configured multiple times in /etc/apt/sources.list.d/mx.list:8 and /etc/apt/sources.list.d/mx.list:14
whats solution for this