
Today, I want to introduce you to one of my favorite, simple yet powerful command-line tools in Linux: the ping command. It’s a go-to tool for network troubleshooting, which I am quite fond of due to its simplicity and effectiveness. However, I also have some reservations about it, like its continuous operation if not handled properly. We’ll get into that later on.
Without further ado, let’s dive into the world of ping.
What is the Ping command?
The ping command is a Network Diagnostic Tool available on almost all operating systems. It checks the connectivity status between the host (the system where the ping command is run) and the server (the system you’re trying to reach).
How to install Ping in Linux?
The first thing we need to do is install the ping command. Luckily, most Linux distributions come with ping pre-installed, which is one thing I truly appreciate about Linux – it’s prepared for everything. But in case it’s not available on your system, you can easily install it using the package manager of your Linux distribution.
For Ubuntu or any Debian-based systems, use the following command:
sudo apt-get install iputils-ping
For Fedora or other RHEL-based systems, use the following command:
sudo dnf install iputils
In Arch Linux or Arch-based distributions, you might find ping in the inetutils package. If it’s not already installed, you can use the Pacman package manager to install it, like so:
sudo pacman -S inetutils
Just like other Linux distributions, you’ll need to have the necessary permissions to install software, which generally means you’ll need to be logged in as a root user or use the sudo command if your user is part of the sudoers group.
As for Red Hat, you can install ping by installing the iputils package using the yum package manager:
sudo yum install iputils
Make sure you have the necessary permissions to install software on your system. You might need to enter your password after typing the command.
How to use the Ping command?
Now that we have ping installed, let’s move to my favorite part – actually using the command. It’s almost as if you’re firing an arrow from your host machine to the server and waiting to see if it comes back.
To use the ping command, open your terminal and type ping followed by the domain name or the IP address of the server. For example:
ping www.google.com
When you execute this command, you’ll start to see lines that look something like this:
64 bytes from maa05s01-in-f14.1e100.net (172.217.167.78): icmp_seq=1 ttl=57 time=2.62 ms
This output means that ping is working and that your host is able to connect to the server. You can also ping the IP address and see its response.
For example:
ping 192.168.1.88
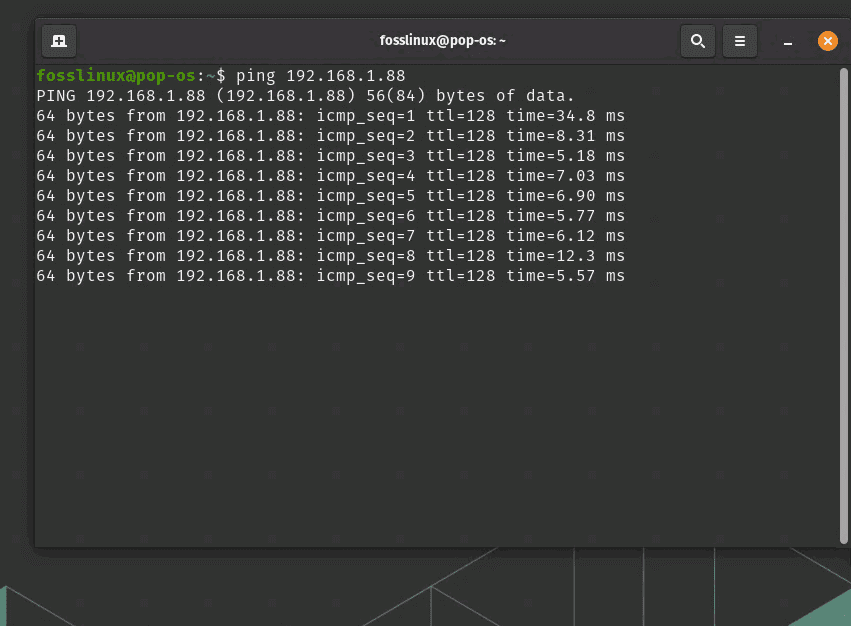
ping command usage
One thing that irks me slightly about ping is that it continues to run until you stop it manually. This behavior, while useful in some scenarios, can be a bit of a nuisance, especially when you forget about it and leave it running in a terminal tab.
To stop the ping command, simply press CTRL+C. This will also display a summary of the ping operations, including the number of packets transmitted, packet loss, and round-trip times.
Adjusting the Ping command behavior
One of the things I adore about Linux is the level of control it offers. You can adjust the behavior of the ping command by using various options:
Limit the number of Pings: To avoid running ping indefinitely, you can limit the number of pings using the -c option followed by the number of pings. For example:
ping -c 5 www.google.com
This will only send 5 packets to the server.
Set the Interval between Pings: By default, ping sends a packet every second. However, if you wish to change this, you can use the -i option followed by the desired interval in seconds. For example:
ping -i 2 www.google.com
This will send a packet every 2 seconds.
Common troubleshooting tips
While ping is a very reliable tool, like everything else in life, it can sometimes present issues. Let me share some common troubleshooting tips I’ve picked up over the years.
Permission Denied: If you see a “Permission Denied” error, it means you don’t have the necessary permissions to execute the ping command. You can resolve this by using sudo before the command, like so: sudo ping www.google.com.
Unknown Host: If you encounter an “unknown host” error, it could mean that the domain name you’re trying to reach doesn’t exist, or there might be an issue with your DNS resolver. Check the domain name for typos.
Network is Unreachable: This error means that the host is not able to reach the network. This could be due to a lack of internet connection or a problem with your network settings.
Pro tips
Before I wrap this up, let me share some professional tips for using the ping command:
Audible Ping: If you want an audible beep for every successful ping, you can use the -a option. This feature is helpful when you’re troubleshooting network connectivity and need to step away from your terminal for a bit. But beware, it can get annoying if the beeping never stops, trust me!
Flood Mode: If you want to send a continuous stream of packets to stress test the network, you can use the -f option. But be very careful with this feature as it can consume a lot of bandwidth and should only be used on your own network.
Conclusion
I hope you’ve enjoyed this journey into the world of ping as much as I have enjoyed guiding you through it. Remember, the magic of Linux lies in its simplicity and the power it offers to the user. The ping command might look simple on the surface, but it’s a powerful tool when used effectively. Happy pinging!