
When you start using Ubuntu and its derivatives, including elementary OS, Linux Mint, etc., you should have come across the abbreviation “PPA.” It is used in the context of adding and removing applications.
What’s a PPA?
PPA is the short-form for “Personal Page Archive.” It is a webpage that has a collection of instructions for installing an application that is typically not included in the Ubuntu Software Center. Anyone can make PPA sources. The app is stored in a storage called “repository.” When you add a PPA repository to your computer, it means you have added a link to the download server from which your PC will procure the app and future updates.
Therefore, you will see PPAs hosted by individual developers as well as some organizations. This comes with its own risk. Not all PPAs are trustworthy. Just like not all Microsoft Windows programs are genuine, there may be some PPAs that can cause harm to your computer. Thankfully, these as well are not malware but just outdated or badly written apps.
The best way to stay away from them is to avoid installing them. Before adding a PPA, take few seconds to read through the PPA page and check the last update and activity on that page. An active developer will update the package periodically with security and bug fixes. Also, make sure that the package works for your Ubuntu version. To check that, you need to expand the “Technical details about this PPA” and then look for the Ubuntu version in the drop-down list.
Examples of PPA
For example, in the Cryptomator, you can see the compatibility from Bionic to Vivid.
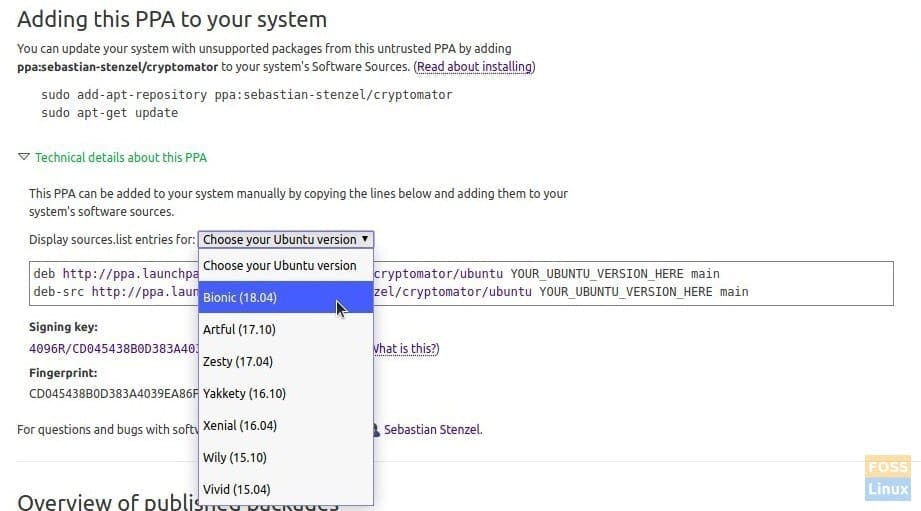
Checking PPA compatibility
Adding a PPA in Ubuntu and its derivatives
To add a PPA, launch the Terminal and use the commands as follows:
sudo add-apt-repository [source]
Where “source” is listed on the PPA page. Once the repo is added to your computer, you need to update the repo list.
sudo apt update
Finally, install the package.
sudo apt install [packagename]
Removing PPA
To remove PPA, use the remove command:
sudo apt-add-repository --remove [package location]
If you prefer a GUI way, you can do that too. Launch “Software & Updates” and go to the “Other Software” tab. You should see all the PPAs that are installed on your computer. Select the PPA source and click remove.
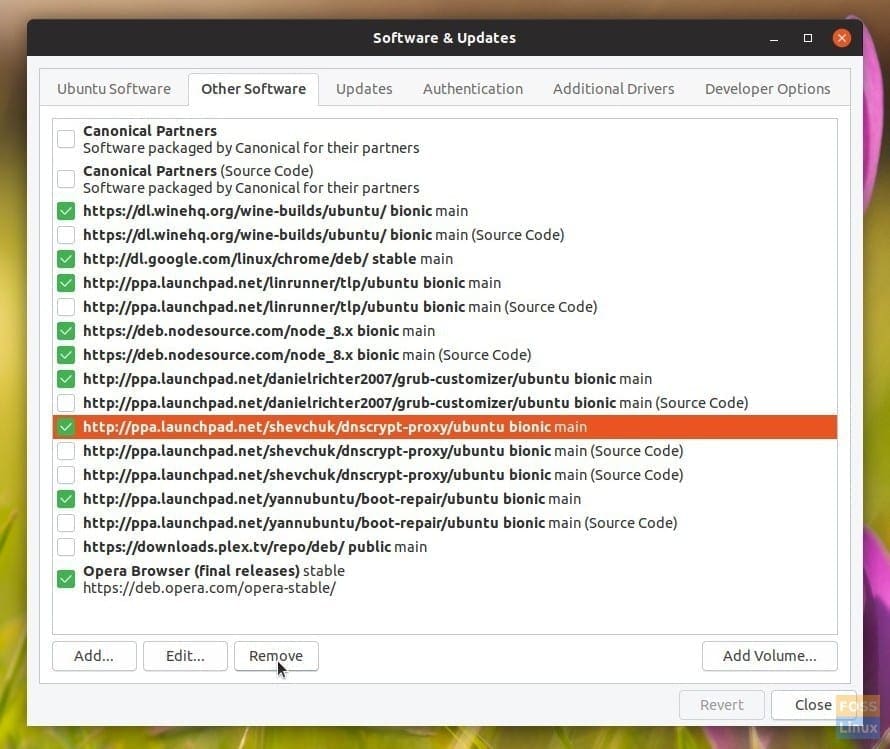
Software and Updates – Remove PPA
5 comments
Hi Kiran. Great job! Keep on working on FOSSLinux. It helps a lot.
Thanks for the articles
Thank you very much!
Hello Kiran, I love reading on FOSS LINUX, i am a newbie but getting to learn about how to use gui and terminal commands. My distro using is xubuntu 20.04lts with xfce ……….KEEP UP THE GOOD WORK.
Thank you a lot ,Kiran!