
Disk cloning entails data copying from one disk to a secondary disk to create an exact copy of an already existing disk. The simplest and easiest way to attain this is through the copy-and-paste approach. The only challenge with this approach can copy hidden files and folders and the files that are in use.
This is where we need the aid of cloning software like Clonezilla, which is ideal in replicating an operating system, software, patches, and drives.
What is Clonezilla?
It is a cross-platform disk imaging and cloning software with distributions dedicated to Windows, Mac OS X, Minix, and Linux. Clonezilla is based on the partclone utility, thus its capability in disk and partition imaging. As a result, Clonezilla can clone blocks of data from a hard disk directly from one disk to another. The other alternative is creating images for partitions or disks to a hard disk, either local or mounted on the network resource through SMB, SHH, or NFS.
It is essential to note that Clonezilla runs on top of a wizard that is command-line driven. These cloned images can then be encrypted or centralized on an external drive like a hard disk drive or a USB drive. In other circumstances, you can opt to use specifically designed network places for these purposes—for instance, attached network storage.
Clonezilla is extremely versatile in ensuring that you restore your data backup from a failed drive, be it on a desktop or a server.
The three main versions of Clonezilla include:
- Lite Version
- SE Version
- Lite-Server
Look at using Clonezilla Lite version as aiding you to clone on a single PC. It is more like you decide to clone your computer’s internal disk to an external hard disk.
If you wish to do more complex cloning, then Lite or SE would be well in order. You can even clone several computers at a go or remote machines via the network.
CloneZilla has more capabilities to perform a full backup of a given device to an entire external drive and perform backups on entire disks or particular partitions. Storing of the cloned data can be accomplished using two varied approaches. These include copying that data or copying an encrypted image file.
Why should you use Clonezilla?
Clonezilla has support for different diverse filesystems running on diverse operating systems and software. It has the dd command that is particularly handy when making a backup of an unsupported filesystem. It works by making a sector-to-sector copy of the drive. When using the dd command, there is no need to know the kind of filesystem being used. You will also love it because it supports remote backups such as NFS shares, SAMBA, and SSH.
We will discuss all the steps around plug-in a new hard disk drive, booting into Clonezilla, and restoring the image from a saved location.
While cloning, we will encrypt the resultant image on the go during cloning the hard disk drive. We will also use a passphrase to encrypt and decrypt the image. On the off chance that we lose the passphrase, we will forever lose our imaged data. So a lot of care is needed when handling the passphrase.
Despite the overall outstanding benefits of using Clonezilla, it has its challenges, just like any other application. Some of these that require your attention include:
- A not-so-easy workaround is needed to create incremental backups of the disks or partitions because it does not happen by default.
- There is a need to decommission a machine whose source drive is on the production server. The services can be migrated to another server temporarily as the decommissioning is happening for a short while. In case of a situation where migrating the services is not possible, then make a consideration to have some downtime for your clients.
- The external disk for image restoration should have a minimum capacity as the cloned image size.
Cloning the Hard Disk using Clonezilla
Note that the external disk you intend to backup your data is at least the same size as the disk you intend to clone. That will save you the time you have to stop and look for a larger disk.
Step 1: The first step is to download Clonezilla using the following link from the official website.
Step 2: Secondly, ascertain that the version you will download is stable and meets the system’s requirements. Subsequently, you will be required to create a bootable version of the USB drive or create a CD/DVD of Clonezilla.
To create a bootable USB disk, there are many tools available. Please refer to our guide.
Step 3: Thirdly, you need to attach both the bootable drive having the Clonezilla and the external disk to back up the data. Subsequently, please reboot the system after ensuring that they have been fitted well.
Follow this by making changes to your usual boot order and customizing it to boot with Clonezilla’s disk. Note that this process differs for different machines, and you may need to look this up. However, the common ones include using DEL keys, F11, F12, or ESC to access your BIOS.
Step 4: Choose to boot from Clonezilla disk, which will subsequently prompt you with Clonezilla welcome screen. Select the option Clonezilla live option and press enter to continue.
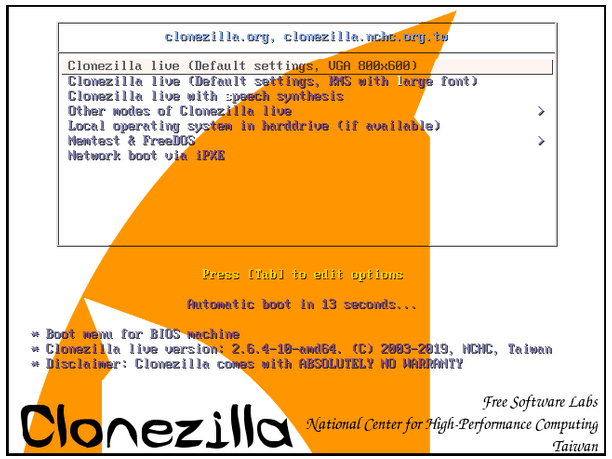
Clonezilla welcome screen
Step 5: The next screen to appear is the language screen, where you are required to select your suitable language for the cloning process.
The arrow keys, Up and Down, are handy in navigating through the various options available. This stage happens after the Linux system loading into RAM.
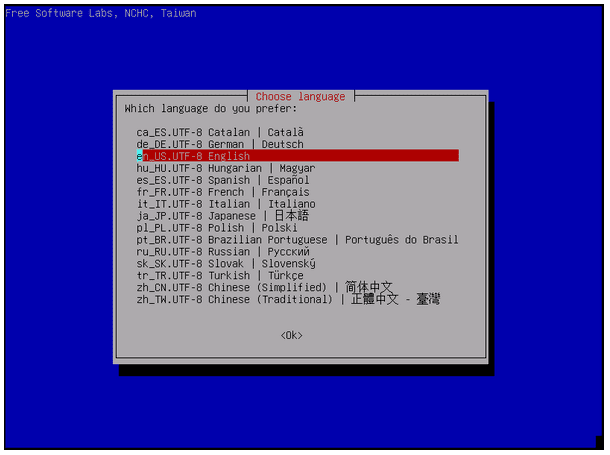
language screen
Step 6: The next step provides an option to configure or change your keyboard layout. Here, you might have various versions depending on the kind of Clonezilla that you choose to use. However, the newer versions of Clonezilla only have two choices.
The first is the default US keyboard layout, and the second is the option to change the keyboard layout. In this case, we will opt for the first option. In case you are using an older version of Clonezilla, choose the option, don’t touch keymap.
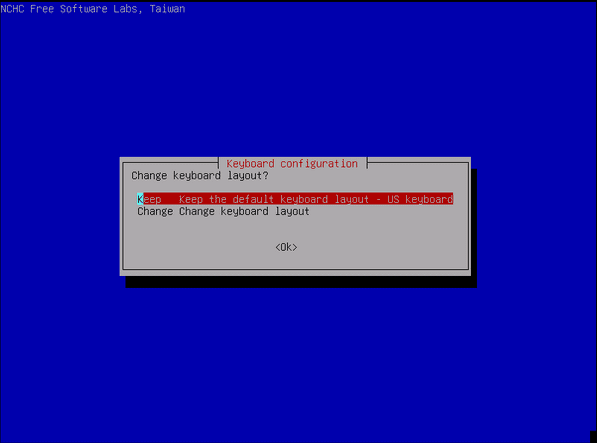
configure keyboard layout
Step 7: The start screen appears next with an option to start Clonezilla or dive in to interact with the shell. Here, we choose the option Start Clonezilla and click on enter to proceed.

Clonezilla start screen
Step 8: Since we are cloning a local encrypted disk image, we will choose to use the device-image alternative and click on Enter to proceed. In this demo, the cloned hard disk’s resultant image will be saved in a network space.

use the device-image
Step 9: We will use the protocols CIFS/SMB to save the cloned image on the network shared directory. You are also free to use other popular network protocols to save the cloned image.
Some of these protocols include an NFS share, a WebDAV server, a local attached driver, or an SSH server. At this interface, we will choose samba_server and click on the Enter key to continue.
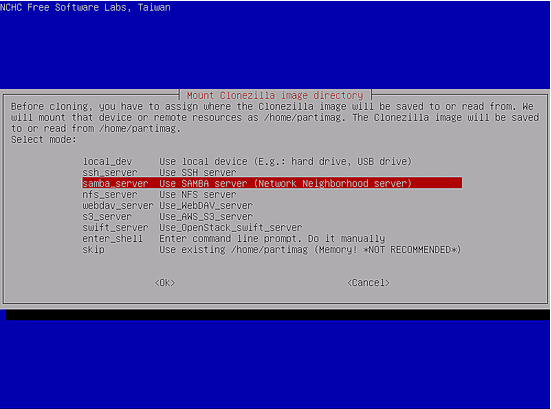
samba_server and press Enter to continue
Step 10: Choose the option DHCP for the network interface configuration. There are many network interfaces in a situation. Choose the physically connected interface to the DHCP network.
In case a DHCP server is not configured, choose the static alternative to add the network interface settings manually.
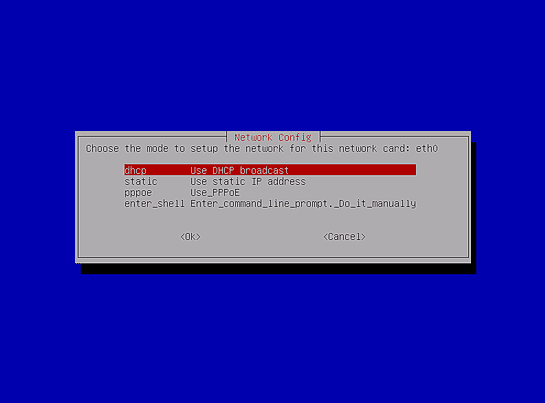
select DHCP option to configure the network interface
Step 11: At this stage, the IP address of the samba server is added. Alternatively, this can be the Fully Qualified Domain Name. Then hit enter to continue to the following screen.
add an IP address or the fully qualified domain name
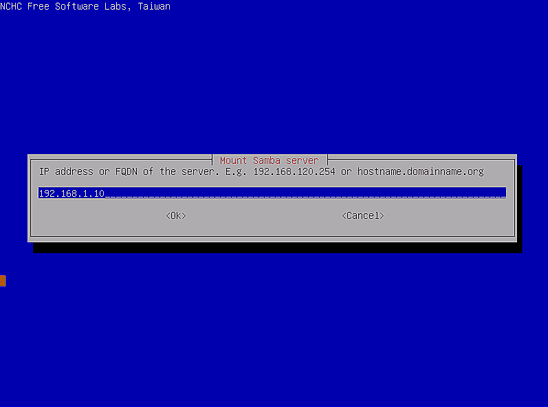
add IP address or the fully qualified domain name
Step 12: In case your samba server has no known domain set, then leave the domain field empty. But if it has, then indicate it in the space given as indicated in the diagram below. Subsequently, press “enter” to proceed.

leave the domain field blank
Step 13: The screen that follows gives the option to add the name of a samba server account. In fact, you can implement write privileges on the server and press enter key to continue.
add the name of a samba server account
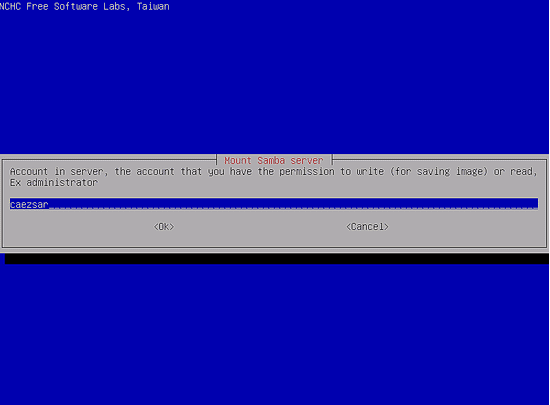
add the name of a samba server account
Step 14: This is where you indicate from the samba server the absolute path of the directory. This is where the cloned image is saved.
Specify the absolute path of the directory from the samba server
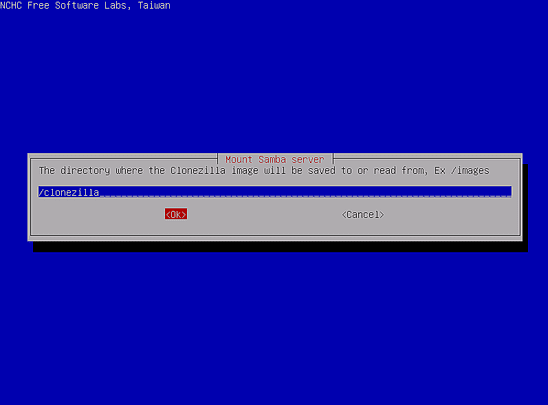
specify the absolute path of the directory from the samba server
Step 15: Select the new version of Samba’s protocol. And press “enter” to proceed to the subsequent prompt. In case the shared network location resides on an old SMB server, then use the protocol version 1.0.

Choose the latest version of the Samba protocol
Step 16: Before proceeding to the screen, select the auto Use system default security mode at this level.
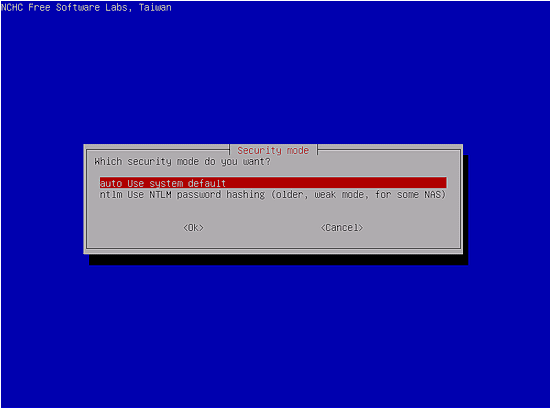
auto Use system default security mode
Step 17: At this stage, you need to add a password for your samba account. This precedes mounting the share and pressing the “enter” key to continue.
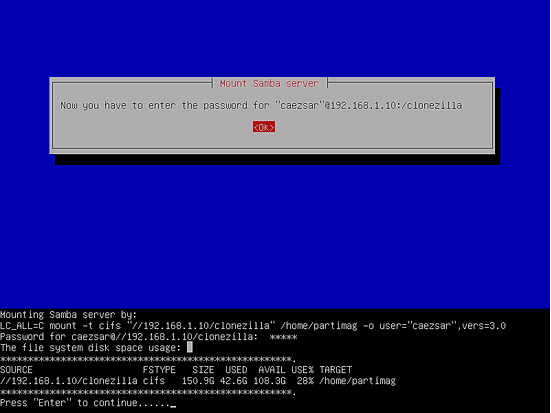
add a password for samba account
Step 18: The next interface presents the user with a chance to select the mode for running the wizard. You can opt for beginner or expert alternatives.
By default, the beginner mode is always selected unless you change this. Now, you will be able to select the partitions of interest to you.
Note that using the expert mode requires extra care where you are very sure of what you are doing. If this is not the case, you may end up losing your data.
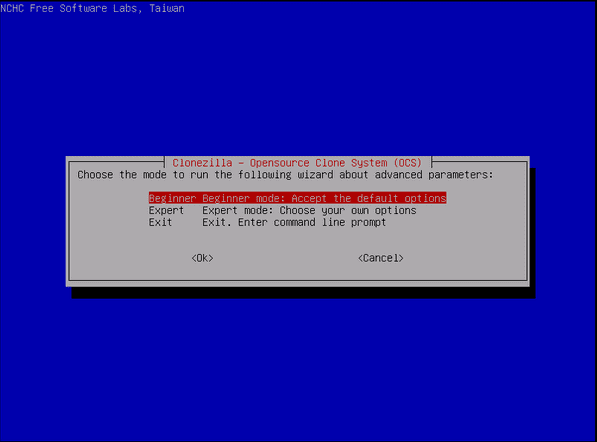
choose beginner or expert mode
Step 19: Choose savedisk alternative to image the IDE/SCI/SATA disk that is locally attached.
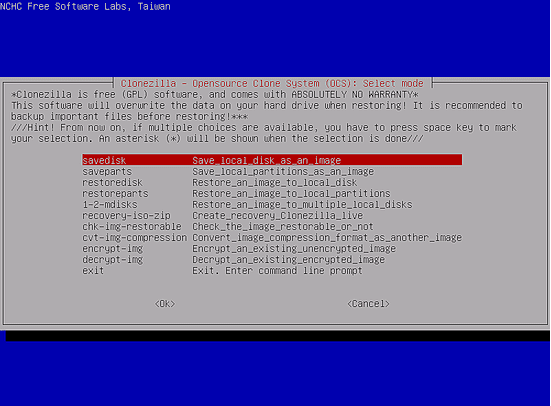
select savedisk option
Step 20: Select to either maintain the default name scheme that Clonezilla inputs for your saved image or choose to add a descriptive name manually.
Normally, choosing to customize the name of the image has the flexibility that you can easily recognize it at a later time. Also, it is highly recommended to have the date the image was taken to be included.
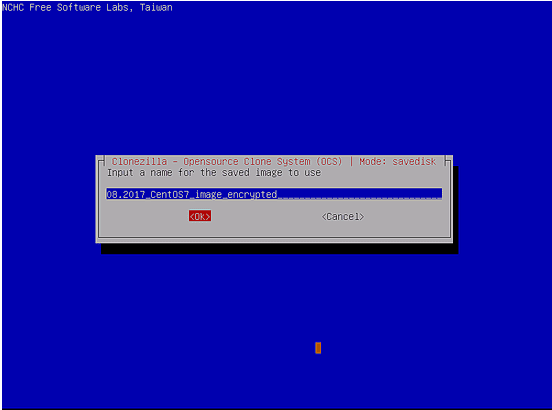
choose the default name scheme Clonezilla inputs
Step 21: Choose the local source disk that you wish to clone. When selecting the source disk, it is vital to note the kind of names used because these could be confusing if you are new to this.
The most common conventions include sda, sdb, etc. In case you find this challenging, you can restart the PC and use the BIOS to confirm your source disk. The other option that is of great importance is using the disk’s size if you are certain.
In case you are stuck, you can get the information by using the serial no of the disk in the identification of the proper device.
Here, we use a Vmware disk for cloning an image. In fact, after choosing the right source drive, select the device by using the space bar. Press the enter key to continue.

select the local source disk
Step 22: Choose “Skip checking/repairing source file system” and press the enter key to proceed if you are certain that the source file system is not corrupted.
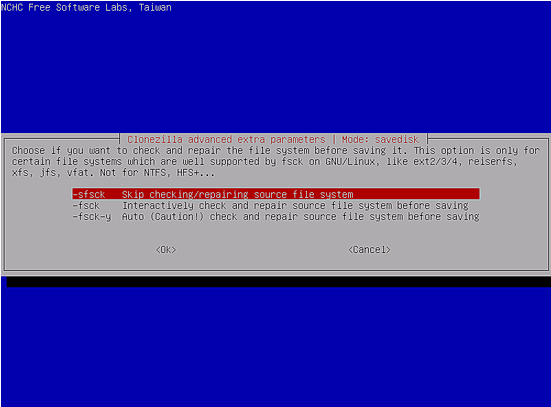
Skip checking or repairing the source file system
Step 23: On this screen, choose no. That will ensure that checking the saved image will be skipped. Then, click on OK to continue.
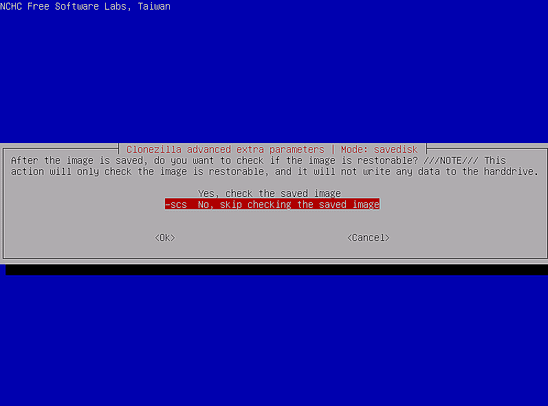
select no to check if the saved image is restorable
Step 24: Here, choose the second option, which is to encrypt the image. Select OK, and then press “enter” to continue. As a result, the resultant cloned image is encrypted with the assistance of the program eCryptfs.
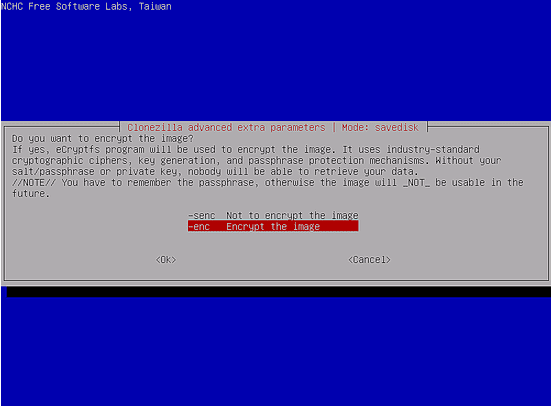
Encrypt the image
Step 25: Clonezilla takes over the cloning process. First, it shows a report of the activity happening and shows two warnings if you are interested in continuing with the process.
You can choose to press n for No or y for Yes.
After this, the third warning gives an option to clone the boot loader or not.
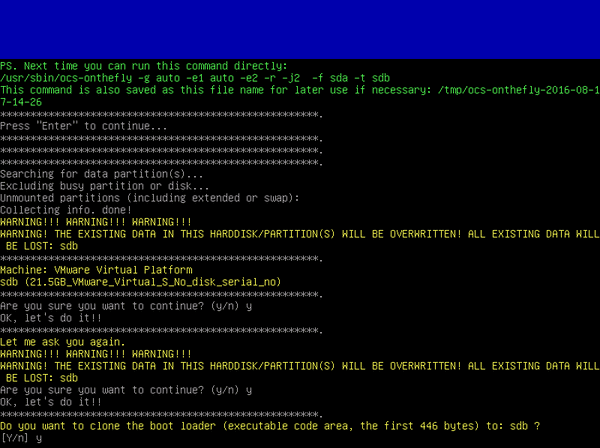
confirm if you wish to continue cloning
Step 26: Selecting yes to proceed with the cloning prompts Clonezilla to create a partition table on the desired target drive initially.
Subsequently, there is a warning that alerts you to clone the boot loader or not. In this case, we press Y because we intend to complete the cloning process.
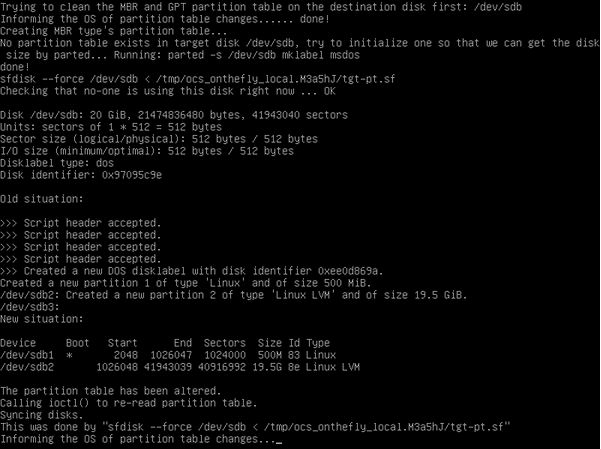
create partition layout on the destination disk drive
Step 27: This is a critical stage that you should be careful not to power off your PC because this is where the cloning process starts without any intervention by the user.
A graphical report of all the activities taking place is displayed here.
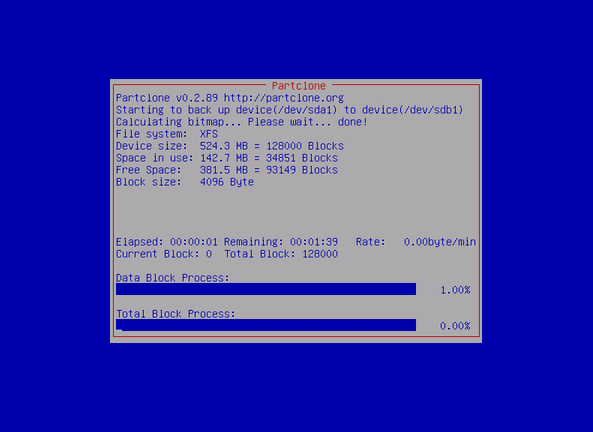
disk cloning process by Clonezilla
Step 28: A report is generated after the cloning process is complete. Besides, you are presented with an option to continue using Clonezilla once more. The options available include pressing 1 to remain in the console mode or option 2 to run the wizard to exit. Alternatively, press “enter” to open the exit screen.
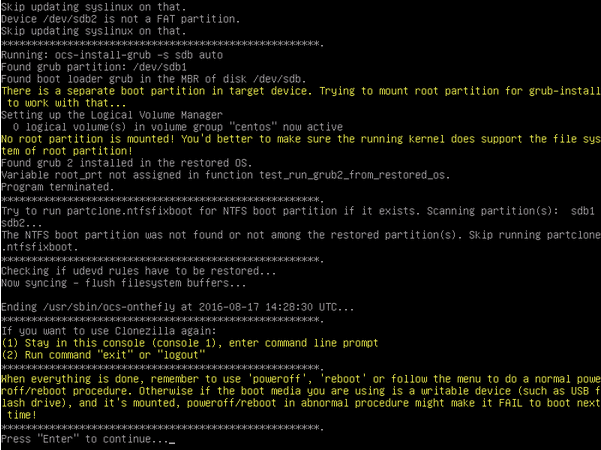
cloning disk complete by CloneZilla
Step 29: The screen that follows has four alternatives that you can opt for. These include:
- – “Poweroff” to stop
- – “reboot” to restart
- – “cmd” opens up the interactive command-line prompt
- – “rerun1” to initiate a new cloning process over again.
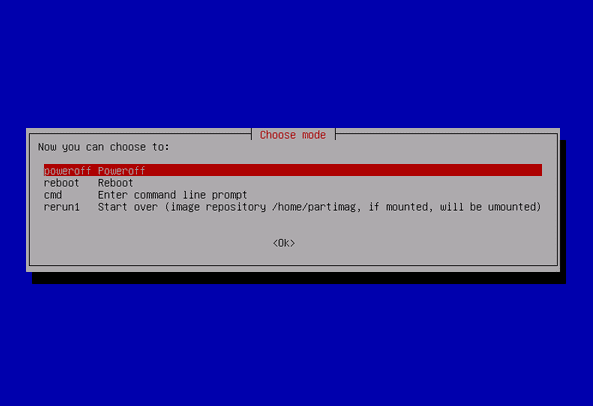
final options presented by Clonezilla
We are now done with cloning your disk drive. All you can now do is detach your external disk drive, keep it somewhere safe, change your current disk, and use the new disk to boot your PC.