
If you are looking for an open-source Linux alternative for Acronis True Image, Norton Ghost, Paragon Drive Copy, you have landed in the right place. Meet Clonezilla.
Clonezilla is a free and open-source disk partition and disk cloning software that helps you perform system deployment, bare metal backup, and recovery.
There are three Clonezilla types, Live, Lite server, and SE (server edition). Clonezilla live is for single machine backup and restoration while the Clonezilla lite server is for deployment on a mass scale at once.
Clonezilla Features
Though it is entirely free, it comes packed with powerful features enough for most uses. It doesn’t support incremental cloning yet, but here are the important things it can do.
- supports almost all file systems including that of Linux, Windows, Minix, Mac OS, and VMWare ones
- LVM2 under GNU/Linux is supported
- supports MBR and GPT partition formats
- unattended mode is supported
- capability of same image restoring to multiple local devices
- an image can be encrypted using ecryptfs, which is a POSIX-compliant enterprise cryptographic stacked filesystem
In today’s tutorial, we shall show you how to create a bootable Clonezilla Live USB drive that you can merely plugin on any computer directly and perform the hard disk cloning.
Creating a bootable Clonezilla USB drive
Step 1) Grab the latest copy of Clonezilla Live ISO image from the official servers.
Step 2) Plugin a blank USB drive to your PC of at least 512MB capacity.
Step 3) Download Etcher for your Linux PC. If you don’t have it installed, you can get the AppImage format that lets you run the app on most Linux distributions without even installing it. It is a portable application.
Step 4) Launch Etcher. You should see your USB drive in the Etcher’s interface.
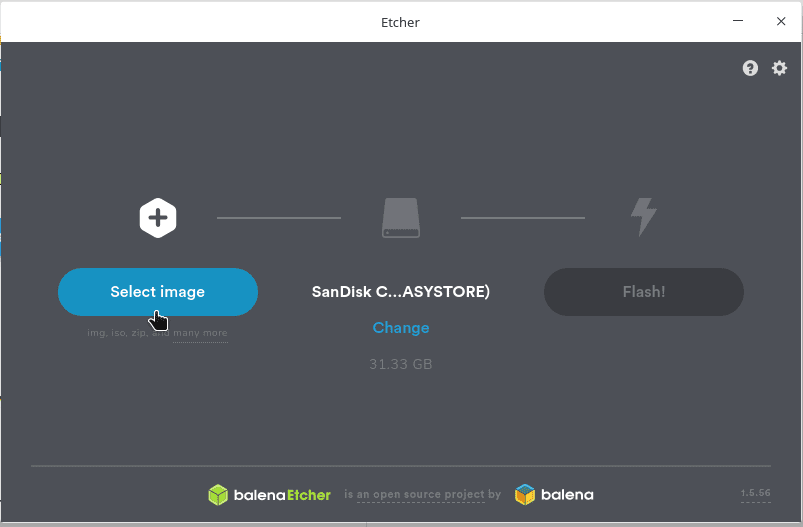
Etcher – Clonezilla
Step 5) Click Select image, browse and select the Clonezilla Live Image that you downloaded earlier.
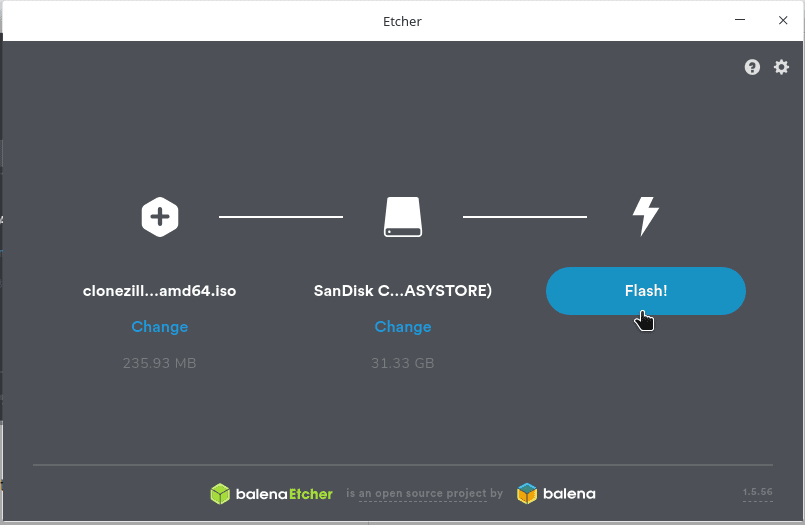
Flashing the Image to a USB drive
Step 6) Wait until it says Flash Complete. Close Etcher, and eject the USB Flash drive.
Your shiny Clonezilla Live USB drive is now ready! You can plug it in any computer and boot into it to start using it. Note that depending on your PC make and model, you may need to change the BIOS settings to be able to boot into the USB drive. Please refer to your computer’s manual for instructions specific to BIOS settings.
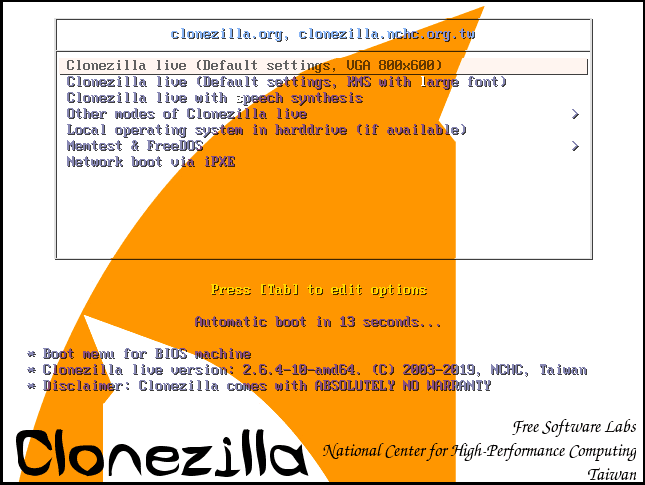
CloneZilla-Boot-Menu
In the next tutorial, we will show you a step-by-step guide on how to use the bootable Clonezilla USB drive to perform hard disk cloning. Stay tuned to FOSS Linux!
2 comments
Where’s the continuation of the article?
Here it is: https://www.fosslinux.com/28452/how-to-clone-hard-disk-using-clonezilla.htm