
SteamOS is a Debian-based Linux distro optimized for the Steam client and designed from the ground up to deliver a modern living room experience. It is optimized to work with a controller and doesn’t need you to attach a keyboard and a mouse. Furthermore, the UI is big and console-like, allowing you to operate it while lying on your sofa easily.
Now, SteamOS was originally announced way back in 2013. However, over the years, development on the operating system has been poor, to say the least. The last major update to SteamOS came back in July 2019, which makes it nearly two years old when writing this review.
But all that said, the project is far from dead. Valve (Steam Developer Company) has reportedly stated that SteamOS is currently sidelined, but they do have plans to go back to it.
However, till SteamOS gets back on track, is the current version of the operating system good enough to function as your living room entertainment system? Well, that’s exactly what we will be looking into in this in-depth review of SteamOS.
SteamOS: Features and Things to Know
Before we give you a live look into SteamOS and what it has to offer, here’s a quick look at some of the core features and functionalities it brings to the table. This should help you build an idea of what is SteamOS and what it’s not!
Not Your Standard Linux Distro
Despite being based on top of Debian (the current version is based on Debian 8), SteamOS isn’t your typical Linux Distro. On the contrary, you can look at SteamOS as a bootloader for the Steam Client. If you primarily intend on using a system just to run Steam and Steam games, then SteamOS is the platform for you.
Furthermore, unlike most distros that come with a standard GUI meant to be used with a mouse and a keyboard, SteamOS is optimized for controller-based navigation.
The Best of Open-Source And Proprietary Software
SteamOS isn’t completely Open-Source. The base system is built on top of Debian, and that’s Open-Source. However, the SteamOS desktop environment, and not to mention the Steam Client, are all proprietary and belongs to Valve. On top of that, SteamOS also ships with many third-party proprietary drivers as well.
A Minimal System
Apart from giving you access to the Steam client right out of the box, SteamOS has a very minimal footprint and exceptionally low overhead. This is because they wanted to allocate as much of your system resources as possible for running your games and not waste it on running unnecessary OS processes and daemons.
But with that being said, SteamOS not a great distro if you want to engage in desktop-related workloads.
Access to Two Desktop Environments
With SteamOS, you will get access to two desktop environments assigned to two different user accounts.
First, we have the “Steam” user account, which uses the custom Steam desktop environment. The UI is essentially the “big picture mode” on your Steam Client, making the whole interface easily navigable using your controller – no need for a keyboard or mouse.
It is worth noting that the “Steam” user account is unprivileged and is only intended to let you install, manage, and play games.
Note: We have put together a quick run-through of the SteamOS Console UI in a later section. You can see that to get a better idea of how it looks and feels.
Next, we have the “SteamOS desktop” user account. This gives you access to a traditional desktop interface powered by Gnome. This account has root privileges, and you can access that using the “sudo” command. This space is provided to let users run non-Steam apps and get a traditional desktop experience.
Note: We also have a quick overview of the SteamOS Gnome desktop environment in a later section.
Hardware Support
SteamOS is meant to come preinstalled in Steam Machines distributed by Steam OEM partners, unlike all other Linux Distros. However, they have publicly available the installation media, and end-users can freely download and install it on their system.
But that being said, SteamOS is still in its Beta stage and only supports a certain set of hardware. Here’s a look at its hardware specific to give you an idea of what you need to get it running:
- Intel or AMD 64-bit capable processor
- 4GB or more memory
- 250GB or larger disk
- NVIDIA, Intel, or AMD graphics card
- USB port or DVD drive for installation
If your system meets these hardware requirements, then you can easily install SteamOS. And to help you out, we have put together a detailed installation guide giving you a full step-by-step walkthrough.
SteamOS: Installation
The SteamOS installation process is a bit unconventional compared to other mainstream distros. As such, here is a detailed step-by-step installation guide to ensure you don’t run into any issues while installing the operating system.
Step 1: Create an Installation Media
Unlike most distros that let you download an ISO, the SteamOS installer is available as a .zip file. After downloading it to your system, you will need to unzip the contents of the .zip file to a FAT32 formatted USB drive. Also, make sure to use an MBR partition.
Well, at least that’s their officially recommended way for installing SteamOS.
After some searching, we found out that there indeed is a SteamOS installer available in ISO format.
You can download this file to your system and then use a program like Etcher or Rufus to flash the OS image on your USB stick. Once done, insert it into your PC, restart your system, and press the appropriate key (either F8, F11, F12, or DEL) to bring up the boot menu.
From here, boot into the SteamOS installer.
Step 2: Pick Installation Mode
At first, you will be presented with the SteamOS installer boot menu, which will give you three options:
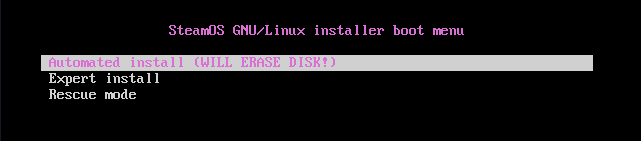
SteamOS Installer Boot Menu
- Automated Install – Fully automatic installation. Formats (erases) available disk and install SteamOS. If multiple disks/partitions are present, it will let you choose where you want to install.
- Expert Install – Lets us choose a preferred language, location, keyboard layout, and disk partitioning.
- Rescue Mode – Recovery Mode. Dumps on the TTY to troubleshoot potential issues or problems.
We recommend going with the Automated Install option as it’s the most hassle-free option. Of course, if you wish to create custom partitions and customize the other details, then you can go ahead with the Expert Install.
Step 3: Installation in Progress
Now, after selecting the Automated Install, it will start installing the base system.
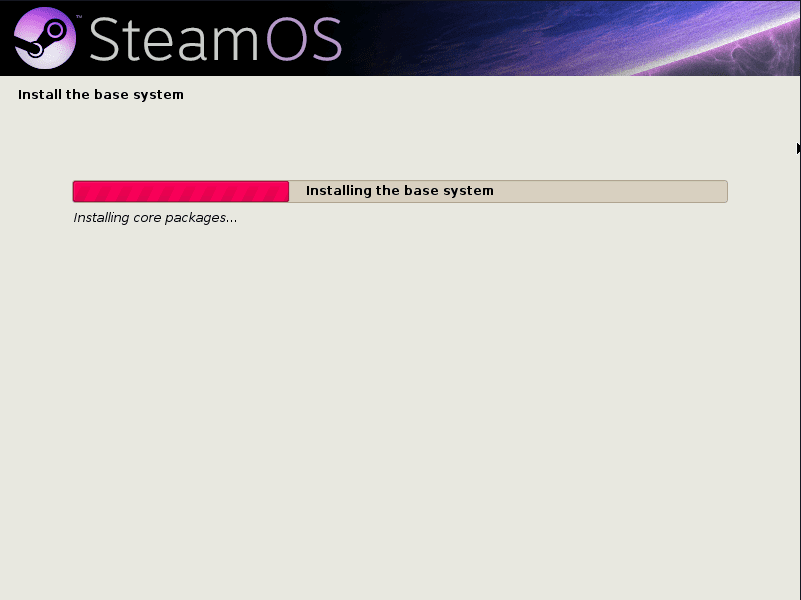
Configuring and Installing Base System
Once the base installation is complete, it will ask you to specify where to install the GRUB bootloader.
As you can see, it will show you available partitions for where you can install the bootloader. For the sake of simplicity, install the GRUB into the master boot record of your first drive.
Type in the corresponding device name into the provided field and hit enter to Continue.
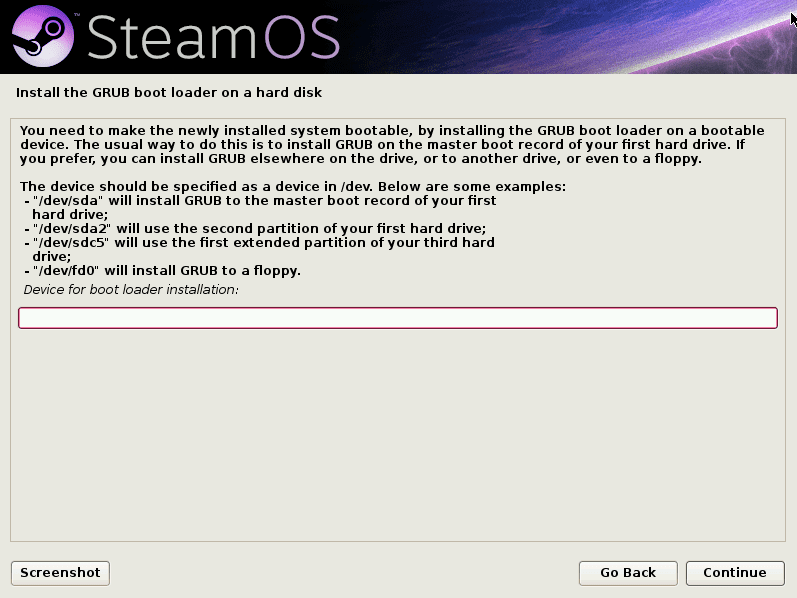
Install GRUB Boot Loader
After a couple more minutes of “installing” and “configuring” different things, you will automatically get booted into the Steam desktop environment.
SteamOS First Boot
But don’t think that the installation is complete just yet.

SteamOS Installation
At this point, the OS will automatically start installing Steam, as you can see from the image.
For this, you will need the system connected to the internet to download the Steam program and the updates. Now in case, you haven’t connected your system to the internet, you will receive a pop-up telling you to “connect to the internet.”
You are given access to a customized version of the Gnome Shell. You can use it to turn on WiFi, connect to your internet, or plug in an ethernet cable.
Step 4: Installation Complete
Once this installation completes, the system will again reboot and create a backup of the system partition. And finally, after that’s done, you will be booted into the lock screen from where you can start using SteamOS.
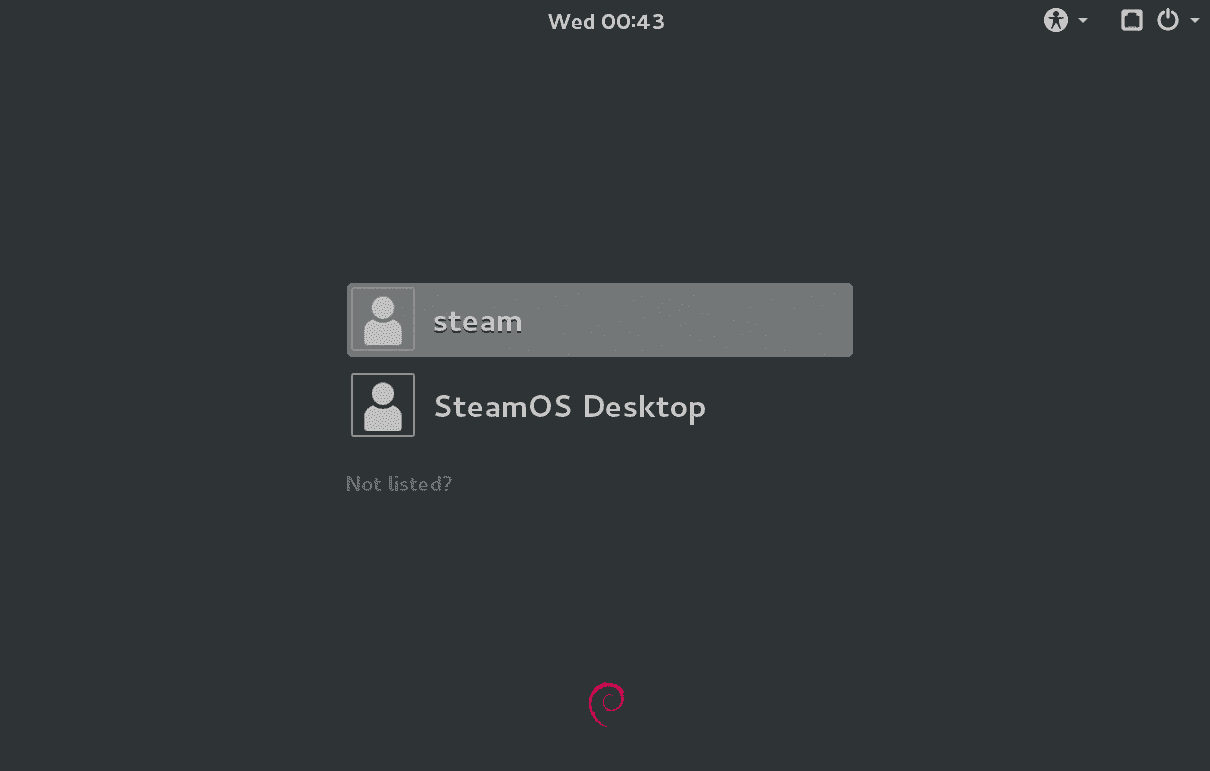
SteamOS Lockscreen
As you can see, the system will present you with two user accounts – Steam and SteamOS Desktop.
SteamOS Desktop will open the Gnome desktop environment we visited earlier. That’s the desktop aspect of SteamOS, from where you can install and launch basic desktop apps.
If you open the Steam user account, it will start the Steam Client from where you can install, manage, and play all your Steam games.
Step 5: Set Up User Password
By default, both user accounts don’t have any associated passwords. They should open just by pressing Enter. However, if it does demand you to enter a password, you will need to configure one manually.
To do this, restart the system and start pressing the “ESC” button. This will take you to the GRUB menu. From there, click Advanced Options for SteamOS option as shown in the image.
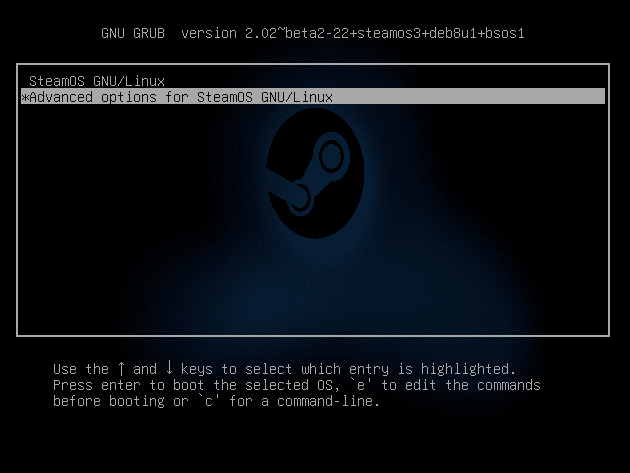
SteamOS GRUB Menu
In here, you will find the option to boot into “recovery mode”. Select it, and you will be dumped into the following terminal interface with root access.

SteamOS Recovery Mode
Once here, you can type in the following command to create a new password for the “Steam” account and the “Desktop” account:
To set a password for the Steam account –
passwd steam
to set a password for the Desktop account –
passwd desktop
Once done, type in reboot to restart the system and boot back to the SteamOS lock screen. Now you can open the accounts using the password you just set.
Important: Do note that SteamOS is still in beta and suffers from some bugs here and there. One of the most common issues reported by many users is having a Black Screen show up after Steam Installation. If this happens to you as well, follow this troubleshooting guide to resolve the problem.
SteamOS: First Impressions
For the sake of this review, let’s take a look at the Steam Client implementation first.
SteamOS: Steam GUI
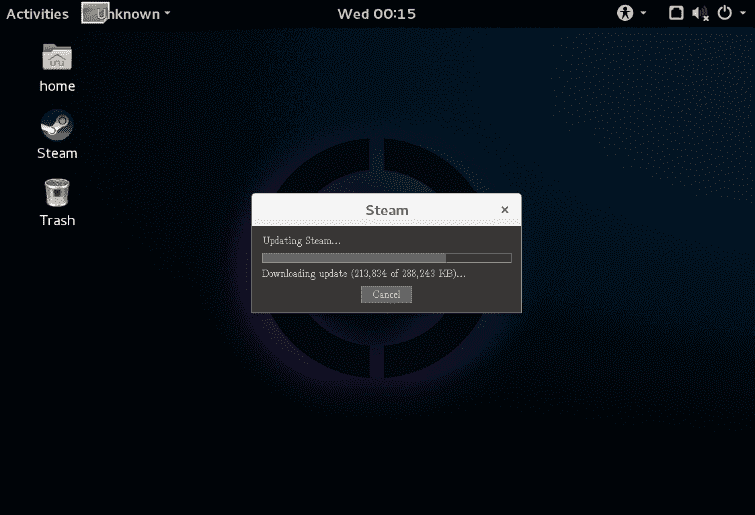
To do this, open the Steam user account. You will be immediately greeted with the following screen informing you that it’s checking for updates. In case it does find available updates, it will start downloading and installing them automatically.
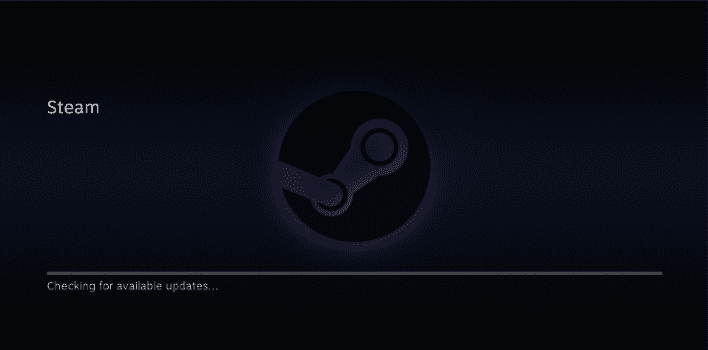
SteamOS Checking for Updates
Once the update process is complete, you will see an animated boot logo for Steam followed by this screen asking you to either “login” to your Steam account or to “Join” and create a new account.
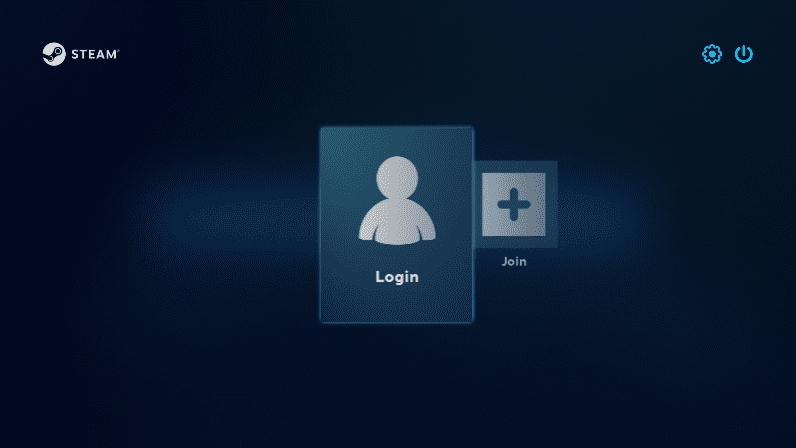
SteamOS Desktop Environment Login Screen
The “Join” button will tell you to open a browser and navigate to the Steam website to create a new account.
But with that being said, since you are using SteamOS, we take it that you already have a Steam account. As such, click the “Login” card, and enter your Steam account login credentials. And that’s it! It will log you in straight into the SteamOS desktop environment:
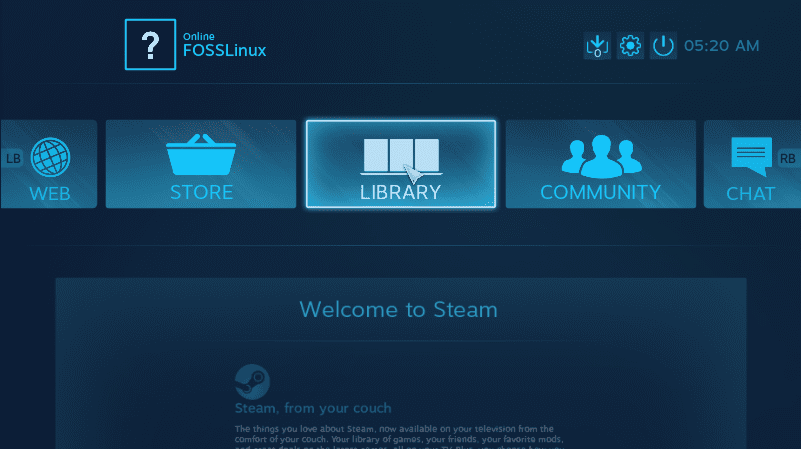
SteamOS Desktop Environment
This is the same UI as what you get If you have ever enabled the “big picture mode” in the regular Steam Client.
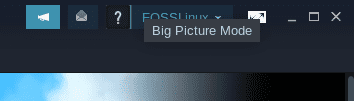
Steam Big Picture Mode
The interface is optimized to be used using a controller instead of a keyboard and mouse. As you can also see, there is literally an indication on the options carousel to use the RB, and LB triggers to cycle through the different options.
Here is a quick look at the “Store” interface, which you can use to download some games to play on your system easily:
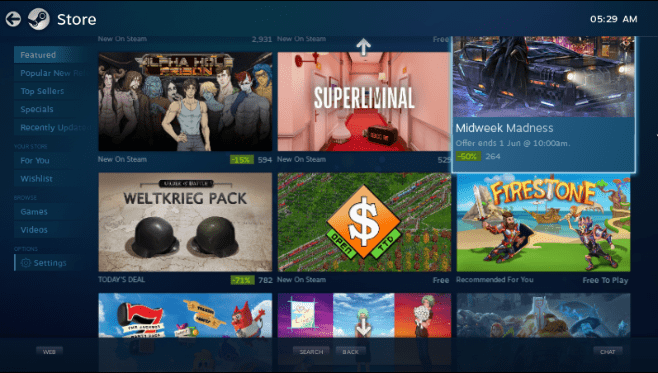
SteamOS Store
You can use the left side menu to browse through featured games, popular new releases, top sellers, your games wishlist, and much more.
Similarly, here is a look at your games Library, where you can see all the games available in your library:
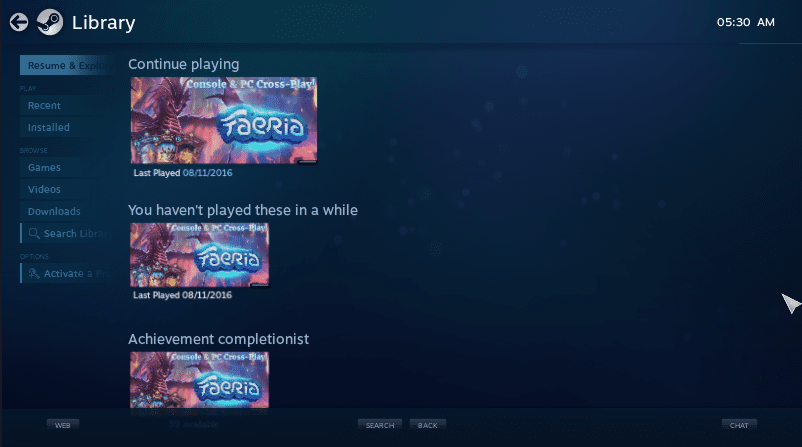
SteamOS Game Library
The left-hand menu gives you quick toggles to display your recently played games, recently installed titles, downloaded videos, and so on.
Besides this, you also have a basic browser built-in called WEB, access to the Steam COMMUNITY, and CHAT to communicate with your friends.
Here is also a quick look at the SteamOS settings menu, so you have an idea of the options available to you for tweaking the system:
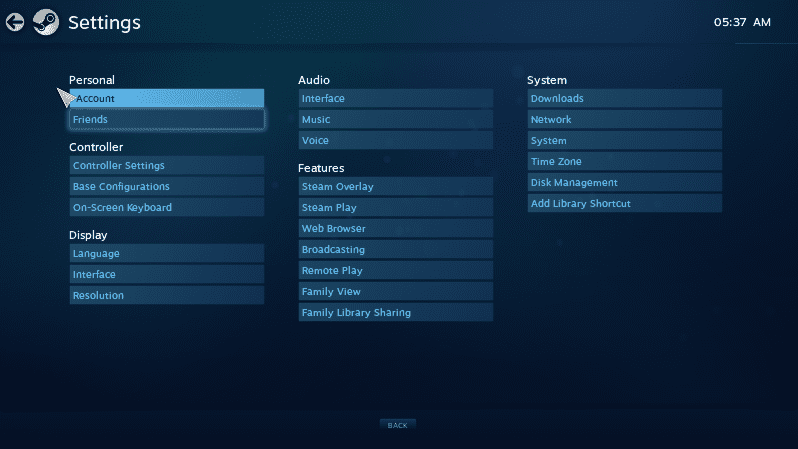
SteamOS Settings
And that pretty much covers our quick tour of the SteamOS desktop environment. It’s a simple and effective controller-optimized environment that you can use to quickly launch games and start playing on your living room sofa.
SteamOS: Desktop GUI
The Desktop Aspect of SteamOS is just as important as its console-optimized user interface.
Logging into the “SteamOS Desktop” user account will bring you here:
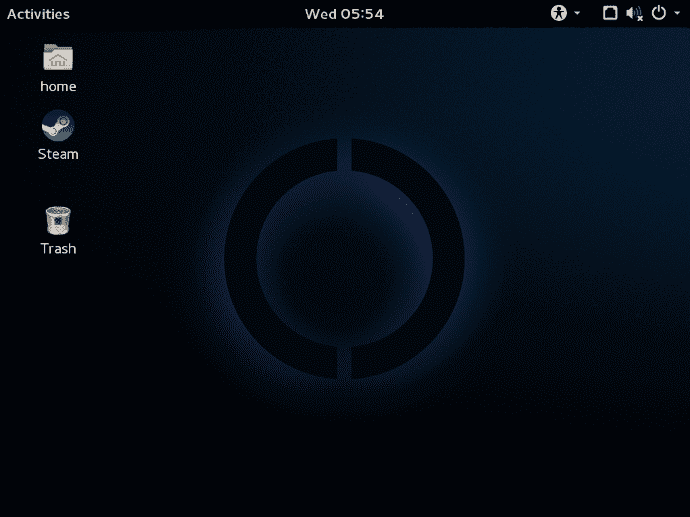
SteamOS Desktop UI
It’s a slightly modified version of the GNOME desktop environment. A look into the System Settings offers a bit more information, including the fact that it’s based on GNOME 3.14.1.
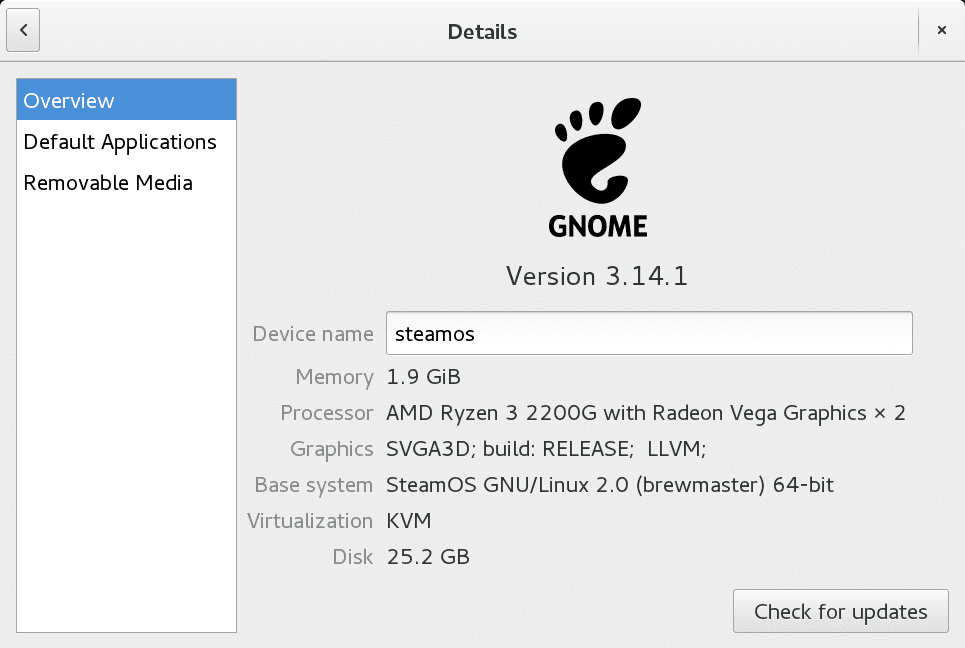
SteamOS System Settings
In terms of the extra system modifications done by Steam, you have this Accessibility menu that gives you quick access to a bunch of settings that you enable/disable on the fly.
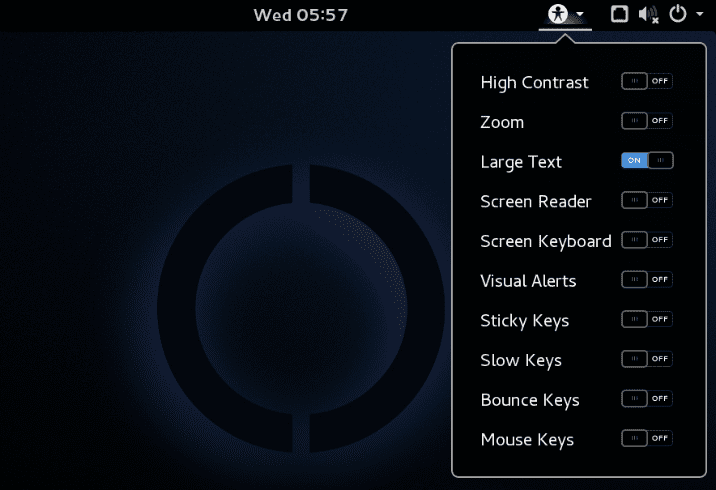
SteamOS Accessibility Toggles
In terms of pre-installed applications, the distro is extremely light. This is to reduce as much overhead as possible.
SteamOS Preinstalled Apps
Apart from the Steam client, you will mostly find all the apps that come pre-bundled with Gnome.
SteamOS: Outdated and Compatibility Issues
As we previously stated, the current version of SteamOS was released approximately 2 years ago.
It is based on Debian 8, whereas the current version is Debian 10.
It is also running on Linux Kernel 4.19, whereas the current version is 5.12.
So as you can clearly see, the operating system is fairly outdated. It misses out on many of the newer features and functionalities introduced with the newer version of Debian and the Linux Kernel. Some of the most notable issues would be its lack of support for Vega-based GPUs and Nvidia RTX-based GPUs.
With that being said, some of these issues can be solved manually, but it’s a lot of trouble.
First, you will need to upgrade Debian 8 to Debian 9 and then on to Debian 10. Then you will need to install the latest Linux Kernel. And once you have done that, many issues will come up as the Steam Client and the SteamOS UI are not compatible with Debian 10 or the latest Linux Kernel.
Now, after toiling through thousands of forums and applying tons of tweaks, we were able to get everything to a working state. However, this process is somewhat hardware-dependent and, as we discovered, isn’t the same for all users.
As such, if you wish to use SteamOS, and you don’t consider yourself highly tech-savvy (read IT professional), we recommend using SteamOS as it is, without making these major upgrades.
Furthermore, the upgrades will mostly be useful to users running super modern hardware -things released in the past couple of years. If your system is 5-6 years old, going through with these upgrades won’t mean too much of a difference.
In fact, if you intend to play some old Steam games to make yourself nostalgic and experience the console-optimized UI, you can use SteamOS without too much of a hiccup.
SteamOS: What Games Can I Play?
The overall gaming experience on SteamOS is going to depend on the hardware and driver support heavily. That being said, if you are running on older hardware, stuff whose drivers were already bundled into the Linux Kernel 4.19, then you shouldn’t face many issues.
Now coming to game compatibility, you can head on over to ProtonDB. The website boasts a comprehensive and almost exhaustive list of all Steam Games that work on Linux, thereby on SteamOS.
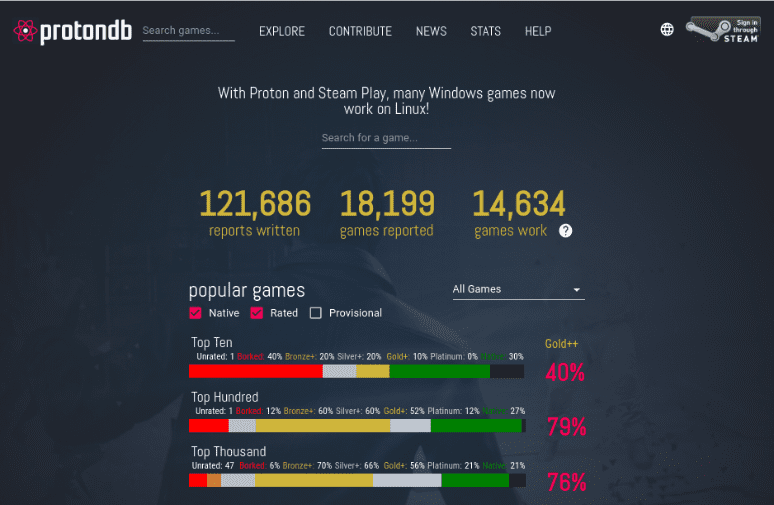
ProtonDB
If you didn’t know, Steam on Linux uses a Windows compatibility layer called Proton (based on WINE) to run the non-native Linux titles. ProtonDB gives you a rating chart showing you which games run flawlessly with Proton, which games require minor tweaking, and which games don’t work at all.
At the time of writing this review, around 21% of the top 1000 Steam Games are natively supported on Linux. Around 21% has a platinum rating, meaning they work flawlessly with Proton right out of the box. And around 56% of them boast a Gold rating, which means you can get them to work by implementing some minor tweaks. And don’t worry, you will also find the necessary tweaks on ProtonDB as well.
To know if the games you play are supported, we highly recommend checking their compatibility on ProtonDB.
So, Is SteamOS Worth Trying Out?
The first thing you should consider is that SteamOS is still in beta and not officially released. As such, it would be lying to tell you that it offers a smooth user experience.
The installation process isn’t beginner-friendly and does demand a bit of technical know-how on your end to get things working. However, we have provided you with a detailed walkthrough to make sure you can at least install the OS.
Furthermore, the OS kernel and the base system – Debian 8, is also outdated. As such, you will not find support for many software, and more importantly, drivers that you will need for optimized performance. And upgrading your system to the latest Debian version and kernel, albeit possible, presents many problems that even Linux veterans will find frustrating.
In fact, if you are already a Linux expert, it would be far simpler for you to do a minimal Arch/Debian installation, download all the necessary drivers, install Steam, and then use it in “Big Picture Mode”.
Alternatively, you can use the Steam Client on your current Linux distro, turn on “Big Picture Mode” to get the console experience, and start using it like that!
And if you are thinking – “My current Linux build isn’t optimized for gaming,” then you can optimize it yourself. Just follow our Ultimate Linux Gaming Guide, and it will hold your hand in turning your Linux PC into a gaming beast.