
Users who use multiple operating systems have to create separate partitions for each operating system. Most users have dual-boot of Windows and Ubuntu, where you have to make different partitions for each operating system. Windows partitions are formatted as NTFS or FAT32 filesystems, whereas most Linux distributions are formatted with Ext4 filesystems, including Ubuntu.
In Linux, you can easily access the Windows partitions through the file manager or the command-line interface. In recent years, Ubuntu has developed a better graphical user interface, so if you are not so used to the command line, you can still mount the partitions using the file manager.
Mounting a drive in Ubuntu
Mounting a drive assigns a directory to the drive where the assigned directory is called a mount point. The drive to be mounted can be a partition of the same drive of a different operating system or an external drive. To mount external devices, formatting the external devices according to the filesystem of the operating system is important. In Windows, external devices are mounted automatically, which is not the same as in Linux. Let’s discuss how to mount a drive in Ubuntu through the GUI and the command line.
Mounting a drive via GUI
To mount a drive through the GUI method, open the file manager application through the app drawer or search bar.

File Manager
Now, navigate the drive from the side pane by clicking on Other Location.
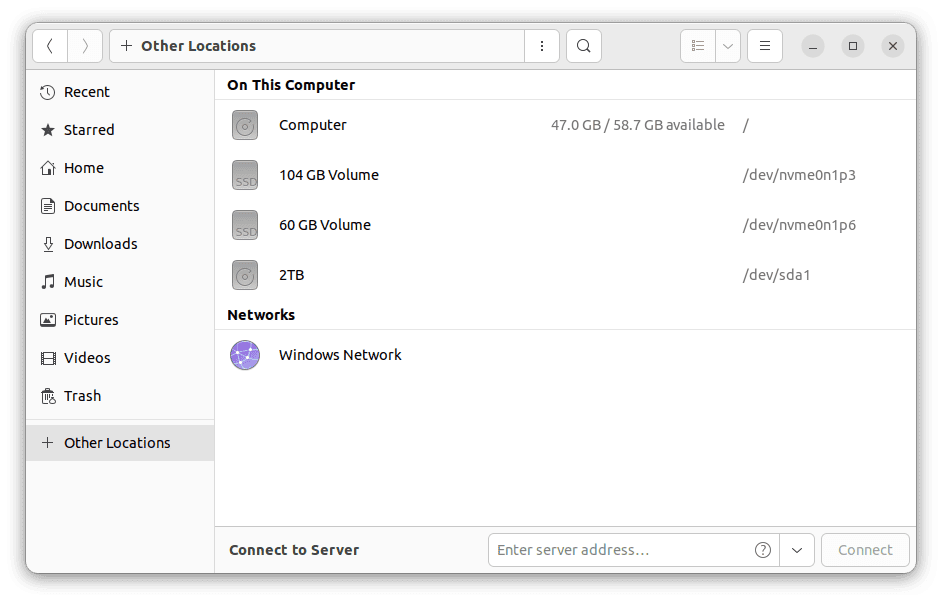
File Manager- Other Locations
Right-click on the drive which you want to mount. Click on Mount.
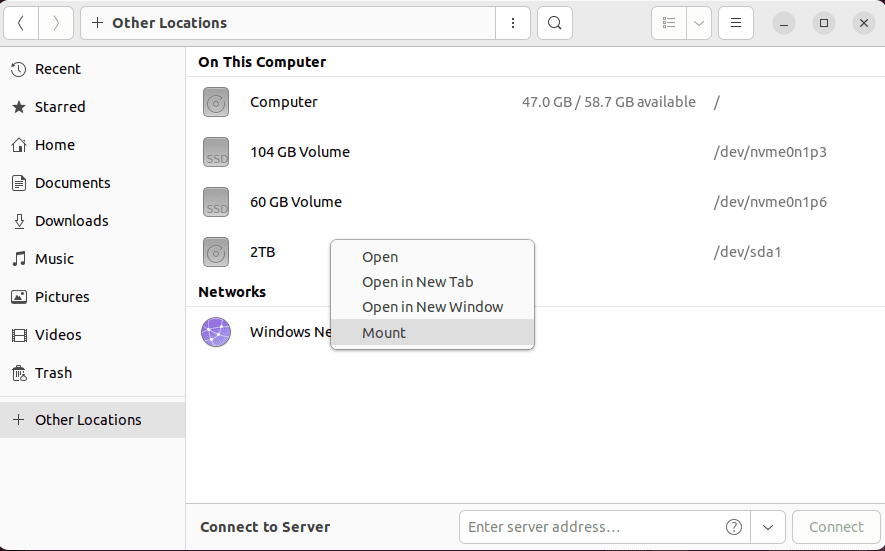
Mount a drive
That’s all; the drive has been mounted successfully. Windows partitions of NTFS or FAT32 filesystem type can also be mounted by following the above method. But, in windows, you can’t simply access Linux partitions of the ext4 filesystem.
To unmount the drive, right-click on the drive and click on Unmount.
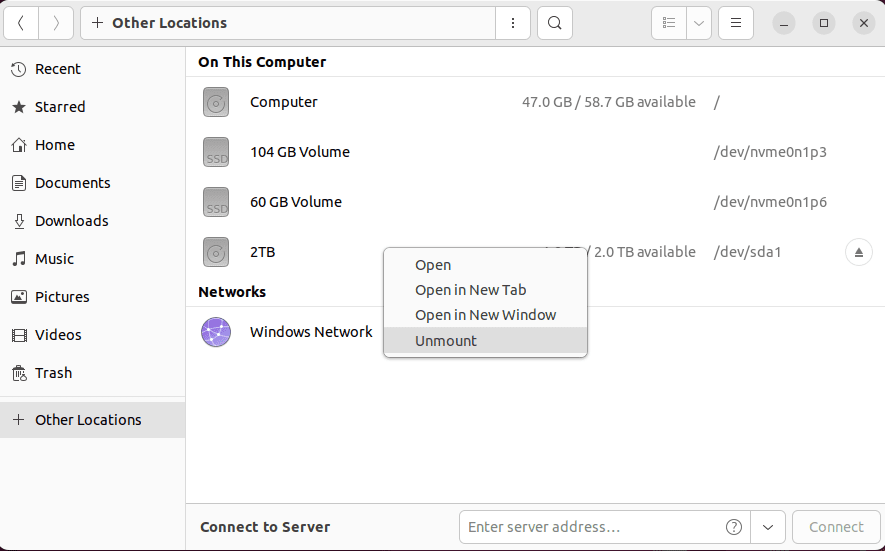
Unmount a drive
Mounting a drive via the command line
Users can easily mount drives by the above method only if the drive format is the same as the operating system’s or the drive size is less than 2GB( in the case of external devices). Otherwise, it may lead to errors.
For external devices larger than 2GB, first, you need to partition the drive followed by formatting and then mount the drive. Here, we will see how to mount a drive through a terminal using the mount command.
Open a terminal window by pressing Ctrl+Alt+T and execute the following command to check all the drives in the system:
sudo fdisk -l
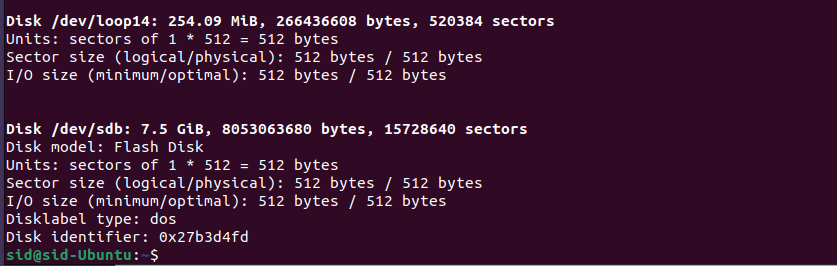
check all connected drives
The above command will list all the drives along with their partitions. For identification, drive numbers and ids are assigned for different devices. Hard disks are assigned as sda, sdb, and sdc, where sda represents the first hard disk, sdb means the second hard disk, and so on. The partitions in a particular hard disk are defined as sda1, sda2, etc., where sda1 represents the first partition, and sda2 represents the second partition.
Creating a partition
For external drives, you need to create a partition of the drive and then format the partition followed by creating a mount point. To create a partition using parted, execute the following command:
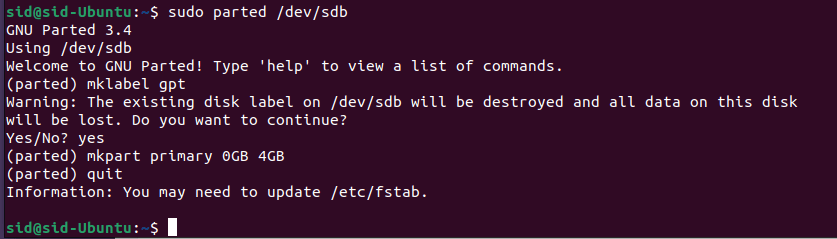
sudo parted /dev/sdb

partitioning
The above command will set the terminal in a partitioned environment. If the partition is greater than 2GB, execute the following command to allow a partition of the size larger than 2GB:
mklabel gpt

Partitioning- will enable the partition of size larger than 2GB
Now, set the size of the partition by executing the following command:
mkpart primary 0GB 4GB

Partitioning- setting the size
Here, the partition is set from 0GB to 8GB. You can set the partition to any desired value. Now, run the following command to exit the partitioned environment:
quit
Partitioning-exit
Formatting a partition
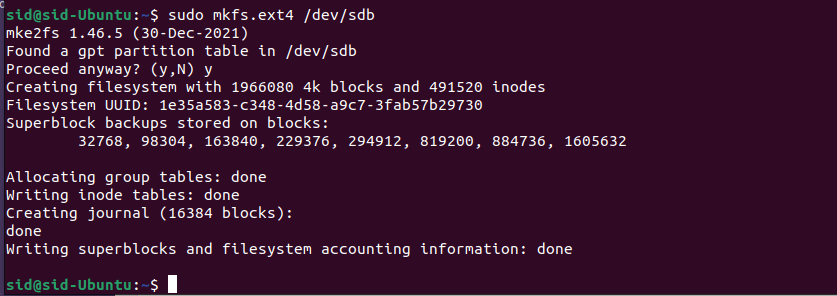
Now, format the partition with the file format same as of the system i.e., ext4, by executing the following command:
sudo mkfs.ext4 /dev/sdb
Formatting the drive
Now, we need to create a mount point using the mkdir command for the drive we will mount. Execute the following command:
sudo mkdir /mnt/sdb
Creating a mount point
where sdb is the second hard drive to be mounted.
Mounting a partition
Now, to mount the drive, use the mount command as shown below,
sudo mount /dev/sdb /mnt/sdb
Mounting a drive
where /dev/sdb is the drive path and /mnt/sdb is the mount point where the drive will be mounted. The above command will mount the drive at the mount point we created in the first step.
The above method is applicable for new drives which require partition and formatting. Once it is partitioned and formatted, you don’t need to do it every time you connect the external drive. You can directly mount the drive by using the mount command.
To view the contents of the drive we mounted, change the current directory to the one we created above, i.e., mount point.
cd /media/sdb
ls -l

View contents
You can also access the drive using the File Manager application.
Automatic mounting of the drive
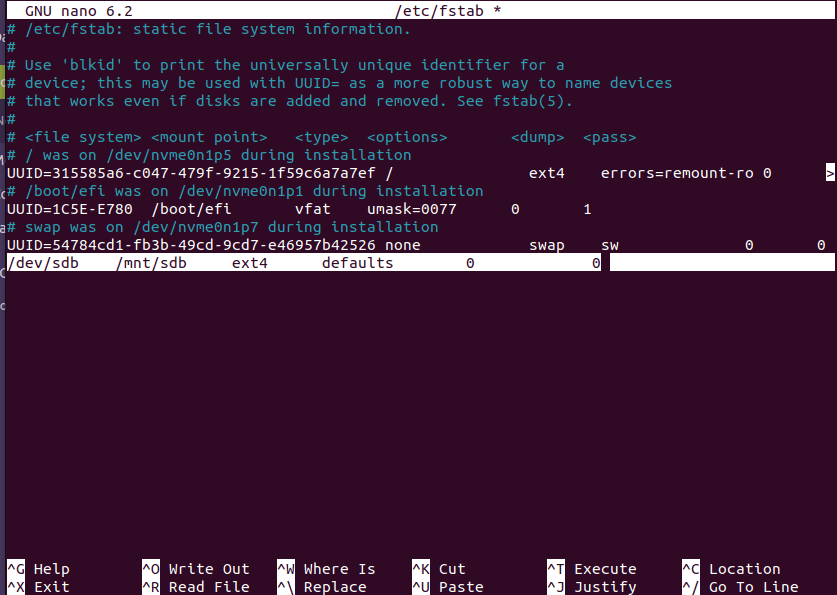
Through the above method, the drive will be mounted only till the device is rebooted. Once rebooted, you need to mount the drive again. To overcome this, edit the file located at /etc/fstab, which will set the drive to mount automatically after each reboot.
Execute the following command to open the /etc/fstab file using the nano text editor. You can use any text editor of your choice to edit the file but with sudo privileges.
sudo nano /etc/fstab
Edit file
Now, add the following content at the end of the file:
/dev/sdb /mnt/sdb ext4 defaults 0 0
Text editor
where
- /dev/sdb: the path of the drive
- /mnt/sdb: mount point where the drive is mounted
- ext4: partition format of the drive
Every time you restart your system, the drive will be mounted automatically without using any of the commands above. For other file formats, change the partition format of the drive. For the NTFS file system, change the format to NTFS, ext3 for ext3 filesystem, and vfat for FAT32 filesystem.
Checking if the drive is mounted
To check whether the drive is mounted, use the grep command along with the mount command as shown below:
sudo mount | grep sdb

Check if the drive is mounted
In my case, sdb is the disk name for the drive. Change sdb to the disk name assigned to the drive in your system.
Unmounting the drive
To unmount the drive, use the umount command by executing the following command:
sudo umount /dev/sdb
or
sudo umount -l /dev/sdb
Unmounting a drive
The -l parameter is used when the drive is busy. It will unmount the drive as soon as it is not busy.
Conclusion
Apart from mounting a drive, we covered everything, including partitioning and formatting new drives and checking and unmounting the drives. You can also use the pmount command, which allows regular users to mount external devices without the fstab entry. If you liked the article or if we missed anything, please let me know in the comment section below.
3 comments
For auto-mounting, there should be a step to check for successful edit of /etc/fstab
umount /mnt/sdb
df -h (check to see that it’s unmounted)
mount -a
df -h (check to see that it was automatically remounted per the added line in fstab
if mount -a fails, then fstab was not properly set. This can save a lot of pain in case fstab was borked.
Also, instead of the devicename (“/dev/sdb”), ideally a UUID should be used. To grab it:
lsblk -f
and grab the corresponding UUID. These steps are critical to prevent unbootable systems, which happens easily when configuring filesystems.
Also, you created the filesystem on the device (/dev/sdb) instead of the partition (/dev/sdb1) … I followed these steps and realized that we then blew away the original partition we created.
Please adjust the article accordingly!!