
If you have multiple audio-input devices connected to your Linux PC, it often becomes necessary to know which ones work properly. Otherwise, you might think that your high-end external microphone is at work capturing audio when in reality, your system is using the default in-built low-quality microphone.
To help you out, we have put together a comprehensive guide on how to test microphones on Linux. We will be showing you both a GUI method and the Terminal method for testing microphone input.
The terminal method is universal and will work for all Linux distros.
However, since different distros use different tools and desktop environments, it’s beyond this tutorial’s scope to show you how the GUI method works for each of them. We will show you how to test the microphone on Ubuntu only. Once you understand how that works, you should get a sense of using this feature on other distros.
How to test the microphone on Ubuntu (GUI method)
Note: For this tutorial, we’re using Ubuntu 20.04. The older version of Ubuntu has a slightly different user interface.
To test the microphones on Ubuntu, you will first need to head on over to the Ubuntu Settings Utility. To do this, you can click on the downward arrow located at the top-right corner of the Ubuntu panel, as shown in the image.
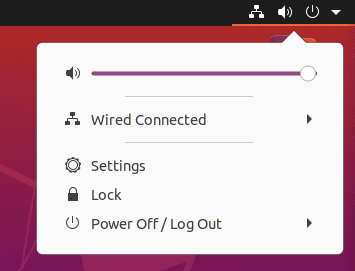
Access Settings From Ubuntu Panel
Alternatively, you can also head over to the application launcher and open the Settings app directly from there.
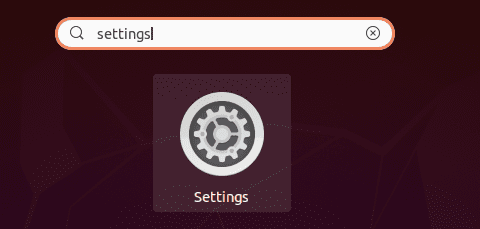
Access Settings From Ubuntu Panel
After opening the Settings app, navigation to the Sound option from the lefthand sidebar. Scroll down, and you will find the Input section with two options – Input devices and Volume.
If you have multiple microphones connected to your Ubuntu system, all the microphones should show up here.
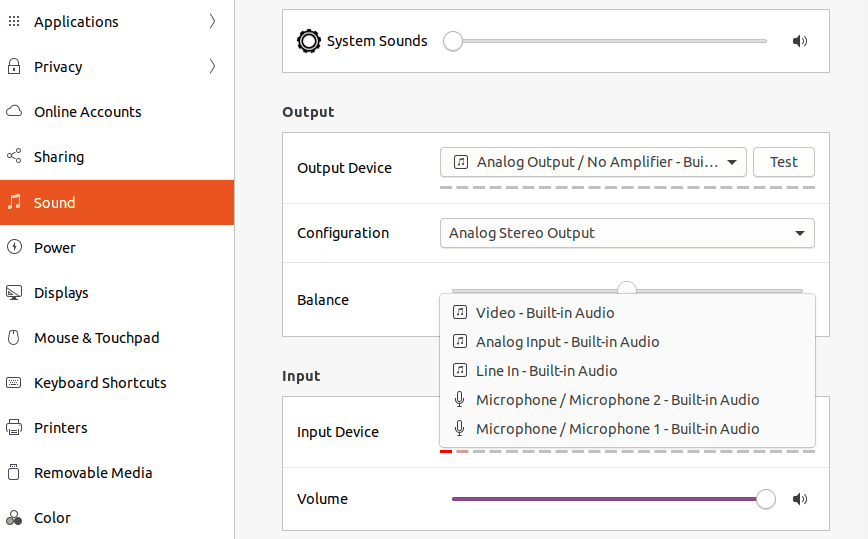
Ubuntu Audio Input Devices
From here, you can select which microphone you want to test. After selecting the desired microphone, start speaking, and you will notice that the “orange bar” is moving up and down based on the loudness. If this happens, then it means that your microphone is working properly.
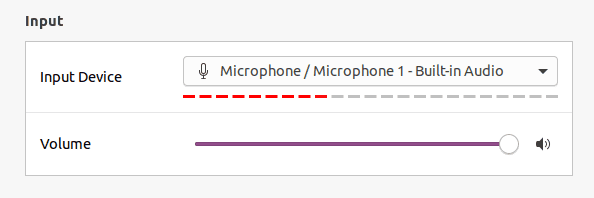
The intensity of Audio Input Shown by the Orange Bar
Now while following the above steps, you might encounter some undesired outcomes. For example, the microphone you want to test might not show up on the list. Or maybe it’s on the list, but the orange bar isn’t moving when you make a sound or noise. Well, let’s see how we can troubleshoot these issues.
What if your microphone is not on the list of Audio-Input Devices?
If your microphone doesn’t show up in the audio-input devices list, it means that your Ubuntu PC can’t read the hardware. This means either there’s a problem with the microphone or the connection.
To check whether your microphone is working properly, connect it to a different PC and check to see if it’s working there. If it’s readable on other systems, then the problem is likely with the connection.
In that case, try switching the cables with spare ones to see if the microphone is readable now. The problem might also be with the ports, which you’ll need to have then replaced.
What if the orange bar isn’t moving?
If your microphone shows up on the list, but the orange bar is not moving when you make any sound or noise, that means the system is not reading your voice. In this case, try to increase your microphone’s sensitivity by increasing the Input volume. This will increase its range of capturing external noise and might help fix your issue.
What if there are orange bars, but you are unable to record your voice?
In case the orange bar is moving when you make noises, but you can not record audio on a particular application, then the problem is with that specific application.
Since the orange bar is moving, your Ubuntu system is reading the sound input. Therefore, there’s no problem with your microphone.
Now, to fix this issue, you might want to go to the sound input settings for that particular application (the one which is not recording sound) and try to resolve the problem from there. A sure-fire way is to reinstall the app, which will revert the app to its default settings, thereby resolving the issue.
How to test the microphone on Linux using terminal
If you are not on Ubuntu or prefer to use the terminal instead, here is a command-line method for testing the microphone on your Linux PC.
First, you will need to get a list of all the available microphone devices on your system. To do this, run the following command:
$ sudo arecord -l
This should give an output similar to this:
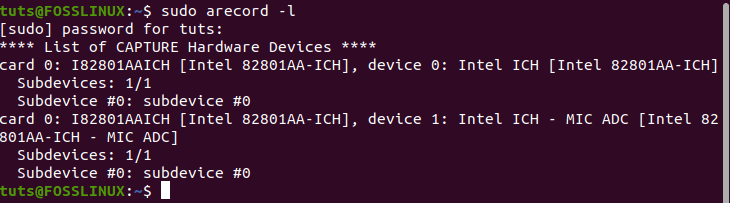
List all Audio-Input Hardware using Terminal
Next, we will select one of the audio-input devices from the list and then use it to record a short 10-second audio clip to see if it’s working. This can be done using the following command:
$ arecord -f cd -d 10 --device="hw:0,0" /tmp/test-mic.wav

Record Sample Audio
Important: Using the -d 10 part, you can assign the recording duration. 10 means it will record for 10 seconds. You can change that to 20 to record for 20 seconds. Next, “hw:0,0” is used to specify which microphone device to use. The first digit specifies the Card, and the second digit specifies the Device. So 0,0 means the hardware corresponding to the Card 0 and Device 0. And finally,/tmp/test-mic.wav specifies where the newly created audio recording will be stored.
After running the command, make some sounds for 10 seconds to record. After that, enter the following command to play the recording to see if the microphone is working properly.
$ aplay /tmp/test-mic.wav

Playing Back Recorded Audio
If you can hear the recorded audio, it means the microphone is working fine. You can now do this test with the other audio-input hardware listed using the first command to test if they are working properly.
If you stumble into some issues where the microphone isn’t detected or the audio is not recorded, you can refer back to the previous section to discuss some troubleshooting methods to help you out.
Wrapping up
So this is how you can test the microphone on Linux. We hope you found this short guide useful and that it helped you in fixing any audio input issues you were having on your Linux PC. However, if you are still facing any issues, leave us a comment down below, and we will be happy to help you out with your problem.
Also, for more helpful Linux tutorials and guides like this one, don’t forget to check our series of Learn Linux articles.