
Minecraft Bedrock Edition is gaining popularity far faster than its Java Edition counterpart. One of the fascinating aspects of Minecraft Bedrock Edition is that it is available on many platforms, including PlayStation, Nintendo Switch, Xbox, Mobile, and many others. Minecraft Realms or setting up a Minecraft server are the finest ways to play Minecraft Bedrock Edition with friends online.
To cut to the chase, Minecraft servers are some of the most enjoyable ways to play the game. Unless the topic is Minecraft Realms, Java gamers receive the lion’s share of the nice things. But not any longer. We’ll go through how to build a Minecraft Bedrock server and the most significant features you can add to take it to the next level. You and your buddies may join the server to explore Minecraft biomes, attempt speedrunning seeds, or simply spend time together.
Furthermore, the Bedrock server may be used to play with Minecraft Preview players. Creating a Minecraft Bedrock multiplayer server is simple, whether on a PC, Android/iOS, or console. The most straightforward approach to setting up a Minecraft Bedrock Edition server will be covered in this article. With that said, let’s get started!
How to create a Minecraft Bedrock Server (2022)
Below is a step-by-step guide that illustrates how to create a Minecraft Bedrock Server. However, before we start the creation, we need to have the following prerequisites in place:
Requirements needed to create a Minecraft Server
To create a dedicated Minecraft Bedrock server, your machine must meet the following official specifications:
- Version 1703 or later of Windows 10 OR Ubuntu 18 or later
- Intel or AMD 64-bit CPU with two cores
- 1 GB RAM
Because the Bedrock edition cannot run Minecraft shaders, its server does not require a lot of graphics horsepower. So, as long as your GPU can run the usual game, it should also handle some extra players. Furthermore, in terms of platforms, Minecraft only permits users on Ubuntu and Windows to run dedicated servers. These servers, however, are accessible to users on any device running Bedrock.
Once you have the prerequisites mentioned herein, follow the steps provided below to make a Minecraft Bedrock Server:
Step 1: Download the Bedrock Server Software
To start a Minecraft server, you must first download the zip file from the official Minecraft website. It includes server files for both Windows and Ubuntu.
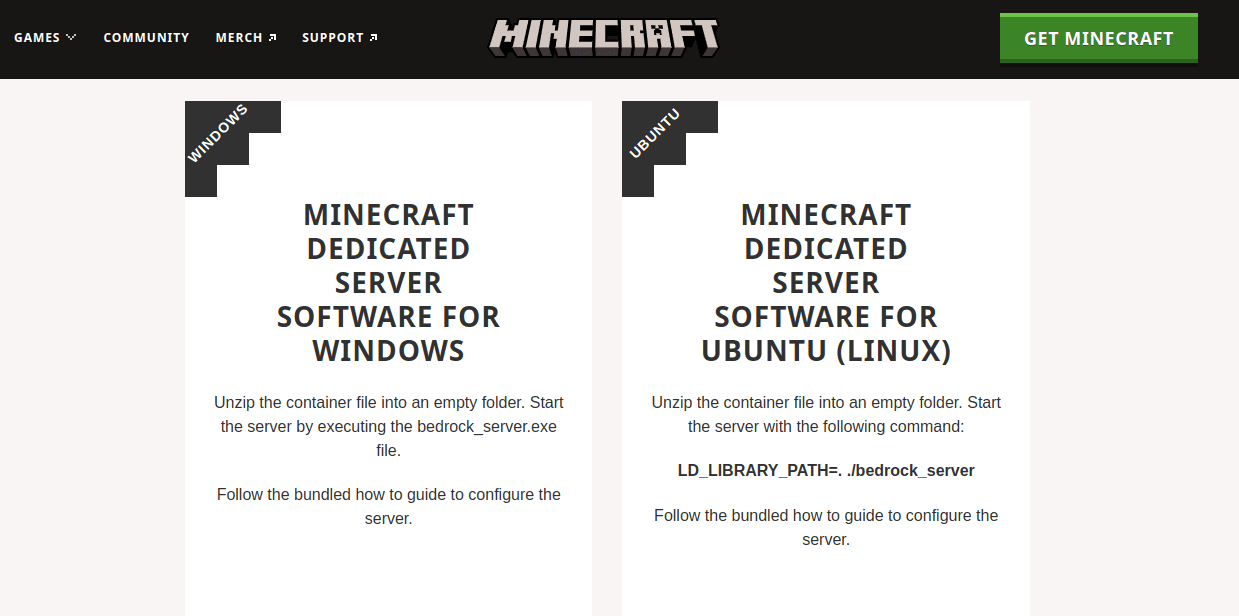
Minecraft download page
Once the application has been successfully downloaded, unzip the downloaded software server using your usual file explorer or applications such as WinZip or WinRar.
Start the Minecraft Bedrock Server.
Unlike a Java server, the Minecraft server does not require installation before hosting. Let’s get started now that you’ve unzipped the server files. We shall be illustrating how to make the Minecraft Bedrock server using both Windows and Linux (Ubuntu)
On Ubuntu:
Each Linux distribution includes its own “terminal” software for running custom commands. First, ensure that your machine is running Ubuntu 18 or above. Then execute the following command to start the server.
cd Downloads

cd bedrock-server-1.19.50.02

LD_LIBRARY_PATH=. ./bedrock_server
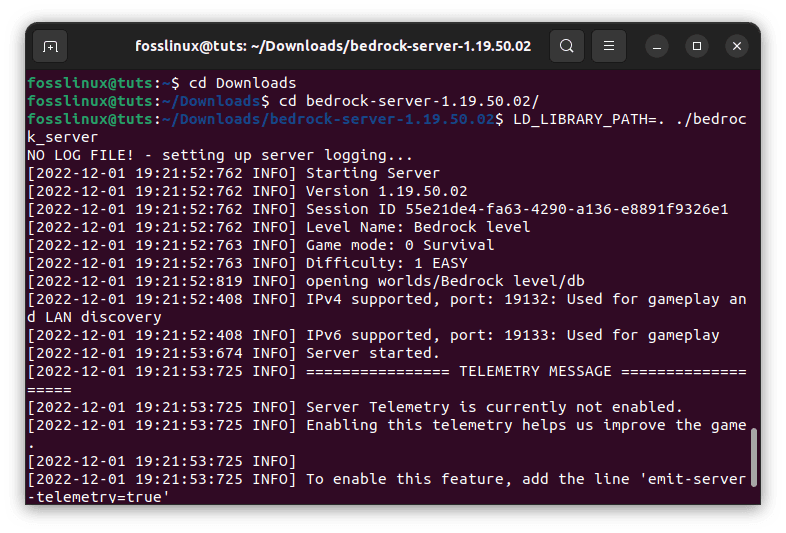
Start server
Note: If the command above fails, try changing the “bedrock server” component with the name of the unzipped folder and rerun it. After successfully executing the command, you may connect to the server and begin playing.
That’s it. If you are using windows, follow the steps provided below:
On Windows:
To create a Minecraft Bedrock server on Windows, follow these steps:
- To begin, we must exclude Minecraft from UWP loopback limitations. It disables UWP programs from connecting to the local server (such as Minecraft Bedrock). Next, open the command prompt as an administrator by right-clicking it in the start menu or selecting the option straight from the sub-menu.
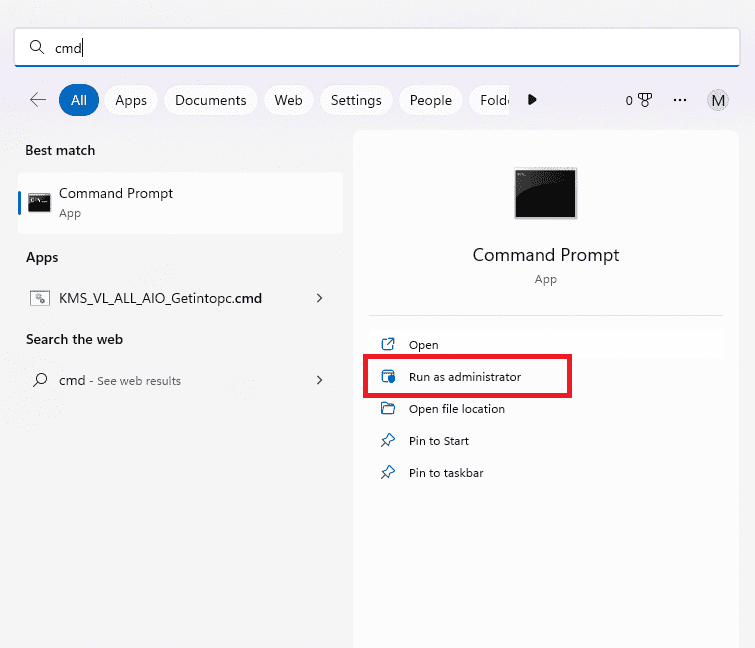
Launch CMD as admin
- Then, at the command prompt, execute the following command.
CheckNetIsolation.exe LoopbackExempt –a –p=S-1-15-2-1958404141-86561845-1752920682-3514627264-368642714-62675701-733520436
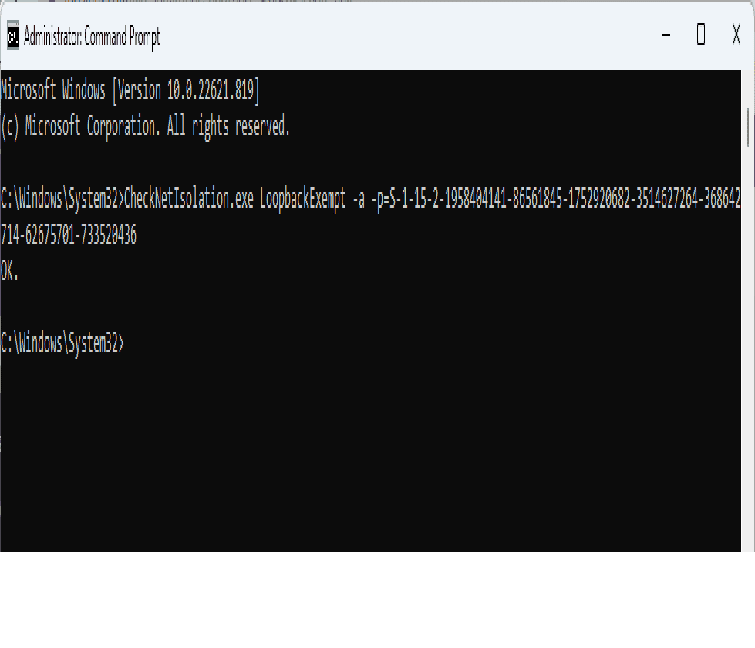
Exclude Minecraft from UWP loopback Limitations
After executing the command, you can exit the command prompt.
- Next, navigate to the unzipped server folder and double-click or right-click the “bedrock server.exe” file to launch it.
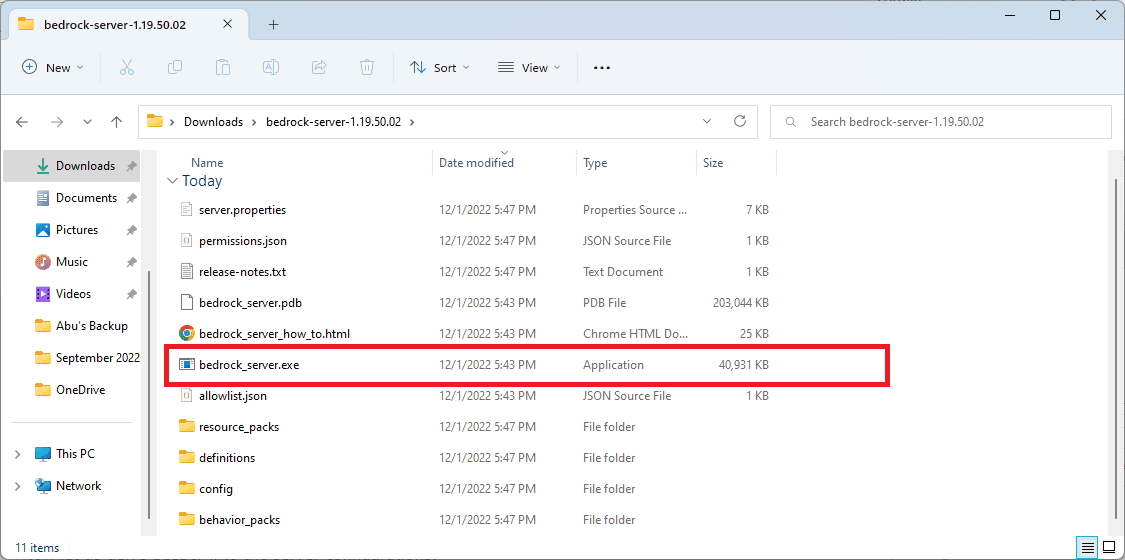
Click on Bedrockserver.exe file
- When you open the server file, Windows launches its firewall. Make sure that both “private” and “public” networks are selected here. Then select the “allow access” option.
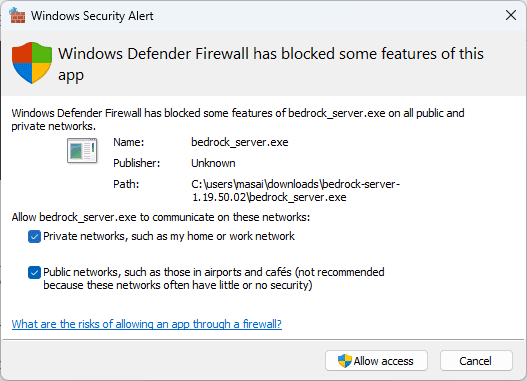
Allow firewall access
- The server will begin running on the command prompt after the firewall accepts the exception you created.
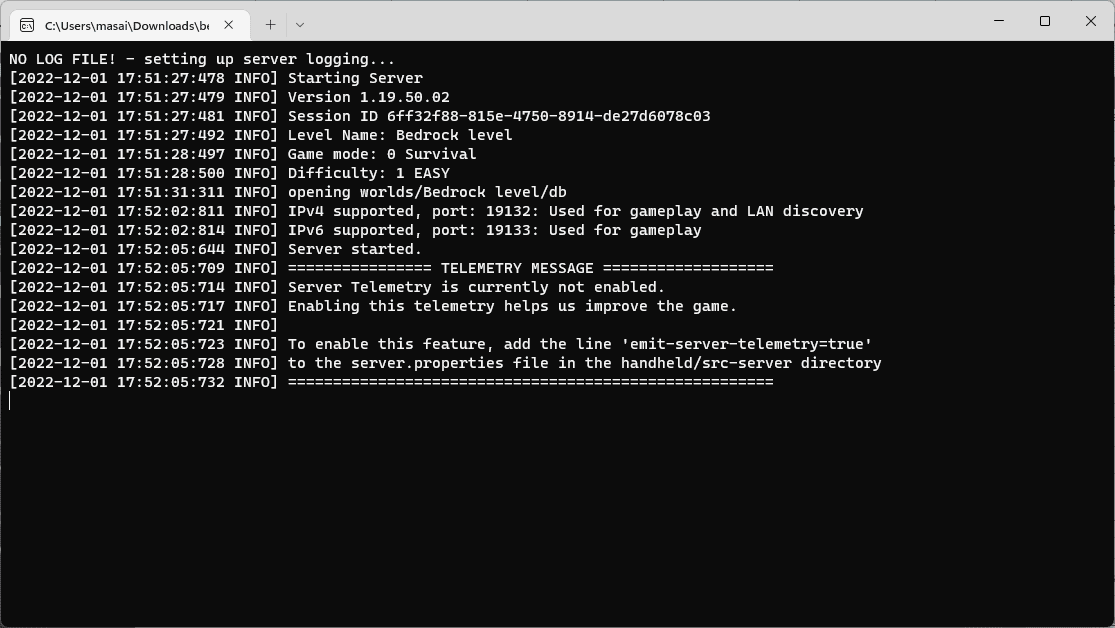
Server running at the command prompt
That’s it. You can now run the Minecraft Bedrock Server on your Windows OS.
Now let us delve deeper into the server configurations:
Activate the System Port
Now that your operating system and firewall can invite other Minecraft players, it’s time to set up the router. Yes, we will delve more into the technical aspects than in the previous section. However, these simple instructions are all you require to get your Minecraft Bedrock server to run smoothly.
Lookup Server IP Addresses and IPv6 Addresses
Before we do anything further, we need to learn more about the platform hosting the Minecraft Bedrock server. To accomplish this, reopen Command Prompt and enter the following command:
ipconfig /all
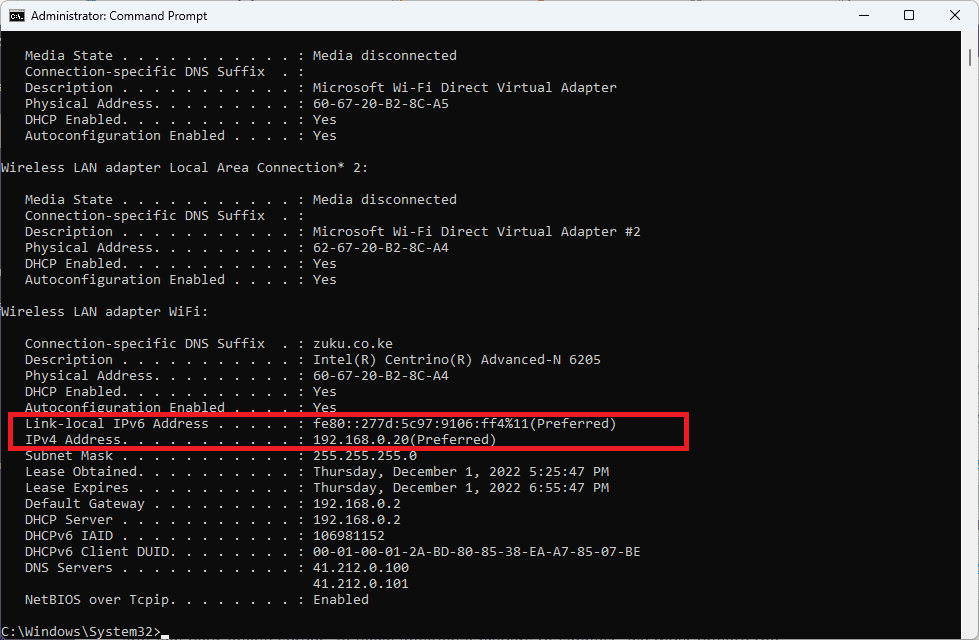
Check IP address
Within the command prompt, it will display your IPv4 and IPv6 addresses. You may keep the window open or write both down for future reference. Some routers demand the default gateway address instead of IPv6, so keep that in mind.
System Port Configuration
A system port serves as the entrance point for gamers from other networks to interact with and join your online server. To allow additional players to connect, we must update the system port settings on your network.
Regrettably, each router manufacturer has its user interface and settings panel. Unfortunately, we can’t cover them all, so go to SetupRouter.com and figure out how to access your Port Forwarding settings.
Enter Server Information
Finally, after you’ve reached your router’s system port settings, seek for and click on “add service” or “create new”. The router will then prompt you to enter the following information:
Server/Service/Port Name: Minecraft Server

Start Port: 19132

End Port: 19132

Service Type: TCP/UDP
The default port ID for Minecraft Bedrock is “19132.” So, if other columns are named “port,” insert the same ID. Furthermore, the router may request that you input an IP address, default gateway address, or IPv6 address. Your IP address is similar to the IPv4 address you specified previously through the command prompt and the other two addresses.
Invite your friends: Discover Your Public IP Address
You need the host’s public IP address to join any dedicated Minecraft Bedrock server. Fortunately, thanks to port forwarding, your public IP address will not expose your personal information. You may obtain the same information by going to Google and searching for “what is my IP?”
Your public IP address will be displayed in the search results. You must copy and distribute it to your friends who wish to join the server. As you will note in the following section, you will also require this to enter your own Minecraft Bedrock server.
Joining the Minecraft Bedrock Server
It’s time to put your server through its paces now that it’s up and running. The instructions below apply to you and your friends who wish to join the server. So, fire up your Minecraft Bedrock, and let’s begin.
- From the homepage, select the “Play” option.
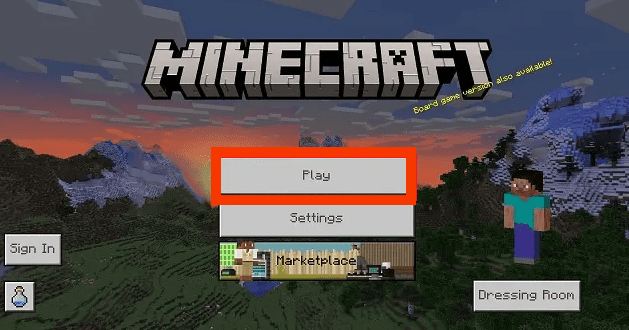
Click Play
- Then, select the servers section from the top column to display all active servers.
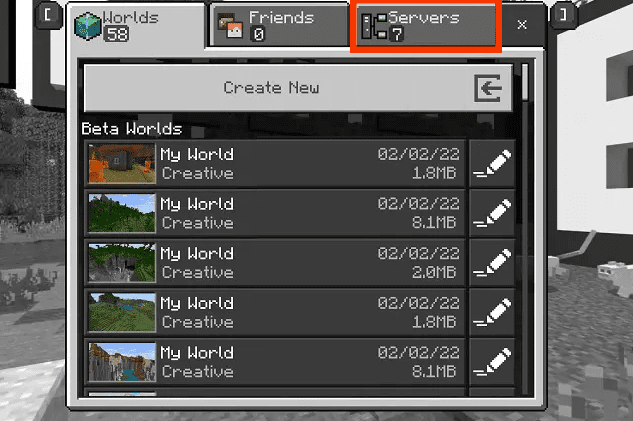
Click on the servers section
- Scroll through to the bottom of the server list under the servers section and select the “add server” button.
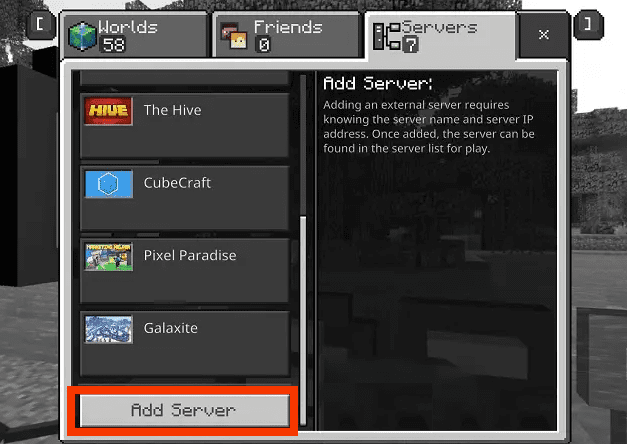
Click on “Add Server”
- Finally, you must enter your server’s information to join it. The server name may be anything you desire. Unless you updated it in the server settings, the port is 19132. Finally, the server address is identical to your public IP address.
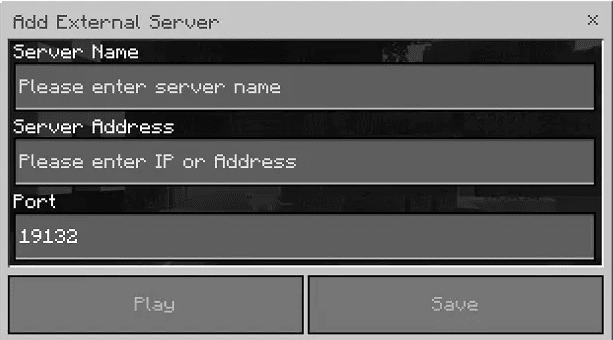
Enter server details
Configure Your Minecraft Bedrock Server
It’s time to personalize your server now that it’s up and running. A server, by default, loads a simple Vanilla survival world, which is ideal for enjoying some of the greatest Minecraft seeds. However, this is insufficient to make your server popular. So, let’s go through our customization choices.
Server Specifications
Changing the attributes of a server’s environment is the most fundamental modification approach. To do so, open the “server.properties” file in notepad. It may be found in the unzipped folder where you run the world.
You may change the following aspects of your world using properties:
- Game mode (Survival, Creative, or Adventure) & related settings
- Server settings
- World Properties
- Difficulty and cheats
- Abilities of players
- Maximum number of gamers along with joining conditions
Worlds and Resource Packs
Changing the appearance of a server is one of the simplest ways to make it stands out. To do so, download and install one of the greatest texture or resource packs by placing it in the server’s “resource pack” folder. Similarly, you may utilize custom Minecraft maps to acquire pre-built worlds you can explore with your buddies by storing them in the “worlds” folder.
Server Commands
Commands in Minecraft function similarly to hacks in other games. They effectively allow you developer-like control over your world without leaving the game. These commands can even be used to modify server characteristics.
Shut Down Your Minecraft Bedrock Server
When you’re through, you and your buddies may quickly exit the server by quitting the game. However, this does not immediately store the game’s progress. You must instead launch the command prompt window your server is executing. Then, within it, type “stop” and press the enter key. The server will immediately shut down and store all of your work and modifications to its environment. This must be done each time you wish to shut down your server and preserve your progress.
Conclusive Remarks
You can enter the ever-expanding Minecraft community with your Bedrock server. It is entirely up to you to choose whether to explore ancient cities or chill out with your buddies on a dedicated server. One of the most popular ways my friends and I utilize such servers is to create Minecraft houses. This is even more enjoyable than connecting over the finest co-op games. However, be sure that your company is dressed appropriately for the occasion. A server full of default protagonists is boring. So, experiment with some of the most fantastic Minecraft skins and share them with your friends.