
As a long-time Linux enthusiast, I have always been fond of how Linux provides users with complete control over their systems. One such aspect is the ability to change the owner of a directory. This powerful feature can make managing your files and directories a breeze, providing you with the flexibility you need to ensure your system runs smoothly.
In this article, I will guide you through the process of changing the owner of a directory in Linux. We will discuss the reasons for changing permissions, the advantages of using the terminal, some helpful tips & tricks, and common troubleshooting methods. Let’s dive in!
Why change permissions?
You may need to change the owner of a directory in Linux for several reasons. A few of the most common scenarios include:
- Transferring files: When transferring files between users, you may need to change the ownership to ensure proper access.
- Security: Changing ownership can help protect sensitive data by limiting access to specific users.
- System administration: As a system administrator, you may need to change ownership to manage user access and system resources efficiently.
Why use a terminal instead of a GUI?
While there are graphical user interfaces (GUIs) available for managing file permissions, I prefer using the terminal for several reasons:
- Efficiency: The terminal allows for faster and more precise control over permissions.
- Universality: Commands in the terminal are consistent across different Linux distributions, while GUI tools may vary.
- Flexibility: The terminal offers more advanced options and customizations than most GUIs.
- Scripting: Terminal commands can be easily incorporated into scripts for automation.
How to change the owner of a directory
Now that we understand why changing the owner of a directory is essential and why using the terminal is beneficial let’s start with the process.
Let’s walk through a practical example of changing the owner of a directory on an Ubuntu system.
Suppose you have a directory named “projects” under /home/fosslinux, and you want to change the owner of this directory from the current user, “fosslinux,” to another user, “divya”. Here’s how to do it step by step:
Open the terminal by pressing Ctrl + Alt + T or searching for “terminal” in the application menu.
First, let’s verify the current owner of the “projects” directory. Run the following command to list the contents of the /home/fosslinux/ directory with owner and group information:
ls -l /home/fosslinux/
You should see an output similar to this:
drwxrwxr-x 3 fosslinux fosslinux 4096 Apr 4 22.25 projects
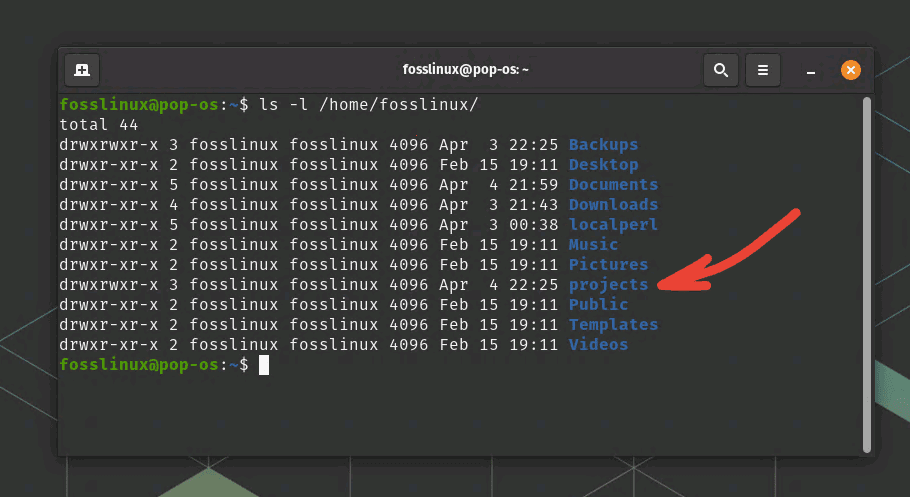
Current Owner of Projects is fosslinux
Here, “fosslinux” is the current owner, and “fosslinux” is the primary group to which the directory belongs.
Now, let’s change the owner of the “projects” directory to “divya”. To do this, use the chown command:
sudo chown divya /home/fosslinux/projects
This command might prompt you for your password, as it requires administrative privileges. Enter your password and press Enter.
To verify that the owner has been successfully changed, run the ls -l command again:
ls -l /home/fosslinux/
The output should now show “divya” as the owner of the “projects” directory:
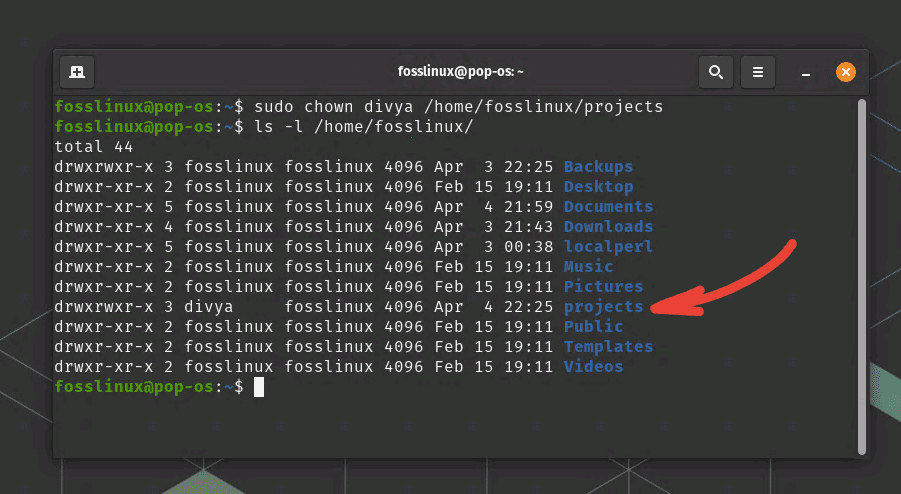
Changed owner to divya
drwxr-xr-x 2 divya fosslinux_group 4096 Apr 5 14:30 projects
That’s it! You have successfully changed the owner of the “project” directory from “fosslinux” to “divya” on your Linux system.
Verifying permissions
To re-iterate, always verify that the correct permissions have been applied after changing the owner of a directory. You can use the ls command with the -l option, which provides a long format listing of the directory contents, including the owner and group information.
For example, we changed the owner of the /home/fosslinux/projects directory to “divya” earlier, and checked the applied permissions by running:
ls -l /home/divya
This command will list the contents of the /home/divya directory along with their permissions, owner, and group information. Look for the “projects” directory entry, and you should see something like this:
drwxr-xr-x 2 divya fosslinux_group 4096 Apr 5 14:30 projects
In this example, “divya” is the owner of the “projects” directory, and “fosslinux” represents the group to which the directory belongs. The permissions are represented by the “drwxr-xr-x” string at the beginning of the line, which indicates the access rights for the owner, group, and others.
To check the permissions of the directory and its contents recursively, you can use the ls command with the -lR option:
ls -lR /home/fosslinux

Displaying permissions recursively
This command will display the permissions, owner, and group information for the “fosslinux” directory and all its subdirectories and files. First, verify that the desired owner and permissions are correctly applied to the directory and its contents.
Tips & tricks
Change owner and group simultaneously: You can change the owner and group of a directory at the same time using the chown command:
sudo chown new_owner:new_group directory_path
Change owner recursively: To change the owner of a directory and its contents, use the -R option:
sudo chown -R new_owner directory_path
Preserve existing ownership: If you only want to change the group ownership and preserve the current owner, use the chgrp command:
sudo chgrp new_group directory_path
Troubleshooting tips
If you encounter issues when trying to change the owner of a directory, consider the following troubleshooting steps:
- Verify your permissions: Ensure you have sufficient privileges to change the directory’s owner.
- Check for typos: Ensure you have entered the correct command syntax, path, and username.
- Confirm user and group existence: Verify that the new owner and group exist on the system.
Conclusion
Changing the owner of a directory in Linux is an essential skill for managing your system efficiently and securely. Utilizing the terminal lets you quickly and accurately change ownership with just a few simple commands. With these tips & tricks in mind, you’ll be well-equipped to tackle any ownership challenges that come your way.
As a Linux aficionado, I truly appreciate the power and control the terminal provides when managing file permissions. Don’t be afraid to experiment with different commands and options to find what works best for your unique needs. Remember always to double-check your commands and keep security in mind when making changes to your system. Embrace Linux’s power and flexibility, and you’ll soon find yourself mastering the art of file and directory management. Happy Linux-ing!!