
Linux is an incredibly versatile and powerful operating system loved by millions of users worldwide. One of the key reasons behind its popularity is the command-line interface (CLI), which allows users to perform tasks quickly and efficiently. In this article, I will share with you my favorite tips and tricks on how to show a directory tree in the Linux terminal. You’ll learn not just the basics, but also some lesser-known techniques that can save you time and make your life easier. So, let’s dive in!
Understanding the Linux directory structure
Before we get into displaying the directory tree, it’s crucial to understand the Linux directory structure. Unlike Windows, which uses drive letters (e.g., C:, D:), Linux has a unified directory structure called the Filesystem Hierarchy Standard (FHS). The FHS defines a set of standard directories and their purposes, making it easier to navigate and maintain the system.
Introducing the “tree” command
The “tree” command is a powerful and flexible tool for displaying the directory structure in the Linux terminal. When executed without any arguments, it displays the current directory’s tree structure, showing hierarchically subdirectories and files. It’s an essential command for understanding the structure and organization of your files and directories.
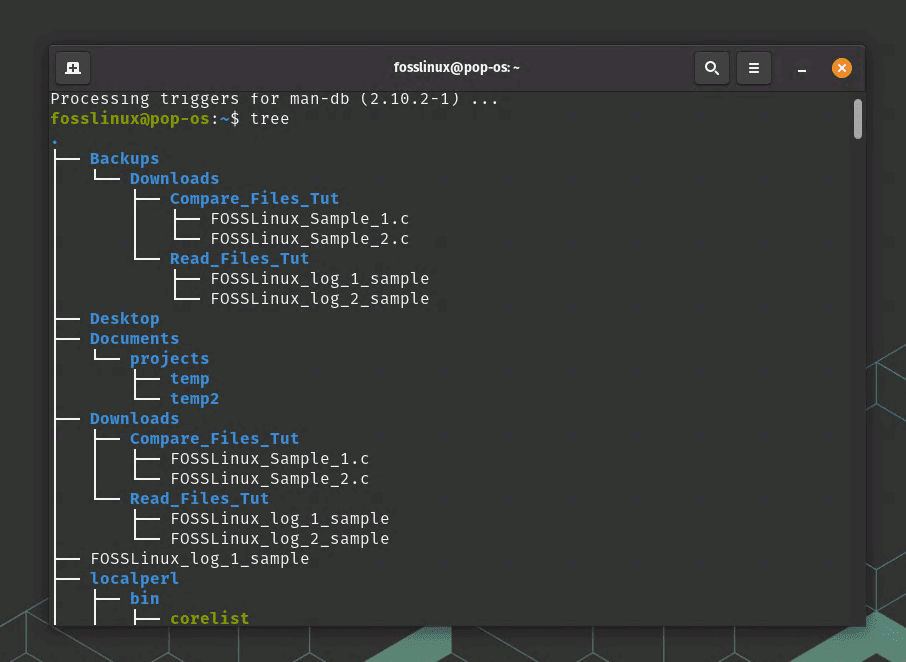
tree command usage
Installing the “tree” command on different Linux distributions
The “tree” command is not always installed by default. Here’s the command you have to use in the terminal on various popular Linux distributions:
- Debian/Ubuntu: sudo apt install tree
- Fedora: sudo dnf install tree
- CentOS/RHEL: sudo yum install tree
- Arch Linux/Manjaro: sudo pacman -S tree
Below is a screenshot showing tree installation on my Pop!_OS Linux distribution.
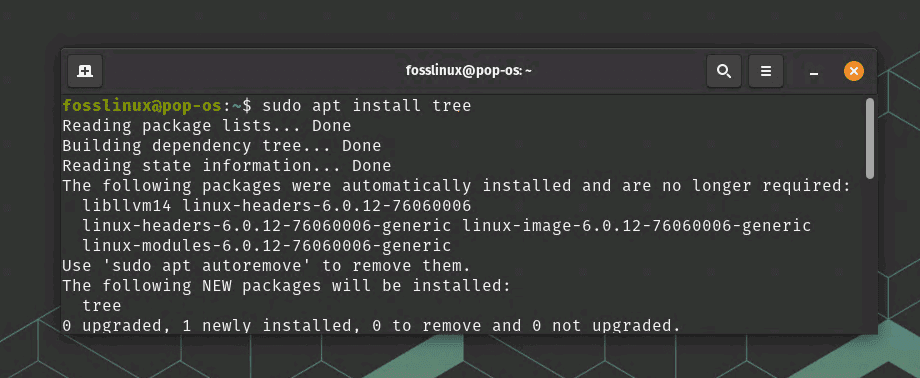
Installing tree on Pop_OS
Exploring various “tree” command options
The “tree” command has many options, allowing you to customize the output to suit your needs. Some of my personal favorites include:
- -L <level>: Limits the depth of the directory tree.
- -d: Only displays directories, omitting files.
- -a: Includes hidden files and directories in the output.
- -I <pattern>: Excludes files and directories that match the specified pattern.
- -o <filename>: Outputs the tree structure to a file.
Let’s quickly look into the usage of these options.
-L <level>: Limits the depth of the directory tree.
Example: To display the directory tree up to 2 levels deep, run the following command:
tree -L 2
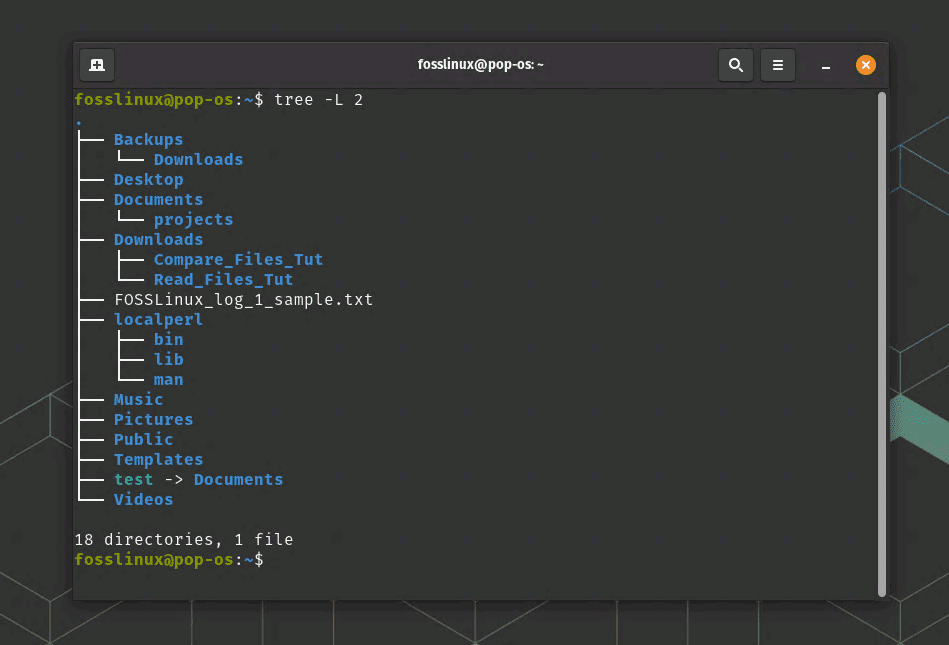
Limiting the depth of the tree
This will show the current directory and its immediate subdirectories without delving further into the structure.
-d: Only displays directories, omitting files.
Example: To display only directories, excluding files, run:
tree -d

Displaying only directories using the d option in the tree
This will generate a tree showing only directories in the hierarchy without listing individual files.
-a: Includes hidden files and directories in the output.
Example: To display the directory tree, including hidden files and directories (those starting with a dot .), run:
tree -a

Display Hidden Files and Folders
This command will reveal all files and directories, including the hidden ones.
-I <pattern>: Excludes files and directories that match the specified pattern.
Example: To display the directory tree while excluding all .txt files, run:
tree -I '*.txt'
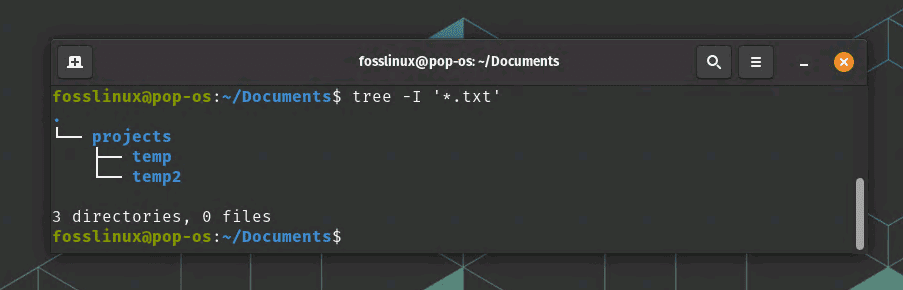
Usage of the option to hide specific files
This command will generate a tree structure without any .txt files in the output.
-o <filename>: Outputs the tree structure to a file.
Example: To save the directory tree output to a file named output.txt, run:
tree -o output.txt
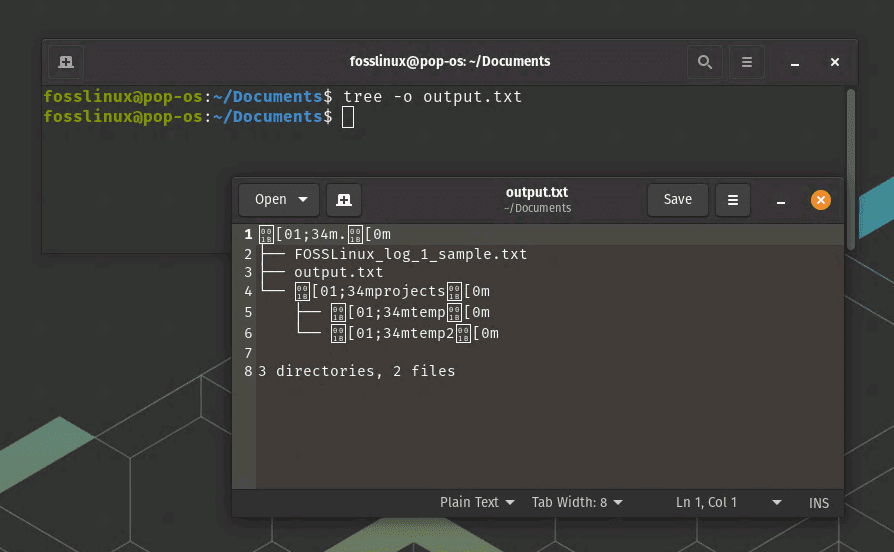
Exporting the tree to a text file
This command will create a file called output.txt containing the tree structure of the current directory. If the file already exists, it will be overwritten.
Remember that you can combine these options to customize the “tree” command output per your requirements. For example, if you want to display the directory tree up to 3 levels deep, including hidden files, and excluding .log files, run:
tree -L 3 -a -I '*.log'
For a complete list of options, refer to the “tree” man page by typing man tree in the terminal.
Tips and tricks for working with the directory tree
Here are some of my favorite tips and tricks for working with directory trees in the Linux terminal:
1. Use the alias command to create shortcuts for commonly-used “tree” options.
The alias command in Linux allows you to create custom shortcuts for lengthy or frequently used commands. You can create an alias with desired options for a specific “tree” command.
Example: To create an alias called treetwo for displaying the directory tree up to 2 levels deep, add the following line to your ~/.bashrc or ~/.bash_aliases file:
alias treetwo='tree -L 2'
Save the file and run source ~/.bashrc or source ~/.bash_aliases to reload the configuration. Now you can use treetwo as a shortcut to display the directory tree with a depth of 2 levels.
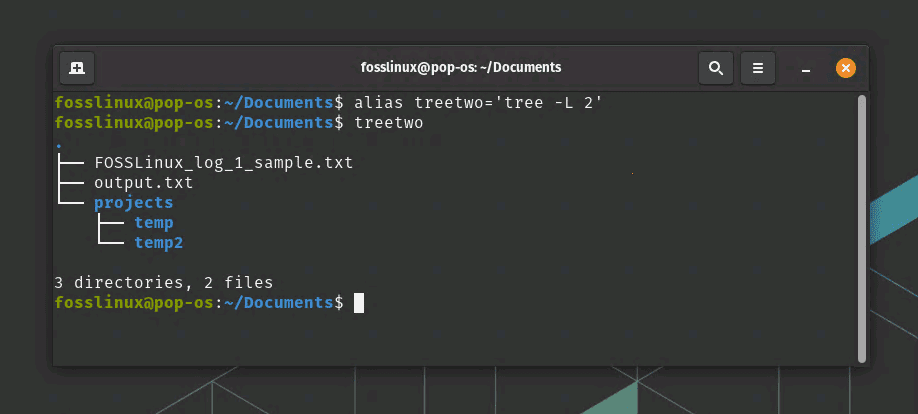
Using alias for tree command
2. Combine “tree” with other commands, like grep, to filter the output based on specific criteria.
By combining “tree” with other commands, you can further refine the output to match your needs. The grep command is handy for filtering the output based on a specific text pattern.
Example: To display the directory tree containing only directories with the word “temp” in their names, run:
tree -d | grep -E 'temp'
This command will first display the directory tree with the -d option to show only directories. Then, the output is filtered using grep with the -E option to match only lines containing the word “temp”.
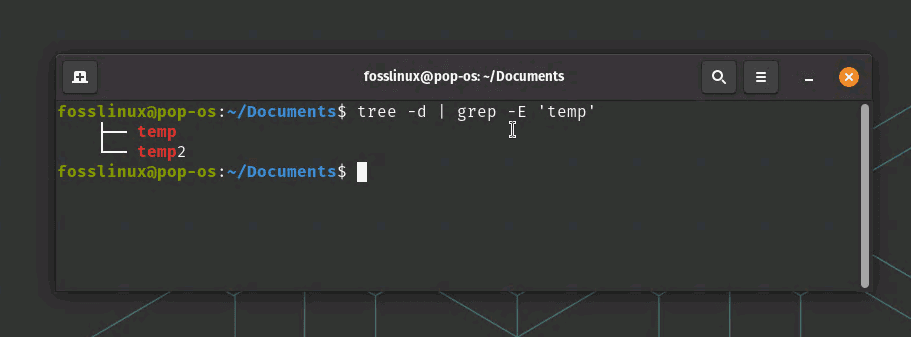
Displaying filtered content
3. Experiment with different terminal color schemes to enhance the readability of the directory tree.
Different terminal color schemes can affect the readability of the text displayed in the terminal. By experimenting with various color schemes, you can find one that enhances the appearance of the directory tree and makes it more readable.
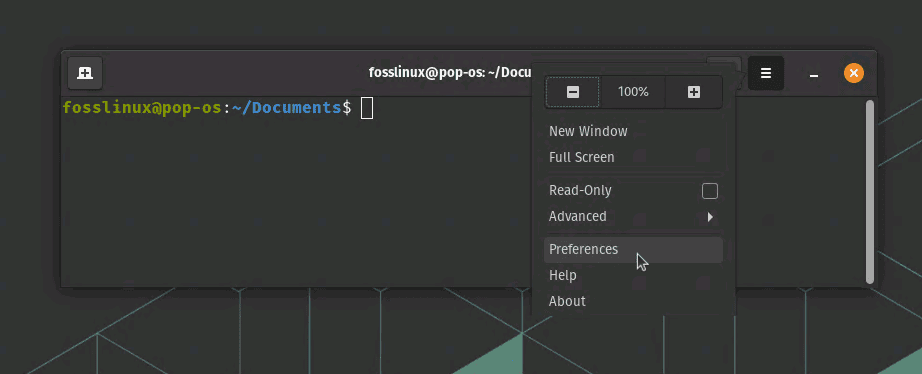
Example: In the GNOME Terminal (the default terminal for Pop!_OS), you can change the color scheme by following these steps:
Open the terminal. Click on the hamburger menu (three horizontal lines) in the top-right corner of the terminal window and select “Preferences.”
Accessing Terminal Preferences
In the “Profiles” tab, select the profile you want to modify (usually the “Unnamed” profile or distro name).
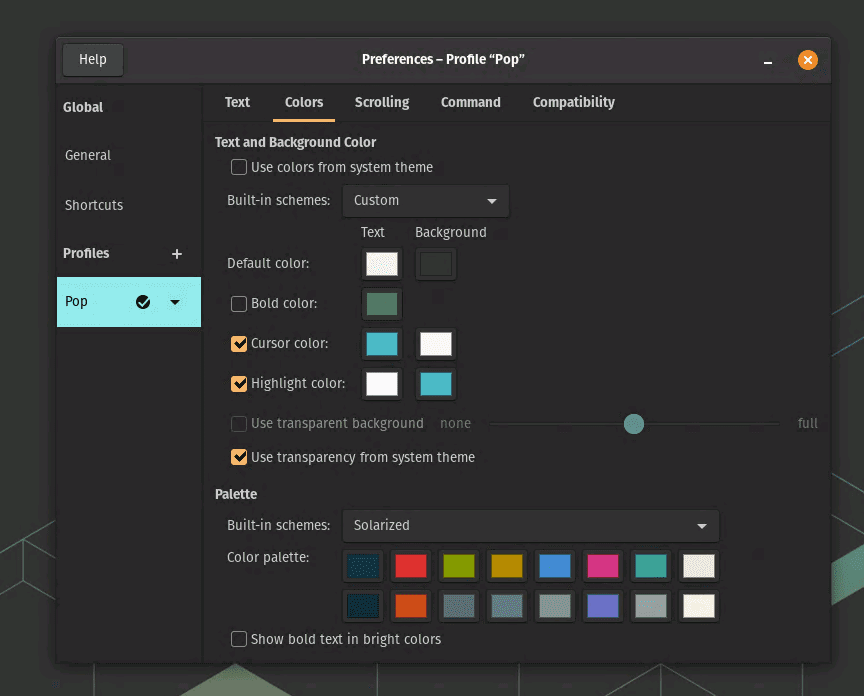
Terminal Colors in Pop!_OS
Experiment with different color schemes by selecting from the built-in themes or customizing the colors individually.
Once you’ve found a color scheme that improves the readability of the directory tree, you can enjoy a more pleasant and visually appealing experience when working with the “tree” command.
Troubleshooting Common Issues
While the “tree” command is generally reliable, you might encounter some issues from time to time. Here are some common problems and their solutions:
- “tree: command not found“: Ensure that the “tree” command is installed, and if not, follow the installation instructions mentioned earlier.
- Incorrect output: Double-check the command options and arguments to ensure they are correct.
- Permission issues: Some directories may require elevated privileges to access. Use sudo or switch to a superuser account to display the directory tree for such directories.
Uninstalling tree
Not sure why you would, but to completely uninstall the “tree” command from your system, follow the instructions below based on your Linux distribution:
Debian/Ubuntu:
sudo apt-get remove --purge tree
Fedora:
sudo dnf remove tree
CentOS/RHEL:
sudo yum remove tree
Arch Linux/Manjaro:
sudo pacman -Rns tree
These commands will remove the “tree” package and its associated configuration files. Once the process is complete, the “tree” command will be uninstalled from your system.
Conclusion
The “tree” command is an invaluable tool for visualizing the Linux directory structure in the terminal. With a wide range of options and customization possibilities, you can tailor the output to your specific requirements. Mastering this command will not only help you navigate your system more effectively but also impress your peers with your CLI prowess.
In this article, we’ve explored the basics of the Linux directory structure, the “tree” command, its installation process, various options, and some tips and tricks to enhance your experience. We’ve also covered troubleshooting common issues you might encounter while using it. Remember, practice makes perfect, so keep exploring and experimenting with the “tree” command to make the most out of your Linux terminal experience. Happy tree traversing!