
Hello FOSSLinux readers, I’m excited to bring you today’s blog post on one of my favorite subjects – setting up Linux in a VirtualBox environment. Harnessing the full potential of Linux often means utilizing virtual environments to run diverse operating systems or to test various configurations without affecting your main system.
VirtualBox stands as a popular choice for this, offering a plethora of settings that can fine-tune your experience. However, navigating through these settings and figuring out which ones are important can sometimes be a daunting task. I’ve spent countless hours experimenting, making mistakes, learning, and fine-tuning my setup to bring you these 10 essential settings for installing Linux in VirtualBox. So, let’s dive right in!
10 important VirtualBox settings for installing Linux
1. Selecting the right version of Linux
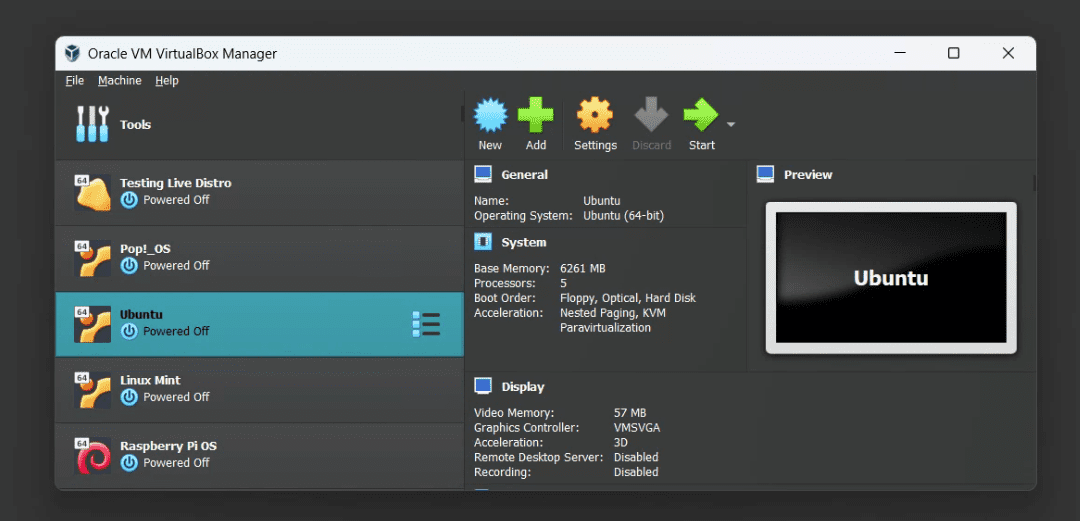
VirtualBox Manager
Firstly, choosing the right version of Linux is an important decision. I’m a massive fan of Ubuntu for its ease of use and wide community support, but you might prefer Fedora or Debian. What I’ve learned from experience is that choosing a distribution you’re comfortable with can make the entire VirtualBox experience much smoother.
Pro Tip: If you’re a beginner, I highly recommend starting with Ubuntu. It’s user-friendly, has a great support community, and is well-documented, which makes it easier to troubleshoot any issues you may encounter.
2. Allocating adequate RAM
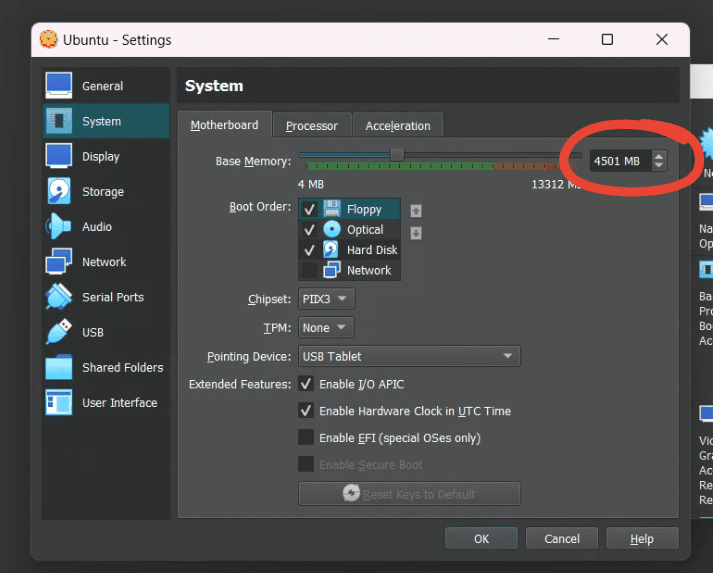
RAM allocation
While creating a new virtual machine (VM) in VirtualBox, it’s crucial to allocate adequate RAM. You can adjust the memory size according to the system requirements of the Linux distro you’re installing. Ubuntu, for example, recommends at least 2GB.
I have had instances where I allocated too little memory, and the system lagged terribly. On the other hand, allocating too much might cause your host machine to slow down. It’s about finding the right balance.
Pro Tip: My rule of thumb is to allocate about 1/4th of the total system memory if you have 8GB or more. It usually provides a fluid experience without impacting the host system’s performance.
3. Setting up the Virtual Hard Disk
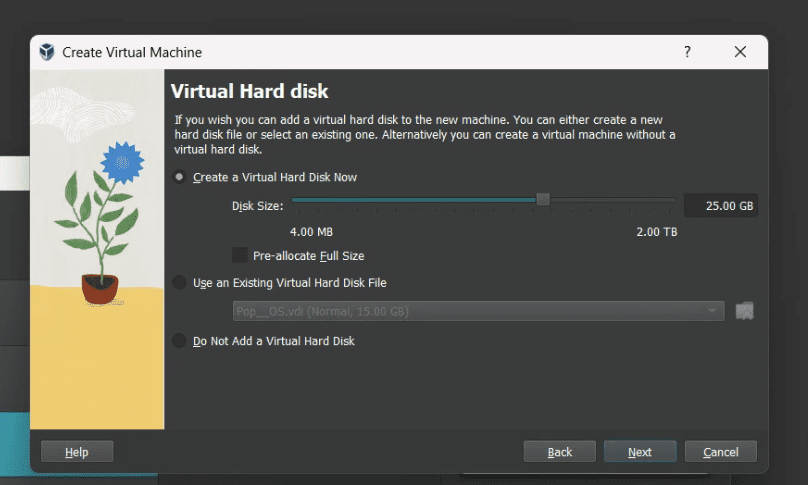
Allocating Virtual Hard disk size
Choosing the right virtual hard disk file type is another significant decision. VirtualBox supports several types, such as VDI, VHD, and VMDK. I usually stick with VDI (VirtualBox Disk Image) because it’s the native format, and I’ve found it to be the most reliable.
The next consideration is whether you want your virtual hard disk to be dynamically allocated or of a fixed size. A dynamically allocated disk file will only use space on your physical hard disk as it fills up (up to a maximum fixed size), whereas a fixed-size file will immediately eat up the space you define. Even though it takes more space upfront, I favor a fixed-size disk because it offers better performance.
Pro Tip: Always allocate more disk space than you think you’ll need. The last thing you want is to run out of disk space when working on a critical project!
4. Enabling the bidirectional clipboard
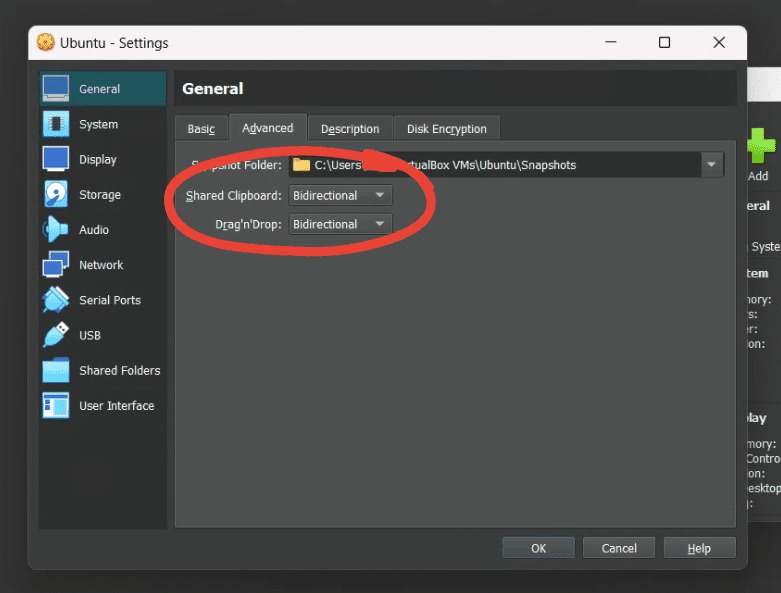
Bidirectional Clipboard Option enabled
The bidirectional clipboard is a lifesaver, allowing you to copy and paste between the host and the VM. This feature is disabled by default, but I highly recommend enabling it. You can do this by going to Settings > General > Advanced > Shared Clipboard and selecting “Bidirectional”. I can’t count the number of times this setting has made my life easier!
Pro Tip: Along with the clipboard, enabling “Drag’n’Drop” to bidirectional can also streamline your workflow.
5. Installing guest additions
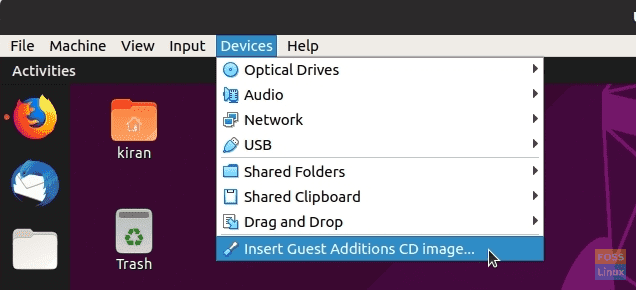
Install Guest Additions CD Image
Installing Guest Additions is a must. It adds better mouse pointer integration, enhanced video support, seamless windows, shared folders, and more. You can install Guest Additions by clicking on “Devices” in the VM window’s menu bar and selecting “Insert Guest Additions CD image…”. Follow the prompts, and you’re good to go!
Pro Tip: If you encounter any problems installing Guest Additions, check if your system is up-to-date. Sometimes running a simple system update solves the issue.
6. Adjusting display settings
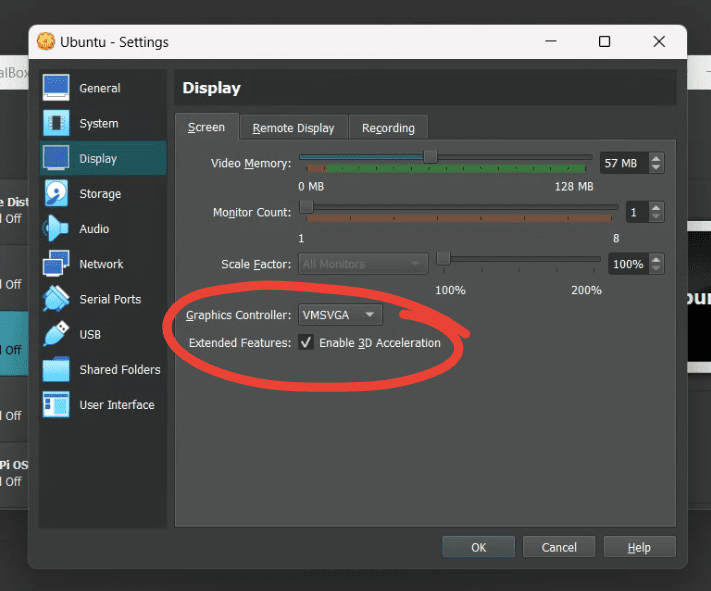
Display Settings in VirtualBox
It’s essential to adjust the display settings to your liking. In the VM settings, you can adjust video memory and enable 3D acceleration under the Display section. I’ve noticed that some Linux distributions don’t play nicely with 3D acceleration, causing the screen to flicker. If you face such issues, try disabling it.
Pro Tip: Increasing the video memory to the maximum can significantly improve the VM’s graphical performance.
7. Allocating CPU cores
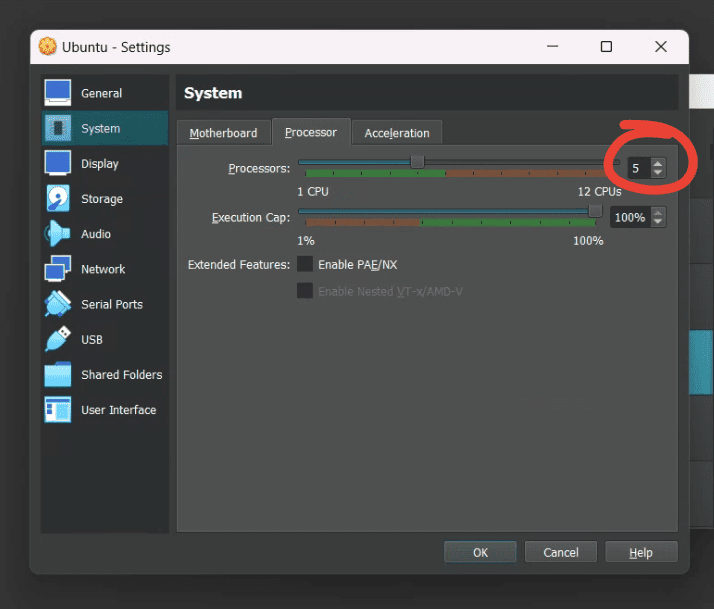
Allocating CPU in VirtualBox
By default, VirtualBox only allocates one CPU core to your VM. However, if you have a multi-core processor, allocating more cores can enhance the VM’s performance. Navigate to System > Processor tab in the VM settings to adjust the number of CPU cores.
Pro Tip: Do not allocate all your cores to the VM. Always leave at least one for your host system to function correctly.
8. Enabling VT-x/AMD-V
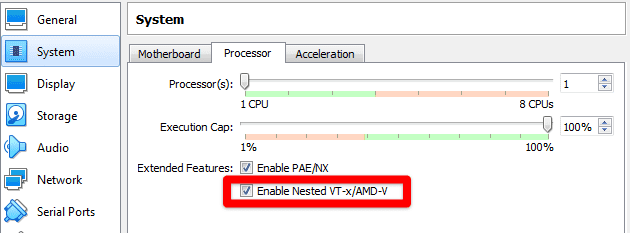
Nested VT-x enabled on VirtualBox
VT-x (Intel Virtualization Technology) and AMD-V (AMD Virtualization) are hardware virtualization technologies developed by Intel and AMD respectively. These technologies allow a virtualization platform like VirtualBox to execute code nearly directly on the physical CPU with minimal intervention from the host operating system. Here are a few key points about VT-x and AMD-V in the context of VirtualBox:
- Improved Performance: By leveraging VT-x/AMD-V, VirtualBox can provide better performance compared to software-based virtualization, as it minimizes the overhead associated with the virtualization process.
- Enabling Hardware Virtualization: To use these features in VirtualBox, they must first be enabled in the computer’s BIOS or UEFI settings. This ensures that the virtualization extensions are available for VirtualBox to use.
- Nested Virtualization: VT-x/AMD-V technologies also support nested virtualization, which allows you to run a virtual machine inside another virtual machine. This is a powerful feature for developing and testing virtualization products.
- Support for 64-bit Guest OS: Enabling VT-x/AMD-V is generally required to create 64-bit guest operating systems in VirtualBox, as these technologies provide the necessary hardware assistance to efficiently run 64-bit guest code.
Pro Tip: If these options are greyed out, you might need to enable virtualization in your BIOS settings.
9. Setting Network Mode

VirtualBox Network Settings
VirtualBox offers several network modes like NAT, Bridged, Internal, and Host-Only. The NAT mode, being the default setting, is usually sufficient for regular internet use within the VM. However, if you want your VM to act like a full-fledged machine within your network, Bridged mode is what you need. Here’s a brief overview of each:
- NAT (Network Address Translation)
- Isolation: VMs can access the external network but are isolated from each other and the host.
- Usage: Commonly used for accessing the internet from the VM.
- IP Addressing: VMs are assigned private IP addresses, and the NAT engine translates these to the host system’s IP address for network communications.
- NAT Network
- Isolation: VMs can communicate with each other and access the external network.
- Usage: Useful when you want to create a separate network for VMs but still allow internet access.
- IP Addressing: Similar to NAT, but allows a group of VMs to be on the same internal network.
- Bridged Networking
- Isolation: VMs are part of the host’s network, having direct access to the physical network.
- Usage: Ideal when the VM needs to be a full participant in the network, appearing as a regular computer on the network.
- IP Addressing: VMs are assigned IP addresses from the same pool as physical machines on the network.
- Internal Network
- Isolation: VMs can communicate with each other but are isolated from the host and external network.
- Usage: Useful for creating a secure network of VMs without external network access.
- IP Addressing: VMs are assigned private IP addresses, and communication is restricted to the internal network only.
- Host-Only Network
- Isolation: VMs can communicate with each other and the host system, but are isolated from the external network.
- Usage: Ideal for creating a network of VMs and the host system without external network influence.
- IP Addressing: VMs and the host share a private network, with IP addresses assigned from a private pool.
Pro Tip: While NAT mode is perfect for most use-cases, choosing the right network mode depends heavily on your specific requirements. So, make sure to research what each mode offers before deciding.
10. Taking Snapshots
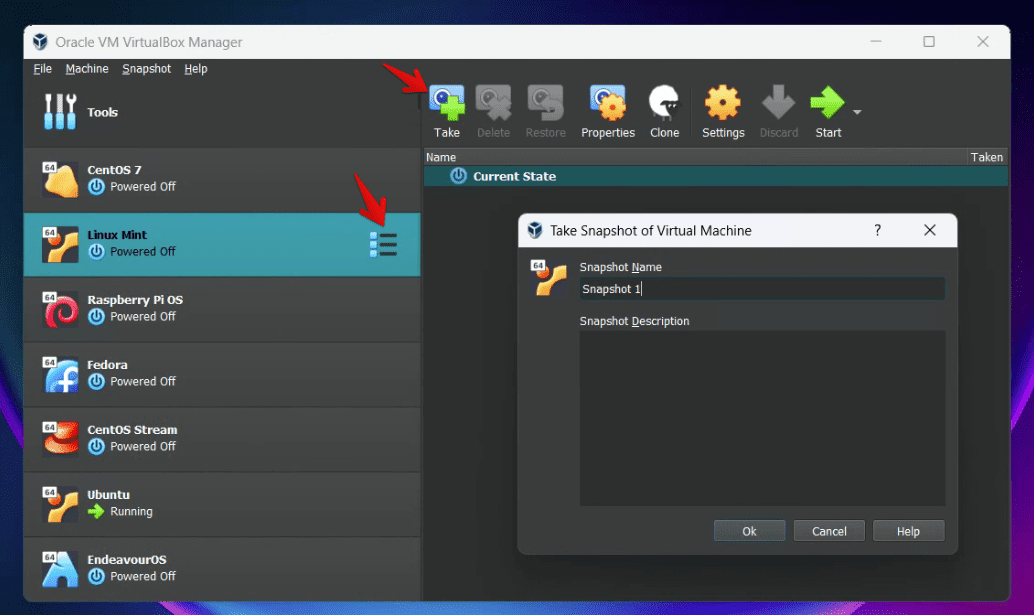
Taking snapshot in VirtualBox
Finally, take advantage of the snapshot feature in VirtualBox. This feature lets you save a particular state of your VM, which you can revert to whenever needed. It’s a lifesaver if you’re experimenting with something and it goes south. Trust me, it’s saved my skin more times than I care to admit!
Pro Tip: Regularly take snapshots, especially before making significant changes. Also, ensure to clean old, unneeded snapshots to save disk space.
Conclusion
It’s safe to say that my experience with Linux on VirtualBox has been a journey filled with learning opportunities, minor frustrations, and ultimately, a satisfying sense of achievement. With these settings, I hope you would have a smoother ride, avoiding the bumps I encountered.
The key is to understand that these settings are not set in stone. You should adjust them based on your system, the Linux distro you choose, and your specific requirements. That’s part of the charm and flexibility of Linux and VirtualBox – making the environment truly your own!
I hope you find these settings and tips helpful. Happy VirtualBoxing with Linux, and until next time, keep experimenting, keep learning!