
Ubuntu, one of the most popular Linux distributions, has gained immense fame and popularity for its user-friendly interface, robust security, and extensive software repository. As Ubuntu continuously evolves with regular updates and improvements, users might occasionally encounter compatibility issues or stability problems with the latest release. In such cases, the need to downgrade to a previous version arises, allowing users to revert to a more stable environment.
While upgrading to the latest version is generally recommended, there might be situations where you need to revert to an older release due to compatibility issues, software conflicts, or personal preference. Downgrading Ubuntu to a previous version requires careful planning and execution to avoid data loss and system instability.
This comprehensive guide will walk you through the process of downgrading Ubuntu to a previous version, ensuring a smooth and risk-free transition. Whether you are a seasoned Linux user or a beginner, sticking around this article will equip you with the knowledge and confidence to execute the downgrade successfully.
Why do you need to downgrade Ubuntu?
Before diving into the downgrading process, it’s essential to understand why you might need to take this step. Some situations that may prompt a downgrade include:
- Software Incompatibility: Certain applications or drivers might not work optimally with the latest Ubuntu release, causing crashes or performance issues. Therefore, downgrading can restore the previous functionality if you previously faced compatibility problems with certain software or hardware in the latest release.
- Stability Concerns: New releases can sometimes introduce bugs or errors that affect system stability, impacting daily tasks and productivity. Downgrading to a previous version gives you access to a more stable environment, reducing the likelihood of encountering new bugs or issues.
- Driver Issues: The latest kernel might not support specific hardware components, leading to compatibility problems.
- Feature Rollback: In rare cases, new Ubuntu versions may remove certain features that were useful to you, making a downgrade preferable.
- Familiarity: Users accustomed to the interface and features of an older Ubuntu version might prefer the familiarity and efficiency it provides.
Benefits of Downgrading
- Improved Stability: The previous version may have undergone more testing and bug fixing, leading to a more stable experience.
- Compatibility with Legacy Software: Some older applications or drivers might only work seamlessly with certain Ubuntu versions.
- Easier Transition: Downgrading can ease the transition if you’re used to the interface and functionalities of the previous version.
Cons of Downgrading
- Limited Support: Older versions may have reduced community support and limited security updates.
- Missing New Features: Downgrading means sacrificing the latest features and improvements introduced in the newer release.
- Potential Data Loss: Without a proper backup, downgrading can result in data loss if not done correctly.
Things to do before downgrading your current Ubuntu
Backup Your Data
It is imperative to back up your important data to prevent data loss before proceeding with any major system changes. Downgrading Ubuntu to a previous version could lead to data loss or corruption, so creating a backup ensures that your files are safe and can be restored in case of any unforeseen issues during the downgrade. There are various methods to back up your data, including using external storage devices, cloud services, or disk imaging tools. Choose the one that best suits your needs and ensure all your essential files and configurations are safely preserved. Before we proceed to the next step, create a complete backup of your documents, media files, configuration settings, and any other crucial data onto an external or cloud storage device.
Understand the Risks and Limitations
Downgrading Ubuntu is not a straightforward process and comes with inherent risks and limitations. Some software and settings may not be compatible with the older version, potentially leading to system instability or loss of functionality. Moreover, downgrading will revert installed packages to previous versions, meaning you may miss out on the latest security patches and updates. Researching the specific version you plan to downgrade to and understanding the potential consequences is vital.
Research Your Target Version
Choosing the right previous version to downgrade to is critical. Research the target version’s features, hardware compatibility, and community support to ensure it meets your needs. Moreover, consider long-term support (LTS) releases for added stability and security updates.
Check Hardware and Software Compatibility
Before proceeding with the downgrade, verify the hardware and software compatibility with the desired Ubuntu version. Older releases might lack support for newer hardware components, leading to driver issues or reduced performance. Additionally, some software applications may not be compatible with older Ubuntu releases, causing compatibility problems or system crashes. Investigate these factors carefully and ensure your system can adequately handle the version you plan to downgrade to.
Downgrading your Ubuntu System
In this guide, I will illustrate two methods we shall use to downgrade from Ubuntu 22.04 to Ubuntu 20.04.
- Downgrading sources.list and pinning packages
- Downloading an older release of Ubuntu
Method 1: Downgrading sources.list and pinning packages
Using this method is very risky hence the caution provided below:
Step 1: Downgrade the Sources List
The first step is to modify the sources list file to reflect the previous version. For example, if you are downgrading from Ubuntu 22.04 Jammy Jellyfish to Ubuntu 20.04 Focal Fossa, you need to change every occurrence of “jammy” to “focal” in the sources list. This can be accomplished using a text editor or automated using the “sed” command:
sudo sed -i 's/jammy/focal/g' /etc/apt/sources.list

Downgrade sources.list file
Ensure that every instance of the current system codename is replaced with the codename of the targeted downgrade Ubuntu system.
Step 2: Pin Packages
Since your current installation contains higher version packages than the ones in the target downgrade version, you need to pin the apt package manager to the previous version packages. To do this, edit the /etc/apt/preferences file and include the following content, replacing the codename with the one you are downgrading to (e.g., “focal” in our case):
sudo nano /etc/apt/preferences

Package: *

Pin: release a=focal

Pin-Priority: 1001
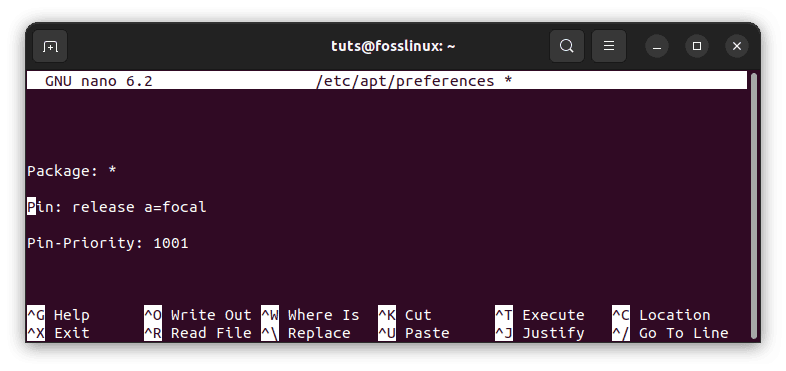
Append the preferences config file
Step 3: Perform the Ubuntu System Downgrade
With the sources list modified and packages pinned, you are now ready to proceed with the Ubuntu system downgrade. Execute the following commands to perform the downgrade:
sudo apt update

sudo apt upgrade

sudo apt dist-upgrade
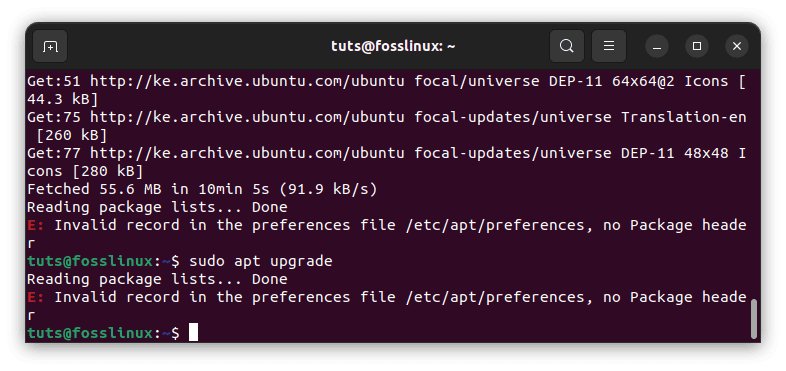
Failed downgrading
Please keep in mind that downgrading Ubuntu can lead to unforeseen issues, and it is essential to consider alternative solutions before attempting a downgrade. Always make sure to back up your data and exercise caution when performing any major system changes. For instance this method failed severally on my PC but it worked for my friend. Therefore I opted for the alternative method below, which is much safer.
Method 2: Download an Older Release of Ubuntu
To begin downgrading to an older version of Ubuntu, the first step is to visit the official website, Ubuntu.com. Once there, you will be presented with two primary download options: the Long Term Support (LTS) release and the latest standard release.
- Long-Term Support (LTS) Release: This version is specifically designed to offer stability and extended support over an extended period. For example, the current LTS release is Ubuntu 22.04 LTS (as of writing). It receives security updates and maintenance for up to five years, making it an ideal choice for users seeking a reliable and long-lasting Ubuntu experience.
- Latest Standard Release: The latest standard release is the most up-to-date version of Ubuntu, offering the latest features, software updates, and improvements. At the time of writing, the latest standard release is Ubuntu 23.04. This option suits users who desire cutting-edge features and software advancements available in the latest Ubuntu iteration.
This guide will demonstrate the process of downgrading from Ubuntu 22.04 to Ubuntu 20.04 LTS, a common scenario for users seeking a stable and well-supported release. However, it’s crucial to note that the instructions provided here apply to any Ubuntu Linux release. Whether you are running a previous LTS release or a different standard release, the downgrading process remains consistent across versions.
Accessing Older Versions from the Ubuntu Archive
To downgrade Ubuntu to a previous version, you will need the installation media or the ISO file of the desired release. Visit the official Ubuntu website or repository to find and download the appropriate ISO file. Make sure to choose the correct architecture (32-bit or 64-bit) and verify the authenticity of the download by comparing the checksum provided on the website.
Ubuntu maintains an archive of all its previous releases, making it possible to access and download older versions. This archive allows users to choose the specific release that meets their requirements, ensuring a seamless downgrading process. To access the Ubuntu archive, navigate to the Ubuntu website and look for the “Archive” section. Here, you will find a comprehensive list of all past Ubuntu releases.
To proceed with the downgrade from Ubuntu 22.04 to Ubuntu 20.04 LTS, follow these steps:
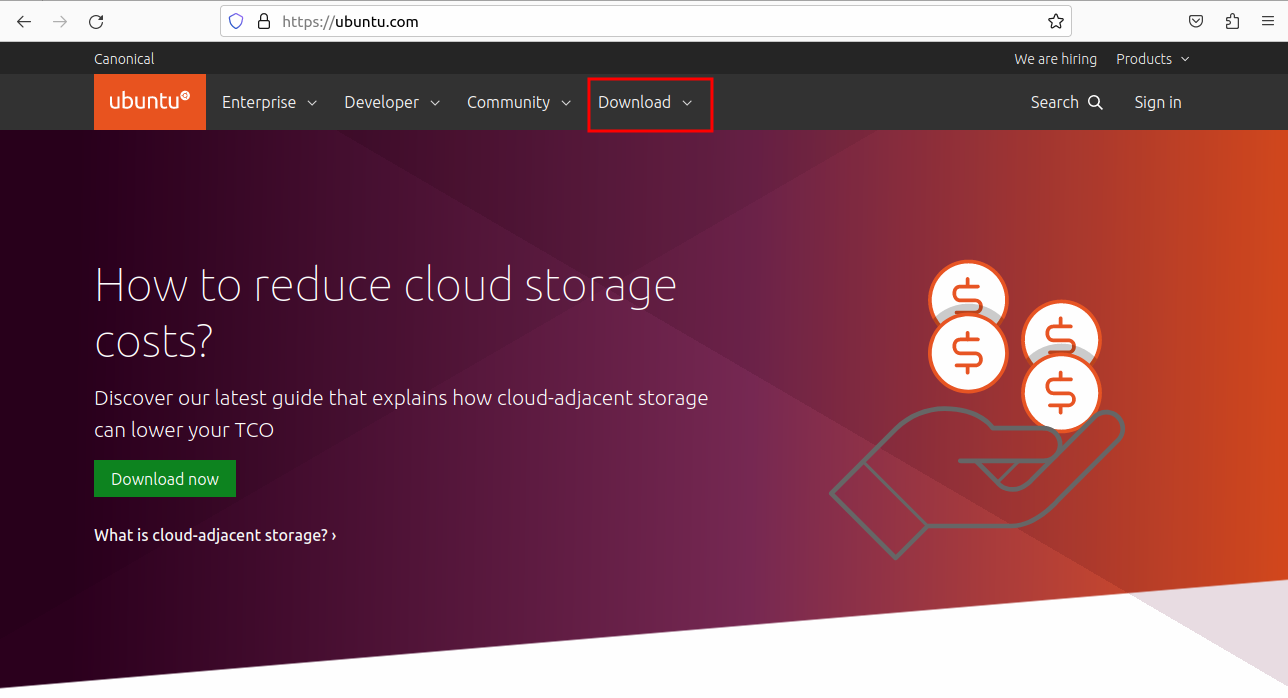
Open your preferred web browser and enter “Ubuntu.com” into the address bar.
Once on the Ubuntu website, explore the download options available on the homepage. Look for the “Download” button and click on it.
Choose the downloads section
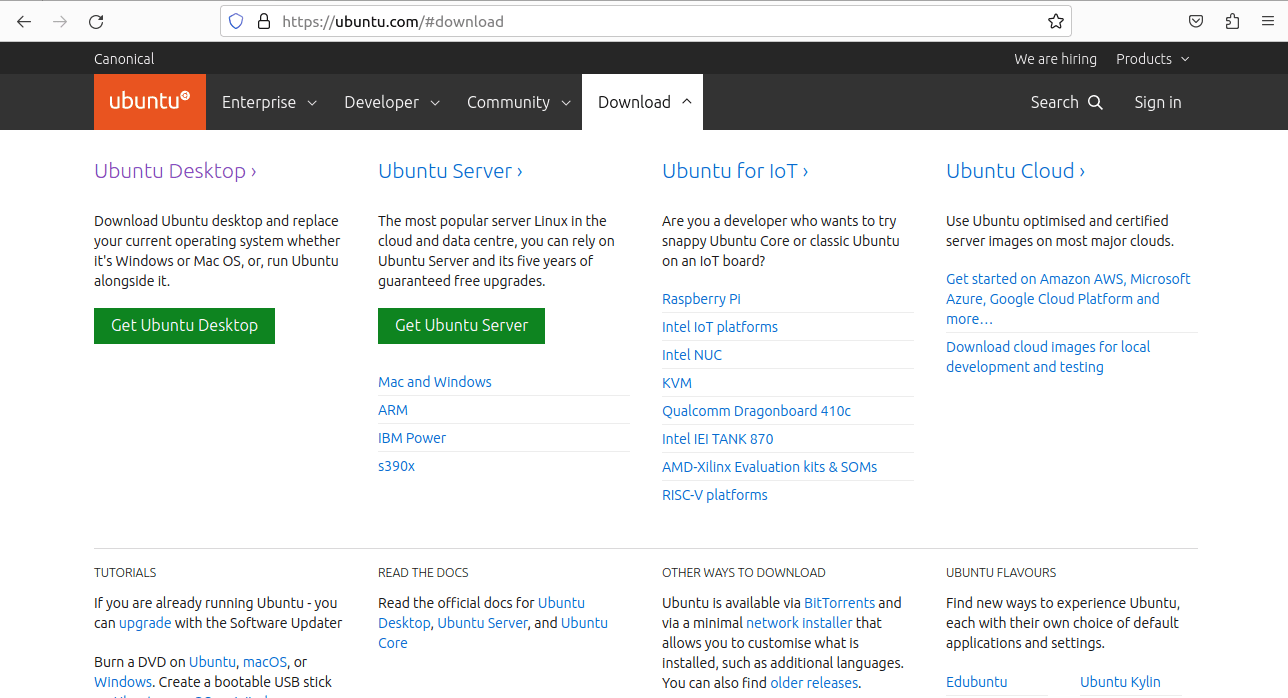
Upon selecting the “Download” button, you will be directed to the download page. Here, you can find an overview of the available download options, including the LTS and the latest standard releases.
Downloads section
To access the ISO image of Ubuntu 20.04 LTS (the older release), locate the “Alternative Downloads” section on the download page. Click the “Archive” link to access the comprehensive list of previous Ubuntu releases.
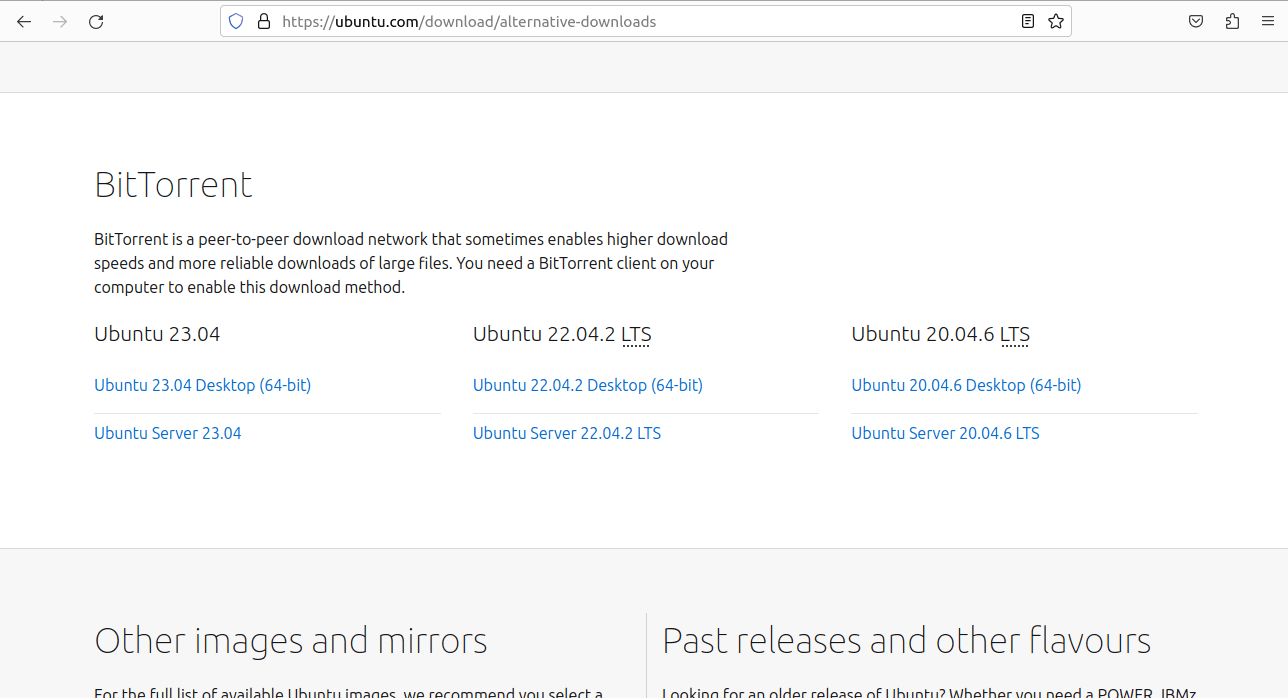
Locate Alternative downloads
Within the Ubuntu archive, search for Ubuntu 20.04 LTS and find the corresponding ISO image for this version.
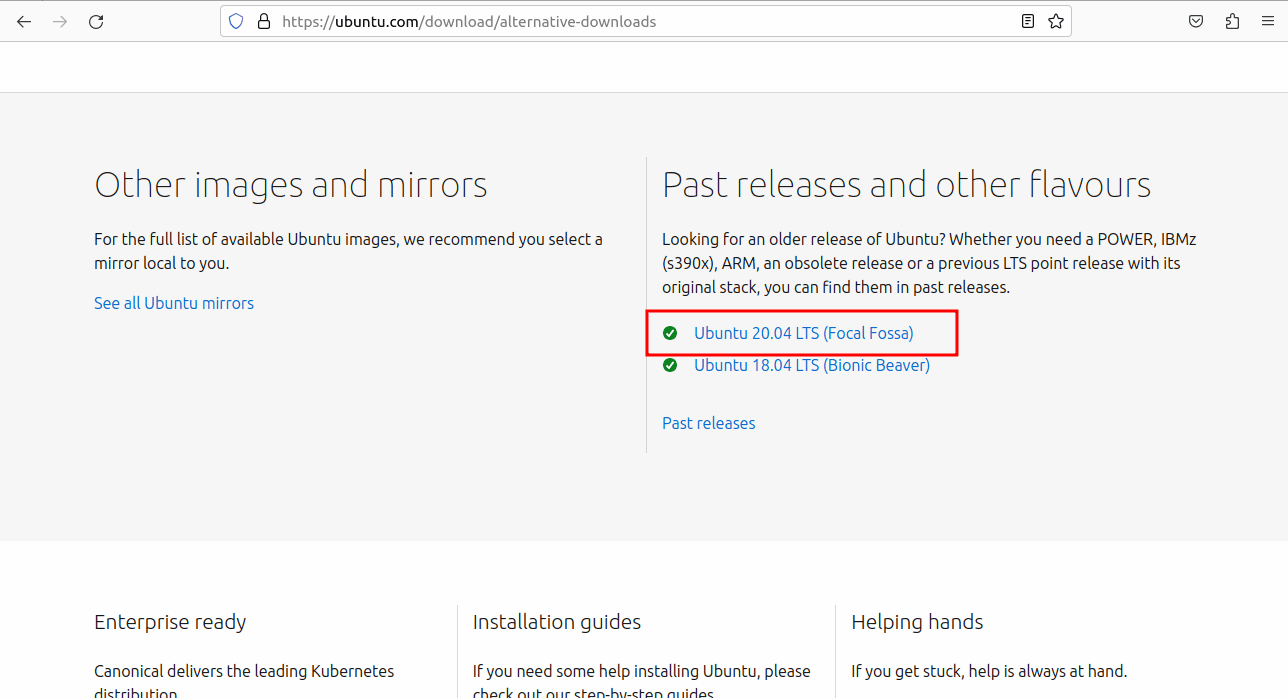
Download Ubuntu 20.04
Once you have identified the correct ISO image for Ubuntu 20.04 LTS, click the download link, and the ISO file will download to your specified location.
By following these steps, you will have successfully obtained the ISO image of the older Ubuntu release, paving the way for the subsequent stages of the downgrading process. With the ISO image ready, you can create a bootable USB thumb drive or DVD to install the older version of Ubuntu on your system.
Creating a Bootable USB Drive for Ubuntu 20.04
A bootable USB drive is crucial for installing/upgrading or downgrading Ubuntu on your computer. It allows you to run the operating system from the USB drive, enabling a smooth installation process without affecting your existing system. To make a bootable USB medium drive for Ubuntu 20.04, follow these step-by-step instructions:
Step 1: Obtain the Ubuntu 20.04 ISO Image
We already did this, but if you didn’t, you can still go ahead and obtain the ISO image before we can create a bootable USB drive. Visit the Ubuntu.com website and navigate to the “Download” section. Look for the latest LTS release, which is Ubuntu 20.04 Long-term release (LTS at the time of writing). Click the download link to save the ISO image to your computer.
Step 2: Prepare the USB Drive
You’ll need a USB flash drive with a minimum capacity of 4GB to create a bootable USB drive. Remember that all the data on the USB drive will be erased during the process, so ensure you back up any important files before proceeding.
Step 3: Install and Launch Etcher
We will use Etcher, a user-friendly and reliable tool for creating bootable USB drives, for this guide. Etcher is available for Windows, macOS, and Linux. Go to the Etcher website (https://www.balena.io/etcher) and download the appropriate version for your operating system. Install Etcher and launch the application.
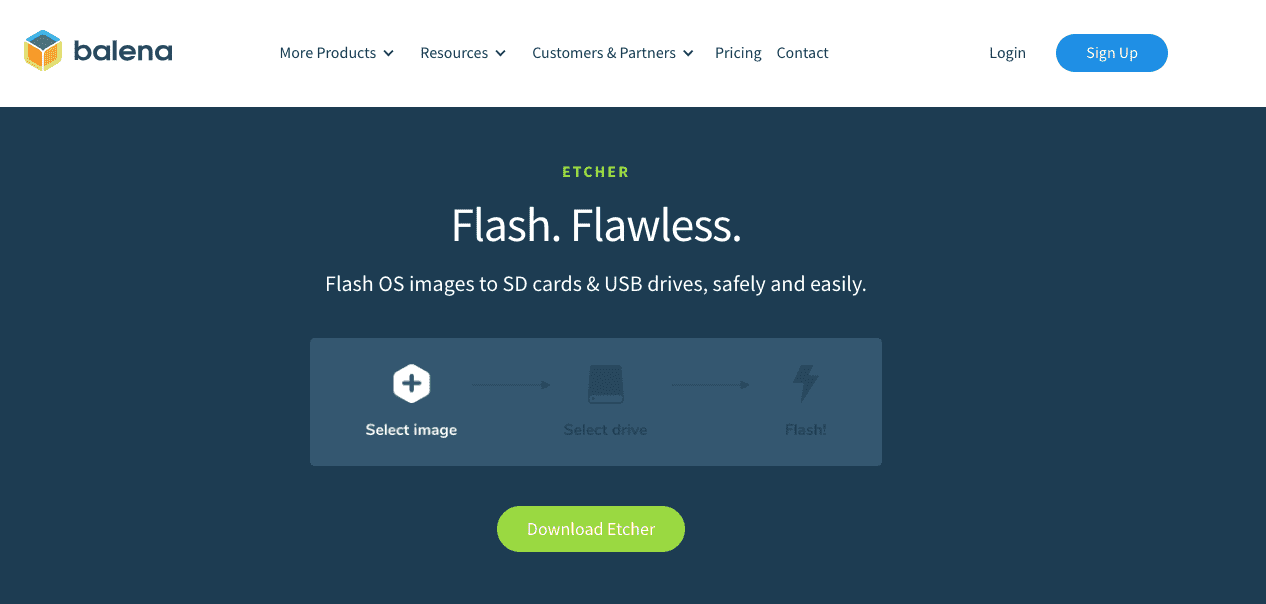
Download balena etcher
Step 4: Select the Ubuntu 20.04 ISO Image
Plug the USB flash drive into an available USB port on your computer. After launching Etcher, the application should automatically detect the USB drive. If not, click the “Select target” button in Etcher and choose the USB drive from the list of available drives.
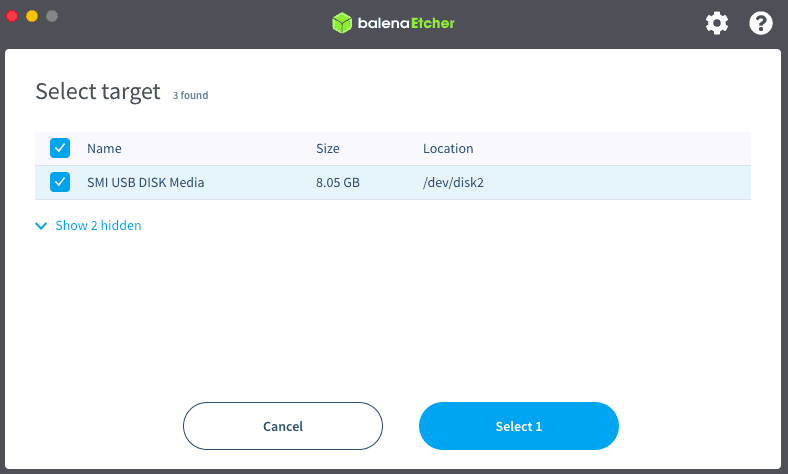
Select target
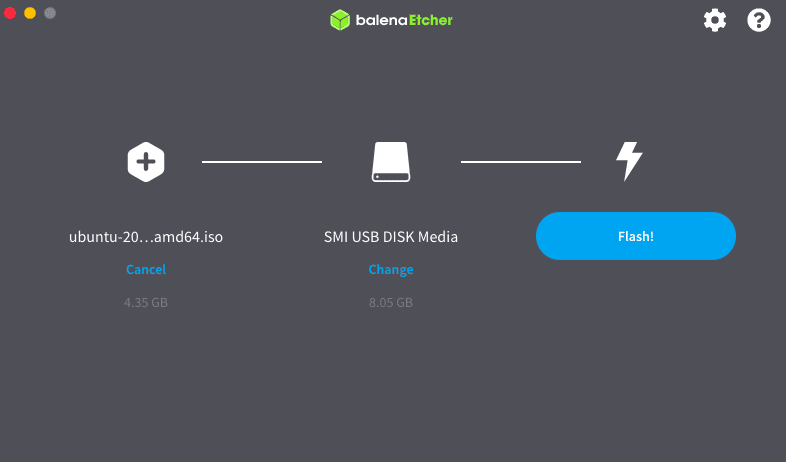
Next, click the “Select image” button and browse your computer’s file system to find the Ubuntu 20.04 ISO image you downloaded earlier. Once you have selected the ISO image, Etcher will display the drive letter of the USB device and the ISO file.
Step 5: Create the Bootable USB Drive
Double-check that you have selected the correct USB drive and the Ubuntu 20.04 ISO image. Once you are confident, click on the “Flash!” button to start the process of creating the bootable USB drive.
Flash
Etcher will now write the Ubuntu 20.04 ISO image to the USB drive. This process may take a few minutes, depending on the speed of your USB drive and computer.
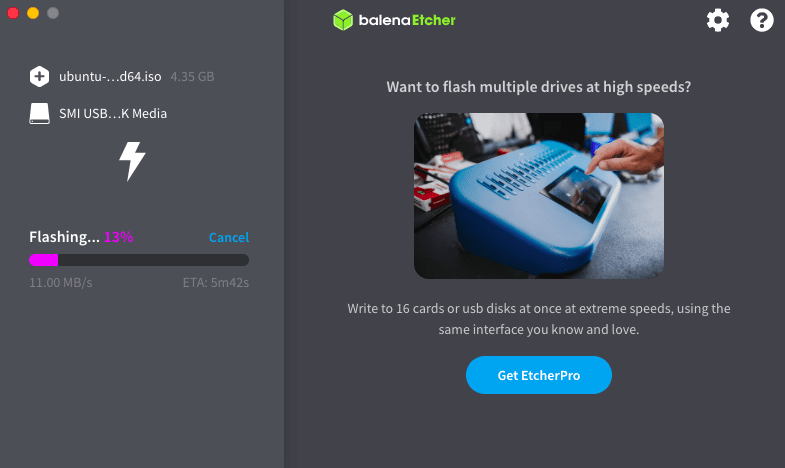
Flashing USB thumb drive
Step 6: Verification (Optional)
After Etcher has finished writing the ISO image, it can optionally verify the data to ensure the integrity of the bootable USB drive. While not mandatory, verification is recommended to ensure that the installation process goes smoothly. To perform verification, leave the “Validate write on success” option checked in Etcher before starting the writing process.
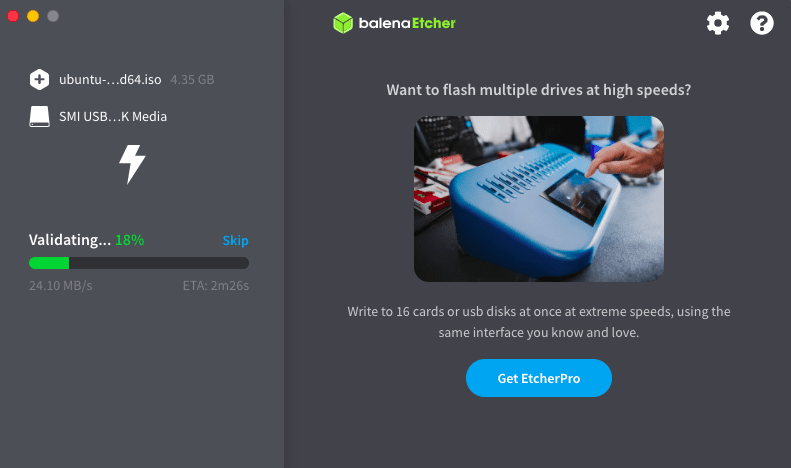
Verification underway
Step 7: Eject the USB Drive
Once Etcher successfully creates the bootable USB drive, it will notify you that the process is complete. Safely eject the USB drive from your computer to avoid data corruption.
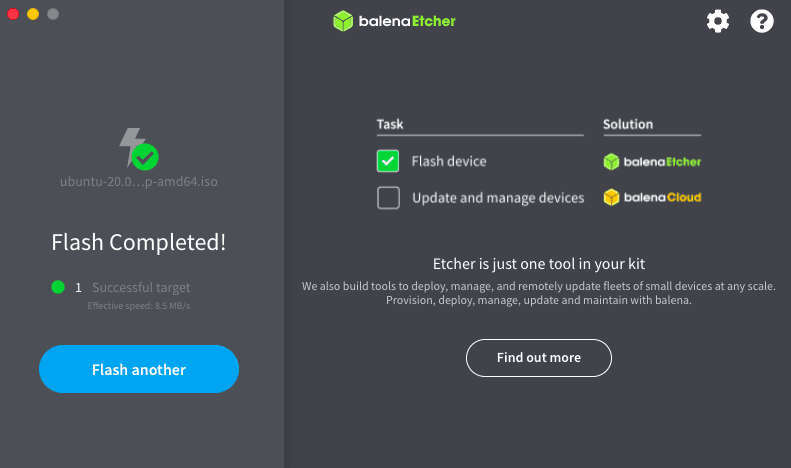
Flash completed
Congratulations! You have now created a bootable USB drive for Ubuntu 20.04. This USB drive can be used to downgrade Ubuntu on your computer. To do so, insert the bootable USB drive into the target computer, restart the system, and check out the section below on downgrading your Ubuntu OS.
Downgrading to Ubuntu 20.04
Follow this section to see how to downgrade to Ubuntu 20.04 using a bootable USB medium.
Step 1: Boot from the Bootable USB Drive
Insert the bootable USB drive into a USB port on your computer. Restart your computer, and during the boot process, access the BIOS or UEFI settings (usually by pressing F2, F12, Delete, or Esc). In the BIOS/UEFI settings, change the boot order to prioritize booting from the USB drive. Save the changes and quit the BIOS/UEFI settings.
Step 2: Ubuntu Welcome Screen
After booting from the USB drive, the Ubuntu installation welcome screen will appear. You will have two options: “Try Ubuntu” and “Install Ubuntu.” Choose “Install Ubuntu” to proceed with the installation process.
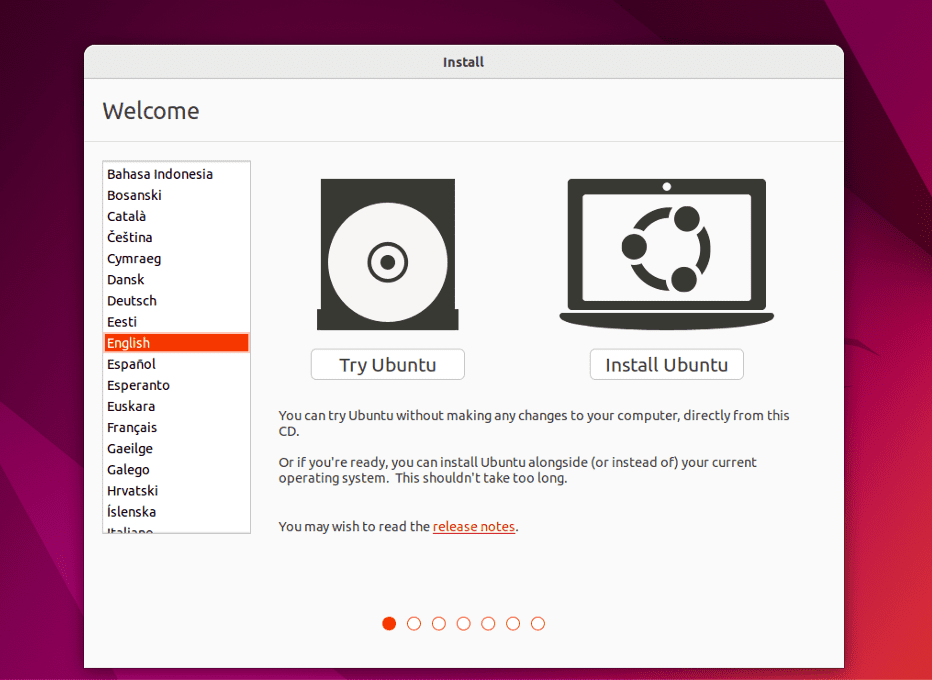
Ubuntu welcome screen
Step 3: Language Selection
Choose your preferred language for the installation process and click “Continue.”

Language selection
Step 4: Keyboard Layout
Choose your keyboard layout from the provided options. You can test the layout to ensure it is working correctly. Click “Continue” once you have made your selection.
Keyboard layout
Step5: Updates and Other Software
On the “Updates and other software” screen, you have two options: “Normal installation” and “Minimal installation.” The “Normal installation” includes updates and third-party software, while the “Minimal installation” skips these additions. Make your selection and click “Continue.”
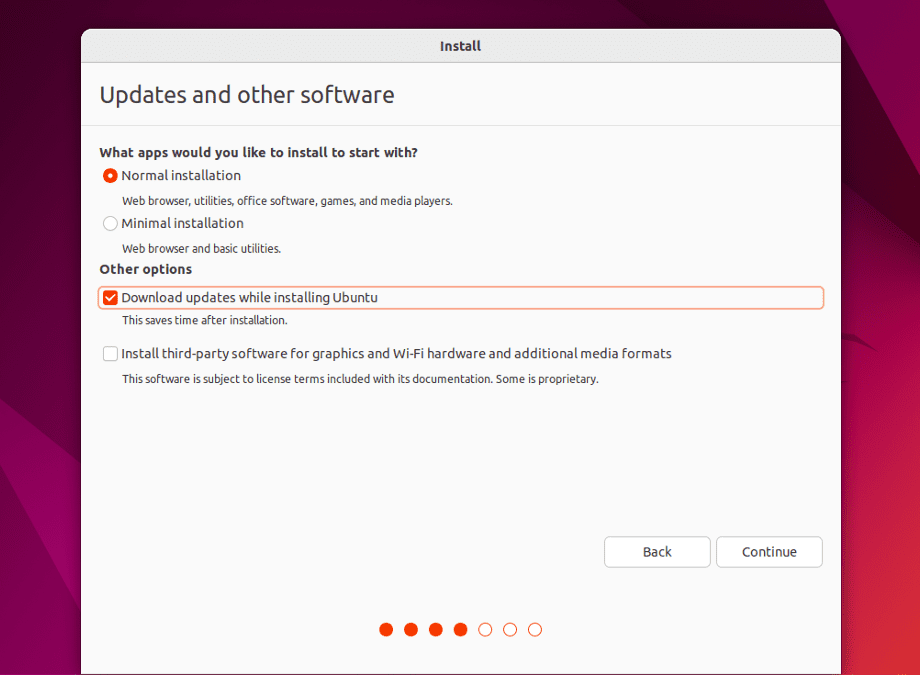
Updates and other software
Step 6: Installation Type
The “Installation type” screen lets you choose how to install Ubuntu 20.04. Here, you have several options:
- “Erase disk and install Ubuntu”: This option will erase the entire disk and install Ubuntu as the sole operating system. This is suitable for a fresh installation.
- “Install Ubuntu alongside [your existing operating system]”: This option lets you dual-boot Ubuntu with your existing OS, preserving both systems.
- “Something else”: This advanced option allows you to manually create custom partitions and manage disk space.
Choose the method that best resonates with your needs and click “Install Now.”
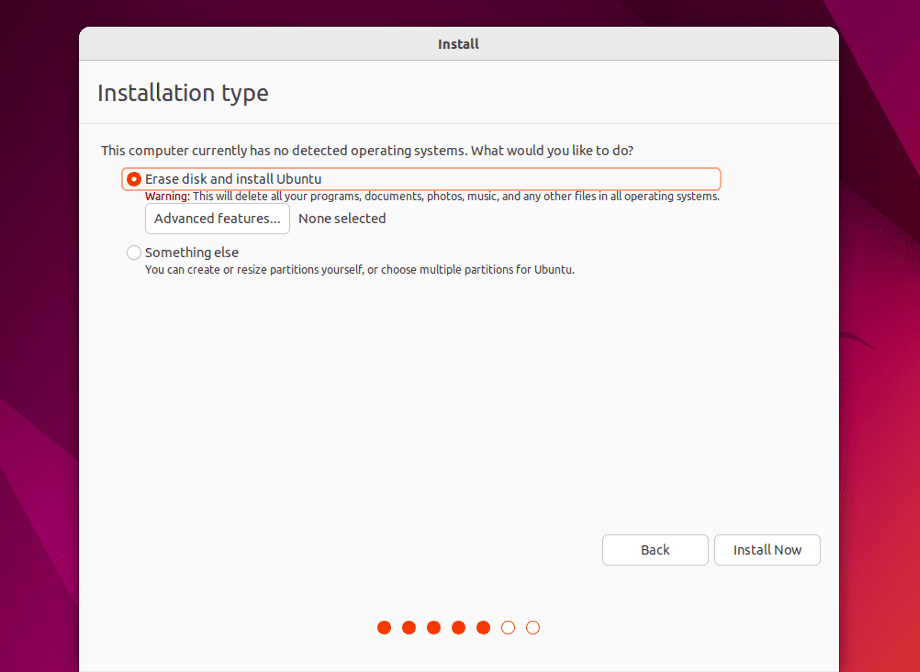
Choose Installation type
Step 7: Partitioning and Disk Setup (Optional)
You will be taken to the partitioning screen if you selected the “Something else” option in the previous step. Here, you can create, delete, or modify partitions as needed. If you are unsure about partitioning, it is recommended to use the default installation option for simplicity and safety.
Step 8: Confirm Partition Changes
A confirmation dialogue will appear if you made any changes to the disk partitions. Review the changes carefully, as this step will permanently modify your disk. Click “Continue” to proceed.
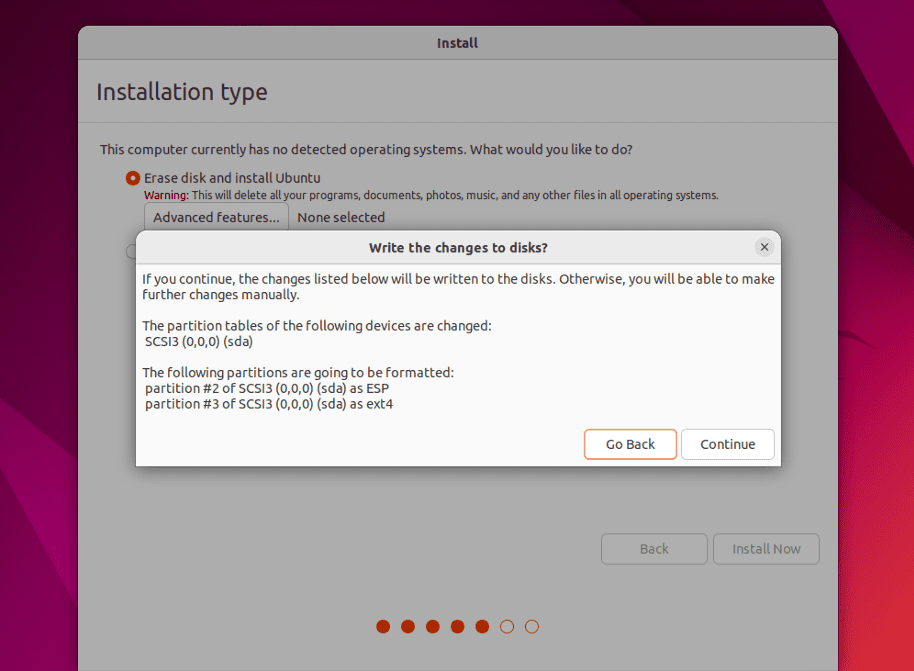
Confirm partition changes
Step 9: Location and Time Zone
Select your location from the map or choose a nearby city from the list to set your time zone. Click “Continue” after making your selection.
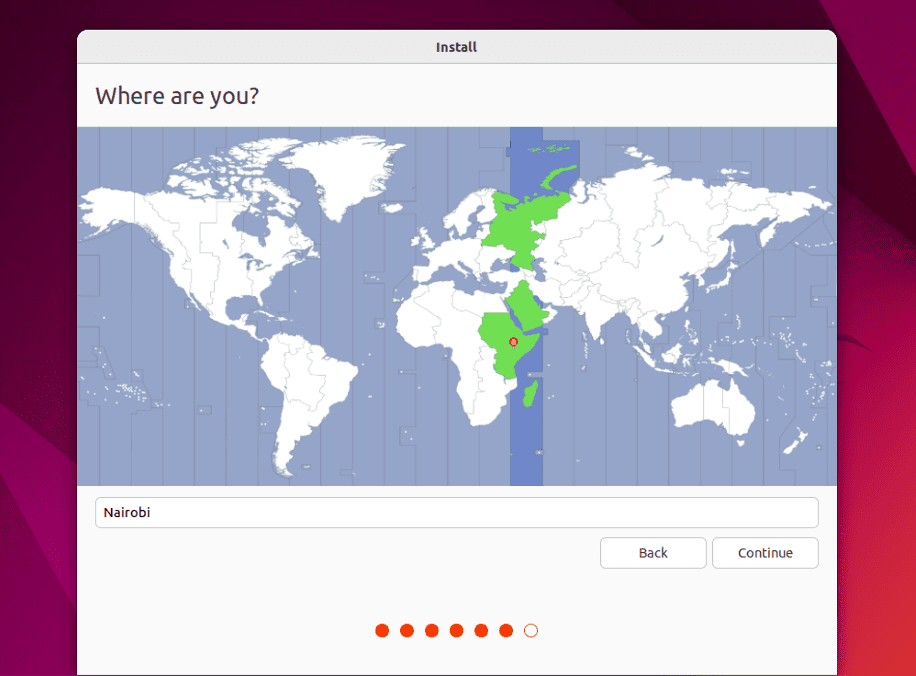
Location and time zone
Step 10: User Details
Provide your name, computer name, username, and a strong password for your user account. You can opt to log in automatically or require a password to log in. Click “Continue” when you have entered the required information.
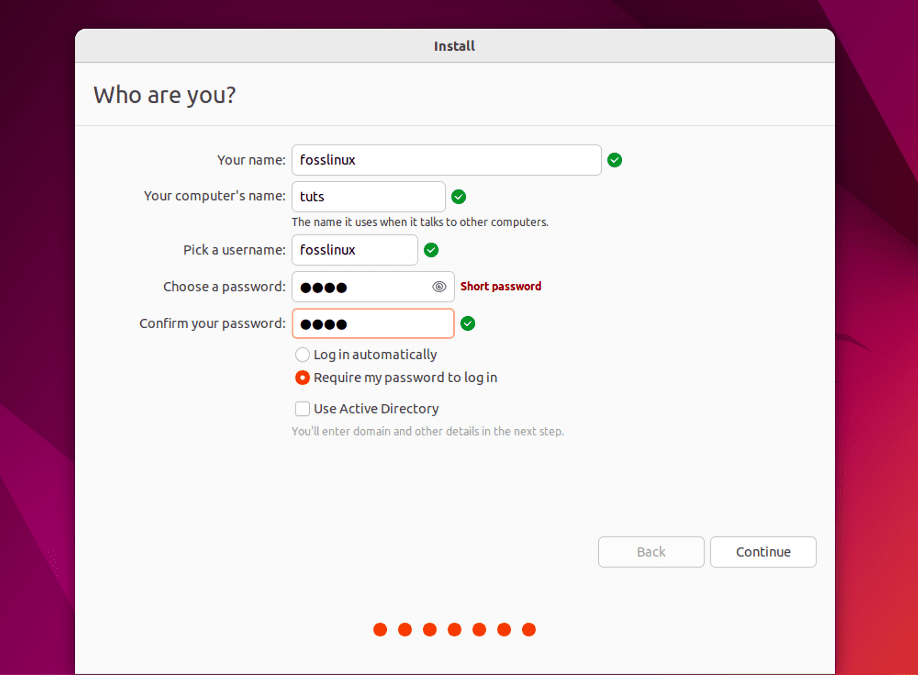
Append user details
Step 11: Installation Progress
The installation process will begin after you have reviewed all the settings. Ubuntu will copy files to the disk and configure the system. This may take some time, depending on your computer’s hardware.
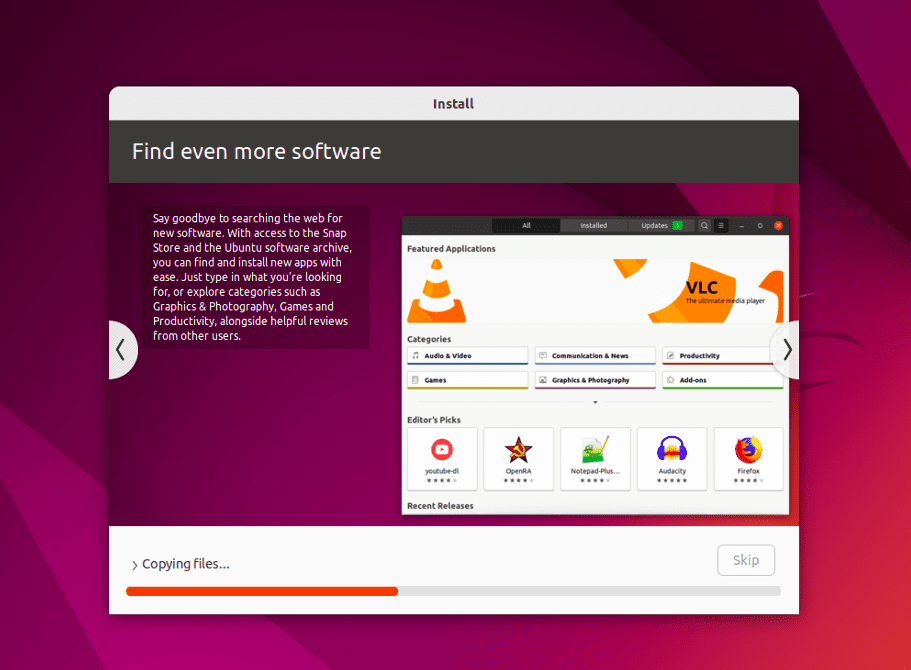
Installation progress
Step 12: Restart and Boot into Ubuntu
Once the installation is complete, you will be prompted to remove the installation media (USB drive) and press “Enter” to restart your computer. After the restart, Ubuntu 20.04 will boot up, and you will see the login screen.
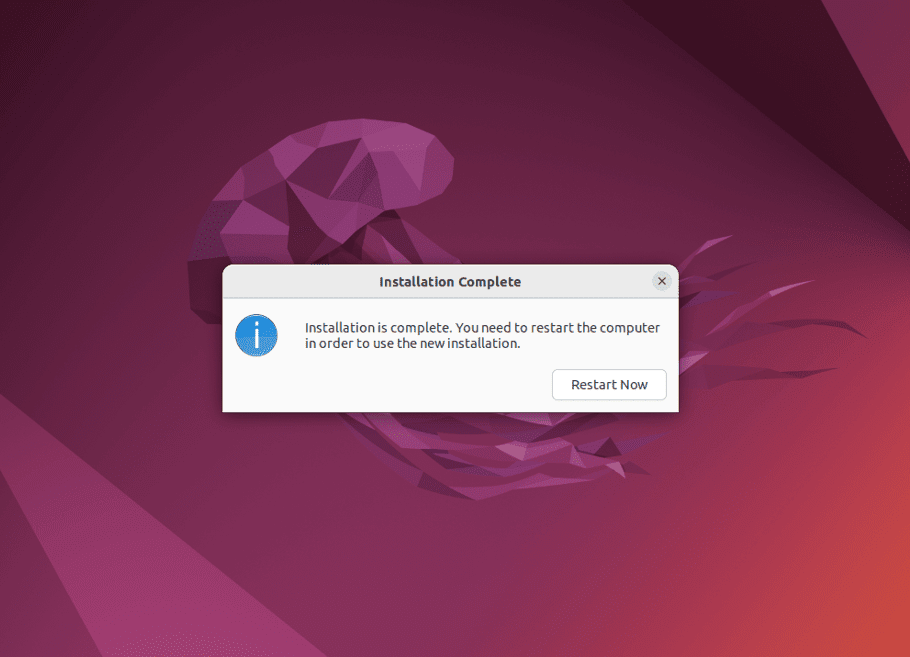
Restart Now
Congratulations! You have successfully downgraded Ubuntu 20.04 on your computer. You can now explore the new features and enjoy the powerful capabilities of this LTS release.
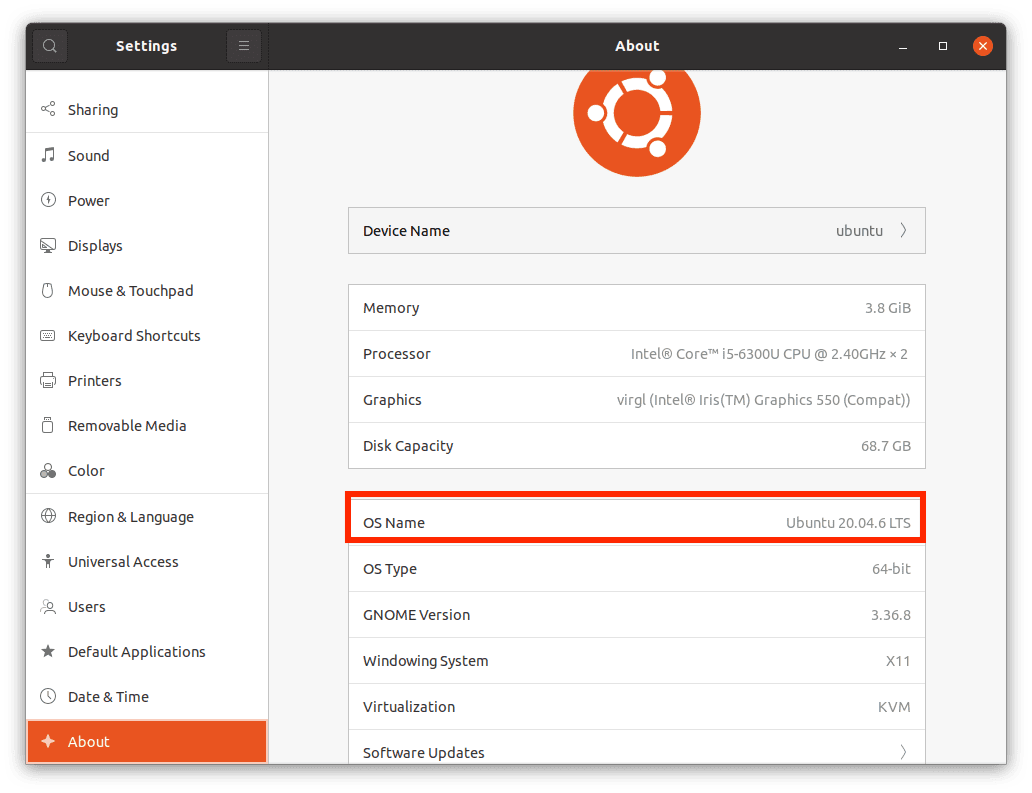
Successfully downgraded to Ubuntu 20.04
Step 13: Reinstall Additional Software
Since downgrading removes all installed software, you must reinstall the applications and packages you had in the previous version. Use the package manager or Software Center to install the required software.
That’s it. You have successfully downgraded to a lower version of Ubuntu.
Conclusion
Downgrading Ubuntu to a previous version is a complex and challenging procedure that requires careful planning, preparation, and consideration of potential risks. However, downgrading Ubuntu to a previous version can be a viable solution for users facing compatibility issues or stability concerns with the latest release. Before attempting to downgrade, backup all your important data and be aware of possible compatibility issues. Make sure to verify hardware and software compatibility, and only proceed with the downgrade if it is absolutely necessary.
3 comments
I actually tried the first approach. As I came to the same result as you reported, I moved the apt preferences file and retried the upgrade. There were some unmet dependencies (from the autoremover removing older versions) and some broken packagas. Fixing those with `sudo apt install -f –fix-missing –fix-broken …` and running the `sudo apt upgrade` again atchieved the downgrade successfully.
For anyone else who runs into this problem, don’t copy and paste the pinning preferences directly into your new preferences file. Doing so copies Windows-style line endings, causing the issue that the author experienced as shown in the picture he provided. Instead, type out the whole thing by hand, and make sure there aren’t any unnecessary spaces.
You can find examples of apt pinning preferences online to see how it should look like.
Basically, the whole tutorial I can summarize in one better sentence:
Copy your files somewhere else and reinstall Ubuntu , then put back your files.