
Being a long-time Ubuntu user and fan, I’ve walked the path of countless system updates. From thrilling new features to those minor glitches that make us scratch our heads, I’ve seen it all. In today’s guide, I’ll walk you through the comprehensive process of updating your Ubuntu system.
Why should you update?
Before we dive deep into the ‘how-to’, let’s understand the ‘why’. Updates offer:
- Security: Patch vulnerabilities.
- Features: New functionalities that weren’t there before.
- Stability: Fixes for bugs in the system.
Updating the system is like giving it a fresh coat of paint. Not only does it look good, but it also protects against the elements. If you cherish the security and performance of your device, you must not ignore these updates.
How often should you update?
I’m of the belief that, in the realm of technology, ‘prevention is better than cure.’ Ubuntu offers frequent updates. Whenever possible, I like to update my system weekly. But, based on your personal or organizational needs, you can do monthly updates too. The critical thing is not to ignore them for too long.
Preparing for the update
A good start is half done! Before you hit that update button, ensure:
- Backup: Before any significant update, back up your critical files. Though rare, things can go south.
- Power: Ensure your system is plugged into a power source if you’re using a laptop. Updates can consume more power than you might expect.
Updating your Ubuntu
Ubuntu provides two primary means to update: the graphical interface and the command line. I prefer the latter because it offers more control, but both are equally efficient.
Graphical method:
Click on the Activities overview button (top-left corner).
Search for “Software Updater”.
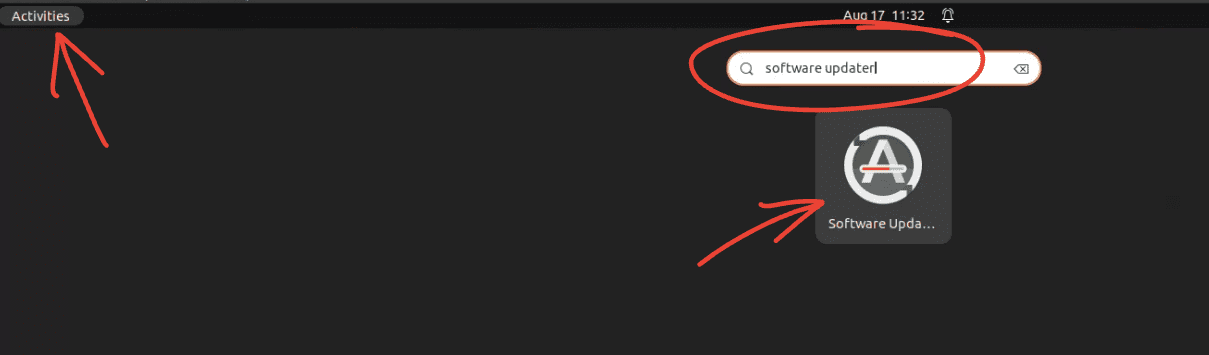
Launching Software Updater on Ubuntu 22.04
Open it. It will check for updates. If updates are available, it will provide a prompt.
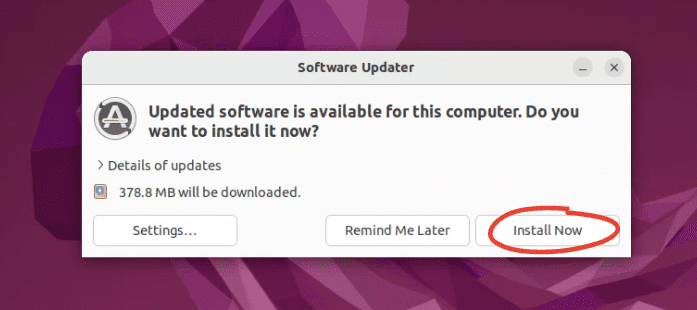
Update Notification
Click “Install Now”.
Wait as it downloads and installs the updates. Be patient; grab a coffee if it’s taking longer than expected.
Command line method:
For those, like me, who find solace in the terminal, follow these steps:
Open the Terminal (press Ctrl + Alt + T).
First, update the package list. Type:
sudo apt updateThis command refreshes the repositories and fetches the list of available updates from different servers. It gives you a sense of which packages have updates available or if new packages have been introduced since the last check. It doesn’t install or upgrade any software. It merely tells you what can be updated.
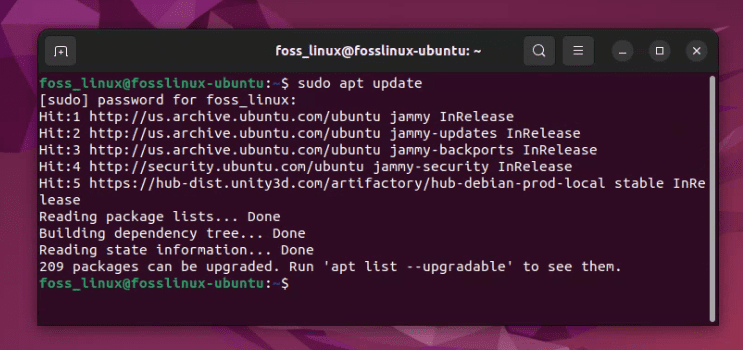
Updating package list on Ubuntu 22.04
After the package list is updated, upgrade the packages:
sudo apt upgrade
This command will upgrade all the packages that have new versions available. It ensures that all the software on your system is current.
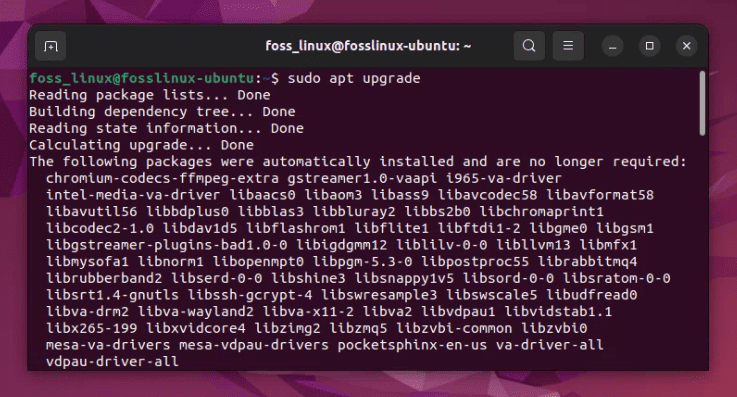
Updating Ubuntu using command line on Ubuntu 22.04
To ensure successful updating, please monitor the progress in the terminal and respond with a “Y” when prompted to begin the update.
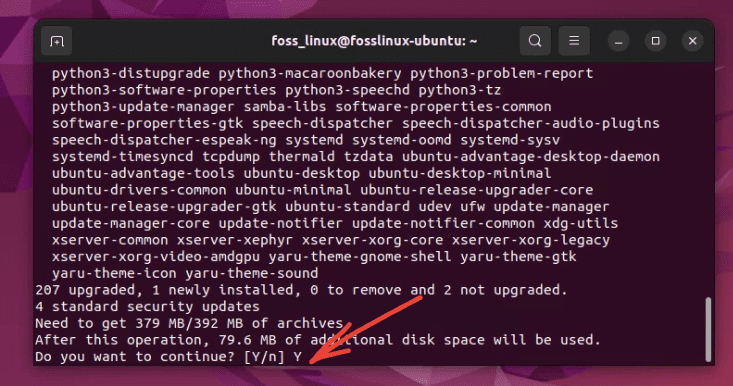
Approving updates installation
Once the update is complete, it is recommended to reboot the system. If there are no suggestions to do so, then you are all set and ready to proceed.
If you want to upgrade to a new release (from Ubuntu 20.04 LTS to Ubuntu 22.04 LTS, for instance), you can use:
sudo do-release-upgrade
Pro Tip: Always read what’s being installed or removed during the ‘apt upgrade’ step. Sometimes, updates might remove a software or library you need. In case you notice something amiss, don’t hesitate to research or ask in community forums.
Understanding the difference: ‘apt’ vs ‘apt-get’
In the realm of Ubuntu, you’ll often come across two seemingly similar command-line tools for package management: apt and apt-get. If you’re like me, initially pondering the mysteries of the universe (or, in this case, Ubuntu), you might’ve been puzzled. Aren’t they the same? Why do some blogs recommend one over the other? Let’s demystify this.
A brief history:
apt-get is older and has been the go-to tool for package management for many Ubuntu and Debian veterans. It offers robust functionality and is known for its reliability.
apt, on the other hand, was introduced in Ubuntu 14.04 as a “front-end” to several core software packages. Its main purpose is to be more user-friendly than its predecessors, providing colorful output, simpler commands, and combining functions of apt-get and apt-cache.
Key differences:
- User-friendliness: As a more recent tool,
aptis designed for end-users and offers more straightforward commands. For instance, instead of usingapt-get updateand thenapt-get upgrade, you can simply useapt updatefollowed byapt upgrade. - Output: One thing I adore about
aptis its colorful output. It displays progress bars and color-coded messages, which are absent inapt-get. - Combining Commands:
aptessentially streamlines some functions. For example, while you’d needapt-cache search [package_name]withapt-get,aptallows you to do the same withapt search [package_name]. - Stability for Scripting: This might sound counterintuitive, but
apt-getis recommended for scripting. This is because its behavior (including output and options) won’t change between versions, ensuring the stability of the script. On the other hand,aptis primarily meant for human-end interactions and might evolve over time.
FOSSLinux recommendations:
If you’re new to Ubuntu or prefer concise, human-friendly commands with more intuitive feedback, go for apt. It’s more modern, colorful, and combines the best of several tools.
However, if you’re scripting or working on an older system, apt-get might be more appropriate. Its predictability ensures scripts won’t break with newer versions.
It’s essential to remember that both apt and apt-get are tools accessing the same backend. Whether you choose one or the other, you’re tapping into the same repositories and databases.
In my early days of using Ubuntu, I remember coming across several blogs and tutorials that left me confused about the differences between and the switch from one version to another. It was like moving from an old diary to a new, modern journal. Though they both serve the same purpose, the latter felt more stylish and sophisticated. But as I delved deeper and understood the nuances, I learned to appreciate the strengths of both versions.
Post update tasks
- Reboot: Some updates require a system reboot. Don’t hesitate; it’s a small step to ensure everything runs smoothly.
- Check for residual updates: Sometimes, you need to run the update process more than once to get everything right.
- Clean-up: Over time, old and unused packages can pile up. Every few months, I run:
sudo apt autoremove
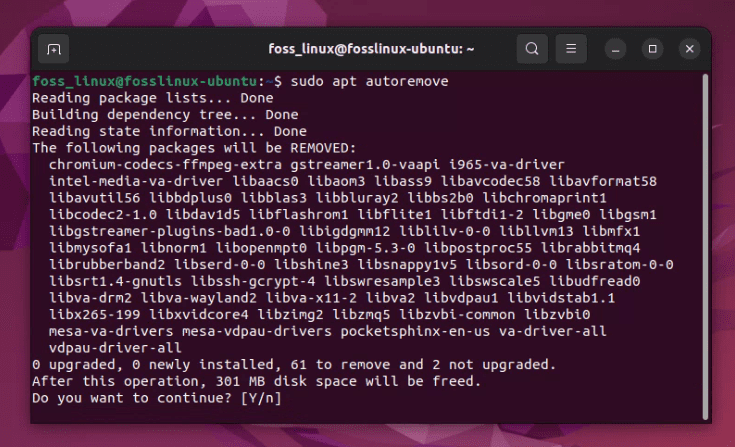
Removing unnecessary packages on Ubuntu terminal
By removing unnecessary packages, the system can be kept clean and free of clutter. The screenshot above demonstrates how I was able to claim an impressive 301MB of disk space.
Troubleshooting
If you face issues (as I did when I got overly enthusiastic with third-party repositories), here’s what you can do:
- Sources: Ensure all repositories and sources are correct. Open “Software & Updates” from the activities overview and check the repositories. Refer this article: Resolving “Failed to Download Repository Information” errors in Ubuntu
- Dependencies: If an application isn’t working post-update, it might be due to dependency issues. Use:
sudo apt -f install
This command will attempt to correct any broken dependencies.
Pro tips:
- Stay Informed: Sometimes, a particular update might have issues. By being active in the Ubuntu community or forums, you can avoid potential pitfalls.
- Use LTS: If you prefer stability over the newest features, stick to Long Term Support (LTS) releases. These are tested rigorously and tend to be more stable.
- Test Updates: If you have a test system or virtual machine, try updates there first. I often do this to ensure everything is smooth for my main system.
Conclusion:
To keep your Ubuntu system at its peak performance, regular updates are non-negotiable. The process might seem intricate initially, but with time, it becomes second nature. Remember to always back up, be patient, and enjoy the new features and improvements with each update. Your system deserves it! And so do you! Safe updating!