
As you know, I am always on the lookout for exciting new ventures to embark on in the tech sphere. Well, recently, I stumbled upon something which really was in my to-do pipeline for a while – EndeavourOS. As a lifelong admirer of all things tech, I am drawn to EndeavourOS due to its user-friendliness and inherent flexibility, making it a perfect candidate for a deep dive.
EndeavourOS is an Arch-based Linux distribution that provides a terminal-centric experience with the option of installing any desktop environment during the installation process. As a fervent advocate of open-source projects, I must admit that I have grown quite fond of EndeavourOS.
Before I proceed, a quick note. While I found the installation process to be reasonably straightforward, it does require some technical understanding. If you are a beginner, don’t be intimidated. I’m here to break it down for you, step by step.
Installing EndeavourOS on VirtualBox Made Simple
Let’s get started!
1. Setting up the prerequisites
To start the process, you need to have VirtualBox installed on your computer. VirtualBox is a virtualization software that allows you to run different operating systems simultaneously on your machine. If you don’t have it installed, you can download it from the official VirtualBox website.
The next thing you need is the EndeavourOS ISO file. You can download this from the official EndeavourOS website. Remember, always download from official websites to avoid potential security issues.
2. Creating a new virtual machine
Once you have VirtualBox and the EndeavourOS ISO file ready, we can proceed to create a new virtual machine. Here is a step-by-step guide:
Open VirtualBox and click on the ‘New’ button.
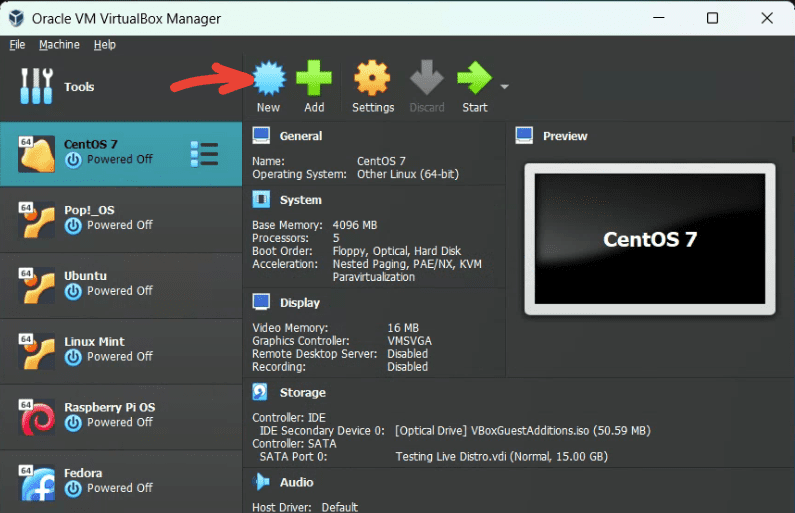
Creating a New Virtual Machine
Enter a name for your virtual machine. I chose to name mine ‘EndeavourOS’, but you can name it whatever you like. Select ‘Linux’ as the type and ‘Arch Linux (64-bit)’ as the version. Click on the ISO Image dropdown menu and select the EndevourOS ISO image that you downloaded earlier.
Unattended Installation Option in VirtualBox Grayed Out
The “Unattended Installation” option in VirtualBox may be grayed out when installing EndeavourOS because VirtualBox’s automated installation feature doesn’t support all Linux distributions. Since EndeavourOS isn’t one of the standard distributions supported for unattended installation, this option is disabled, requiring a manual installation process.
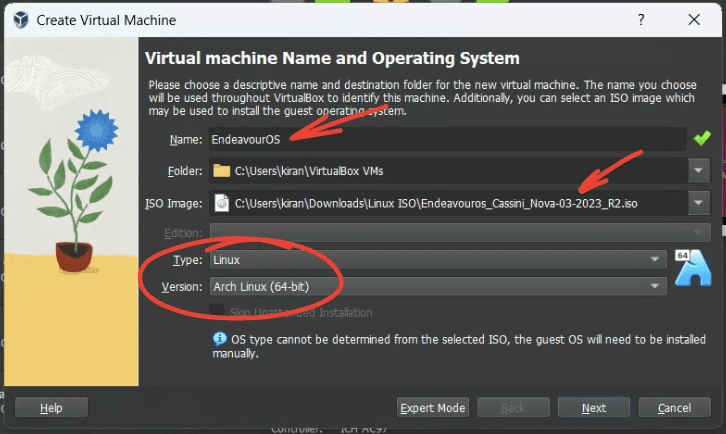
Creating EndevourOS Virtual Machine on VirtualBox
Assign memory size. For EndeavourOS, I would recommend assigning at least 2GB, though more would be preferable if your system can handle it. Increase the ‘Processor’ count if your system permits it. This will improve the performance of your virtual machine.
Enable EFI Setting?
EndeavourOS, like many modern Linux distributions, is compatible with EFI (Extensible Firmware Interface). You can choose to enable the “Enable EFI (special OSes only)” option in VirtualBox when installing EndeavourOS if you want to emulate an EFI environment.
However, it’s worth noting that enabling EFI isn’t usually a requirement for EndeavourOS, and the distribution should install and run correctly with or without this option enabled. If you’re following a specific guide or have particular needs that require EFI, then it might be appropriate to enable this option. Otherwise, for general testing purposes, leaving it at the default setting (usually disabled) should work just fine for a standard installation of EndeavourOS in VirtualBox.
Click “Next”.
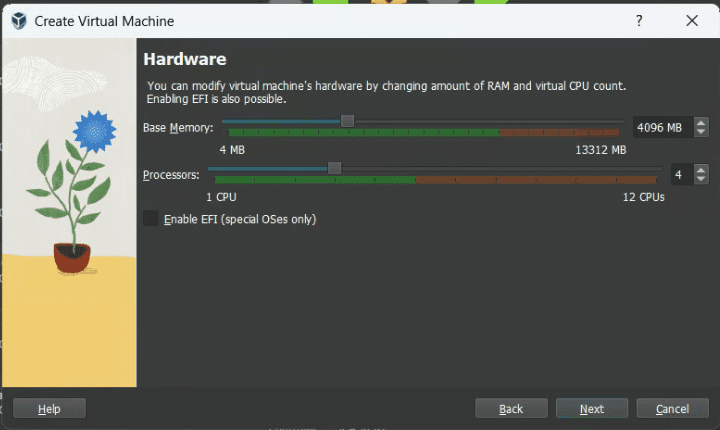
VirtualBox Hardware Settings – RAM and Processors
Select ‘VDI (VirtualBox Disk Image)’ as the hard disk type.
Optional (Older VirtualBox versions): I prefer to choose ‘Dynamically allocated’ for storage, as it only uses space on your hard disk as it fills up, rather than reserving all the space you allocate upfront.
Decide the size of the virtual hard disk. For EndeavourOS, I recommend at least 15GB, but 20GB would be more comfortable.
Click ‘Next’ to finish the process.
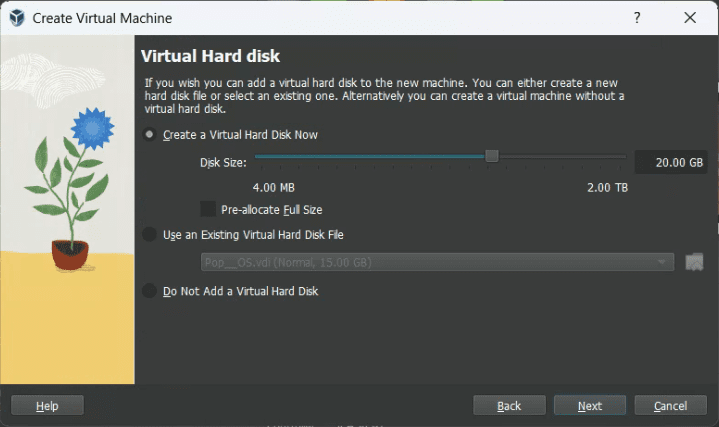
VirtualBox Settings – Hard disk size
Pro Tip: Always keep some extra space available on your hard drive for the virtual machine to function smoothly.
Review the final hardware summary based on your selections so far and click “Finish”.
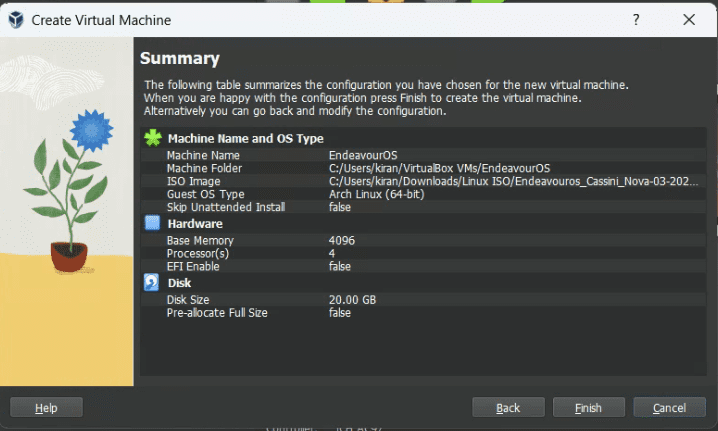
VirtualBox Hardware Summary
3. Configuring the virtual machine
Before we install EndeavourOS, we need to configure the virtual machine.
- Select your virtual machine and click ‘Settings’.
- Under ‘Display’, increase the ‘Video Memory’ to its maximum limit.
- Click ‘OK’ to save the settings.
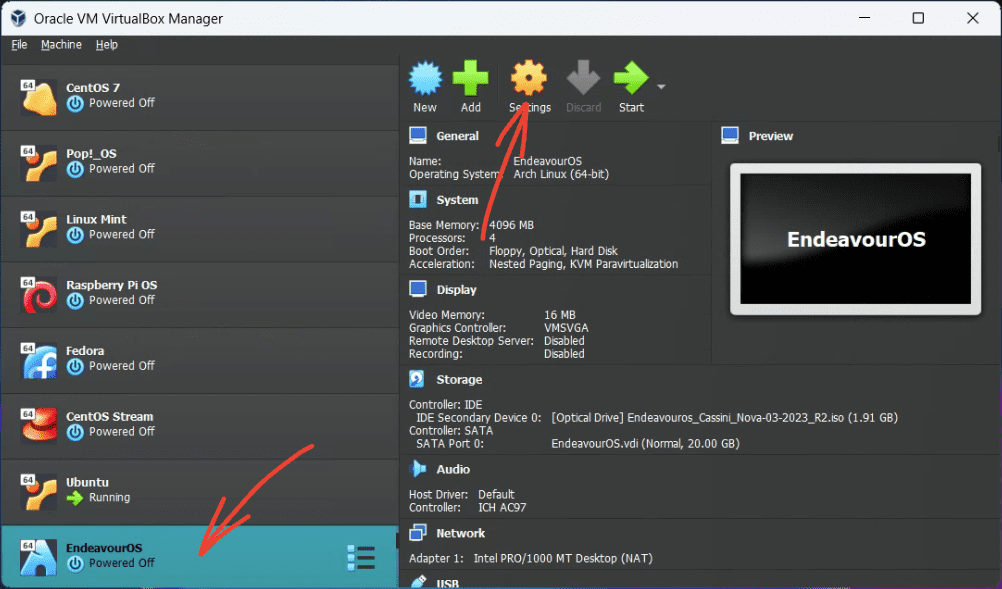
Launching Virtual Machine Settings
4. Installing EndeavourOS
Now we are ready to install EndeavourOS. Start your virtual machine by selecting it and clicking ‘Start’ located on VirtualBox.
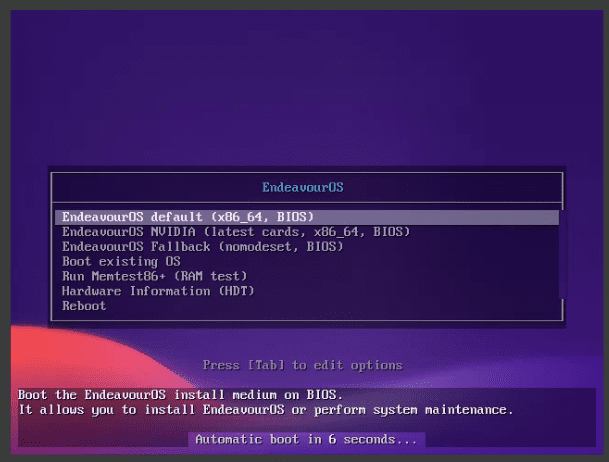
EndeavourOS (Cassini Nova) Start Up Screen
The EndeavourOS live environment will boot up. Click on the ‘Start the installer’ icon on the desktop to start the EndeavourOS installer.
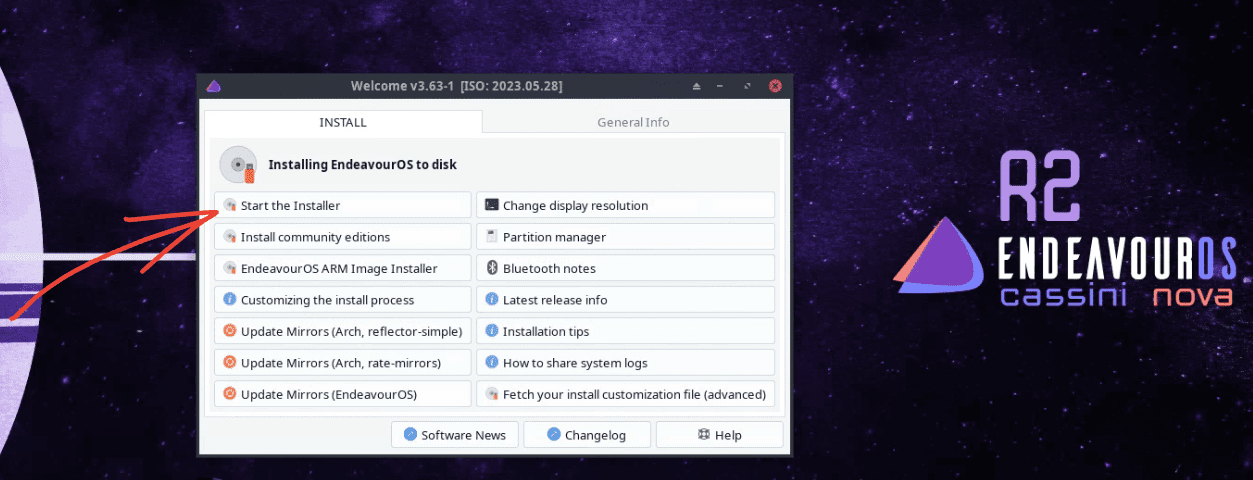
EndeavourOS (Cassini Nova) Installer Welcome Screen
There are two installation methods – Online and Offline. The online method lets you choose your desktop with the vanilla theme. The offline method gives you an Xfce desktop with an EndevourOS theme. As a minimalist who appreciates clean, uncluttered spaces, I chose the Offline method that gives Xfce environment, but you can choose based on your preference.
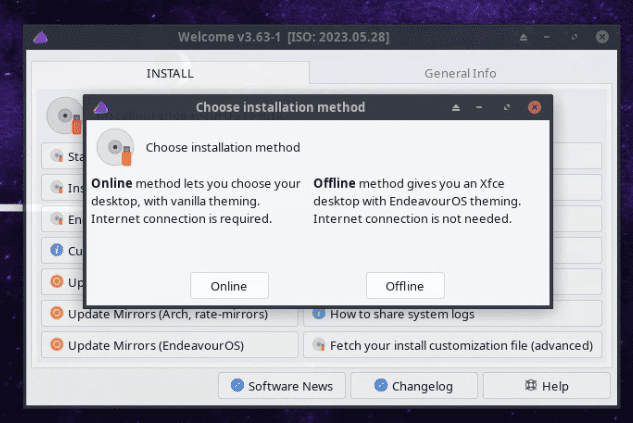
EndeavourOS (Cassini Nova) Installation Options
The installation process is pretty straightforward. Follow the prompts, selecting your preferred language, location, and keyboard layout.
When asked to partition your disks, if you’re not sure what to do, choose ‘Erase disk’ for the simplest option. This will automatically create the necessary partitions in your virtual machine. You can also use the Swap (with Hibernate) option if you want to test the hibernation on EndeavourOS. Don’t worry; none of these settings impact your host machine.
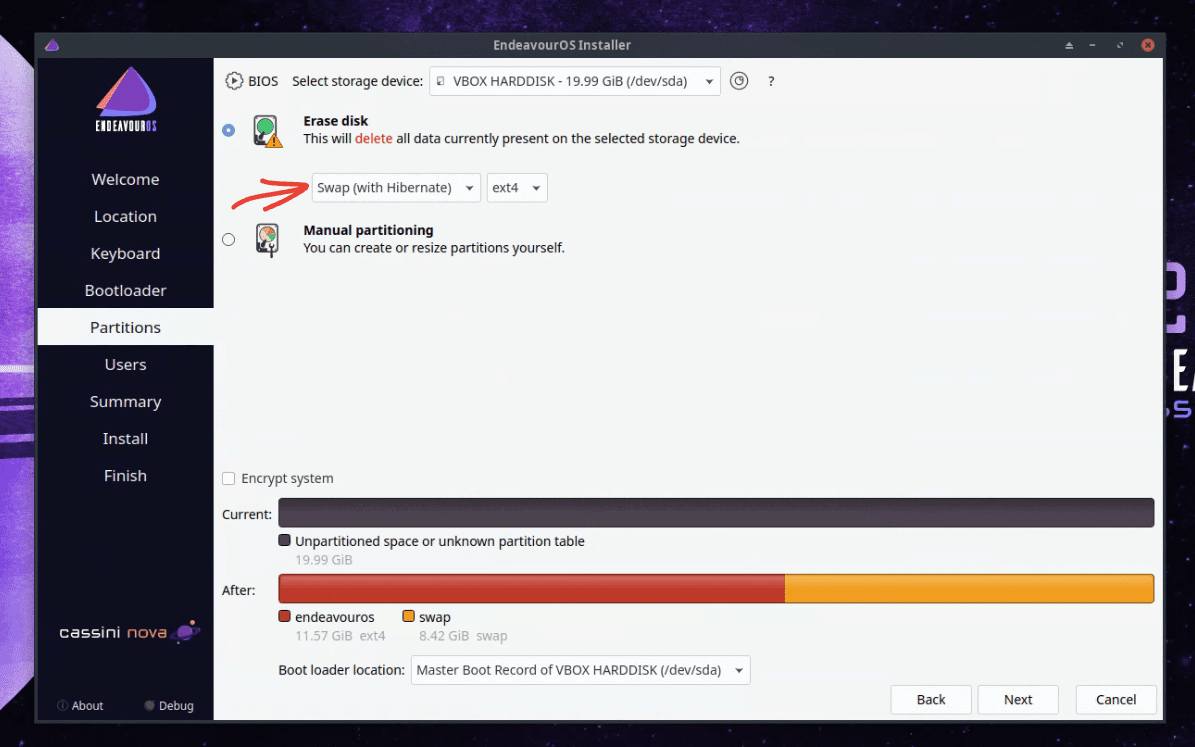
EndeavourOS (Cassini Nova) Installer Partitions Options
Complete the installation process by creating a new user and setting a password. Ensure “Use the same password for the administrator account is selected” if you are the only one to use the installation. Click “Install”.

EndeavourOS (Cassini Nova) Users Creation
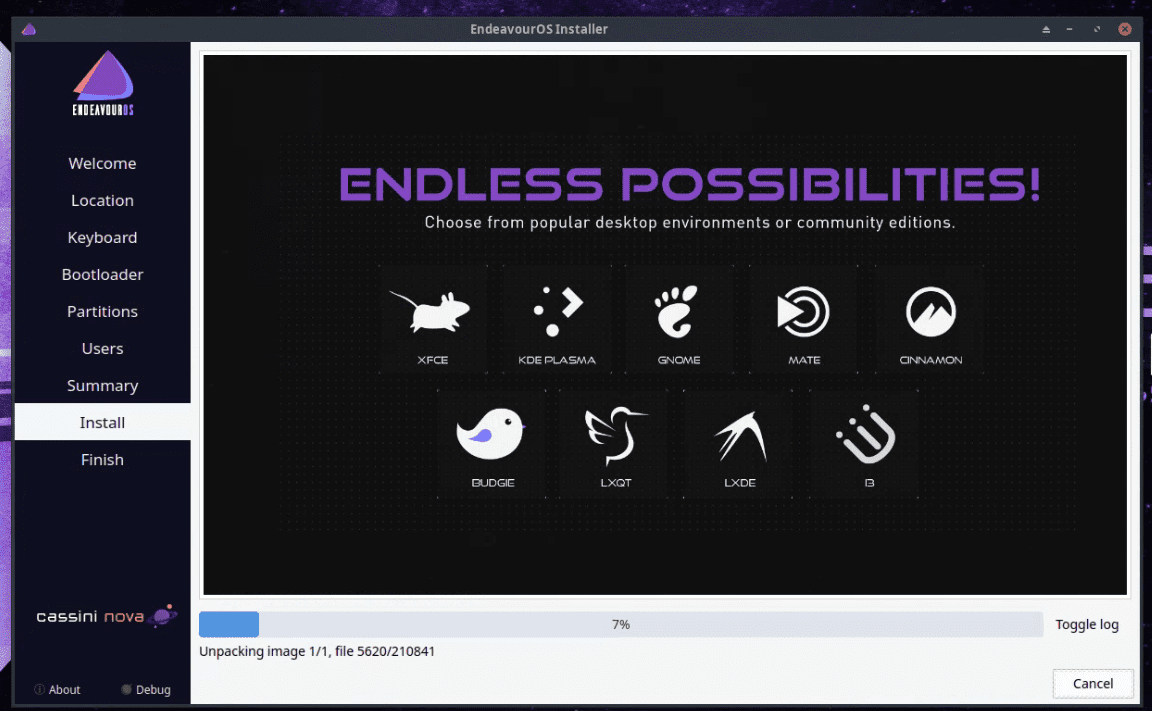
Installing EndeavourOS (Cassini Nova)
Once the installation is complete, reboot the system and eject the ISO from the virtual optical drive in the VirtualBox settings > Storage > Controller IDE. Otherwise, your VirtualBox will keep booting into the Live environment.
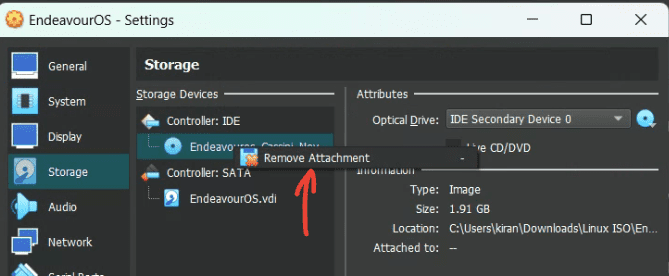
VirtualBox Settings – Removing the EndeavourOS Live CD
You are now ready to explore your new EndeavourOS installation!
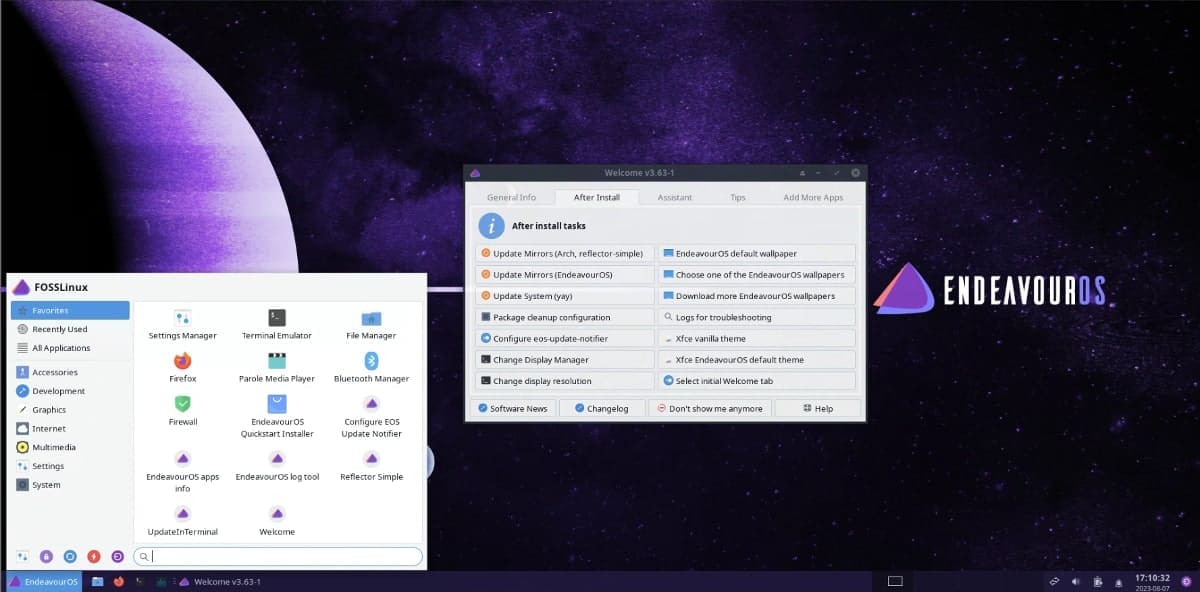
EndeavourOS Cassini Nova Desktop
Pro Tip: EndeavourOS is very lightweight by default. Customize it to suit your needs, but remember, each additional program or service can potentially slow it down.
There you have it! A comprehensive guide to installing EndeavourOS on VirtualBox.
Concluding thoughts: My Experience with EndeavourOS
As I reflect on my journey with EndeavourOS, I am filled with a sense of satisfaction and appreciation for this flexible, user-friendly Linux distribution. As an Arch-based system, EndeavourOS can be as lightweight or as feature-rich as you choose, giving you complete control over your computing experience.
At first glance, EndeavourOS might seem like a system geared towards more experienced users. Its terminal-centric approach and lack of an extensive graphical interface did make me a bit wary initially. However, as I delved deeper and explored various desktop environments and customization options, I found myself enamored with its simplicity and elegance.
The experience of using EndeavourOS has been both rewarding and enlightening for me. From the sleek interface of the Xfce desktop to the robust performance under heavy multitasking, everything feels finely tuned to cater to both productivity and aesthetics. Stay tuned for a detailed review of EndeavourOS coming up soon!