
In the fast-paced digital world we find ourselves in today, time synchronization in computer systems is not just a necessity, it’s an expectation. Among the myriad of Linux users around the globe, a sizable faction constantly seeks a simplified pathway to ensure that their system clocks are ticking precisely, synchronized to a standard time source. If you are someone who holds the same concern, you are at the right place!
In my path of exploring Linux, one of the things that caught my attention was the way Linux manages time synchronization with exceptional precision. It brings a sense of uniformity and synchrony in the ecosystem. In this detailed guide, I am eager to share with you my insights and experiences on how to effortlessly sync your Linux time with a Network Time Protocol (NTP) server.
So, let’s not waste a moment more (no pun intended!) and delve deep into this enlightening journey.
Understanding the importance of time synchronization
Before we set foot into the technical labyrinth, I want to share my personal view on why time synchronization matters. You might not realize, but a discrepancy of even a few seconds can create chaos in certain applications. During my early years with Linux, I overlooked this aspect and faced difficulties while managing server logs, troubleshooting, and even when running time-sensitive applications. Over the years, I have developed a penchant for synchronized systems for their ability to avoid such unnecessary hassles.
Time synchronization is not just a convenience, but a necessity in maintaining security, data integrity, and the smooth functioning of networked systems. So, let’s proceed and get your Linux system synchronized with an NTP server.
Getting acquainted with Network Time Protocol (NTP)
Network Time Protocol, widely known as NTP, is a protocol that is used to synchronize the computer clock time across a network of computers. Its accuracy and ability to mitigate the problems of system clock drifts have made it a popular choice among Linux users.
I have a soft corner for protocols that have stood the test of time and NTP, being in use since 1985, certainly qualifies. It is resilient and adapts well to the variable latency of the internet, which is something I deeply appreciate.
NTP server and NTP client
Before we move on to the synchronization process, I’d like to briefly explain two terms that you would come across quite often in this guide – the NTP server and the NTP client.
An NTP server is a server that uses NTP to provide a time service to various clients. It communicates with other servers or reference clocks to get accurate time, which is then passed on to clients.
An NTP client, on the other hand, is a computer system that requests time from servers. It adjusts its own local time based on the time information received from the server.
With this distinction clear, let’s move on to the actual synchronization process.
Step by step guide to syncing Linux time with an NTP server
Follow these steps and you will have your Linux clock ticking perfectly.
Step 1: Installing the NTP package
Before you begin, make sure that you have root privileges. You will first need to install the NTP package. On most Linux distributions, the package is available in the default repositories. Here is how you can do it:
- On Debian/Ubuntu:
sudo apt update
sudo apt install ntp
- On Fedora:
sudo dnf install ntp
- On CentOS/RHEL:
sudo yum install ntp
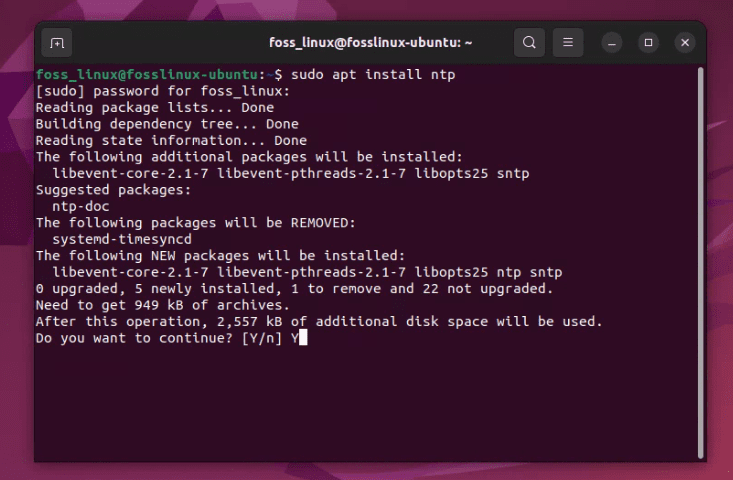
Installing ntp on Ubuntu
Step 2: Configuring the NTP daemon
After installation, the next step is configuring the NTP daemon. The main configuration file is located at /etc/ntp.conf. Use your favorite text editor to open this file. I usually prefer nano for its simplicity:
sudo nano /etc/ntp.conf
In this file, you need to define the NTP servers that your system will sync with. You can find a list of public NTP servers at the NTP Pool Project. Add or edit server lines to include the servers you want to use. I generally prefer servers that are geographically closer to me to minimize latency.
Here is an example configuration:
server 0.us.pool.ntp.org iburst
server 1.us.pool.ntp.org iburst
server 2.us.pool.ntp.org iburst
server 3.us.pool.ntp.org iburst
Remember to replace “us” with your region code. Note that you may see all these entries in the configuration by default. If you want to use something else, for example, to use the NTP servers from Google and Amazon, proceed to next step,
Step 3: Using Google and Amazon NTP servers
Choose your preferred NTP service
First and foremost, you have to decide whether you would like to use Google’s or Amazon’s NTP servers. I personally appreciate the reliability of these services, and I have switched between them a couple of times, based on the specific project requirements. Here are the details for both:
Google Public NTP Servers:
-
time.google.comtime2.google.comtime3.google.comtime4.google.com
Amazon Public NTP Servers:
-
169.254.169.123(This is a link-local address, reachable from Amazon EC2 instances and VPCs)- Alternatively, you can use Amazon’s global servers:
0.amazon.pool.ntp.org1.amazon.pool.ntp.org2.amazon.pool.ntp.org3.amazon.pool.ntp.org
Step 4: Modify the NTP configuration file
Now, comment out any existing server lines by adding a # at the beginning of the line. Then, add new lines to define the servers from Google or Amazon that you have chosen.
For instance, if you decide to use Google’s servers, your configuration file might look something like this:
# Use Google NTP servers
server time.google.com iburst
server time2.google.com iburst
server time3.google.com iburst
server time4.google.com iburst
If you prefer Amazon’s servers, your configuration file should be updated accordingly:
# Use Amazon NTP servers
server 0.amazon.pool.ntp.org iburst
server 1.amazon.pool.ntp.org iburst
server 2.amazon.pool.ntp.org iburst
server 3.amazon.pool.ntp.org iburst
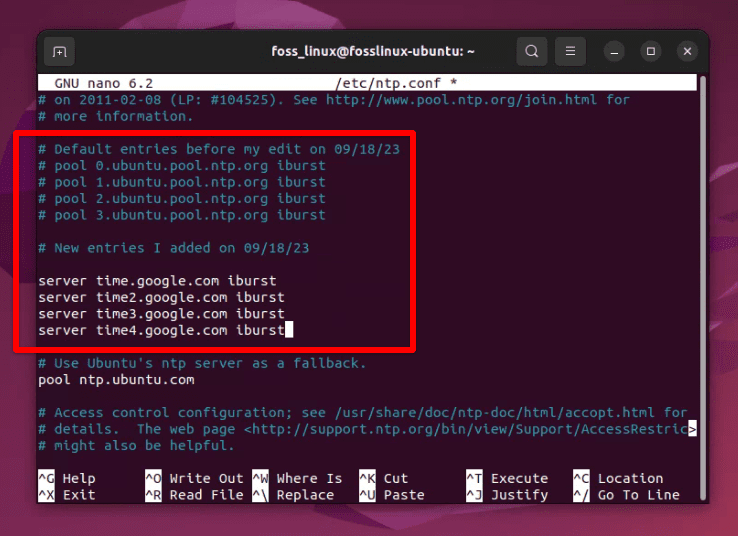
Editing the ntp configuration file and adding custom ntp servers
Notice the use of “iburst”? If you want to learn more about it, don’t worry, I’ve got it covered later in this article.
Step 6: Restart the NTP service
After editing the configuration file, save it and exit the editor. Now, restart the NTP service to apply the changes. Here’s how you can do it:
sudo systemctl restart ntp
I love this moment when the system embraces the changes, and I can almost visualize the clocks ticking in sync.
Step 7: Verify the synchronization
Once you have restarted the service, it’s time to verify if the synchronization is successful. Run the following command to check the synchronization status:
ntpq -p
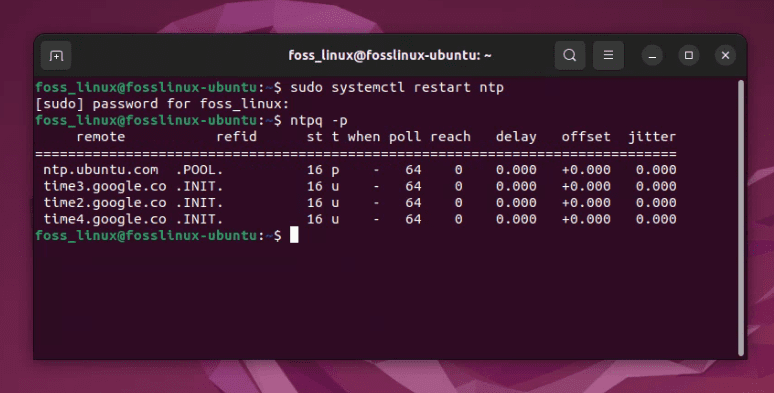
Checking ntp sync
Seeing the synchronization happen smoothly always brings a smile to my face, as I know I have aligned my system with reliable time sources, promising stability and accuracy.
Step 8: Enabling the NTP service at boot
To make sure that NTP starts at boot, enable it with this command:
sudo systemctl enable ntp
I find this ability to enable services at boot very convenient, as it ensures that the NTP service is always running, keeping my system time accurate without any intervention.
Fine-tuning and personal tweaks
While the above steps are sufficient for most users, there might be a few enthusiasts like me who love to tweak things to perfection. If you belong to this category, here are a few additional steps and adjustments you might consider.
Adjusting the Time Drift
Linux maintains a file to track the time drift of your system. This file, generally located at /var/lib/ntp/ntp.drift, helps in maintaining synchronization over long periods. Occasionally, I take a glance at this file just to make sure everything is functioning as expected.
Setting up a local NTP server
If you are in an environment with multiple systems, you might consider setting up a local NTP server to serve time to all systems in your local network. This not only ensures uniform time across all systems but also minimizes the traffic to external servers. Setting up a local NTP server has always given me a sense of accomplishment and technical prowess.
Now, let’s talk about that “iburst” parameter you used in step 4 – it’s one of those little nuances in the Linux world that I’ve grown to appreciate.
Decoding the ‘iburst’ parameter
You can opt to use just one server like time.google.com if you wish, and it would indeed work just fine for synchronizing time. Incorporating multiple servers is primarily a precautionary measure to ensure time synchronization continues seamlessly even if one server is temporarily unreachable. When you add the ‘iburst’ option at the end of the server line in the configuration file, you’re essentially giving the NTP service a directive to speed up the initial synchronization process. Here is a more detailed explanation:
What exactly is ‘iburst’?
The ‘iburst’ option is a modifier that instructs the NTP client to send a burst of eight packets instead of just one if the server is unreachable at the first attempt. This is a tactic employed to expedite the synchronization process when the server becomes available.
Why use ‘iburst’?
In my personal experience, using ‘iburst’ has been beneficial for a couple of reasons:
- Quick Synchronization: During the initial setup or when the service is restarted, ‘iburst’ helps in achieving a faster synchronization compared to the default behavior. This is something I’ve found particularly helpful in environments where a quick sync with the time server is desirable.
- Network Fluctuations: In the case of network fluctuations or if the server is temporarily unreachable, ‘iburst’ assists in re-establishing synchronization swiftly once the server is back online. I have witnessed scenarios where this has prevented potential delays in synchronization.
- Resource Utilization: While it sends a burst of packets, it’s designed to back off exponentially, meaning it doesn’t unduly burden the network or the server with traffic. It’s a neat balance of efficiency and resource utilization, which has always resonated with me.
Usage in Real-World Scenarios
In real-world scenarios, especially in enterprise environments, time synchronization is a critical aspect. I have often advised using the ‘iburst’ parameter in such setups to ensure that the systems can synchronize quickly and maintain accurate time, which is vital for log synchronization, transaction consistency, and various other aspects.
Choosing to Use ‘iburst’
Using ‘iburst’ is not mandatory, but rather a choice based on preference and the specific requirements of your setup. If you prefer a faster initial synchronization and a bit of resilience against network issues, including ‘iburst’ is a good practice. In personal setups where the need for time synchronization is not very critical, you might choose to omit it, and the system would still synchronize, albeit a bit more slowly.
Concluding remarks
In conclusion, syncing your Linux time with an NTP server is an essential practice that ensures uniformity, security, and smooth functioning of your system. Throughout my journey with Linux, I have realized that investing a little time in understanding and implementing time synchronization can save you from a lot of trouble in the long run.
As someone who enjoys the symphony of well-synchronized systems, I can vouch for the peace of mind it brings. So go ahead and sync your Linux time with an NTP server. Trust me, your future self will thank you for the synchronization and the problems it avoids.
1 comment
Of course not everyone wants to use a distro dependent on systemd and there are literally hundreds of distros other than Ubuntu or its derivatives. Ubuntu should have been mentioned in the title