
In today’s blog, I am eager to delve deep into a topic that often seems daunting to many, but in reality, is a straightforward process when you grasp the basics. I’m talking about the art of installing applications packaged in .tar.xz and .tar.gz files in Ubuntu. I have seen many users hesitating to download and install these types of files, probably because it seems a bit too “techy” at a glance. However, I am here to break down the barriers for you and guide you step-by-step, making the process as simple as enjoying a cup of your favorite beverage. So, buckle up as we embark on this educational journey, sprinkled with my personal likings and dislikings throughout.
Before we jump in, I must say that I have a soft spot for Ubuntu owing to its user-friendly features and flexibility. Ubuntu is an open-source operating system, which means that it encourages users to play around with different functionalities and learn the ins and outs of it. Now, without further ado, let us get into the nitty-gritty of installing .tar.xz and .tar.gz files on Ubuntu.
Understanding the tar.xz and tar.gz file formats
Before we dive into the actual installation process, I find it essential to have a rudimentary understanding of the .tar.xz file format. You would often find these files while searching for applications or software to install on your Ubuntu system. The .tar.xz and .tar.gz format is a compressed archive, which means that it contains multiple files bundled into one package, saving space and making the downloading process more streamlined.
I must confess that I am not a big fan of stumbling upon a .tar.xz and .tar.gz file when I am in a hurry because it requires a few more steps than a .deb package. However, these formats often brings the latest versions of software, which kind of makes up for the extra steps involved.
Are tar.xz and tar.gz file formats the same?
No, tar.xz and tar.gz are not the same. They are both archive files, but they use different compression algorithms.
- tar.gz is a compressed tar file that uses the gzip compression algorithm. Gzip is a lossless compression algorithm, which means that it can be used to compress files without losing any data. However, gzip is not as efficient as some other compression algorithms, so tar.gz files tend to be larger than other types of compressed tar files.
- tar.xz is a compressed tar file that uses the xz compression algorithm. Xz is a newer compression algorithm that is more efficient than gzip. This means that tar.xz files tend to be smaller than tar.gz files.
Here is a table summarizing the key differences between tar.gz and tar.xz:
| Feature | tar.gz | tar.xz |
|---|---|---|
| Compression algorithm | gzip | xz |
| Compression ratio | Lower | Higher |
| File size | Larger | Smaller |
| Speed | Faster | Slower |
Preparing your system
Before venturing further, it is essential to ensure your system is ready to handle the installation. Firstly, check if your system meets the requirements of the application you intend to install. Then, ensure you have sufficient privileges to install software on your system. Personally, I love keeping my system up to date as it provides a smooth experience, and I would recommend you do the same.
Updating the system
Start by updating your system to ensure you have the latest updates installed. Open the terminal and run the following command:
sudo apt update && sudo apt upgrade
Acquiring the necessary tools
Before we proceed, let’s ensure that we have the necessary tools installed on our system. In this section, I will guide you through installing tools that would help in extracting and installing .tar.xz and .tar.gzfiles.
Installing xz-utils
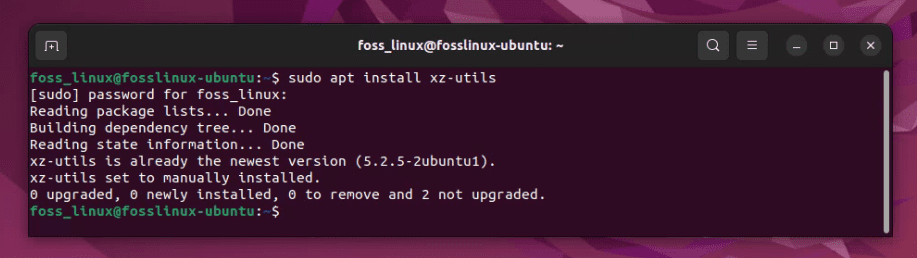
To handle .tar.xz and .tar.gz files, the first thing you would need is the xz-utils package. It’s a collection of tools to work with compressed files. It’s likely already installed on your system, but it doesn’t hurt to check. You can install it by using the following command:
sudo apt install xz-utils
Installing xz utilities on Ubuntu
Nothing gets installed in the above screenshot since it’s already installed on my Ubuntu. You get the point.
Part 1: Installing Ruby from a .tar.gz file
Ruby, a dynamic, reflective, object-oriented programming language, has always held a special place in my heart. Its elegant syntax and versatility make it a favorite among programmers, including myself. Let’s dive into the steps of installing Ruby on your Ubuntu system.
Step 1: Downloading the Ruby tar.gz file
Start by downloading the Ruby .tar.gz file from its official website. While browsing the website, I often find myself amazed at the community and resources available for Ruby enthusiasts. Once on the website, locate the .tar.gz file and initiate the download. When downloading a Ruby file, it is usually saved in the “Downloads” folder as per your browser’s default settings. You can use the cd and ls command to navigate on your Linux terminal.

Verifying downloaded ruby tar gz file
Step 2: Extracting the file
After the download is complete, navigate to the directory containing the file. I have fond memories of my first extraction process; it felt like unboxing a much-awaited gift. Use the following command to extract the file:
tar -xf ruby-3.2.2.tar.gz

Extracting tar gz file in Ubuntu
Step 3: Entering the directory
Next, enter the directory that has been created during the extraction process. This step always brings a sense of progress, like stepping into a new realm. Use this command:
cd ruby-3.2.2
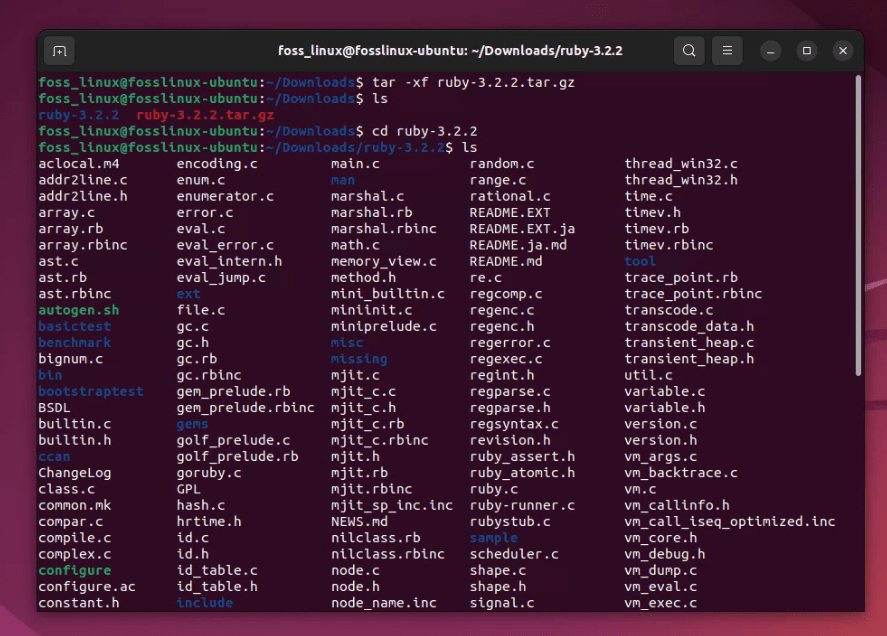
Seeing the contents of the Ruby 3.2.2 package
Step 4: Gearing up for the installation
Before embarking further, it’s prudent to read the accompanying documentation. I confess, in my eagerness during my initial installations, I often skipped this step, only to realize its importance later. Use these commands to acquaint yourself with the instructions:
cat README.md
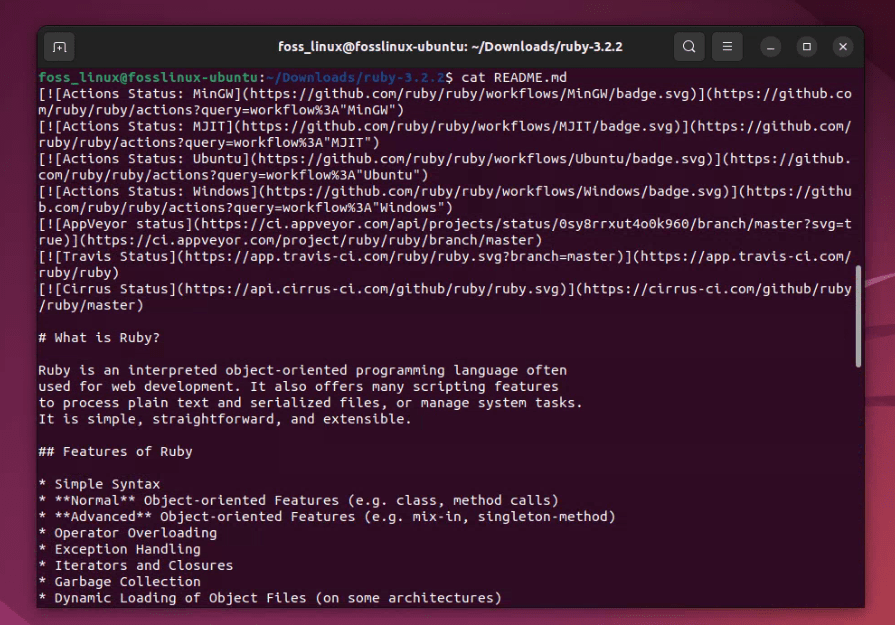
Reading the contents of README file
Step 5: Configuring the setup
Next, we initiate the configuration process, a step that often reminds me of setting up a new gadget, filled with anticipation and eagerness. Use this command:
./configure
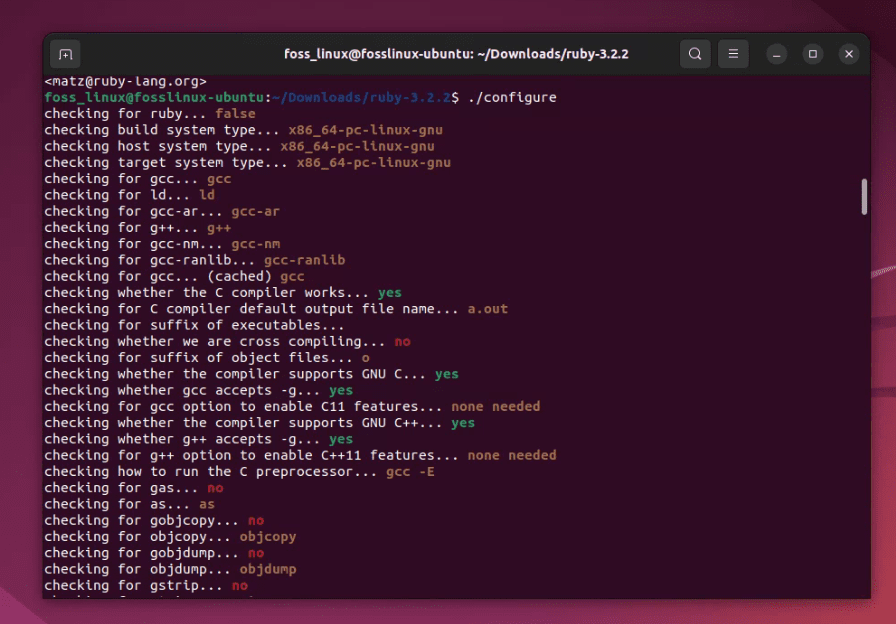
Initiating the configuration process
Step 6: The compilation adventure
Now, venture into the compilation process. This step has a charm of its own, gradually building up to the final product. Use this command:
make
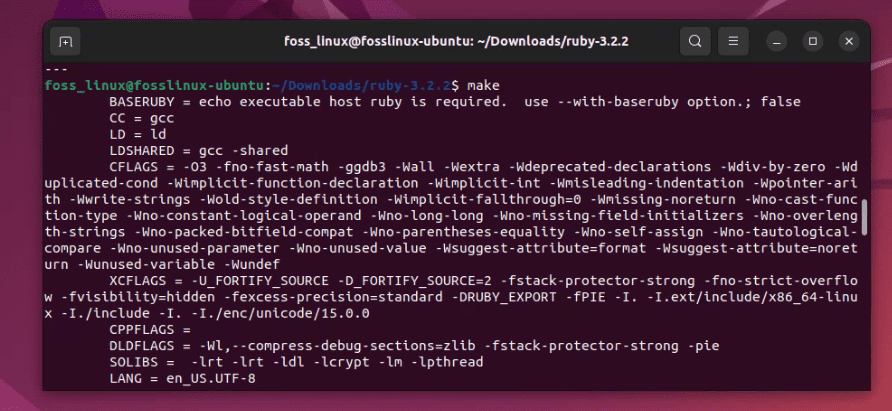
Compiling Ruby
Step 7: Installing Ruby
Finally, we arrive at the installation step. This moment always feels like reaching the summit after a strenuous hike. Use this command:
sudo make install
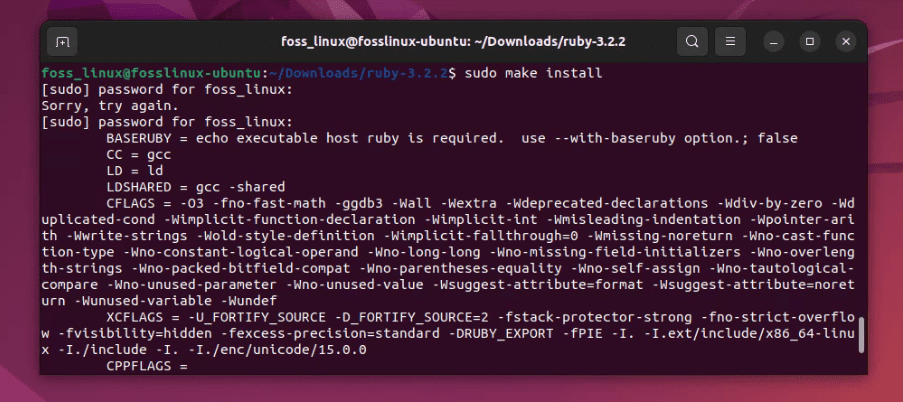
Installing Ruby
You can almost feel the thrill of accomplishment at this stage, much like reaching a milestone in a journey.
Part 2: Installing Transmission from a .tar.xz file
Step 1: Downloading the Transmission .tar.xz file
Shifting gears, we now focus on installing Transmission, a lightweight and cross-platform BitTorrent client. Head over to Transmission’s official website and download the .tar.xz file for the software. I must say, I have a soft spot for Transmission due to its clean interface and resource efficiency.
Step 2: Extracting the .tar.xz file
cleaUpon downloading the file, navigate to the download location and use the following command to extract the .tar.xz file:
tar -xf transmission-4.0.4.tar.xz
Step 3: Entering the installation phase
With a heart filled with anticipation, navigate into the extracted folder:
cd transmission-4.0.4
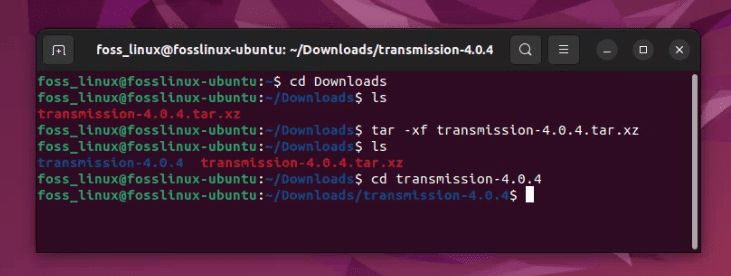
Extracting the tar xz file
Step 4: Configuring and installing Transmission
Just like before, we begin the configuration process with:
./configure
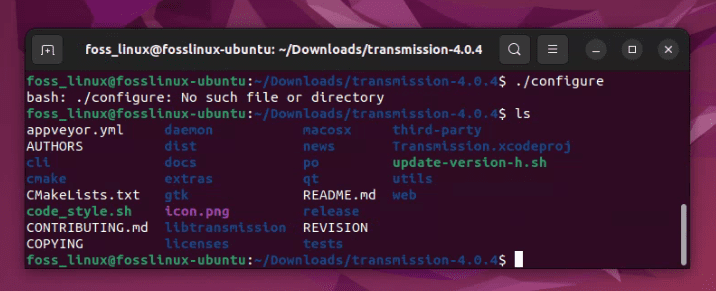
Failed Configuration!
When running the command “./configure”, I received an error message saying “No such file or directory”. To solve the problem, I should have checked the contents of the package beforehand. My mistake! It seems like the newer versions of Transmission don’t come with a configure script which is part of the traditional build process (which is also the case for several other modern packages). This sometimes happens and it did throw me off the first few times I encountered it. Instead, it seems like it uses CMake as the build system. This situation is a testament to the dynamic nature of the Linux environment, always keeping us on our toes.
Let’s adjust our approach and use CMake to build and install Transmission. Here is how you can do it:
Adjusting our strategy: Using CMake
The presence of a CMakeLists.txt file hints at the usage of CMake for the build process. As someone who loves the ever-evolving nature of the Linux ecosystem, I must say that encountering such changes always adds a layer of thrill to the journey.
Let’s dive right into the adjusted steps:
Step 1: Installing CMake and other Necessary Packages
Before we proceed, we need to ensure that we have CMake and other necessary packages installed on our system. It reminds me of gathering all the necessary tools before embarking on a new project. Open your terminal and type in the following commands:
sudo apt update
sudo apt install cmake libcurl4-openssl-dev libssl-dev pkg-config build-essential
Step 2: Running the CMake Command
Now, navigate to the directory where you extracted the Transmission files. Here, we initiate the CMake process to generate the Makefile, a roadmap for our building journey:
mkdir build
cd build
cmake ..
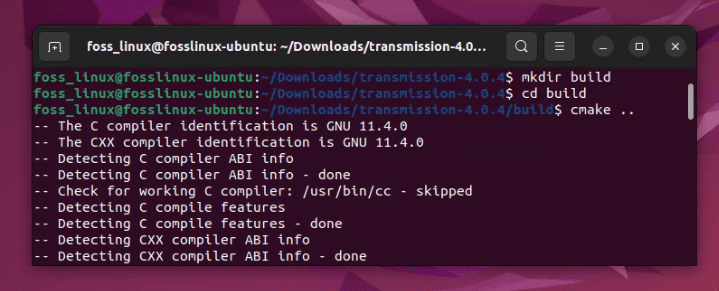
Using CMake to install Transmission
Step 3: Compiling the Source Code
With the Makefile ready, we can now compile the source code. This step often feels like watching a masterpiece come to life, piece by piece:
make
Step 4: Installing Transmission
Finally, we install Transmission, a step that feels like placing the final piece in a puzzle:
sudo make install
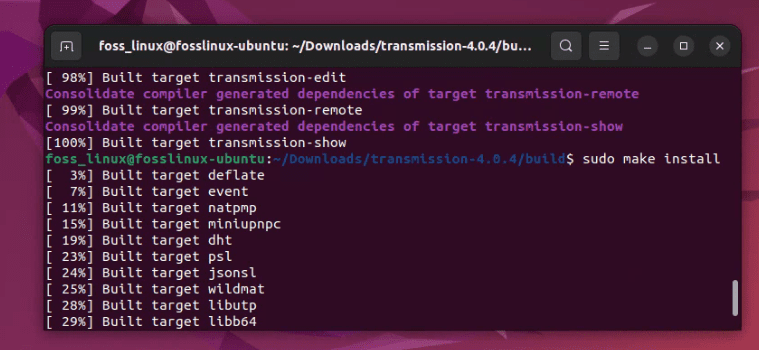
Installing Transmission
As you type this command, you can almost hear a drumroll in the background, signaling the climax of our installation journey.
Conclusion
There you go! You have successfully installed an application packaged in a .tar.xz and .tar.gz files on your Ubuntu system. I must say, the first time I completed this process, I felt like a true Linux pro, navigating through the terminal and using commands to install software.
I hope this blog has demystified the process of installing .tar.xz and .tar.xzfiles on Ubuntu. While it might seem cumbersome at first, it becomes a breeze once you get the hang of it. Remember, the Ubuntu community is always there to help you out if you get stuck.
As we wrap up this enlightening journey, I would love to hear about your experiences with installing .tar.xz and .tar.gz files in Ubuntu. Did you find it simple, or were there hurdles along the way? Share your stories and tips in the comments section.
Thank you for sticking with me throughout this blog. Until next time, happy Ubuntu-ing!
1 comment
Without a doubt this complicated way to update Firefox will lose Firefox millions of users…I’ve used Firefox for years and have never had to jump through all these hoops just to update Firefox…I don’t want to use another browser but this complicated procedure is seemingly designed to scare users away