
If you’re an Ubuntu user with a passion for pixel art or in search of a user-friendly image editing tool, mtPaint might just be what you need. This open-source software stands out in the realm of digital graphics, especially for those who value simplicity and efficiency.
In our article today, we’re going to delve into the process of installing mtPaint on Ubuntu, uncover its key features, and draw a comparison with GIMP, a more advanced image editor. This guide is designed to help you navigate the choices available and decide when to use each tool, catering to both beginners and experienced users alike.
Understanding mtPaint
Before we get our hands dirty with the installation process, let’s talk a bit about mtPaint. It’s a free, open-source graphics editing program, primarily designed for pixel art and digital painting. Known for its simplicity and low resource usage, mtPaint is an excellent choice for older computers or for users who need a straightforward, no-frills image editor.
Prerequisites
Before starting, ensure you have:
- A computer running Ubuntu (any recent version should do).
- Basic knowledge of using the terminal (command-line way) or Ubuntu Software Center (GUI way)
- An internet connection to download the necessary packages.
Installing mtPaint in Ubuntu
Method 1: Command-line way
Opening the terminal
First things first, let’s open the terminal. You can do this by pressing Ctrl + Alt + T on your keyboard or by searching for ‘Terminal’ in your applications menu.
Updating package lists
To ensure we have the latest package lists, input the following command:
sudo apt update
Output:
foss_linux@fosslinux-ubuntu:~$ sudo apt update
Hit:1 http://us.archive.ubuntu.com/ubuntu jammy InRelease
Get:2 http://us.archive.ubuntu.com/ubuntu jammy-updates InRelease [119 kB]
Hit:3 http://us.archive.ubuntu.com/ubuntu jammy-backports InRelease
Get:4 http://security.ubuntu.com/ubuntu jammy-security InRelease [110 kB]
Hit:5 https://hub-dist.unity3d.com/artifactory/hub-debian-prod-local stable InRelease
Fetched 229 kB in 2s (109 kB/s)
Reading package lists... Done
Building dependency tree... Done
Reading state information... Done
42 packages can be upgraded. Run 'apt list --upgradable' to see them.
Installing mtPaint
Now, it’s time to install mtPaint. Type in this simple command:
sudo apt install mtpaint
Output:
foss_linux@fosslinux-ubuntu:~$ sudo apt install mtpaint
[sudo] password for foss_linux:
Reading package lists... Done
Building dependency tree... Done
Reading state information... Done
The following additional packages will be installed:
gtklp
The following NEW packages will be installed:
gtklp mtpaint
0 upgraded, 2 newly installed, 0 to remove and 42 not upgraded.
Need to get 783 kB of archives.
After this operation, 2,599 kB of additional disk space will be used.
Do you want to continue? [Y/n] y
Press Y and then Enter to proceed.
Get:1 http://us.archive.ubuntu.com/ubuntu jammy/universe amd64 gtklp amd64 1.3.4-1 [180 kB]
Get:2 http://us.archive.ubuntu.com/ubuntu jammy/universe amd64 mtpaint amd64 3.40-3.1build1 [603 kB]
Fetched 783 kB in 1s (1,139 kB/s)
Selecting previously unselected package gtklp.
(Reading database ... 244692 files and directories currently installed.)
Preparing to unpack .../gtklp_1.3.4-1_amd64.deb ...
Unpacking gtklp (1.3.4-1) ...
Selecting previously unselected package mtpaint.
Preparing to unpack .../mtpaint_3.40-3.1build1_amd64.deb ...
Unpacking mtpaint (3.40-3.1build1) ...
Setting up gtklp (1.3.4-1) ...
Setting up mtpaint (3.40-3.1build1) ...
Processing triggers for desktop-file-utils (0.26-1ubuntu3) ...
Processing triggers for gnome-menus (3.36.0-1ubuntu3) ...
Processing triggers for man-db (2.10.2-1) ...
Processing triggers for mailcap (3.70+nmu1ubuntu1) ...
Verifying the installation
Once the installation is complete, you can verify it by typing:
mtpaint --version
Output:
foss_linux@fosslinux-ubuntu:~$ mtpaint --version
mtPaint 3.40
If you see a version number, congratulations, mtPaint is successfully installed!
Method 2: Installing mtPaint using Ubuntu Software Center
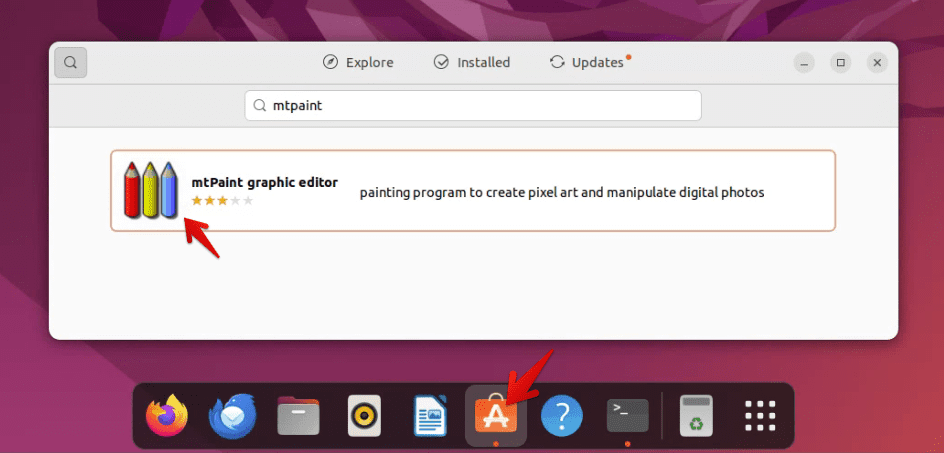
- Open Ubuntu Software Center: Click on the Ubuntu Software icon on your dock or search for it in the applications menu. The Ubuntu Software Center is the default package manager and software store for Ubuntu.
- Search for mtPaint: In the search bar at the top, type “mtPaint” and press Enter. This will display the search results including mtPaint.
- Install mtPaint: Find mtPaint in the search results, and click on it. You will see an “Install” button. Click on it. You might be prompted to enter your password to authenticate the installation process.
Installing mtPaint on Ubuntu by GUI way
- Wait for the installation to complete: The Software Center will download and install mtPaint for you. This might take a few minutes depending on your internet speed.
- Launch mtPaint: Once installed, you can launch mtPaint directly from the Ubuntu Software Center by clicking the “Launch” button, or you can find it in your applications menu.
Launching mtPaint
To start using mtPaint, you can either type mtpaint in your terminal or find it in your applications menu. It’s time to unleash your creativity!
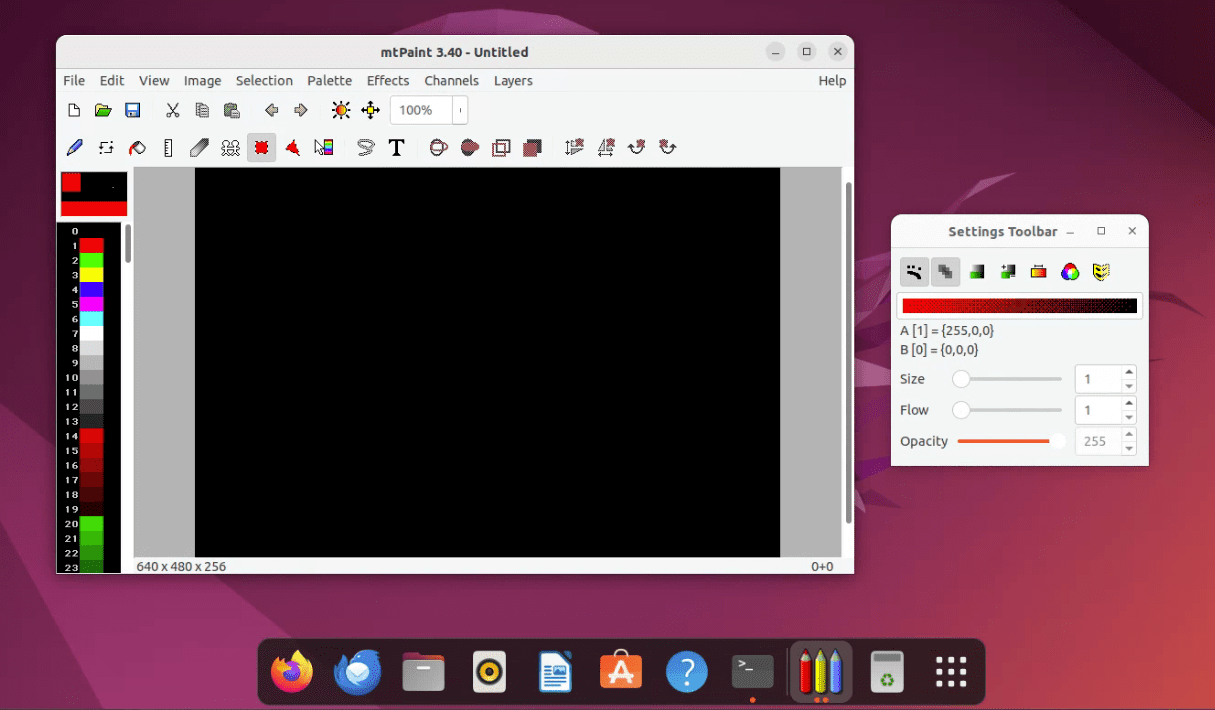
Running mtPaint on Ubuntu 22.04 LTS
Exploring the key features of mtPaint
Now that you’ve successfully installed mtPaint on your Ubuntu system, let’s explore some of its key features. I’ve personally dabbled with many of these features and have found them quite useful for various projects. Here’s a rundown of what makes mtPaint a great tool for digital artists and general users alike:
1. Pixel art creation tools
- Grid overlay: This feature is incredibly useful for pixel art, allowing you to maintain precision and symmetry.
- Pencil and brush tools: These basic tools are essential for drawing and sketching. They’re simple but effective, especially for pixel-level work.
- Custom brushes: You can create and save your own brushes, which is great for repeated patterns or textures.
2. Image manipulation
- Basic editing tools: mtPaint offers essential editing tools like crop, resize, and rotate, which are straightforward and easy to use.
- Color replacement: This feature is handy for modifying specific colors in your image without affecting the rest of the palette.
3. Palette and color management
- Palette editor: You can create and edit custom palettes, a must-have for pixel artists who need consistent color schemes.
- RGBA and indexed modes: mtPaint supports both RGBA (true color) and indexed color modes, giving you flexibility depending on your project’s needs.
4. GIF animation
- Frame-by-frame animation: Though basic, mtPaint allows you to create simple GIF animations by working on frames individually.
5. User interface and accessibility
- Customizable interface: You can rearrange and adjust the toolbars and panels according to your workflow.
- Language Support: mtPaint is available in multiple languages, making it accessible to a broader audience.
6. File format support
- Multiple formats: mtPaint supports various file formats, including BMP, GIF, JPEG, PNG, and TIFF, among others.
7. Low resource usage
- Great for older systems: One of mtPaint’s biggest advantages is its ability to run smoothly on older or less powerful hardware, making it accessible to virtually anyone.
Personal experience and tips
Having used mtPaint for various small projects, I find its simplicity to be its biggest strength. For those who are just starting with pixel art or need a tool for quick image edits, mtPaint is a perfect choice. It doesn’t have the complexity of GIMP or Photoshop, making it great for beginners.
Uninstalling mtPaint using the command-line
If you decide that mtPaint is no longer needed on your Ubuntu system, you can easily uninstall it using the command-line, which is a quick and efficient method. Here’s how you can do it:
Steps to uninstall mtPaint via terminal
- Open the terminal: You can open the terminal by pressing
Ctrl + Alt + Ton your keyboard or by searching for ‘Terminal’ in your applications menu. - Uninstall mtPaint: To remove mtPaint from your system, enter the following command:
sudo apt remove mtpaint
Output:
Reading package lists... Done
Building dependency tree
Reading state information... Done
The following packages will be REMOVED:
  mtpaint
0 upgraded, 0 newly installed, 1 to remove and X not upgraded.
After this operation, YYY kB disk space will be freed.
Do you want to continue? [Y/n]
Here, press
Yand thenEnterto proceed. - Clean up: After uninstalling, it’s a good practice to remove any unused dependencies and clean up the package cache. You can do this by running:
sudo apt autoremove
sudo apt clean
This helps in freeing up space by removing packages that were installed as dependencies for mtPaint but are no longer needed.
- Verify uninstallation: If you want to make sure that mtPaint has been successfully removed, you can try launching it from the terminal by typing
mtpaint. If it’s been removed, you’ll receive an error message indicating that the command is not found.
Why use the command-line for uninstallation?
- Speed and efficiency: The command-line method is often faster than navigating through GUI-based package managers.
- Precision: It ensures that you are explicitly removing the software you intend to, without any ambiguity.
- Learning experience: For those new to Ubuntu or Linux, using the terminal can be a valuable learning experience, enhancing familiarity with command-line tools and operations.
Comparing mtPaint and GIMP: When to use each
In the world of open-source image editing tools, both mtPaint and GIMP have their unique places. As a user who has spent considerable time with both, I’ve noticed key differences that make each suitable for specific tasks. Understanding these differences can help you choose the right tool for your project.
Key differences between mtPaint and GIMP
1. Purpose and focus
- mtPaint: It’s primarily designed for pixel art and basic image editing. Its toolset is geared towards simplicity and efficiency in these areas.
- GIMP (GNU Image Manipulation Program): GIMP is a more comprehensive image editing tool, often touted as a free alternative to Adobe Photoshop. It’s suitable for detailed photo editing, complex digital art, and graphic design.
2. User interface and complexity
- mtPaint: The interface is straightforward and uncluttered, making it easy for beginners to navigate.
- GIMP: GIMP has a more complex interface with a steep learning curve, catering to professional or advanced users who require a wide array of tools and features.
3. System resources and performance
- mtPaint: Being lightweight, it runs smoothly on older or less powerful hardware, making it accessible for almost any system.
- GIMP: GIMP is more resource-intensive, requiring a reasonably good computer to run smoothly, especially when handling large or complex images.
4. Toolsets and capabilities
- mtPaint: Offers basic tools like pencil, brush, color replacement, and simple GIF creation. It’s excellent for pixel-level work and simple image manipulations.
- GIMP: Provides a comprehensive set of tools including layers, masks, advanced color adjustment, filters, and plug-ins, suitable for detailed and professional-grade image editing.
When to use mtPaint
- Pixel art: Ideal for creating pixel art or working on pixel-level details.
- Simple image editing: Best for quick edits like cropping, resizing, or basic color adjustments.
- Older hardware: A great choice if your computer is not very powerful.
- Learning basics: Perfect for beginners who are just starting with digital art or image editing.
When to use GIMP
- Advanced photo editing: Use GIMP for detailed photo manipulation, color correction, and retouching.
- Complex digital art: If you’re creating intricate digital paintings, concept art, or textures for 3D models.
- Graphic design: Suitable for designing graphics, layouts, and compositions involving multiple elements and layers.
- Professional work: Ideal for professional artists and photographers who need a robust set of tools.
Conclusion
After walking through the installation process, discussing the noteworthy features of mtPaint, and comparing it with GIMP, it’s clear that mtPaint holds a special place in the world of image editing tools. Its focus on pixel art and basic image editing tasks makes it a fantastic choice for those who appreciate simplicity and ease of use. Particularly on Ubuntu systems, where users often seek out lightweight and efficient software, mtPaint stands out as an optimal choice.