
Windows users that are looking to use Linux or at least try it out for the first time may seem at a loss on how to go about doing it. The first thought is that a user would need a separate machine just for the Linux software or that they would need to replace Windows with Linux on their Windows machine.
But this is not the case. This article will explain how to install Ubuntu on a Windows host machine using VirtualBox.
Installing Ubuntu on VirtualBox on Windows
To follow this guide, you will need to download Ubuntu and Virtualbox.
Installing VirtualBox:
Install Virtual Box
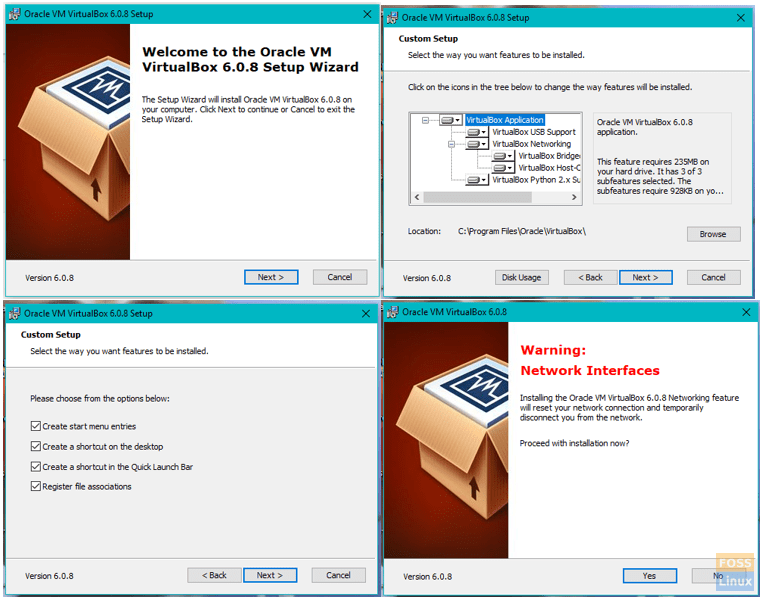
Once you have downloaded VirtualBox, navigate to the download folder and double-click the VirtualBox installer.
-
- The Welcome Screen is the first screen to appear. Click Next to move on.
- You will choose which components you wish to have installed. I recommend leaving the default options selected. Click Next to go to the next screen.
- On the Custom Setup screen, choose which folder on which you want VirtualBox to be installed. Click Next.
- On this screen, you will choose whether or not to have a desktop shortcut created. Click Next again.
- It will be the Network Warning screen, and you will select Yes.
- You are now ready to install VirtualBox, so click Install to start the installation.
Note: During the installation of VirtualBox, you may be asked to allow permissions to install the application and you will want to be sure to allow these permissions so that VirtualBox can install completely.
Setting Up VirtualBox:
Virtual Box Setup
Once the installation of VirtualBox is complete, it is time to set it up and get everything ready to install Ubuntu.
-
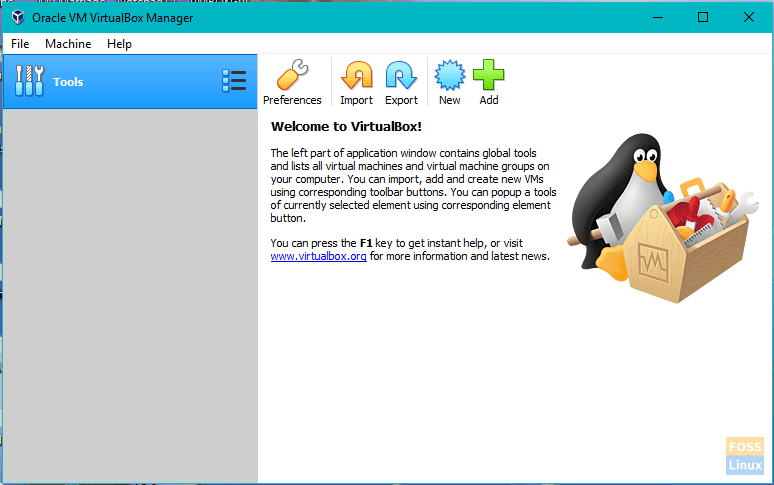
- After the installation, a screen will appear with an option to Start Oracle VM VirtualBox after Installation. Please be sure the box is checked beside this option and then click Finish to complete the installation.
- If the box in the previous step was checked, then VirtualBox should have started and shown you the main screen. Otherwise, you will need to double-click the shortcut icon on the desktop or the icon within the folder you installed VirtualBox within.
- On the main screen click New in the toolbar at the top left of the window.
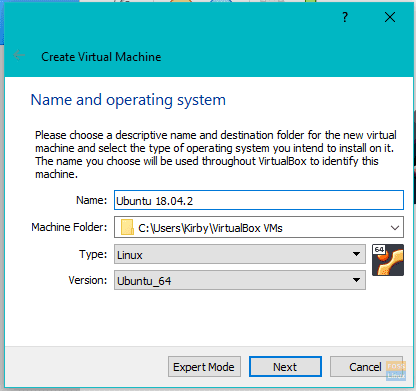
- On the next screen, you will define the type of virtual machine that you want to create.
-
- Enter a name into the Name box. (e.g. Ubuntu)
- Select Linux as the type.
- Choose Ubuntu as the version.
- Click Next.
-
Virtual Box Setup
-
- On the next screen, you will allocate memory to the virtual machine. You don’t want to go below the minimum memory specified, but you also want to make sure that enough memory is left so that your Windows operating system can keep running. If you have enough memory, I recommend increasing the bar to between 2 gigabytes (2048 megabytes) and 4 gigabytes. Once you have moved the slider to your selection, click Next.
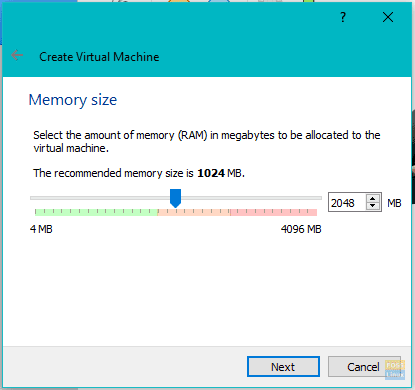
Creating Virtual Machine – Memory Size
-
- The next step is to create a virtual hard drive.
-
- Select Create a virtual hard drive now and then click Create.
- Next, you will be asked to select what type of hard drive you want to create. By default, VDI is selected, which is native to VirtualBox. Make sure VDI is selected and click Next.
- Select the desired hard drive type. A fixed size hard drive is created with a maximum size that you choose while a dynamically sized hard drive adds space as needed. I recommend going with a fixed size hard drive for better performance. Once your desired hard drive type is selected, click Next.
- Now you will need to specify the amount of disk space that will be allocated to the Virtual Machine. You should not go below the minimum, and if you can spare the space, I recommend at least 20 gigabytes. Choose where the virtual machine will be saved and then specify the disk size. Once done click Create.
-
- The next step is to create a virtual hard drive.
Start Virtual Machine
-
- With the Virtual Machine created, it is time to start it. Press the Start button on the toolbar.
- With the first boot, you will be required to select a startup disk.
-
- Click the folder icon.
- Navigate to the downloads folder or to where you downloaded the Ubuntu file to and select Ubuntu ISO.
- Click Start.
-
Installing Ubuntu within VirtualBox:

Ubuntu Install
Ubuntu will now start as a live version within VirtualBox to go through the steps to install it.
-
- Choose the installation language and click Continue.
- The next screen will show you the computers statistics. I recommend plugging into a power source if you are on a laptop. There will be two checkboxes at the bottom of the screen. You will need to choose whether or not to install updates as you go. Then choose whether or not to install 3rd party software. For these choices, I recommend installing the updates as you go and waiting to install 3rd party software post installation.
- Click Continue.
- The next step is partitioning the hard drive. Don’t panic as this is strictly for the virtual hard drive on VirtualBox and will not affect Windows. Select Erase disk and install Ubuntu.
- Click Install Now.
- Choose your location by clicking on the map. It sets the timezone. Click Continue.
- Choose the language for your keyboard.
- Choose the type of keyboard.
- Click Continue.
- On the next screen, you will fill in who you are.
-
- Enter your name.
- Choose a name for your virtual machine.
- Create a username.
- Create a password and repeat the password.
- Choose whether to automatically login or require username and password to login.
- Choose if you want the home folder encrypted.
- Click Continue.
-
- Once the installation is complete, you will need to reboot the virtual machine. It can be done by clicking the icon in the top right corner of the Ubuntu desktop and clicking restart.
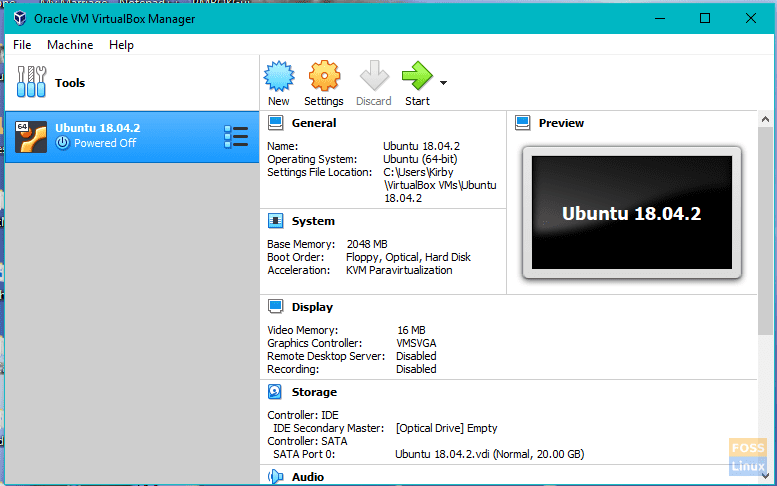
Ubuntu is now good to go, and it’s time to enjoy!