
SD Cards and portable USB drives are among the many flash storage devices we have in the market today. SD Cards are commonly used in smartphones and cameras to hold personal data and digital information.
If you delete this data the usual way, it is possible to recover it using various data-recovery tools we have in the market today. Therefore, if you are working with sensitive information, you need to wipe it completely, such that it is difficult to recover.
Before looking at some of the ways to wipe data securely on SD cards and USB drives, we need to understand why it’s more complicated compared to ordinary hard drives.
Flash storage devices require a block/cell completely wiped out of any data before any other data is written on it. Having this in mind, the overall process of writing data to SD cards would be longer, were it not for new technology implemented on these devices.
Most of these flash storage drives have a 10-20% more on-board storage than the indicated capacity and a memory controller. When writing any data on a flash storage media, the memory controller will dynamically map all empty cells, and during low load, it will wipe the unmapped blocks/cells. This feature raises a security issue of possible data recovery.
Lack of a tool that can leverage the memory controller, your operating system has close to zero chances of addressing every single cell on these devices. A lot of manufacturers today are providing tools that you can use to wipe data securely on their devices. However, if your current vendor doesn’t have such a tool, this article will provide you with several workarounds.
Secure wiping the data in a USB drive or SD Card
We will look at both Graphical (GUI) and command-line methods. Our distro of choice is Ubuntu 19.04 (Disco Dingo); however, it should work with all other Ubuntu releases. Previously, we did an article on – How to Format a USB drive on Ubuntu using both graphical and command-line methods. Be sure to check it out.
Wipe the data completely using the Disks Manager
It is one of the most straightforward methods, even for Linux newbies. The Disks utility comes preinstalled in all Ubuntu releases; therefore, no need to run any installation (apt-get install …) commands.
Step 1). Insert your USB drive into any working port on your PC. Ensure it’s listed on the Ubuntu file manager.
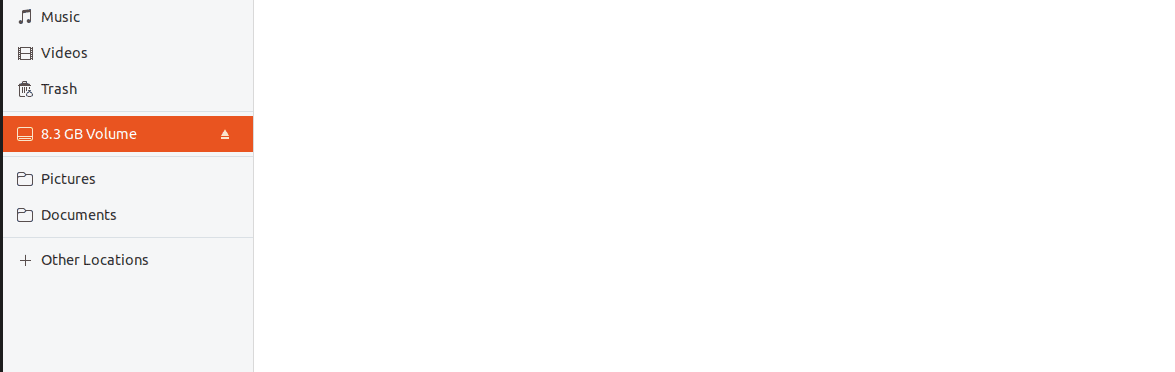
USB Drive listed on the file manager
Step 2). Launch the Disks utility.
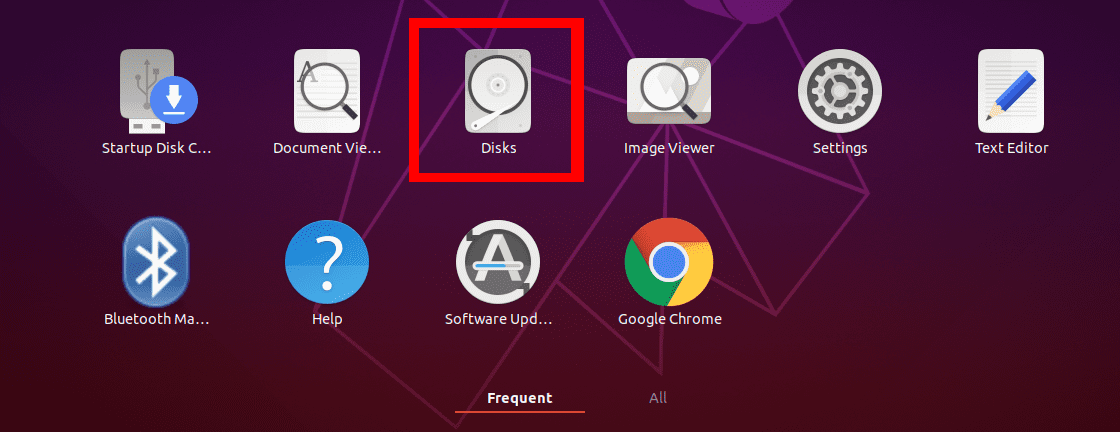
Launch Disks utility from the applications menu
Step 3). Select your USB drive or SD card.
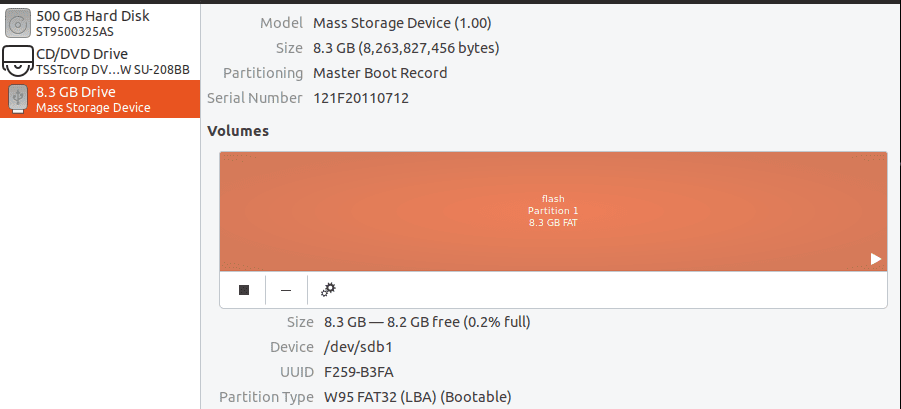
Select the USB drive or SD Card you want to wipe data.
Step 4). To completely wipe data, we will use the usual format process only that we will introduce one more feature. Click on the Settings icon and select the format option. It is illustrated in the image below.

Click-on-the-format-button
Step 5). A window will pop-up where you will be required to set the volume label and the file system type you want to use. One more option we are going to use here is the Erase button. Click on it and ensure it turns to green. Click Next to continue.
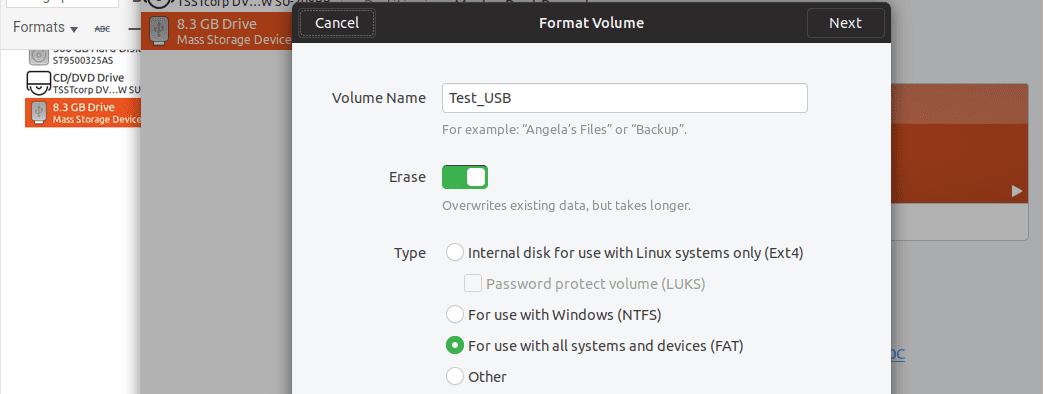
Set Volume name and turn on the erase button
Step 6). A window will pop-up listing all the set options and a warning that all data on will be lost. Click the Format button to continue.
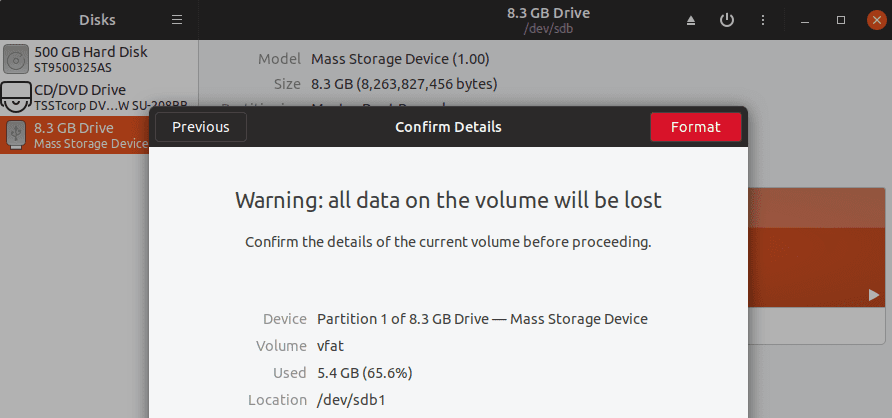
The Format warning screen
This process will take time than usual. It is also dependent on the size of the USB drive or SD Card.
Wipe data completely using the DBAN tool
One more graphical tool we can utilize to wipe data on a USB drive or SD card securely is the Darik’s Boot and Nuke (DBAN). It is a self-contained utility that completely wipes data on any storage device connected to the computer.
It is a Linux open-source tool that runs on a Live USB drive. You will, therefore, need to change the boot order of your laptop and use the bootable USB drive of DBAN. Download DBAN ISO image from the official website and burn it on a USB drive. You can check our article on the MultiBootUSB tool used to create a multi-boot USB drive.
Step 1). Boot your PC using a bootable USB drive of DBAN. You should see the DBAN welcome screen appear. Press Enter key to continue.
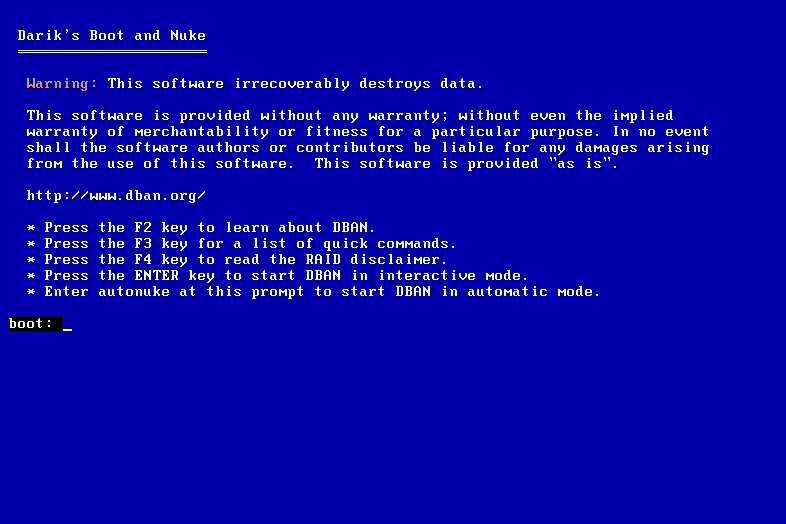
DBAN Boot screen
Step 2) Choose which storage device you want to wipe data. You can navigate using the UP and DOWN arrow keys and select using the Space Bar key. Press Enter to continue.
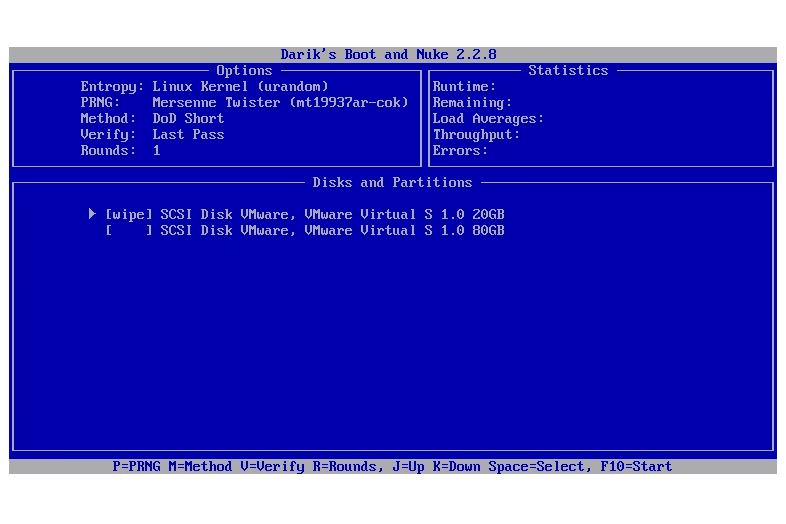
Select the Storage media you want to wipe.
Step 3). Wait for DBAN to finish erasing the drive contents. You will see the general progress displayed in a percentage format. There is no pause or stop option on this screen. You, therefore, need to be careful when working with this tool.
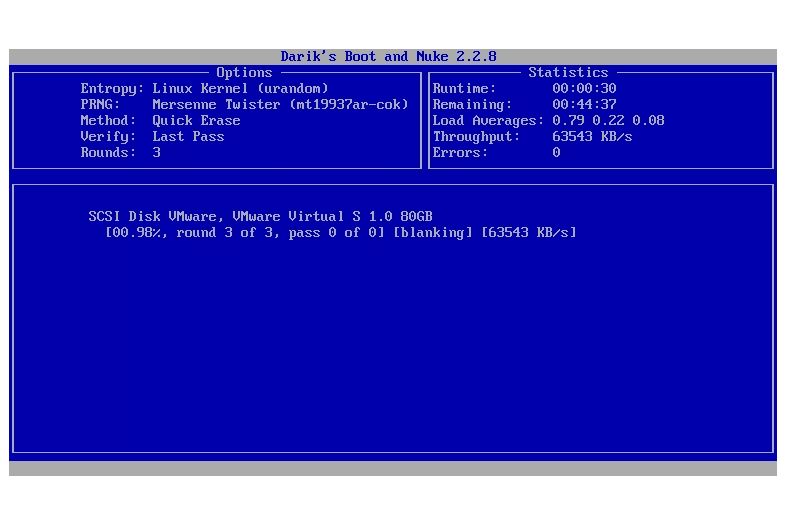
DBAN Wiping Data process.
Step 4). Once the process is completed, you will see the DBAN notification screen.
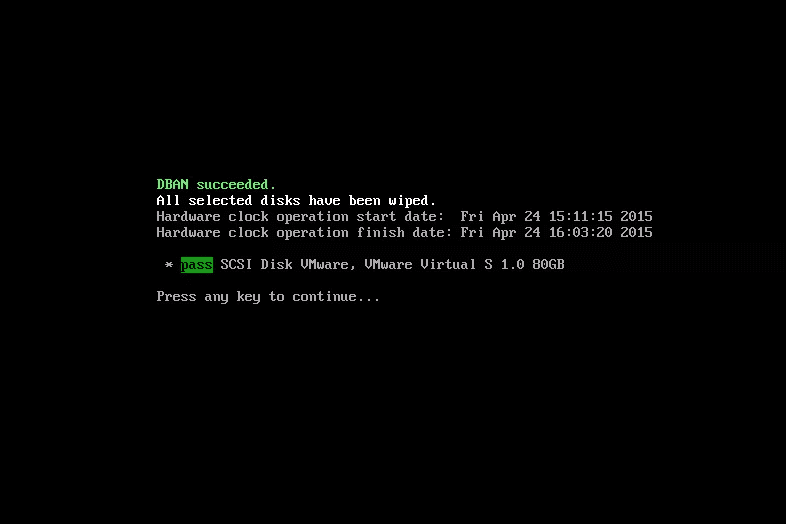
DBAN Process completed successfully
We have looked at two ways you can completely wipe data using graphical utilities. With everyday advancements in technology, we can’t say it will be impossible to recover the data, but it will be challenging. In case you are not contented with the above tools, lets now go the command-line way.
Wipe data using Terminal Commands
It is no surprise that most readers will skip directly to this section. The Terminal is one of the most potent utilities we have in Ubuntu or any other Linux distribution. There are two powerful commands that we will work with for this post, and luckily, all of them come preinstalled.
The DD command
It is one of the most common methods used to wipe data on Linux distributions securely. It is not a fast process and might take a while, depending on the size of the USB drive or SD card. The best way to use the DD command is to execute it overnight and leave your PC running. In the morning, when you wake up, everything should be set.
By running the dd –help command on the Terminal, you should be able to see all the features this tool has to offer.
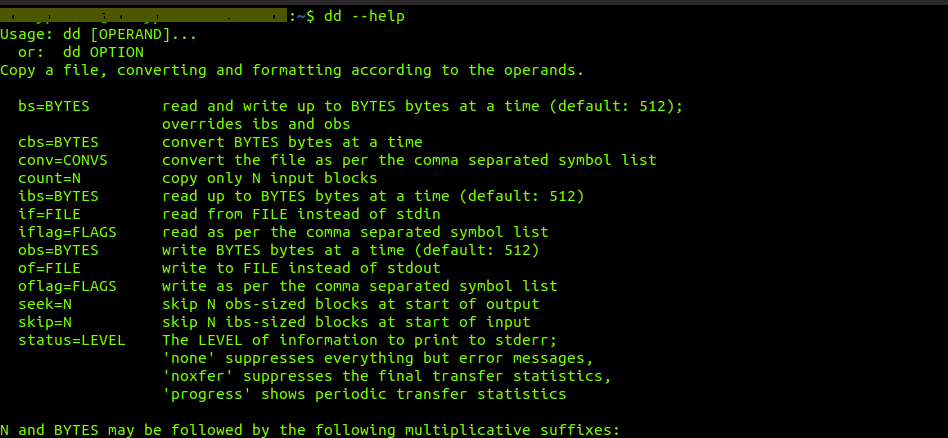
dd –help command image
Step 1). Insert the USB Drive or SD card that you want to wipe data. Ensure it is not mounted. Otherwise, unmount it using the file manager or the umount command.
sudo umount [device_label] -l
e.g
sudo umount /dev/sdb -l
In case you are not sure of your device label, execute the following command:
sudo fdisk -lStep 2). Now let’s wipe all the data on our USB or SD card. Execute the command below.
sudo dd if=/dev/urandom of=/dev/devicename bs=10M
e.g
sudo dd if=/dev/urandom of=/dev/sdb bs 10M
You can execute this command severally to ensure more difficulty in any data-recovery attempts. Filling the drive with random data multiple times will cause the memory controller to remap the cells and eventually overwrite enough of them, making your device more secure and complicated to recover data.
The SHRED command
Another command-line option is using the SHRED command. One being advantage is that you can wipe particular files in the USB drive/SD card or the entire storage media. It comes preinstalled in most Linux distributions, including Ubuntu.
Execute the shred –help command and see what features this command has to offer.
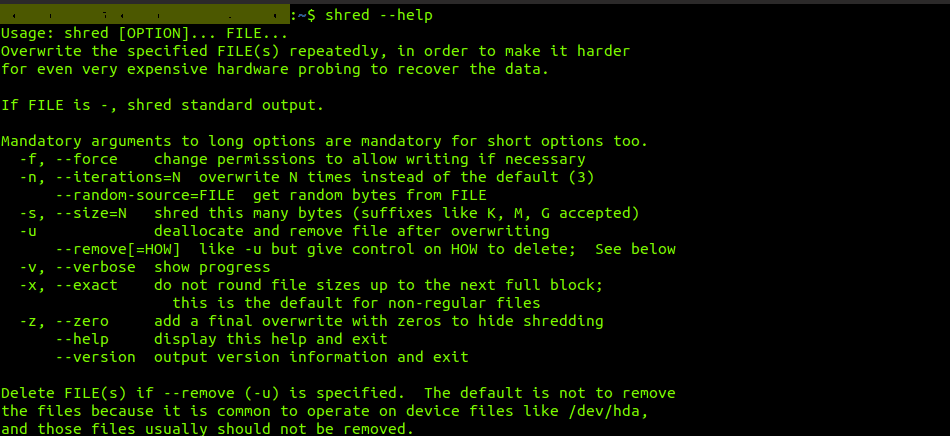
Shred –help command
Step 1) Shred command to wipe out particular files in a USB drive or SD card.
shred -u image1.png file1.zip test.docx
The above command will wipe out three files at a go – image1.png file1.zip and test.docx. Note, you have to change directory to the device you are wiping data.
Step 2). Shred command to wipe all data in an entire USB drive or SD card. Just like the dd command, shred also takes quite some time.
sudo shred -vfz [device_label]
e.g
sudo shred -vfz /dev/sdb
Conclusion
Those are some of the methods you can use to securely wipe data on a USB drive or SD card using Ubuntu. In case your USB drive or SD card vendor has provided a utility to wipe data completely, then make an effort of using that too. If you find this article useful, don’t forget to share the link with friends.
3 comments
USB hard disk techniques/software list here are not appropriate for USB-SSD and SD Cards. The problem is described at the start of the article, but it then goes on to recommend techniques that use logical block overwriting.
(I’m speaking as an individual, not on behalf of my company.)
it is important since I use etcher for making bootable usb. I refuse to use anything ubuntu and debian is not as good as I thought it would be. I refuse to use the terminal since I consider it not to be user friendly. I allways manage to find programs to solve the problems i meet. I thank you anyhow for understanding the problems and proposing a solution.
sudo shred -vfz /dev/sdb
Should be the first line of this article.