
In the Linux community, one thing is common between almost all of the users: trying out different Linux distributions. Most of the Linux based distributions have a great way of being tested as they provide ISO images for creating a Live USB.
In this method, the distribution is installed on a USB drive, which is later used as the boot device. You boot into the distribution without modifying your system configuration – pretty neat.
Now, there are different methods of creating a live USB, but we’re going to talk about a particular program today: Etcher.
Etcher Features
Etcher has recently become very popular in the Linux community, due to its simplistic nature. We have recommended on multiple articles to use Ether to create a live USB drive. Etcher can also be used to flash SD cards, like for the Raspberry Pi operating systems. Let’s talk about the features of Etcher.
1. Beautiful Interface
The interface is the most fantastic thing about Etcher. Historically, bootable drive creators have been not so good looking, complicated, and overall an unpleasant experience. Although Etcher, it has a pretty minimal interface. There are only three buttons in the window:
- Select Image: To select the location of the image of the operating system that you want to create a bootable drive
- Select Target: To select which of the external drives is to be used to create the bootable drive
- Flash! : To begin the process
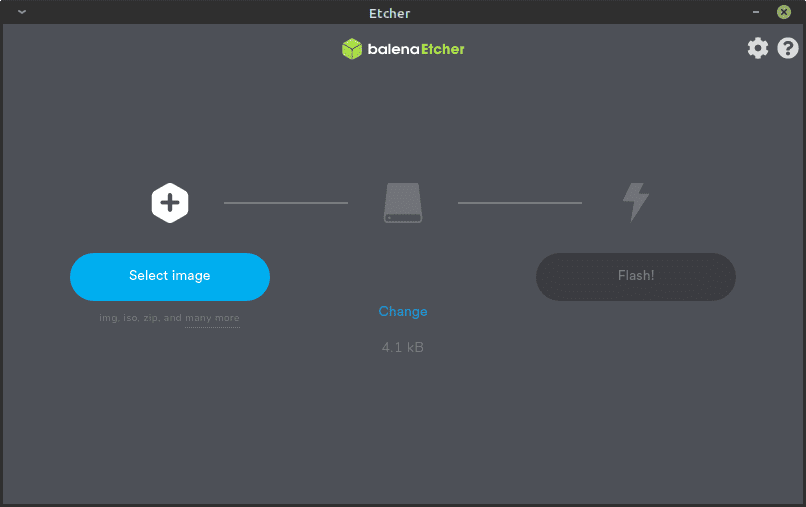
Interface
There are small buttons for opening up the preferences window, and to get help on the top right corner.
2. Validation
This is a unique feature of Etcher. After the image has been flashed to the USB drive or the SD card, Etcher runs a validation process that confirms that the flashing has been done correctly. This is helpful because often, it is found that the flashed drive is corrupt while attempting to boot from it. The validation process prevents that to a large extent.
3. Drive Selection
Etcher chooses one of the external storage devices by itself, and it is generally the obvious choice of a USB drive, according to the storage space. It happens many times that accidentally, the flashing gets done to hard drives or some device that you don’t want to use. To make things better, Etcher also lists the storage space of the device, along with the name for better distinction.
Install Etcher on Linux
Ubuntu/Debian and their derivatives
The repositories of Etcher are available for these systems. For installation, enter these commands:
echo "deb https://deb.etcher.io stable etcher" | sudo tee /etc/apt/sources.list.d/balena-etcher.list
sudo apt-key adv --keyserver hkps://keyserver.ubuntu.com:443 --recv-keys 379CE192D401AB61
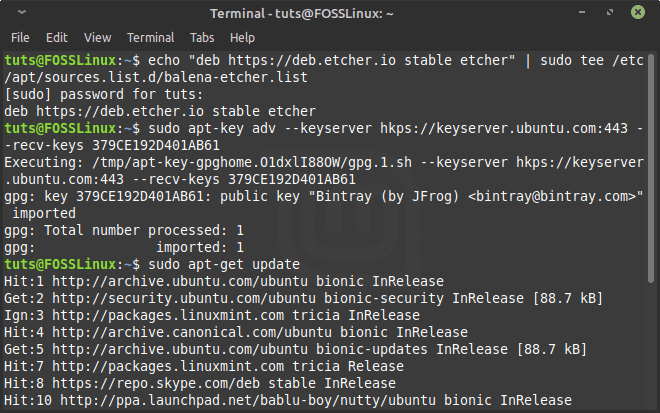
Repository addition
This adds the repositories. Now an update is required:
sudo apt-get update
And you can install Etcher:
sudo apt-get install balena-etcher-electron
Uninstall
If you want to remove Etcher, you’ll also need to remove the repositories. Here’s how:
sudo apt-get remove balena-etcher-electron
sudo rm /etc/apt/sources.list.d/balena-etcher.list
sudo apt-get update
Fedora/CentOS and their derivatives
Repositories of Etcher need to be added first to install it. Enter these commands to achieve that:
sudo wget https://balena.io/etcher/static/etcher-rpm.repo -O /etc/yum.repos.d/etcher-rpm.repo
Now install Etcher:
sudo dnf install -y balena-etcher-electron
Uninstall
To uninstall Etcher and remove repositories, enter:
sudo dnf remove -y balena-etcher-electron
sudo rm /etc/yum.repos.d/etcher-rpm.repo
sudo dnf clean all
sudo dnf makecache
Solus
On Solus, eopkg can directly be used to install Etcher.
sudo eopkg it etcher
Uninstall
Etcher can be uninstalled simply using:
sudo eopkg rm etcher
Other distributions
There are only DEB and RPM specific packages available, so for other distributions, Etcher has an AppImage file. The AppImage file is standalone and runs on pretty much any distribution. You can find the download link to the AppImage right here on the official website.
Install Etcher on Windows and macOS
Windows and macOS users can create a Linux Live USB drive from their system too.
Download Etcher for Windows and macOS
In the download page, click on the drop-down list and select your OS accordingly. Once installed, the usage is the same, which we will be discussing in the next section.
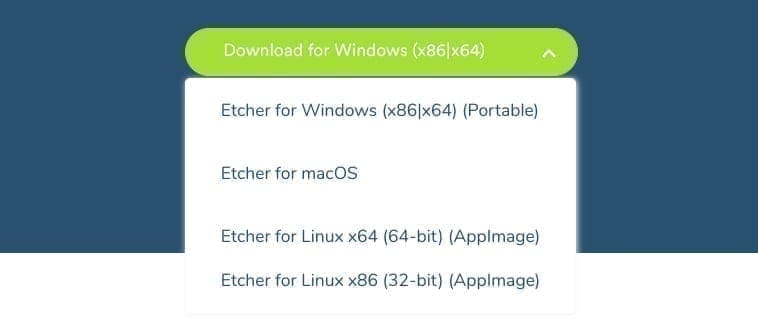
Etcher download options
Usage
The usage is pretty simple. Make sure that you have the image of the operating system. This can be in various formats, most commonly ISO, IMG, Zip, etc. Now, launch Etcher.
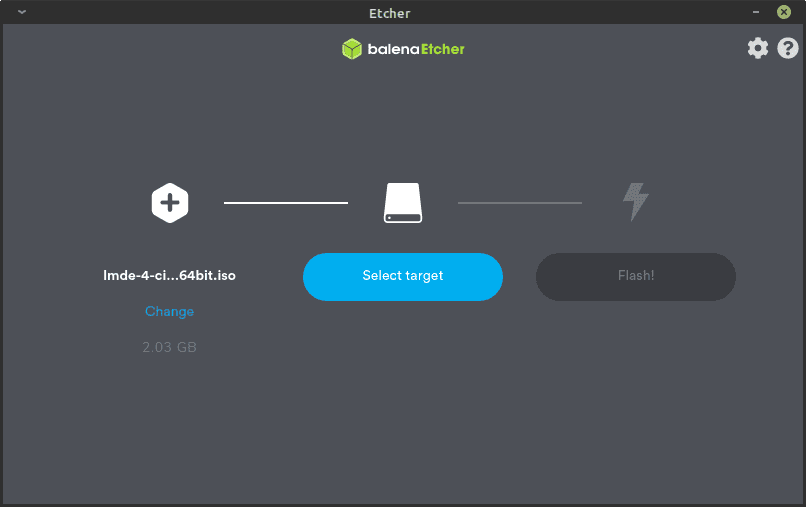
1. Choose an image
The first prompt on Etcher is to choose the location of the image file of the operating system to be flashed. Choose the image file by clicking ‘Select Image.’
Selecting an image file
2. Choose the removable drive
Now the next step is to proceed and choose the desired removable drive option by clicking on ‘Select Target.’
3. Flash!
Now click on the ‘Flash!’ button. This will prompt you for the administrator password. Enter the password, and the flashing process will begin.
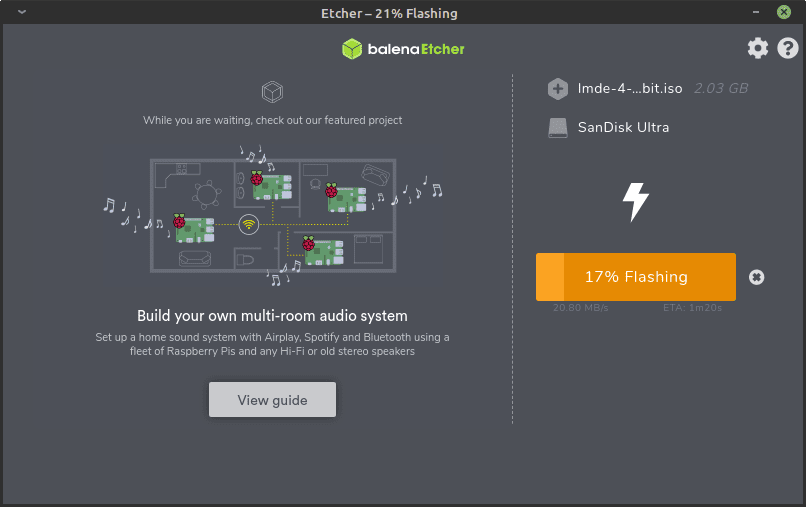
Flashing begins
As seen in the screenshot below, the validation is also done after the flashing completes.
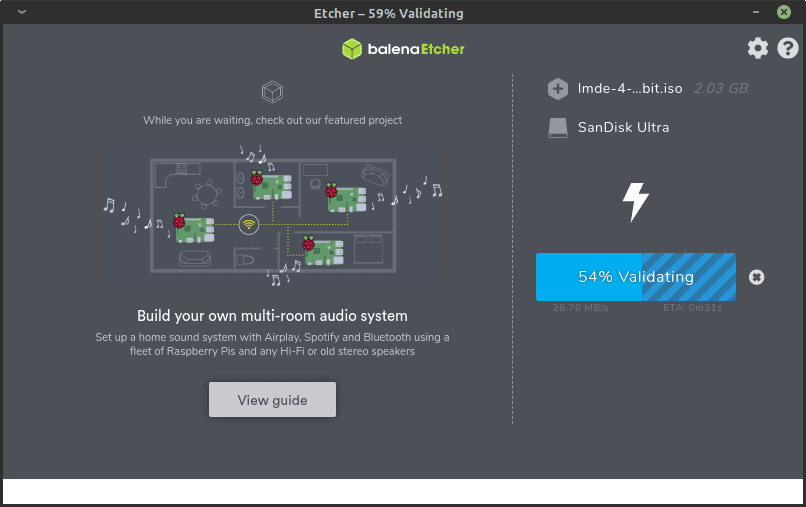
Validation
Conclusion
Etcher makes one of the most common tasks of a Linux enthusiast easy. It has a beautiful interface, works well, works on everything, and has a satisfying result. On top of that, it is also quite faster than the other methods. If you have any questions, feel free to use the comments section.
1 comment
This tool is supposed to cut a running Linux to a USB device but the only options are from: a file, a URL or disk?