
Vim is one of the most popular and celebrated text editors in the history of Linux. For those of you who don’t know, Vim is a command-line based text editor that has been around for a very long time. People who use Vim often swear by it, and there are justifiable reasons as to why Vim is such a legendary editor. First, a little introduction:
Introduction
The name ‘Vim’ is a combination of the words ‘Vi Improved.’ Vi was a text editor in the original Unix system. Vim is known to be one of the most reliable text editors, and while it was originally written for Amiga, it has been made cross-platform to every operating system. Some distinct and well-implemented features of Vim are:
Keyboard Shortcuts
This is the unique feature of Vim. There are a lot of keyboard shortcuts for almost everything that you would have to do, and it makes your productivity go to a uniquely higher level. Since Vim is command-line based, there is no involvement of a mouse, and getting familiar with the key bindings is the essence of Vim. We will discuss some of these shortcuts is much more detail later on.
Plugins
Thanks to its so many years of existence, the Vim user community has developed a lot of plugins for it to make the workflow even smoother. Plugins are intended to make the work more comfortable, no matter what language you are working with. For example, I was recently working on a LaTeX document, and using the Vim-LaTeX plugin helped a lot. Vim has a plethora of plugins for many different purposes. Might be a fancy tree-structured file browser, or some more productivity hacks.
Versatility
Vim has been the editor of the preference of a lot of users for long years. Due to this, Vim has support for almost every language that you could think of. The highlighting and indentation of most common languages are built-in. It is an editor that was built in the ’80s, so I need not say that it performs well no matter what hardware you have, or on what device you are, as long as it supports Vim.
VIM Installation and Everything You Need to Know
There is a chance that your system may not have Vim installed. To check, enter:
vim --version
If you see information about Vim in the terminal, you have it on your system.
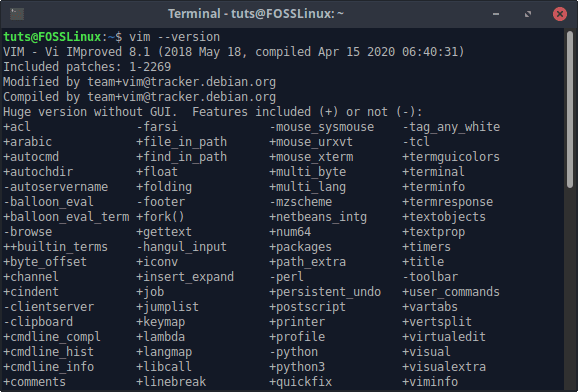
Vim Version information
If you don’t, you can install it with the following commands:
Ubuntu/Debian and their derivatives
sudo apt install vim
Fedora
sudo dnf install vim
Usage
Now, to explain how to use Vim, we are going to work through a text file that we need to create. Along the way, I will tell you how to get various things done so that we can learn how to work with Vim efficiently. An important thing to remember is that everything is done through the terminal. Whatever I mention here, I probably mean to do it in the terminal. Off we go, then.
Creating/Opening a file
The first part of a text file is opening/creating it. For creating a file, all you have to do is go to the location where you want the data to be and enter this command.
vim <Filename>
If a file with the same name already exists, it will be opened. This means that you can open files in the same way. There is one more way of opening a file. First, just open Vim in the terminal:
vim
Now, enter:
:e <Filename>
As you start typing, you will notice that whatever you are writing starts to appear on the bottom of the window. What you just wrote is a command! Almost all the commands that don’t have to do with a specific character, word, or line begin with the ‘:’ character.
We have successfully opened a file. Let’s go on to write something in it.
Starting Writing
After opening the file, if you start typing in random characters, you will notice that they are not getting written. Why is that? The reason is that you are still in what is called the ‘Normal’ mode. Vim starts in this mode by default. In the Normal mode, you can enter various commands to the file. You can still navigate through the data, however. To start writing, just press the I key. This will make Vim go into the Insert mode. You will see that it is in insert mode, as a string of “– INSERT –” will appear at the bottom of the window. Now you can start typing away. This is important to note:
To exit NORMAL mode and enter INSERT mode, press I.
To exit INSERT mode and enter NORMAL mode, press ESC.
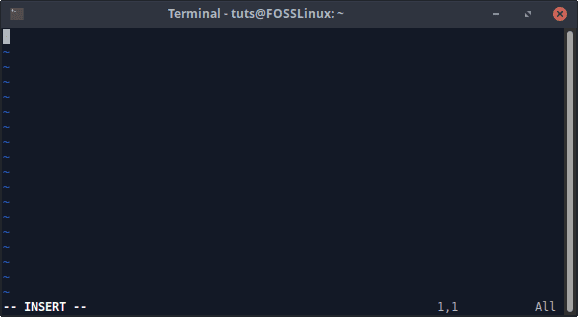
Insert Mode
Reference Methods
The following tasks that are writing and editing text require the knowledge of reference to the text. You have to know how to select the text that you desire to change. There are four of them:
e:
Apply from the position of the cursor to the end of the current word.
w:
Apply from the location of the cursor to the beginning of the next word.
0:
Apply from the position of the cursor to the beginning of the line.
$:
Apply from the position of the cursor to the end of the line.
You can also apply this to multiple words/lines. For example, if you want to implement something till the end of two words, type in 2e. These methods will have different applications combined with other commands, as we will see later.
Navigation
Vim has numerous ways of navigation. These majorly are:
- Arrow keys: These will help you go around the file in obvious fashion (towards the directions the keys are pointing).
- Vim traditionally uses H, J, K, and L for navigation, instead of the arrow keys. The sequence is:
- H: Left
- J: Down
- K: UP
- L: Right
- From any given position in a line of the file, the reference methods mentioned above will work. For example, if you press 0 from any point, the cursor will move to the beginning of the line. Similarly, $ will bring you to the end of the line, e to the end of the current word and w to the beginning of the next word.
- Pressing Shift+G brings you to the end of the file while pressing GG brings you to the beginning of the file.
- You can also move to a specific line in Vim. In Normal mode, just enter the line number, and press Shift+G. For example, if I want to go to line 17, I have to type in 17 and then press Shift+G.
These were some basic navigation methods in Vim.
Text Insertion
The text insertion is nothing much to explain after you have entered the Insert mode, but here are a few tricks that you will find it useful.
If you are at a line and want to append to it (as in continue writing at the end of the line), just press Shift+A from any position in that line, and the cursor will be moved there in Insert mode.
Suppose you want to write in a new line just below the line that you are in, press O at any position in the current line. If you’re going to write in a new line just above the current line, press Shift+O from any position. In both cases, you will be taken to a new line in Insert mode.
Text Replacement
The next useful thing in Vim is the commands to replace text. Here, we are also going to use the reference methods that we talked about. The basic command is:
- To replace one character, move the cursor to that character and press r. Whatever character you type next will replace that character.
- To replace text from the cursor position to the end of the word that you are on, press ce. Start typing in the required text after that.
- To replace text from the cursor position to the end of the line, press c$.
- To replace text, the cursor position to the end of the line, press c0.
- There is also a “Replace Mode”. From the position you want to begin in, press Shift+R and all the text that you type in after that will replace whatever text is next, as far as you type.
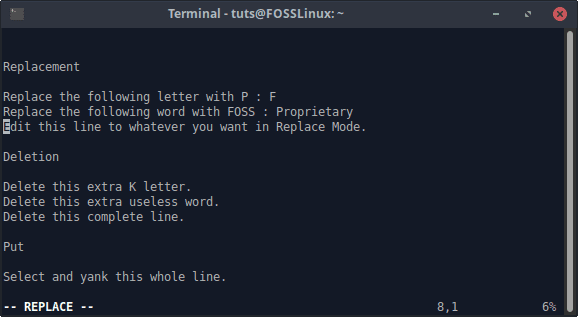
Replace Mode
You can also use cw if you want to replace the gap after the word as well, but one gap or not doesn’t make much of a difference.
Text Deletion
Now that you have had a basic understanding of the usage of reference methods, text deletion commands are going to be a piece of cake. Alright:
- For simple one character deletion, go to that character and press x.
- To delete from the cursor position to the end of the word that you are in, press de.
- To delete from the cursor position to the end of the line, press d$.
- To delete from the cursor position to the beginning of the line, press d0.
- To delete the whole line from any position in the line, press dd.
Just a reminder, if you want to delete two words at once, as mentioned earlier, you can use d2w. Okay, this is a milestone; you are through the basic editing part. Now we move on to the more advanced things.
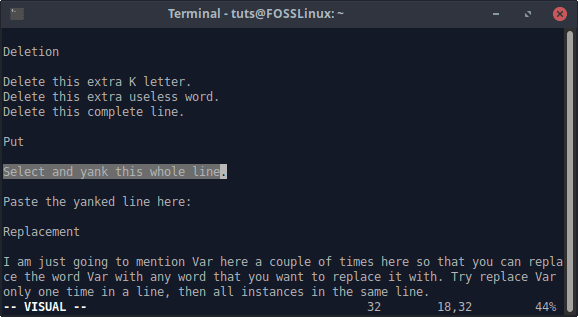
Selecting
Text selection can be done pretty quickly. Go to the position you want to start selecting from and press the V key. As you move the cursor using the navigation keys, the content will be selected.
After selecting the text, you can do anything with it. For example, if you want to delete it, just press d after the required selection. To start replacing the text, press c after selecting the required text.
Selected Text
There is also one more exciting thing you can do with selected text in Vim, which is exporting it to an external new file. After selecting the text, press the ‘:’ key, and you will see a prompt like this:
;'<,'>
After this, the command to export this to a new file will make the prompt look like:
;'<,'>w [Filename][enter example]
Yank
To ‘yank’ means to copy text. To yank text, first, select text using v as mentioned before, and then press y to yank it.
Put
The put command is sort of like the paste command but has more extensive usage. It can not only be used to paste yanked text but also put in the last deleted text. For example, if you just deleted a word with de, go to a location and press p, and you will see that text appear there.
As for yanked text, after selecting and copying the required text, go to the desired location, and press p to paste it there.
Search
To search for text in Vim, press / and type in what you want to search. After pressing enter, you will see the search results. The command, therefore, looks like this:
/[Search Term]
To move to the next search result, press the N key and to move to the previous result, press Shift+N.
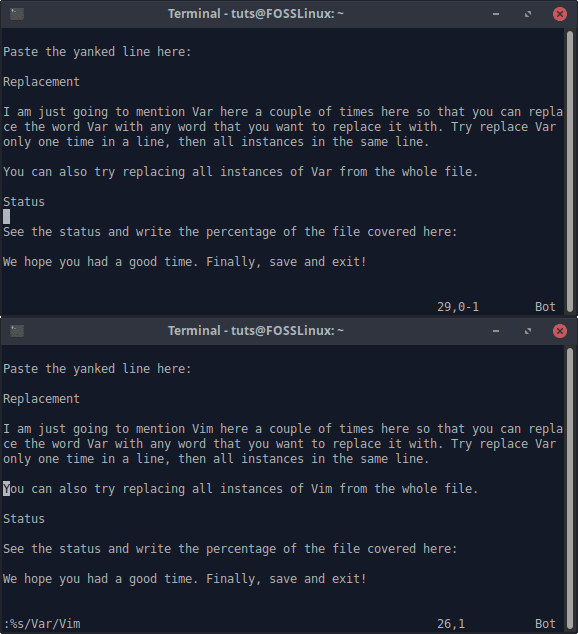
Substitute
Substitution commands have various options. The first part of it includes only making changes in the active line. The basic command to replace the first instant of the word looks like:
:s/[Old word]/[New word]
For example, if I want to replace the first instance of Ubuntu with Fedora in this line, the command would be:
:s/Ubuntu/Fedora
If you’re going to replace all the instances of the word from the active line, enter the command:
:s/[Old Word]/[New Word]/g
If you want to replace a word’s all instances in the whole file, the command is:
:%s/[Old Word]/[New Word]/g
You can also get a prompt to replace the word at its every instance:
:%s/[Old Word]/[New Word]/gc
Replacing Text
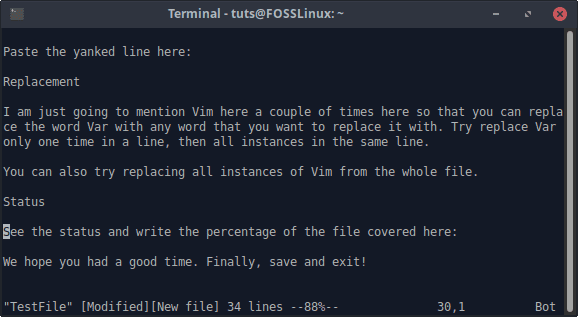
File Status
To get basic file and location status in Vim, press Ctrl+G. The information that you will get is:
- Filename
- Written [Modified] if the file has been modified in some way
- The line that you are in, with the total number of lines.
- The location of your cursor in the form of percentage compared to the content of the whole file.
- Column number
Vim Status
External Commands
That’s right; you can run Bash commands from Vim. Doing this is fairly simple:
:![Command]
This comes in particularly useful if you want to check whether a file already exists or not, or if you want to create a new file and open it from within Vim. Example:
:!ls

Running ls in Vim
Undo/Redo
Any of the things that you just learned doing can be undone with the simple strike of the U key. To return the line that you are into its original state, press Shift+U.
For redo, press Ctrl+R.
Saving/Exiting
Finally, there are multiple ways to exit/save your file.
- If you want just to save the file and not exit it, enter this command:
:w
And press enter.
- If you want to exit without saving:
:q!
- If you want to save and exit:
:wq
So, you see, exiting Vim is not as difficult as people make you believe.
Conclusion
Vim is a handy editor, which frankly, is just a step away from being a full operating system. As you have seen, it has many useful commands and shortcuts that will make you a peak in productivity in most of the cases. Due to such features, it has become the editor of choice for many people spanning across a significant number of use cases. Sure, it takes some getting used to, but it is impressive once you get the hang of it. To get a more interactive tutorial, consider running the vimtutor command. We hope this article helped. Cheers!