
Another day, just another Linux distro installation article? That’s not the case with Puppy Linux. If you are looking for an ultra-light Linux distro where the entire system can be run from random-access memory, Puppy Linux is a strong contender. The latest version takes about 300 MB of space, allowing the boot medium to be removed after the distro has started.
Reasons for choosing Puppy Linux
Here are the reasons for choosing Puppy Linux as your operating system of choice.
- It is pre-packaged with basic computing tools that you might not find in other operating systems.
- It’s grandpa-friendly certified TM meaning that any user can adapt to its usage.
- Puppy Linux is 300 MB or less, making it a very lightweight operating system.
- Its small size makes it equally fast and versatile in terms of its system performance.
- You do not need any expert knowledge to customize this operating system to suit your preference, as it is relatively easy.
- Since its existence comprises multiple Linux distributions, it is richly flavored, making it an optimal candidate for old computers tagged with performance issues.
- Puppy Linux offers its user community puplets or derivatives. They are forked Puppy Linux distributions versioned to meet a definite user need.
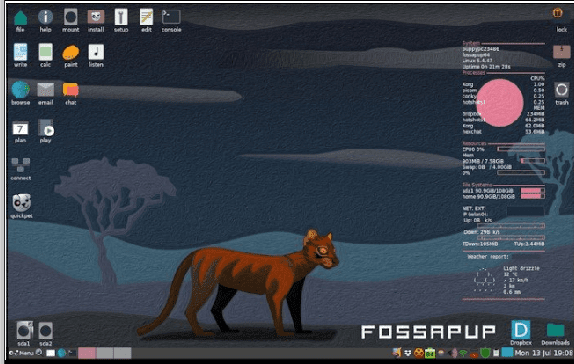
Puppy Linux operating system
If either of these bullet points interests your eyes, then you should carry on and learn how to install Puppy Linux on your machine. First things first, grab a copy of Puppy Linux from this download link. Depending on the Puppy Linux OS version you wish to download, compare it with the supported architecture from the download page. Your installation machine architecture should either be 64-bit or 32-bit. There are two approaches to installing Puppy Linux. It can be through an optical disc or USB drive.
Creating a bootable Puppy Linux medium
1. Preparing an optical disc
Since you already have a copy of Puppy Linux from the provided download link, a good recommendation for a reliable image burner is Brasero. You can install it with the following command on your terminal.
$ sudo apt install brasero
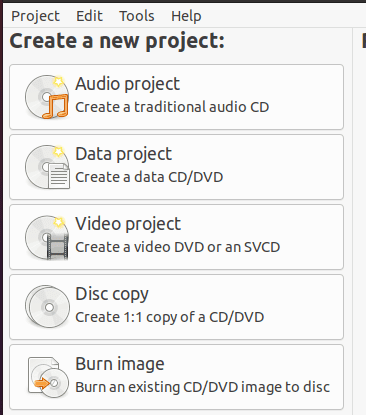
brasero optical disc image burner
Its usage is straightforward through its self-explanatory GUI. You should have no problem burning your Puppy Linux image to an optical drive. Navigate to the “Burn image” menu option and find the ISO file location of the Puppy Linux distro you downloaded. Finally, click “Create Image.”
2. Preparing a live USB drive using Balena Etcher
If you do not prefer the old-school way of burning the Puppy Linux image to an optical disc, you could be techy enough to create a bootable USB drive of the same. For this approach, consider using Balena Etcher. There are three simple steps to using Balena Etcher,
- Select image
- Select drive
- Flash.
Step 1: Download Balena Etcher from its official site. The downloaded file will be in a .zip format. Extract the contents of the zip file on your machine. The resulting file extract should have a .AppImage file extension.
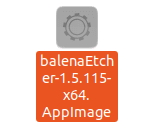
Balena Etcher formal file extension
Step 2: Use your computer mouse or touchpad to Right-click on the extracted file and then click Run.
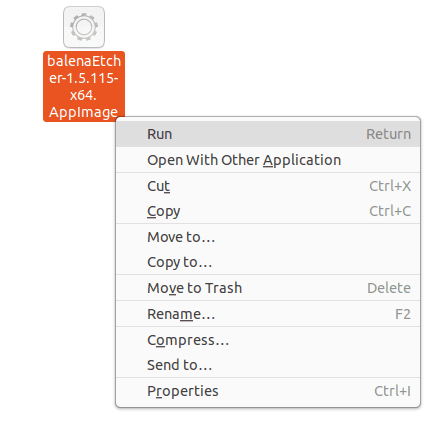
Launching Balena Etcher
Step 3: You should be able to have a view of Balena Etcher main GUI
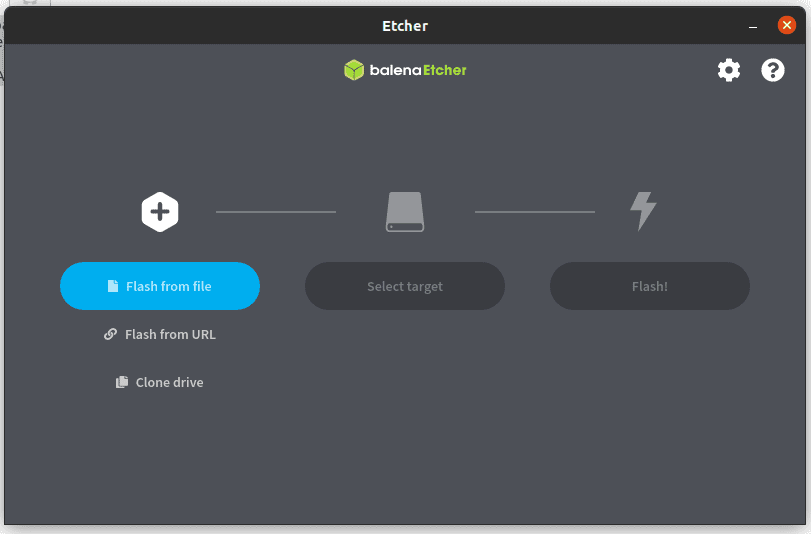
Balena Etcher main GUI
The resulting interface will give you three simple steps. First, select the Puppy Linux ISO file you downloaded. Select the location of your plugged-in USB drive. Balena Etcher will write the Puppy Linux ISO file on this USB drive to make it bootable with its Linux OS. The end of this process will result in a functional live USB drive.
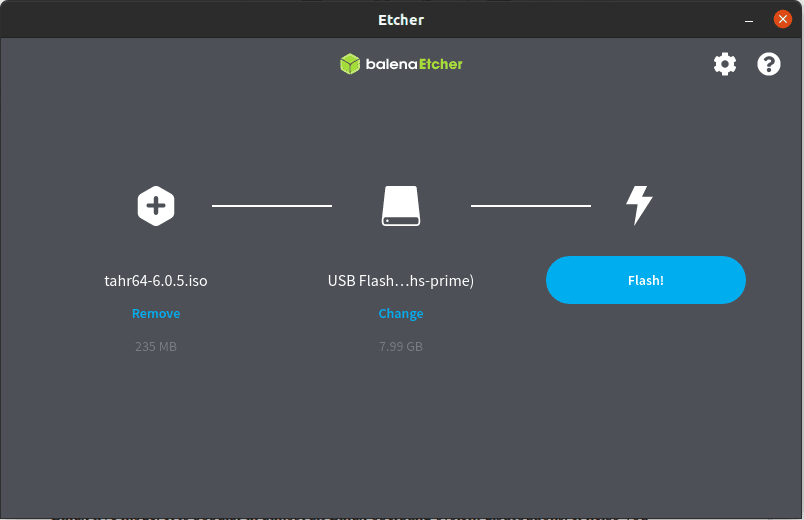
Using Balena Etcher main GUI
Step 4: Finally, click “Flash” and wait for the magic to happen.
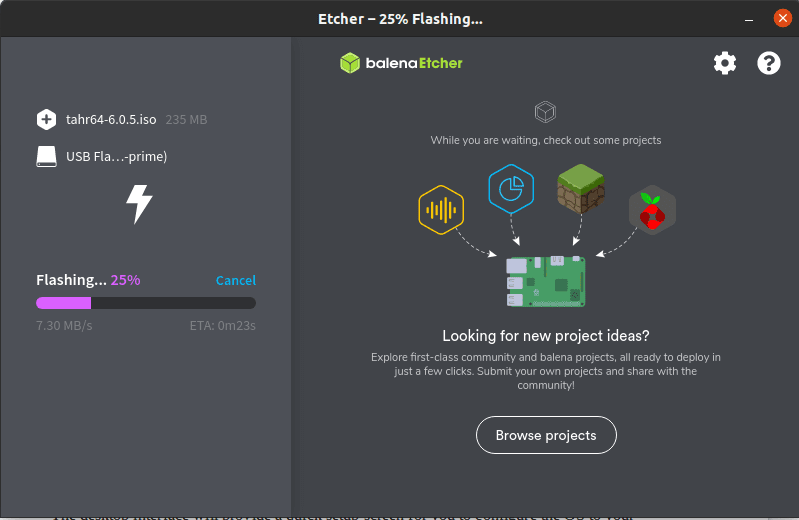
Creating a live USB drive with Balena Etcher
Once the Flash process completes, Balena Etcher will run a validation check to ensure that the process is executed correctly without any errors. Afterward, you should see the following screenshot.
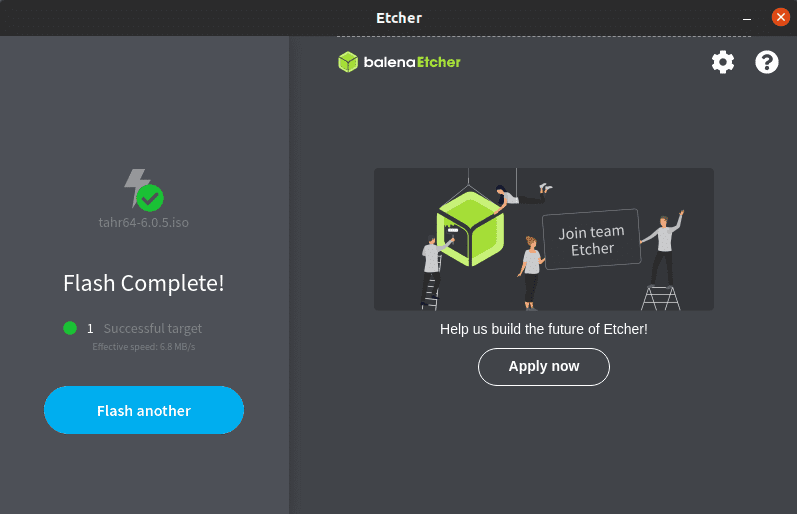
Successful creation of a live USB drive using Balena Etcher
You now have a functional Puppy Linux live USB drive.
Booting Puppy Linux
Depending on the installation media you chose to go with. Since you might be installing this operating system on an old computer, it is always a good idea to check up on your BIOS setup configurations. If your device’s boot order does not prioritize USB ports or optical drives over the computer’s hard drive, then you might have challenges booting into the Puppy Linux installation media or getting past this step.
If you manage to fix the BIOS setup issue or do not run into issues with its pre-configurations, getting Puppy Linux up and running on your installation media is straightforward. After you successfully boot into the installation media, you will encounter a text screen interface that will lead you to a flashy desktop.
The desktop interface will provide a quick setup screen for you to configure the OS to your preference before redirecting to a final welcome screen. At this stage, you are free to familiarize yourself with your new operating system.
This direct boot into the OS desktop environment from the installation media is courtesy of Puppy Linux live mode. It is popular in almost all Linux operating system distributions. It helps you interact and familiarize yourself with an operating system before you can decide to install it on your hard drive permanently.
After using Puppy Linux live mode, you have the option of saving or ending the session. Ending the session will remove any footprint of the operating system on your hard drive. It is due to one specific reason. Puppy Linux live mode entirely depends on a computer’s RAM operability. Since the system RAM does not store any data, restarting or powering your machine will immediately flush any content held by the RAM.
This puppy Linux functionality is not a disadvantage. This OS mode might be ideal for sensitive financial transactions like internet banking from an internet security perspective. With nothing cached by RAM, you do not have to worry about leaving vulnerable internet footprints on the internet, such as passwords and sensitive credit card information.
Saving a Puppy Linux session
If you are opting to save a user session after using Puppy Linux on Live mode, there are several ways of achieving it.
First, if you have access to a USB drive or an internal or external hard drive, the Puppy session can be saved in an NTFS, VFAT, o Linux partition. The OS will create a pupsave folder or file used to save your system’s settings. So next time you need to access this saved session, boot off the media containing the pupsave. The system settings and user files will be in the same state as you last used them.
Alternatively, if you used optical media to boot off and access the Puppy Linux OS, all the important system settings and sessions can be saved on that same optical media used to boot and access the Puppy OS.
Other options for installing Puppy Linux
The first boot into Puppy Linux lets you interact with its OS environment to decide whether you want to temporarily use it on Live mode or install it on a storage media for consistency in its usage. To install Puppy Linux, you will have to choose between three different installation modes. Let us highlight them one by one.
Puppy Linux frugal installation
With this type of installation, you have the option of installing Puppy from an optical or USB boot media. During boot up, the main Puppy files are copied to the computer’s hard drive. Before Puppy installation commences, the installation media will pick up on information about your system specs and available or viable partitions. If you had not prepared a partition for the installation of Puppy, you should be able to use its pre-packaged GParted (Graphical Partition Master). It is effective in shrinking, moving, and creating the needed system partitions for your Puppy installation.
After you have picked or created a viable partition, the next prompt will request your boot media files location. It can be files, optical media, or ISO images. This step confirms that these boot media files exist and are not corrupt. Depending on the partition you choose, its location will hold copies of the boot media file.
After copying the files, the installation of a bootloader follows. It will be responsible for launching Puppy Linux once you boot or reboot your machine. Its installation is the final step of setting up your Puppy Linux OS. You will then need to reboot your machine to start enjoying and using Puppy Linux.
Since this system will be pristine, at shutdown, save your sessions to keep track of the system settings you were using. Saving this user session will create a pupsave folder or file. The next time you boot into Puppy Linux OS, it will boot from the created pupsave folder or file for you to access your system settings and user files exactly the way you left them.
Puppy Linux USB installation
With this type of installation, you will also need optical or USB boot media. However, the installation of the main Puppy files will take place on the available USB drive. The USB drive should be inserted into an active machine port. You might also need the aid of the GParted graphical partition master to be certain that your USB drive has a suitable partition for the installation of Puppy Linux.
For good portability, you should consider formatting the USB drive to fat32 Windows TM style filesystem. This format makes the USB drive ideal for storing other files on a Windows or Linux operating system environment. It will also be able to hold other supported Linux filesystems. It is important to note that the support of the f2fs filesystem is not viable in all Puppies. The OS installer usually determines the viability of the supported file systems.
You will also receive a prompt to direct the installer to the boot media files location. They can be files, optical media, or ISO images too. Once the installer confirms the existence and viability of the requested boot media files, copies of these files will be stored in a folder inside the availed USB installation drive. The final step is installing a bootloader that will enable you to boot into a fresh Puppy Linux OS environment from the USB drive.
With this installation approach, you will always have a potable Puppy Linux copy in hand. You will be flexible enough to boot into the Puppy OS from any computer you come across. You will also have the option of using the OS on live mode or fully installing it once you boot from the USB drive.
This system will also simulate pristine properties requiring you to save your user sessions on shutdown optionally. It will save your already configured system settings on a pupsave folder or file so that your next boot into the OS preserves the previous state of files and settings you configured at your last shutdown.
Puppy Linux full installation
Most users might prefer this approach as it is a traditional way of getting most Linux distributions successfully installed on a dedicated hard drive partition. Again, to create a viable partition for the full installation of Puppy Linux, you will need to borrow the functionalities of the included Gparted graphical partition master. First, familiarize yourself with the interface of this partitioning tool to be swift and effective in its usage. The partition you use or create should be of a Linux file system.
The next step will also prompt the location of the boot media files characterized as files, optical media, or ISO images. The confirmation of the existence and viability of these boot media files will expand them to the installation partition you earlier chose or created with GParted. The installation of the Puppy Linux bootloader will follow suit to finalize the configuration of this OS. Once finished, you should be able to boot into your new Puppy Linux OS environment. Afterward, the access and usage of this OS will behave like any other Linux installation.
A walkthrough on Installing Puppy Linux Ubuntu Trusty 64 distribution
Whether you are using a USB drive or a CD optical drive, the following are the typical steps of installing a Puppy Linux distribution on your machine. The first step is to boot your machine with a viable USB drive or optical drive containing the Puppy Linux image. You should see something similar to the following screenshot.
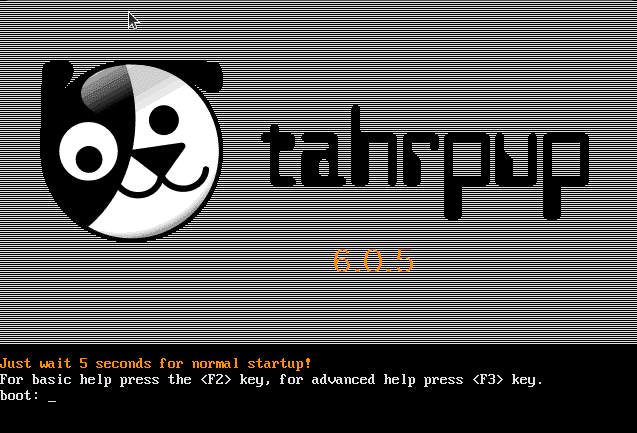
Puppy Linux Ubuntu Trusty 64 launch
The installer will then perform a routine checkup and assessment of your machine and Puppy Linux installation files.
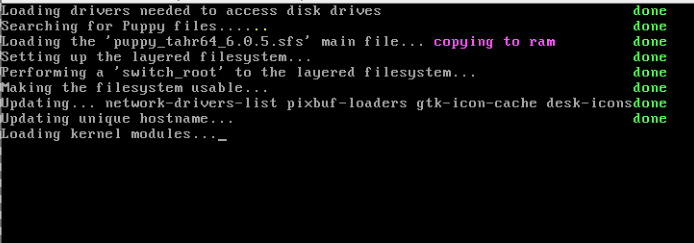
Puppy Linux Ubuntu Trusty pre-installation checkup
Follow the prompt query to set up the needed configurations. In this case, I needed to set up X for the installation to resume.
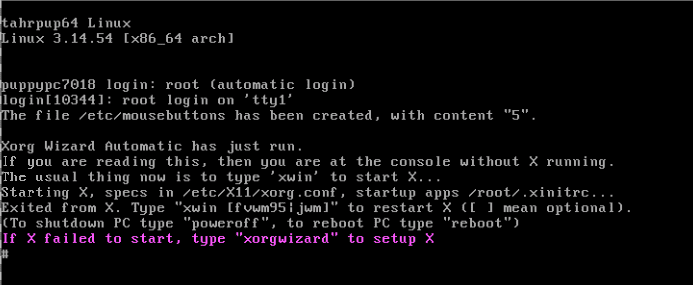
setting up pre-installation configurations
Follow through with the suggested input.
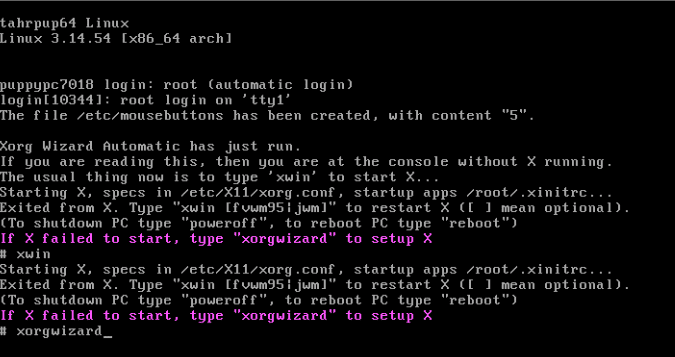
setting up X with xorgwizard command
Hit enter and proceed to the next screen prompt.
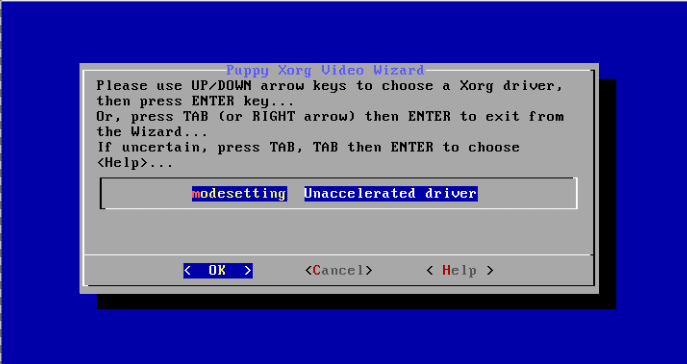
unaccelerated driver setup
Hit enter again and proceed to the next screen prompt.
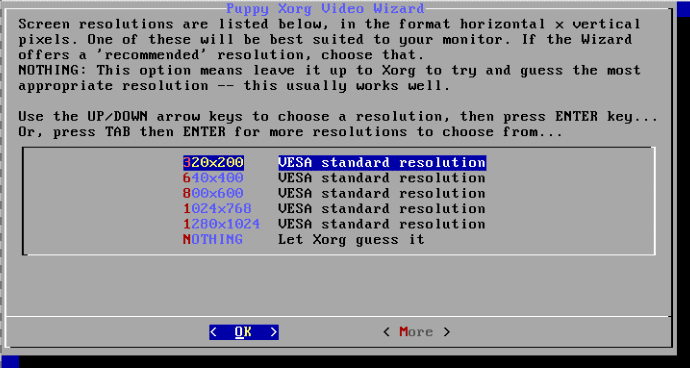
choose your preferred Puppy Linux standard resolution
Choose your preferred Puppy Linux standard resolution and hit enter on your keyboard.
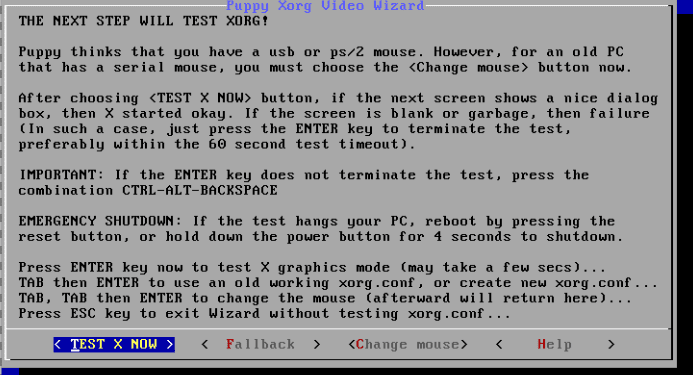
testing the X video wizard
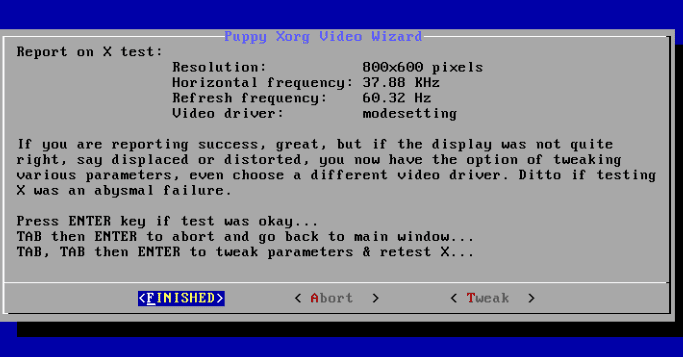
You will be testing whether the video wizard setup and configuration were successful. Hit enter again.
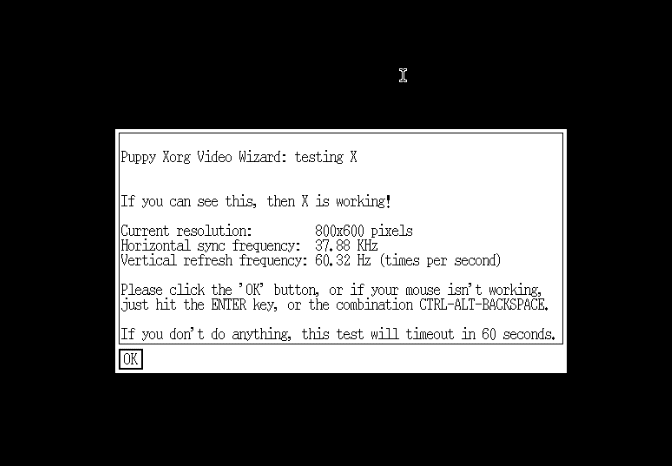
successful video wizard setup
This prompt implies that the wizard setup and configuration were a success.
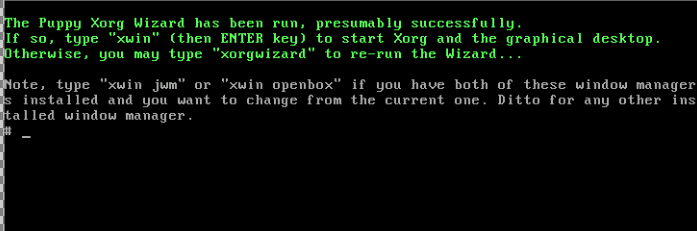
confirm video wizard configuration setup
Confirm that the set configurations are suitable for your Linux machine.
In the net prompt, key in the xwin command to launch the graphical desktop of your Puppy Linux distribution.
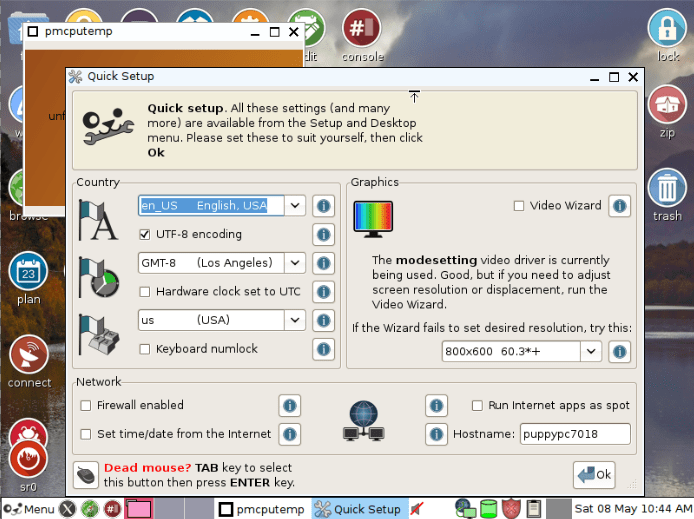
launching Puppy Linux Ubuntu Trusty 64 graphical desktop
You should be greeted with the following welcome screen.
Puppy Linux Ubuntu Trusty 64 desktop
Your final polished Puppy Linux desktop looks like the following screenshot.
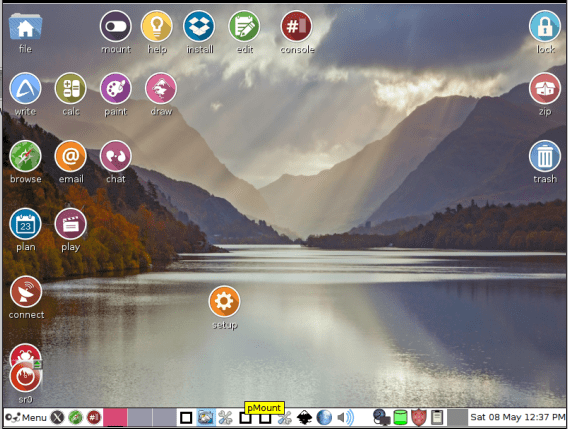
final Puppy Linux Ubuntu Trusty desktop
If you click on the “install” icon on this desktop environment, you will be presented with an interface for making a full installation of this Linux distribution.
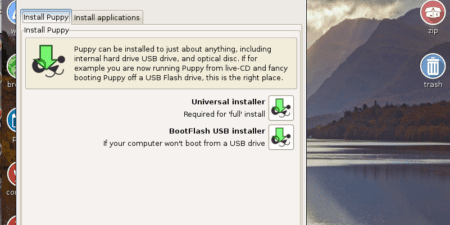
other Puppy Linux installation options
It is up to you to decide whether you want to keep testing this Puppy Linux distro or want to install it on your machine’s hard drive fully.
Final Note
The three installation steps highlight a summary of how easy it is to have Puppy Linux installed on your machine. The accompanying installation procedures are quite straightforward, making it impossible to bump into any technicalities while setting up this lightweight and performant Linux operating system on your machine.
When you manage to install your favorite Puppy Linux distro, feel free to explore it to your satisfaction. The more curious you are, the more you will learn.
2 comments
I really like your articles Brandon! Thank you for this one on fossapup, I am a real fan.
Thank you Lydia for being a fan…Greatly humbled with a smile!