
When I first started my journey into the world of software development, one of the earliest hurdles I encountered was the operating system barrier. Like many others, I was raised in the comfort of Windows, with its user-friendly interface and wide array of applications. It was only when I plunged into the world of programming, I realized the endless possibilities that lay in the uncharted territory of Linux.
Why Linux?
It is crucial to understand why we are talking about Linux when the world is running on Windows and MacOS. Linux, contrary to popular belief, is not a geeky, complicated operating system. It is powerful, open-source, and highly customizable. It plays a massive role in the server environment and is the backbone of the majority of the world’s supercomputers.
However, switching entirely from Windows to Linux can be daunting, especially if you are used to Windows’ interface and have specific applications that are exclusive to Windows. Thankfully, Microsoft has taken a massive step in bridging this gap by introducing the Windows Subsystem for Linux (WSL). WSL allows you to run Linux on your Windows machine without the hassle of setting up a dual boot or running a virtual machine. Of course, I will cover both methods in this article i.e. Linux via WSL and Linux via Virtual Machine.
Here’s my step-by-step guide on installing Linux in Windows 10 & 11. While I’ve tried to make this as simple as possible, I recommend you take your time to understand each step, especially if you’re new to this.
Method 1: Setting Up WSL on Windows 10 & 11
Step 1.1: Enable the Windows Subsystem for Linux
To start, we first need to enable WSL on our Windows machine. We can do this using PowerShell, which comes pre-installed on Windows.
To open PowerShell:
- For Windows 10: Type
PowerShellin the search bar and right-click on the application and choose ‘Run as administrator’. - For Windows 11: Right-click on the Start button and choose ‘Windows Terminal (Admin)’.
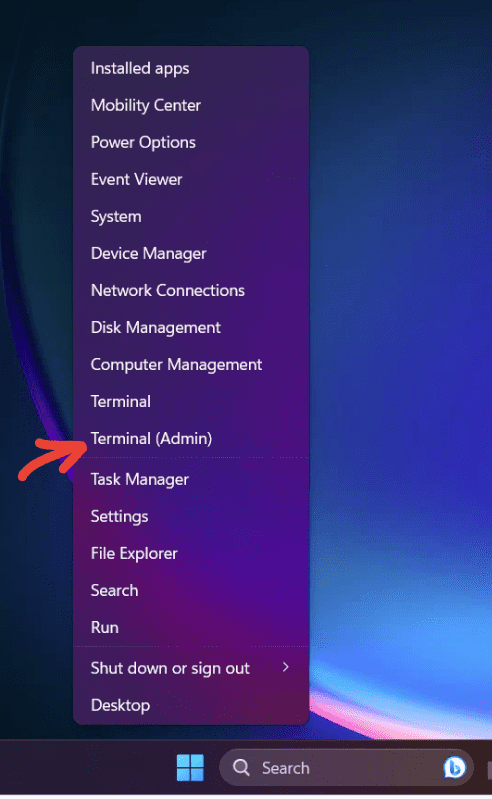
Launching Admin Terminal on Windows 11
Once you have the PowerShell open, type the following command:
wsl --install
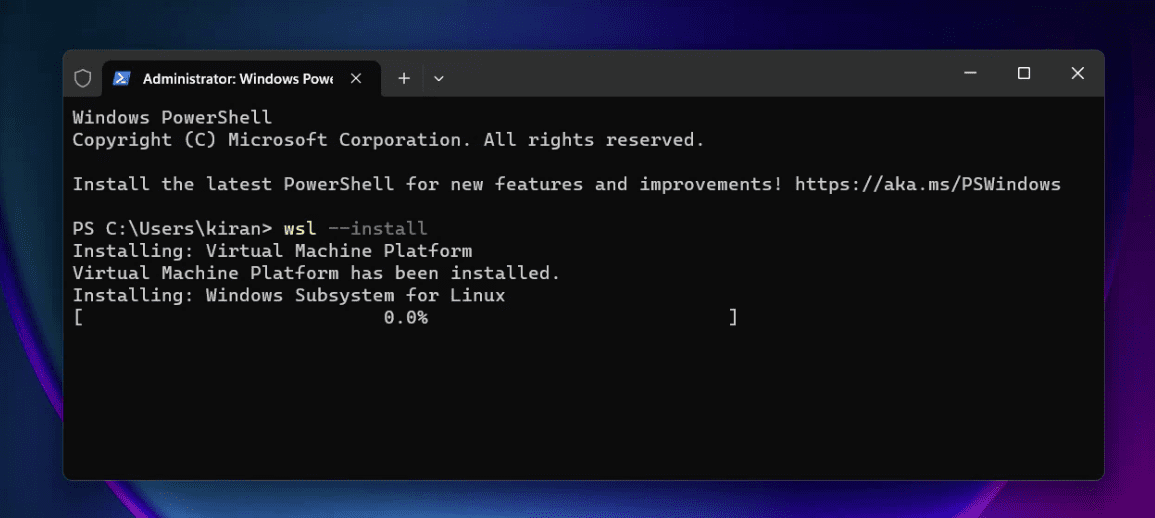
Installing WSL on Windows 11
This command will enable WSL and install the Ubuntu distribution by default. The process will also ask you to restart your PC. After restarting your Windows PC, you should see the following Terminal open automatically saying “Ubuntu is already installed”. Go ahead and set up the UNIX username and password.
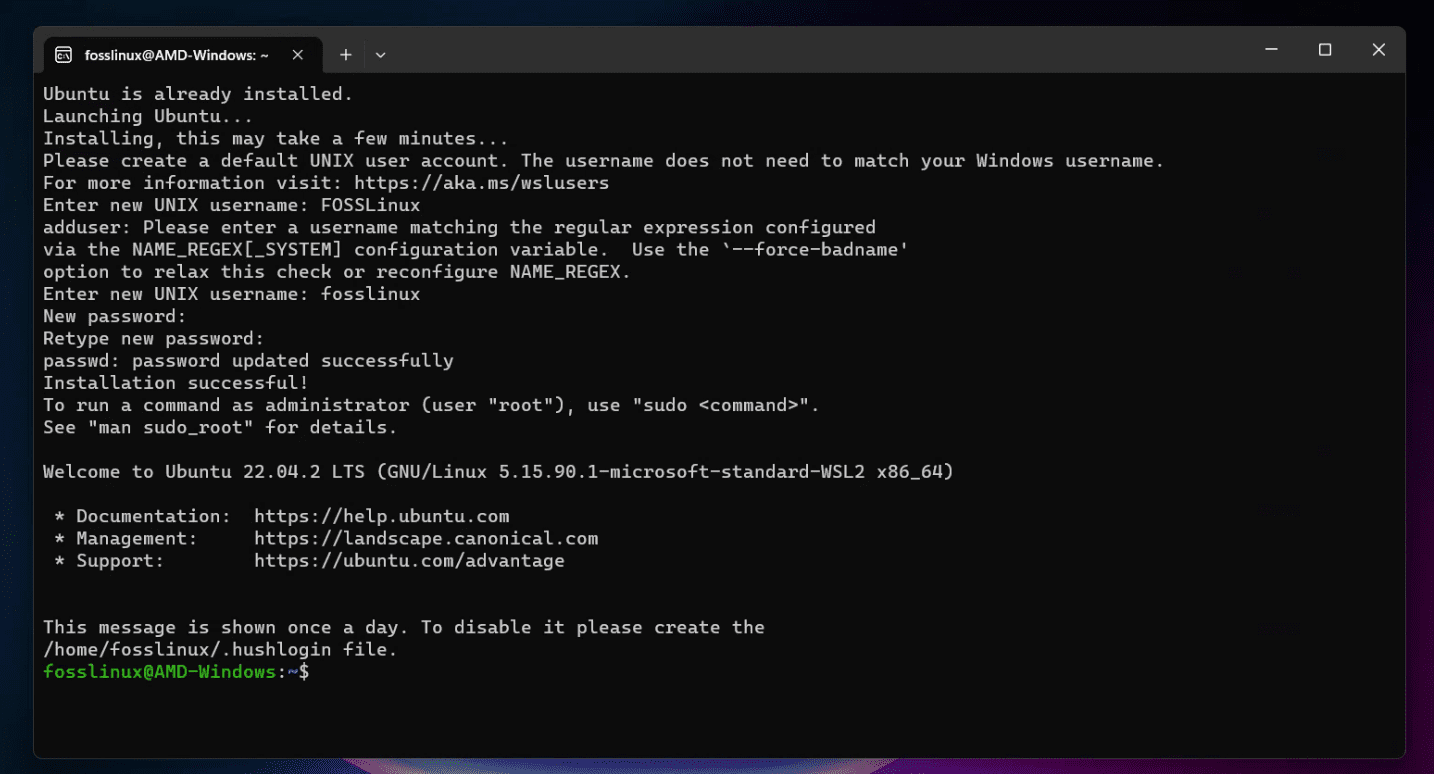
Installing Ubuntu on Linux
Pro tip: If you wish to select a different Linux distribution, you can list the available options using the command wsl --list --online and install your chosen distribution with wsl --install -d DistroName.
Step 1.2: Update to WSL 2
With the advent of WSL 2, there are significant improvements in file system performance and full system call compatibility, which is why it’s highly recommended to update to WSL 2.
Open PowerShell as an administrator again and run this command:
wsl --set-default-version 2
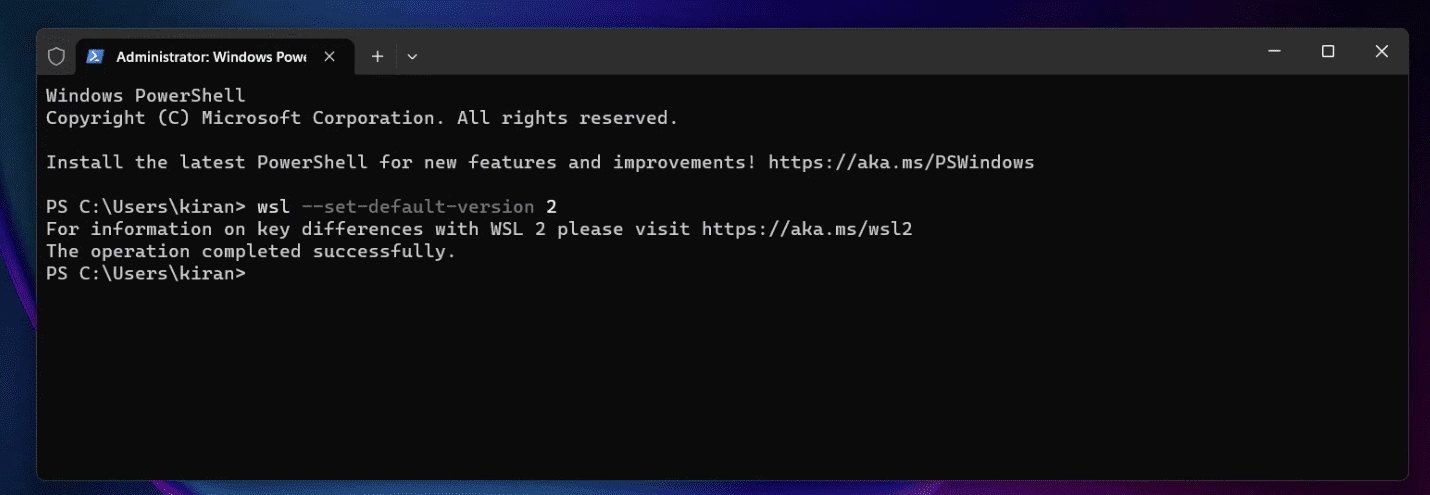
Confirming WSL 2 is installed on Windows 11
If the command executes successfully, congratulations, you have WSL 2 running on your machine.
Pro tip: If you see a message about Virtual Machine Platform not being enabled, it means your system does not support WSL 2. You can still use WSL 1 by running the command wsl --set-default-version 1.
Step 2: Installing a Linux Distribution
WSL allows you to run different Linux distributions. By default, it installs Ubuntu, but you can install any other distribution like Debian, Kali Linux, or SUSE.
To install a distribution:
- Open Microsoft Store.
- Search for your chosen Linux distribution (Ubuntu, for example).
- Click on ‘Get’ or ‘Install’.
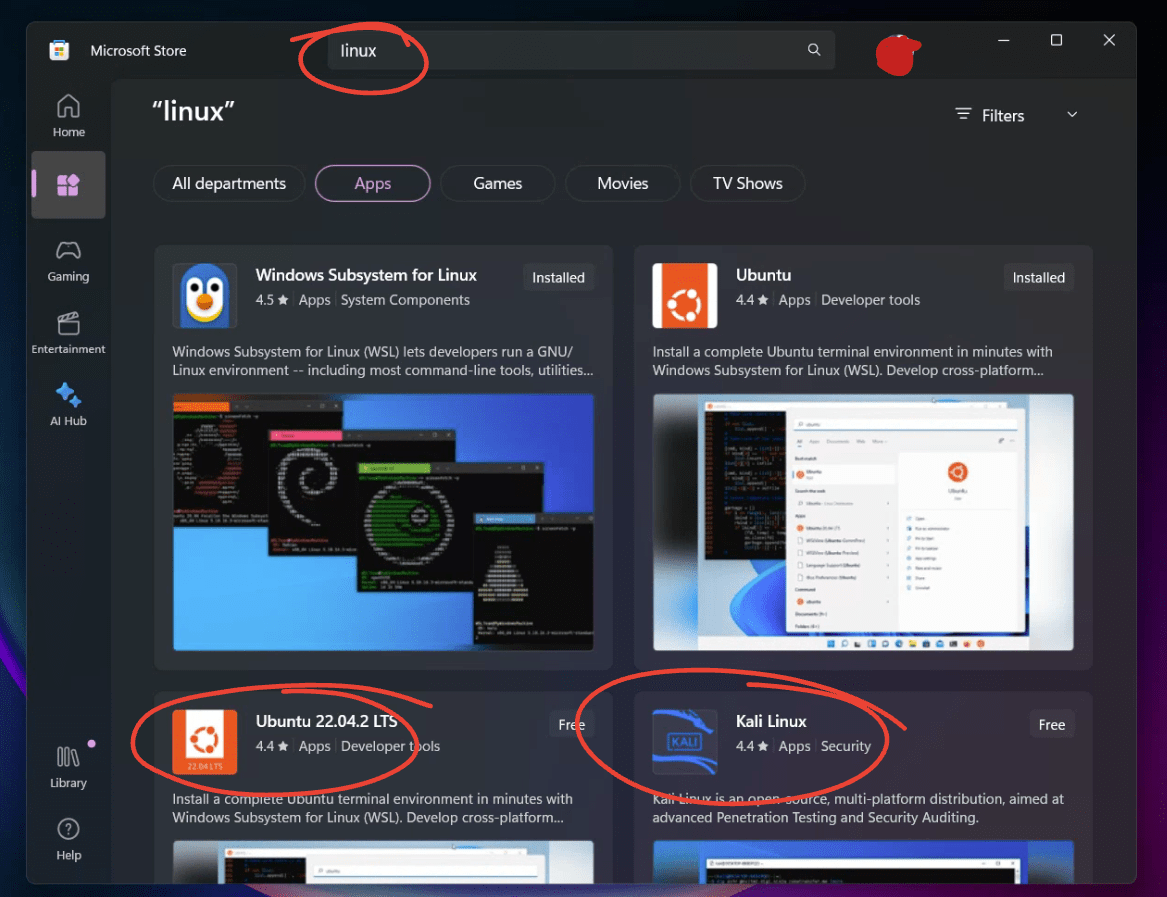
Looking for other Linux distributions in Microsoft Store on Windows 11
Once the download is complete, you can launch the distribution, and it will prompt you to create a user account and password.
Pro tip: Remember this username and password. You will need it for administrative (sudo) tasks within the Linux environment.
Congratulations, you now have a fully working Linux distribution running on your Windows machine.
Step 3: Using the Linux Terminal
You can access your Linux distribution through the Start menu. It works just like a regular terminal. You can use it to run Linux commands, install packages, write scripts, and much more. This is where the power of Linux truly shines.
Personally, I found this feature incredibly handy, especially when I needed to use tools like grep, awk, and sed, which are far more robust in Linux than their Windows counterparts. It was also a breath of fresh air to use the package manager apt to install tools and software, something I had missed dearly on Windows.
Pro tip: The Linux files for each distribution installed through WSL are available in the Windows file system under this path: \\wsl$\<DistroName>\.
Step 4: Practical examples of using Linux inside Windows
Let’s look at couple of simple examples of using our brand new Ubuntu in Windows. Go ahead and launch “Ubuntu” from the start menu. You should see Ubuntu Terminal.
Example 1 : Updating Ubuntu and installing GIMP
Let’s run through the process of installing and using GIMP (GNU Image Manipulation Program) via the command line. GIMP is a powerful open-source tool for photo editing and manipulation, and it’s available for Linux distributions.
Update Your System
Before installing any new software, it’s a good practice to update your system. Open your Linux terminal within Windows and enter:
sudo apt update
sudo apt upgrade
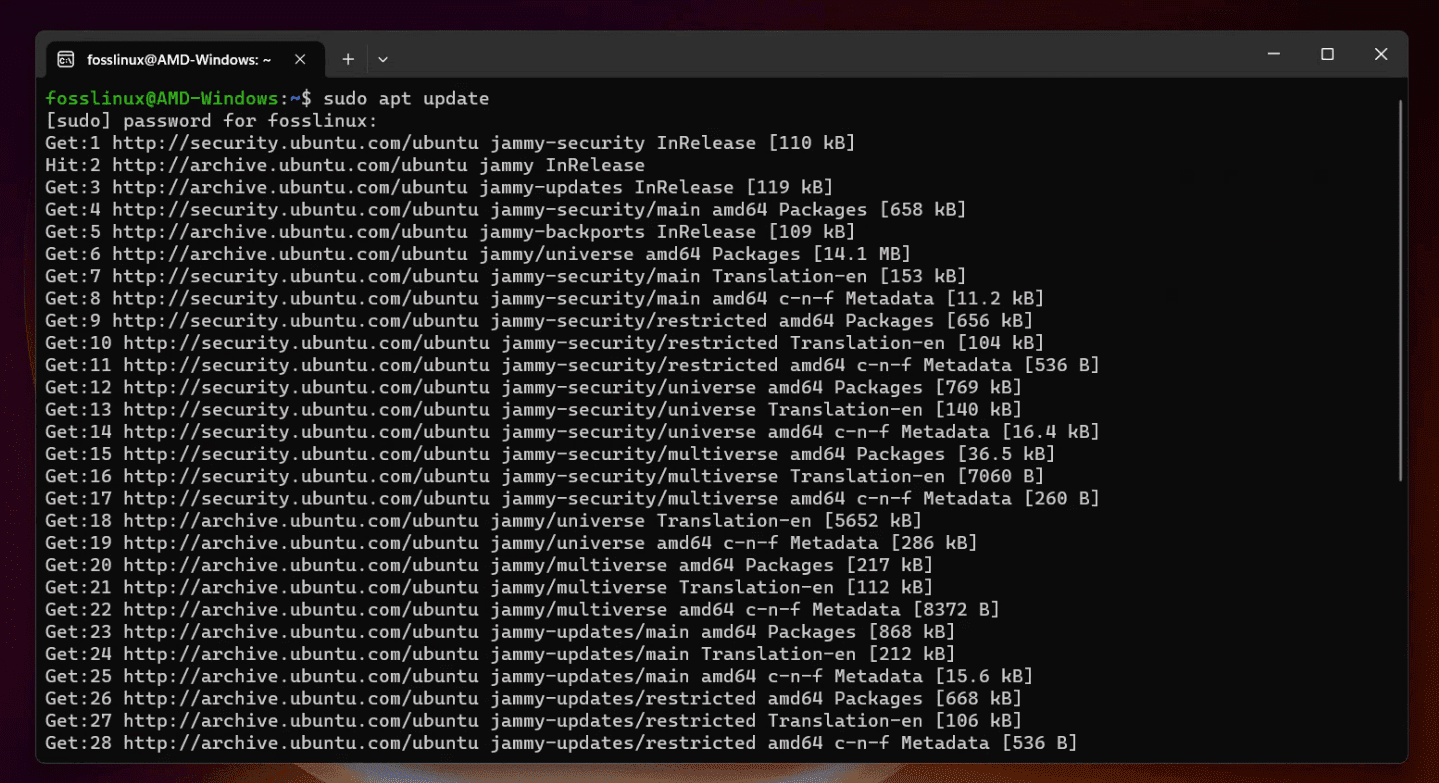
Updating Ubuntu in Windows 11
Enter your password if prompted. These commands will update the package lists and upgrade installed packages to their latest versions.
Install GIMP
Now, you can install GIMP using the following command:
sudo apt install gimp
This command will download and install GIMP and its dependencies.
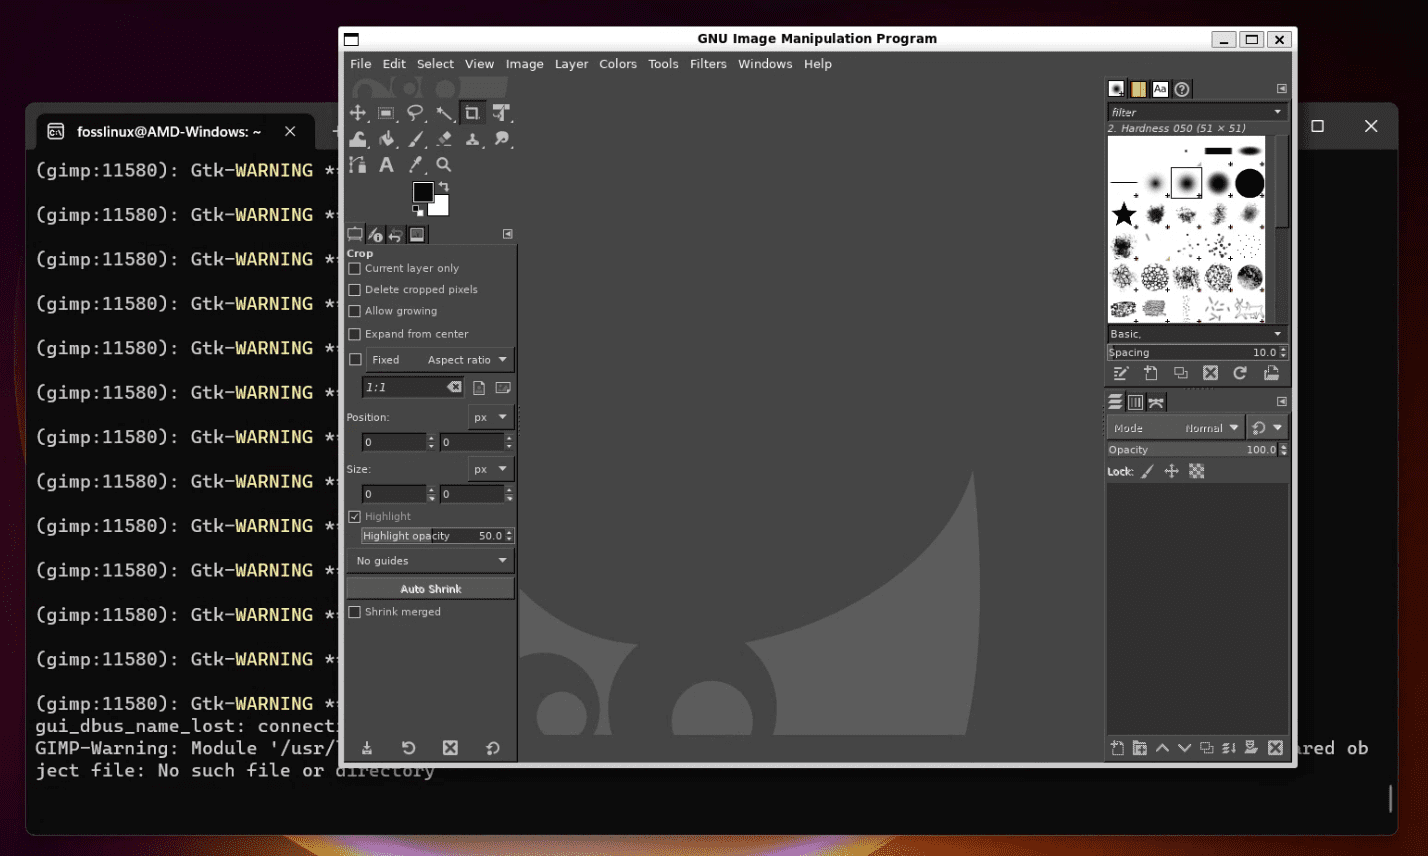
Launch GIMP
Once installed, you can launch GIMP directly from the command line:
gimp &
The ampersand (&) allows the program to run in the background, so you can continue to use the terminal.
Explore GIMP
GIMP will open, and you can start using it to edit images, create artwork, etc.
Running GIMP from Ubuntu on Windows 11
Just incase you wanted to remove GIMP, you can use the command:
sudo apt remove gimp
Example 2: Setting Up a Simple Web Server
After you’ve installed Linux on your Windows machine, you’ll have access to an extensive suite of Linux tools and commands. Let’s explore how you can use this environment to create a simple web server to host a basic HTML page. This will give you a taste of developing and hosting web applications on Linux.
Create a Project Directory
First, open your Linux terminal (Ubuntu, Debian, etc.) that you installed using WSL.
Use the following command to create a directory for your project:
mkdir my_web_server
Navigate to the directory using:
cd my_web_server
Write an HTML File
Next, create a basic HTML file using a text editor like nano. Type:
nano index.html
This will open the nano text editor. Add the following code:
<!DOCTYPE html>
<html>
<head>
<title>My Simple Web Server</title>
</head>
<body>
<h1>Welcome to My Web Server</h1>
<p>This is running on Linux within Windows!</p>
</body>
</html>
Press CTRL + O to write the file and then CTRL + X to exit nano.
Start the Web Server with Python
Many Linux distributions come with Python pre-installed. You can use Python to quickly start a web server.
Run the following command to start a basic HTTP server:
python3 -m http.server 8080
This command tells Python to run a simple HTTP server on port 8080.
View Your Web Page
Open a web browser on your Windows machine and navigate to:
http://localhost:8080
You should see your HTML page displaying the message “Welcome to My Web Server.”
Pro Tips:
This simple server is great for development and testing but isn’t suitable for production.
You can explore more complex web servers like Apache or Nginx if you want to delve deeper into web hosting on Linux.
Method 2: Installing Linux using Virtual Machine
Installing Linux on a virtual machine like VirtualBox is a popular method that many prefer due to its simplicity and the fact that it allows the user to run a full-fledged Linux distribution within Windows. Here’s a step-by-step guide:
Step 2.1: Download and Install VirtualBox
VirtualBox is a free and open-source virtualization software that lets you run different operating systems inside your current operating system. Here’s how you can install a Linux distribution (e.g., Ubuntu) inside VirtualBox on Windows 10 or 11.
- Visit the VirtualBox website.
- Click on “Download VirtualBox” and select the version for Windows hosts.
- Follow the installation instructions, accepting the default options.
We have earlier published a detailed article. Please refer to this article for a detailed step-by-step guide to installing Linux on VirtualBox.
Pro Tips:
- Ensure that virtualization is enabled in your BIOS/UEFI settings.
- You can create snapshots of your virtual machine, which allows you to revert to a previous state if something goes wrong.
Personal Reflections
My experience with VirtualBox has been largely positive. I’ve found it incredibly useful for testing different Linux distributions without having to make any permanent changes to my system. The ability to run Linux within a window on my Windows desktop has allowed me to experiment without fear.
However, I must note that running an OS inside a virtual machine does come with some performance overhead. It won’t be as fast as running Linux directly on the hardware or even through WSL. But for many tasks, the convenience outweighs the performance hit.
Conclusion
The integration of Linux within a Windows environment represents a remarkable evolution in computing that caters to a diverse range of users, from beginners to professionals. Whether through the Windows Subsystem for Linux (WSL) for a lightweight, flexible approach or using a virtual machine like VirtualBox for a full-fledged Linux experience, the doors are open to explore, experiment, and enhance your skills.