
Nextcloud is a software suite of applications to store and sync files and data across multiple devices. It is a fully on-premises solution to share and collaborate on documents, manage your calendar and send and receive email.
Nextcloud gives you control and protection of your data while facilitating communication. It can enable productivity as you can access, sync, and share your existing data on an FTP drive across several connected devices at a home or office setup. Moreover, data privacy is critical, and running a private Nextcloud server is an excellent way to get started.
Installing a private Nextcloud server on Fedora 34
This tutorial will demonstrate how to install a private Nextcloud server on a Fedora 34 based server. We will install an Apache web server, PHP 7.4, and a MariaDB server and client as prerequisites.
Step 1. Prerequisites
The first step is to satisfy the following prerequisites.
- A server running Fedora. (I will use Fedora Workstation 34 for the demonstration)
- A non-root sudo user.
- Update your packages.
sudo dnf update
- Essential packages and dependencies.
Your system may already have some of these packages installed.dnf install wget curl bzip2 nano unzip policycoreutils-python-utils -y
Note: if you have some prerequisites and packages already configured, then you can skip those steps.
Configuring Firewall in Fedora
The first step is to configure the firewall from Firewalld through the command line. Note that Firewalld comes preinstalled in Fedora servers.
Check firewall status to ensure it is running:
sudo firewall-cmd --state
running
The next step is to allow HTTP and HTTPS ports.
Check allowed services and ports:
sudo firewall-cmd --permanent --list-services
dhcpv6-client mdns samba-client ssh
Allow HTTP and HTTPS ports.
sudo firewall-cmd --permanent --add-service=http
sudo firewall-cmd --permanent –add-service=https
Check allowed services and ports again.
sudo firewall-cmd --permanent --list-services
dhcpv6-client http https mdns samba-client ssh
Reload the firewall.
sudo systemctl reload firewalld
Install Apache Webserver
Run the following command with sudo privileges to install the Apache webserver.
dnf install httpd
Install PHP
The next step is to install PHP and other additional modules. If you already have PHP, make sure the PHP version meets Nextcloud’s requirements.
dnf install php php-gd php-mbstring php-intl php-pecl-apcu php-mysqlnd php-pecl-redis php-opcache php-imagick php-zip php-process
After PHP is installed, enable and start the Apache webserver:
systemctl enable --now httpd
Check if PHP is running.
php -version
PHP 7.4.19 (cli) (built: May 4 2021 11:06:37) ( NTS )
Copyright (c) The PHP Group
Installing MariaDB server and client
MariaDB server is a drop-in replacement for MySQL, which means that commands to run and operate MariaDB and MySQL are the same.
Check if you have a default MariaDB server in your server or install it by running the following command.
dnf install mariadb mariadb-server
Enable and start the MariaDB server:
systemctl enable --now mariadb
Run the mysql_secure_installation command to secure your MariaDB server.
The command will perform default configurations setting the root password, removing anonymous users, disallowing root login remotely, and dropping test tables.
sudo mysql_secure_installation
[sudo] password for tuts:
Securing the MySQL server deployment.
Enter the password for user root:
The 'validate_password' component is installed.
>> The subsequent steps will run the existing configuration
of the component.
>> We are using an existing root password
Estimated strength of the password: 100
Change the password for root? ((Press YY | Y for Yes, any other key for No) :
>>
By default, a MariaDB server installation has an anonymous user
>>> is intended only for testing.
Remove anonymous users? (Press Y y | Y for Yes, any other key for No) : y
Success.
Normally, 'root' should only be allowed to connect from
'localhost.' This ensures that someone cannot guess
the root password from the network.
(ensure you read this policy while installing MariaDB server)
Disallow root login remotely? (Press Y y | y Y for Yes, any other key for No) : Y y
Success.
>>> (removing test database)
Remove test database and access to it? (Press Y y | Y for Yes, any other key for No) : y
>>> Dropping test database.
Success.
>>> Removing privileges on test database.
Success.
Reload privilege tables now? (Press Y y | Y for Yes, any other key for No) : y
Success.
All done!
Create a dedicated user and database for the Nextcloud server.
mysql -p
Create the ‘nextcloud’ database.
mysql> create database nextcloud;
Create a dedicated MySQL user to handle the ‘nextcloud’ database
mysql> create user 'nextclouduser'@'localhost' identified by 'SeCrEttErCeS';
Grant all privileges to the database (nextcloud) to the user (nextclouduser) we created.
mysql> grant all privileges on nextcloud_db.* to 'nextclouduser'@'localhost';
Flush privileges for the changes you have made to take effect.
mysql> flush privileges;
Quit the MySQL Shell.
mysql> exit;
Configure SELinux permissions
You must configure SELinux/permissions to work with Nextcloud.
Run the following commands for your basic SELinux settings. These should work with your installation.
Make sure to adjust the file paths appropriately as per your system. Just in case they are different.
semanage fcontext -a -t httpd_sys_rw_content_t '/var/www/html/nextcloud/config(/.*)?'
semanage fcontext -a -t httpd_sys_rw_content_t '/var/www/html/nextcloud/apps(/.*)?'
semanage fcontext -a -t httpd_sys_rw_content_t '/var/www/html/nextcloud/data(/.*)?'
semanage fcontext -a -t httpd_sys_rw_content_t '/var/www/html/nextcloud/.user.ini'
semanage fcontext -a -t httpd_sys_rw_content_t '/var/www/html/nextcloud/3rdparty/aws/aws-sdk-php/src/data/logs(/.*)?'
# restorecon -Rv '/var/www/html/nextcloud/'
You can learn more SELinux commands that work with Nextcloud at Nextcloud SELinux configuration.
Step 2. Installing Nextcloud Server
Our second step is to download and install Nextcloud. Head over to the official website and copy the download link of the zip file.
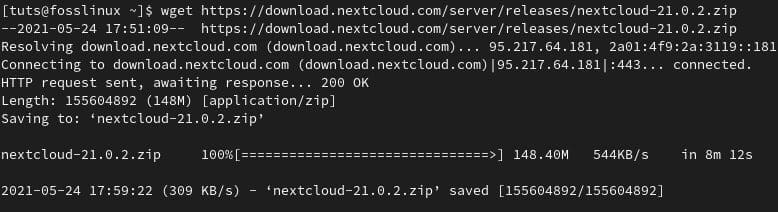
Download and unzip the Nextcloud archive using wget. Make sure to paste the copied link after wget in the below command.
wget https://download.nextcloud.com/server/releases/nextcloud-21.0.2.zip
Nextcloud archive
Unzip the archive to the ‘/var/www/html/’ directory.
unzip nextcloud-21.0.2.zip -d /var/www/html/
The next step is to grant Apache read and write access to the Nextcloud directory tree:
Create a data folder in ‘/var/www/html/nextcloud/’ directory.
mkdir /var/www/html/nextcloud/data
Grant Apache read and write access using Chown.
chown -R apache:apache /var/www/html/nextcloud
Step 3. Configuring Nextcloud server
You can configure Nextcloud via the web interface or the command line.
Method 1: web interface
Access ‘http://your_server_ip/nextcloud’ from your web browser.
In our case, the server is running from the localhost;
http://localhost/nextcloud
or
http://127.0.0.0/nextcloud
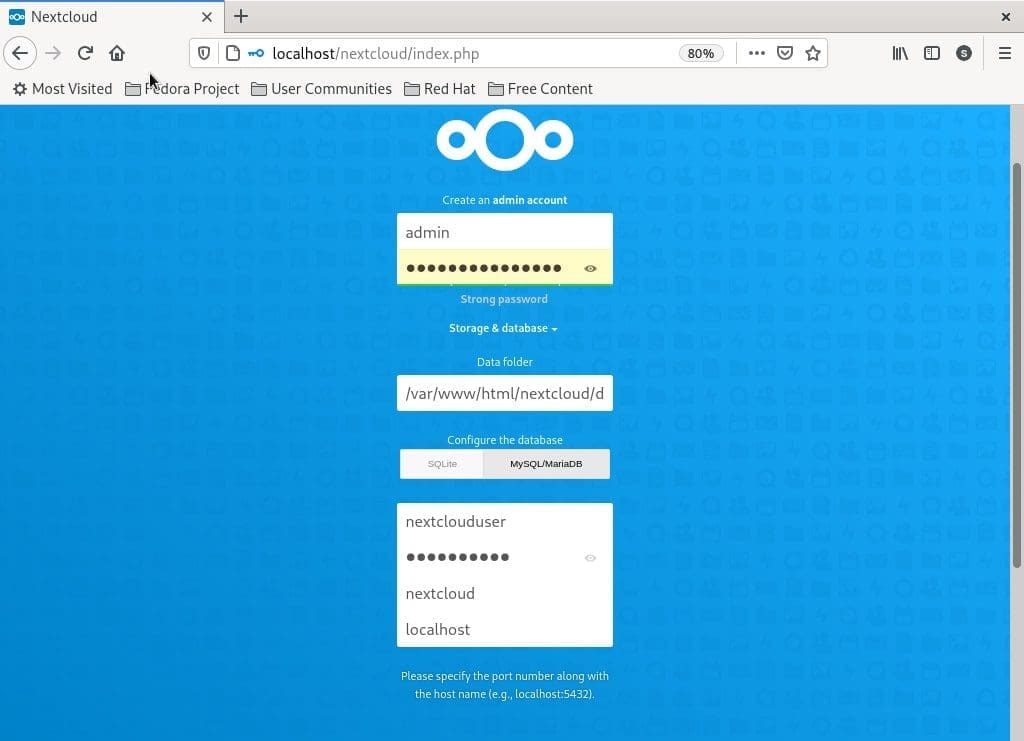
Nextcloud config details
Method 2: command-line
Run the following command to configure Nexcloud from the command line.
sudo -u apache php occ maintenance:install --data-dir /var/www/html/nextcloud/data/ --database "mysql" --database-name "nextcloud" --database-user "nextclouduser" --database-pass "SeCrEttErCeS" --admin-user "admin" --admin-pass "AdMin_PAssWOrd"
Enter your administration login details and configure Nextcloud for first use.
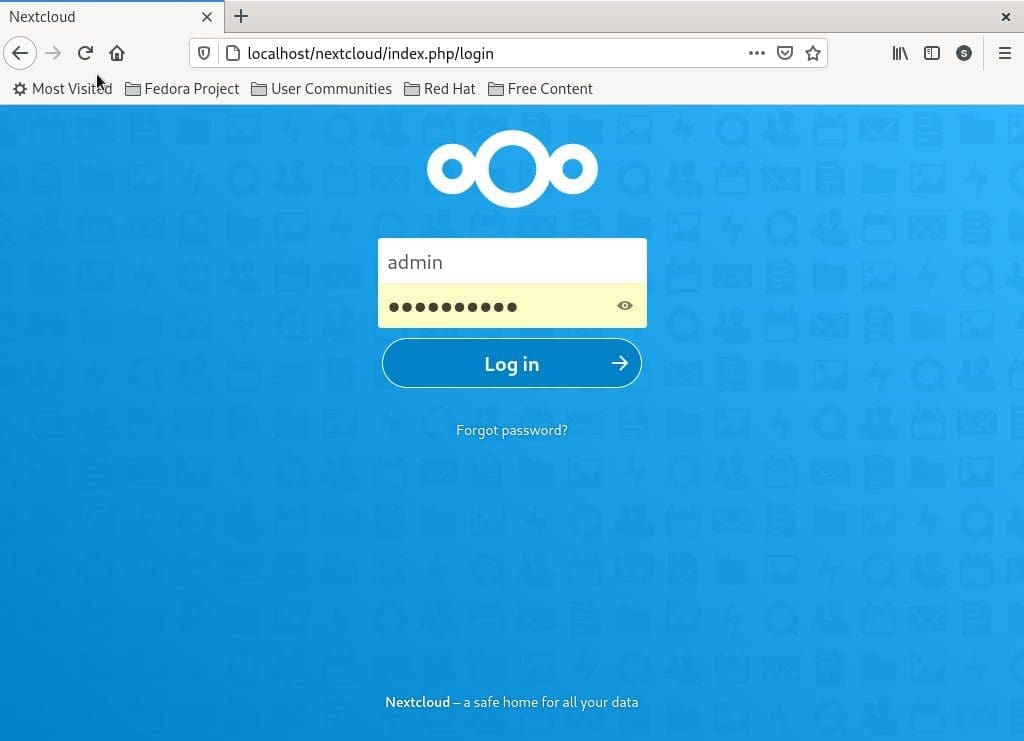
Nextcloud admin login
Wrapping up
The recommend PHP memory limit for Nextcloud is 512M. You can edit the memory_limit variable in the /etc/php.ini configuration file and restart your httpd service.
Security is critical, and you should always configure SELinux rather than disabling it. It’s not a good idea to disable SELinux. The recommended practice is to always have it in enforcing mode.
That concludes our demonstration on installing a private Nextcloud server on Fedora 34 server. If you run into any challenges or problems, feel free to ask or add a comment.
10 comments
I have Nextcloud 21.0.2 successfully installed on my Fedora server and noticed that there is a new release of Nextcloud (21.0.3). Have attempted to upgrade to that release but am getting the error:
An unhandled exception has been thrown:
OC\HintException: [0]: Memcache \OC\Memcache\APCu not available for local cache (Is the matching PHP module installed and enabled?)
I have checked and APCu is both installed and enabled. Attempted to reinstall APCu but it was already at the current release level. Not sure what else might be causing the problem.
I’ve just noticed in the final command to create the account on the nextcloud server and connect the DB that the DB name is incorrect, it needs to include “_db” as follows;
sudo -u apache php occ maintenance:install –data-dir /var/www/html/nextcloud/data/ –database “mysql” –database-name “nextcloud_db” –database-user “nextclouduser” –database-pass “SeCrEttErCeS” –admin-user “admin” –admin-pass “AdMin_PAssWOrd”
Just a typo; there is a hyphen missing in the command
sudo firewall-cmd –permanent –add-service=https
“Method 1: web interface” – results in Nextcloud telling me that an “Internal Server Error” happened.
“Method 2: command-line” – results in the command line telling me “Could not open input file: occ”
This blog doesn’t work.
the same error:
“Method 1: web interface” – results in Nextcloud telling me that an “Internal Server Error” happened.
“Method 2: command-line” – results in the command line telling me “Could not open input file: occ”
FYI “Method 2”
cd /var/www/html/nextcloud
and run
sudo -u apache php occ maintenance:install –data-dir /var/www/html/nextcloud/data/ –database “mysql” –database-name “nextcloud_db” –database-user “nextclouduser” –database-pass “SeCrEttErCeS” –admin-user “admin” –admin-pass “AdMin_PAssWOrd”
thank you
A couple of corrections:
=====================
It looks as though the majority (if not all) of these commands need to be run as root, but only maybe half of them are prefixed with “sudo”, which would make you think they need to be run as a regular user. It seems you really should just run “sudo -i” at the beginning, then forego using “sudo” after that.
Also: shouldn’t we bw downloading and extracting the nextcloud.zip file before trying to set the semanage contexts? Because until you extract nextcloud, the files/directories the commands are trying to set won’t exist.
Also, I’m presuming the “restorecon” line is intended to be run, but it looks like it was commented out.
And Guillermo’s corrected line above cannot be used is it’s shown, the double-dashes have been converted to em-dashes. You’ll need to fix those
Fedora 35 has Nextcloud in it’s repository, but it places it’s files in a different location. I need to figure out how that one works, then I can combine this page and the Fedora-wiki’s obsolete page and make one good one to replace theirs.
Actually, an additional comment:
Even with the fixes and corrections, Nextcloud *STILL* fails. I’m testing this on a VM currently so that I can just drop back to a clean image and start over. Eventually I wnat to run it on my Raspberry Pi 4, but I don’t want to have to keep wiping and reinstalling on there everytime the install fails. And the pre-made rPi Nextcloud image is useless because the wifi doesn’t work on it (and that HAS to be working on my setup).
Additionally:
logging in through the WebUI it thinks the database is SQLlite, EVEN THOUGH I have done all the MariaDB configuration above.
And then running the “sudo -u apache…” command line gives this error:
===============================
Command “maintenance:install” is not defined.
Did you mean one of these?
app:install
maintenance:data-fingerprint
maintenance:mimetype:update-db
maintenance:mimetype:update-js
maintenance:mode
maintenance:repair
maintenance:theme:update
maintenance:update:htaccess
Maybe it DOES mean one of those, but since there’s no decent explanation of WHAT any of these steps are supposed to do, nobody would know.
So yet another failed Nextcloud install. Has this server actually ever worked?