
MySQL is an open-source database management system categorized as a relational DBMS (Database Management System). Michael Widenius’s daughter “My” was the co-founder of MySQL, thus the name MySQL. The name combines two terms; the co-founder “My” and SQL, an abbreviation for Structured Query Language.
MySQL is offered both as an open-source server edition and as an enterprise server edition. This article will review the installation of the open-source community server edition.
Note: When using a Windows-based server as your host, some users resort to using MSSQL (Microsoft SQL Server). However, you should bear in mind that MSSQL has some limitations, such as licensing restrictions making it quite challenging to use compared to MySQL that will be covered in this article.
MySQL is similar to Lamp Stack, a Linux-based server build that is also available for Windows users. Depending on the users’ needs, they can develop an entire database with the aid of MySQL. The benefit of using MySQL is that it can be run simultaneously with MSSQL. Being free, you can experiment with both the database servers.
Installing MySQL on Windows
Step 1: Download the installer file
Download the MySQL open-source community server from here. After downloading the latest version, which at the time of writing this article is version 8.0.25, execute the downloaded installer file. You have to locate the downloaded installer file and double click to execute it.
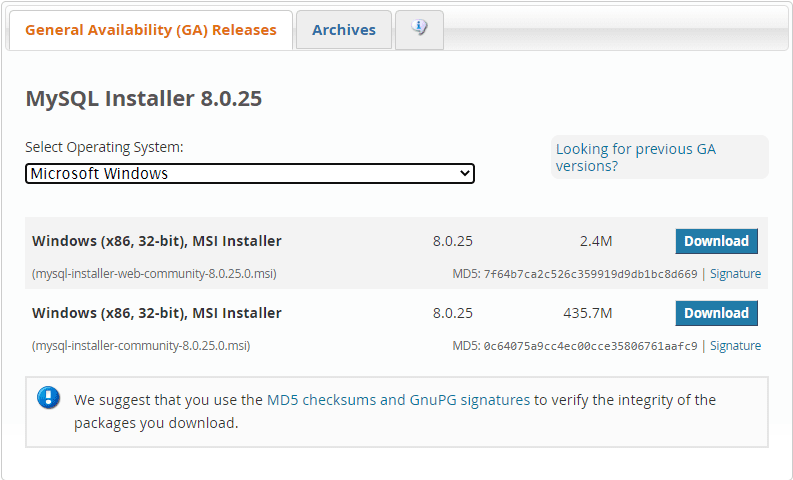
MySQL Download Page
Step 2: Selecting the setup installation type
This is the second phase during the installation process. Once the installer has run, you will have to choose an installation type for MySQL installed on your Windows operating system. You will see five installation types as shown below:
1. Developer default: This option installs packages and applications that will be used for development, such as:
- MySQL Server
- MySQL shell: This is a new MySQL client application used to manage MySQL servers and InnoDB cluster instances.
- MySQL Router: This is high availability router daemon for InnoDB cluster setups that are installed on application nodes
- MySQL Workbench: This is the graphical user interface used in the development and management of the server
- MySQL for Excel: This is an excel plugin that aids easy access and manipulation of MySQL data.
- MySQL for Visual Studio: This tool enables VS users to work with MySQL.
- MySQL Connectors: Allows connection of data using connectors/Net, C/C++, Java, OBDC.
In short, this option aids in creating a development machine.
2. Server Only: It is used to deploy MySQL servers but is not used in MySQL application development. This option can only be used if the user plans to install a standalone database server. It comes with all the server applications and packages.
3. Client Only: This type installs all the tools required to develop MySQL applications; however, it does not include the MySQL server. If you plan to develop applications for an existing server, then this should be your ultimate choice. The packages and applications installed by Client Only are:
- MySQL shell: This is a new MySQL client application used to manage MySQL servers and InnoDB cluster instances.
- MySQL Router: This is high availability router daemon for InnoDB cluster setups that are to installed on application nodes
- MySQL Workbench: This is the graphical user interface used in the development and management of the server
- MySQL for Excel: This is an excel plugin that aids easy access and manipulation of MySQL data.
- MySQL for Visual Studio: This tool enables VS users to work with MySQL.
- MySQL Connectors: allows connection of data using connectors/Net, C/C++, Java, OBDC
4. Full: This option is used if the user wishes to install all MySQL Server components on the machine.
5. Custom: This is a customizable option that gives the user opportunity to select options that best suits his or her needs.
In this article tutorial, we shall select the “Full” option and click “Next.”
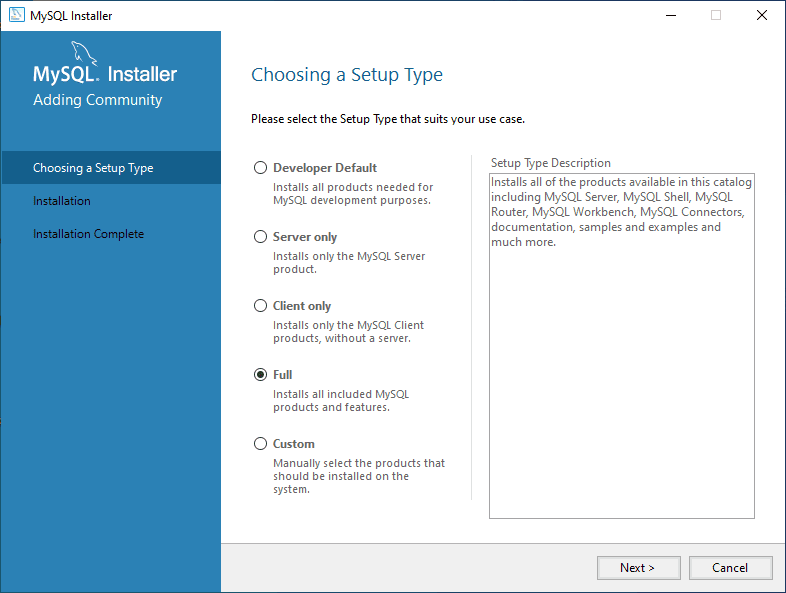
MySQL Choosing Type Screen
Before moving from the “Choosing a Setup Type” to the “Installation” phase, the installer will check all the required prerequisites to install the MySQL database server. If software prerequisites are missing, you can find details on the “Check Requirements” screen. In addition, the name of the missing product or essential component/software and its reason for failure will be displayed on the “Check Requirements” screen.
For instance, in this tutorial, MySQL For Excel 1.3.8 (Installs Visual Studio 2010 Tools required for Office Runtime), MySQL for Visual Studio 1.2.9(Installs Visual Studio 2015,2019, and 2017) Connector/Python 8.0. 19(Installs python 64-bit) have not been resolved. To resolve them click “Execute.” Alternatively, you can ignore and proceed to the next stage by clicking “Next.”
After checking requirements and installing all the required prerequisites, click “Next” to proceed to the installation phase. The installer will warn if the required prerequisites were not installed in the “Check Requirements” phase. However, you should not worry about this stage, as you can skip to the installation phase by clicking “Yes.”
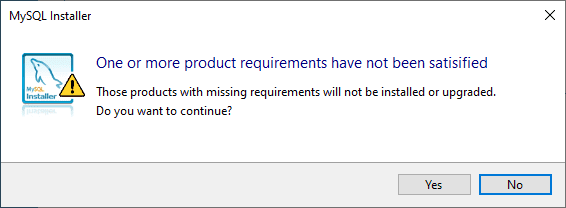
MySQL Check requirements Prompt
Once on the installation screen, you will see a list of MySQL products that will be installed onto your workstation. If you have no clue about MySQL, don’t worry. Just click “Execute.” The installer will download and install all the products shown on the previous screen. Depending on your internet speed, you will have to wait for few minutes.
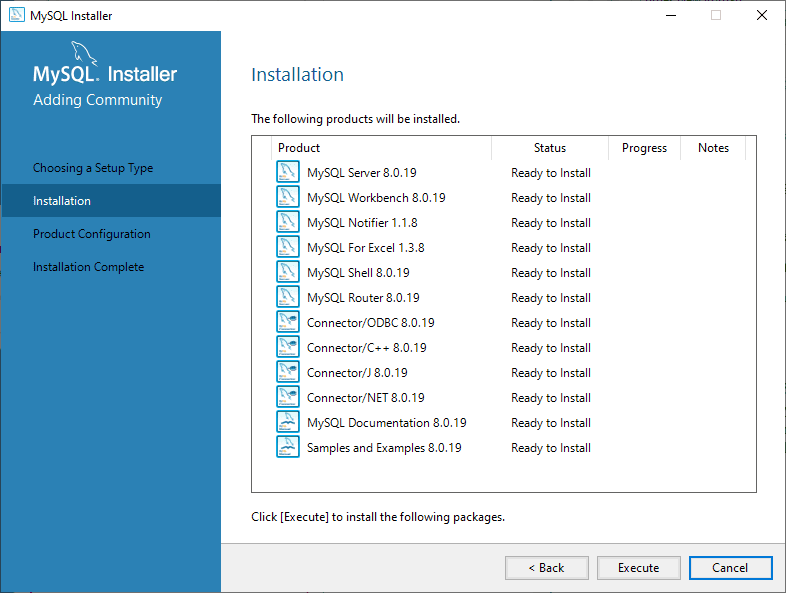
MySQL Installation Screen
Once the process is complete, MySQL is installed in your Windows operating system, and you are now ready to proceed to the next phase, configuring the MySQL database server and other required components. Click on “Next” to proceed to the next phase, which is “Product Configuration.”
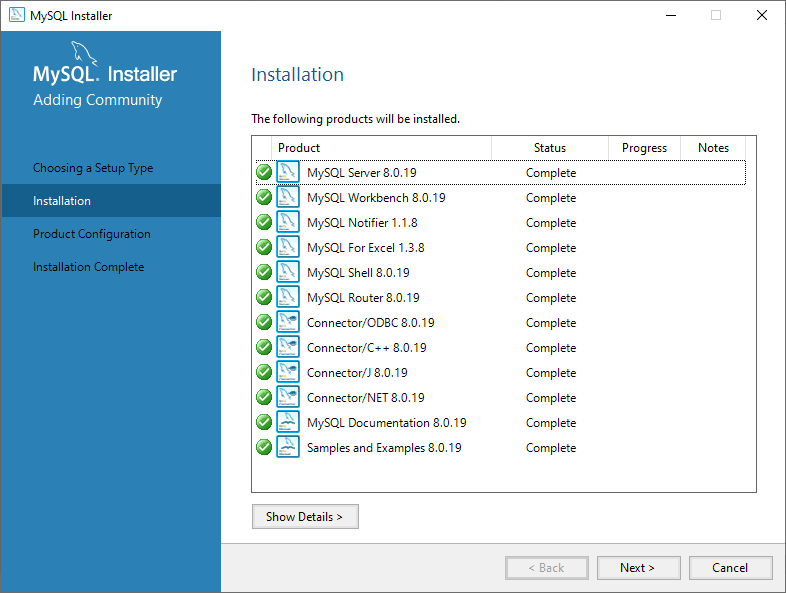
MySQL Installation of all products complete
The products shown on the product configuration screen are the products that require configuration. In our case, we shall begin with configuring the MySQL server 8.0.19. To commence, click “Next.”

MySQL Product Configuration Screen
On the next screen, “High availability,” you can either choose to install the Standalone MySQL Server/ Classic MySQL Replication or the InnoDB Cluster. InnoDB Cluster is a MySQL high availability solution that uses group replication. For the tutorial’s sake, we shall select the “Standalone MySQL Server/ Classic MySQL Replication.”
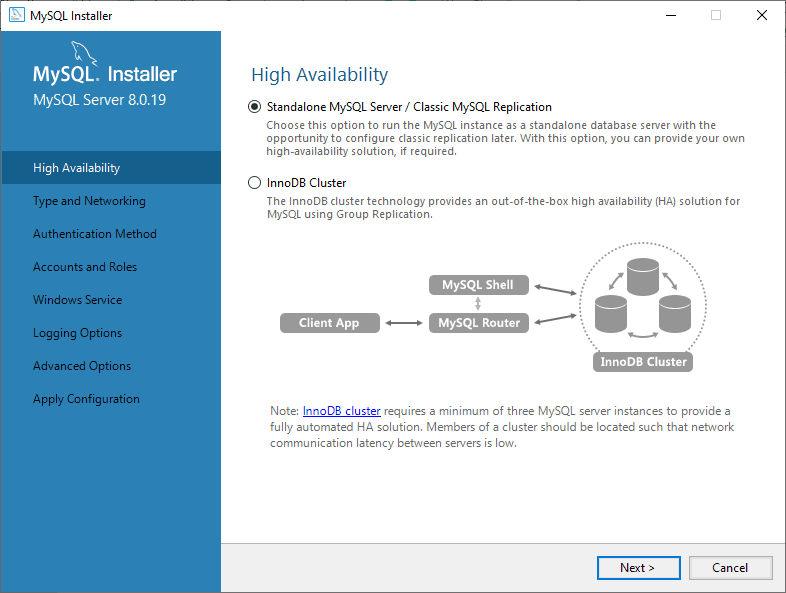
MySQL High-Availability Screen
The next screen is “Type and Networking.” In this screen, we shall configure the type of MySQL configuration. It is a predefined configuration parameter set that determines resources that need to be relocated to MySQL services. The configuration options are:
- Development Computer: This configuration enables the user to allocate minimal resources to the MySQL service.
- Server Computer: This option also uses minimal resources. It suits database and web server installation. It equally allocates minimal resources to MySQL services.
- Dedicated Computer: a user can only opt for this configuration option if he has created a dedicated MySQL Server. MySQL services are allocated high resources using this configuration method.
For this tutorial, we shall configure a “Development Computer” using the configuration drop-down box.
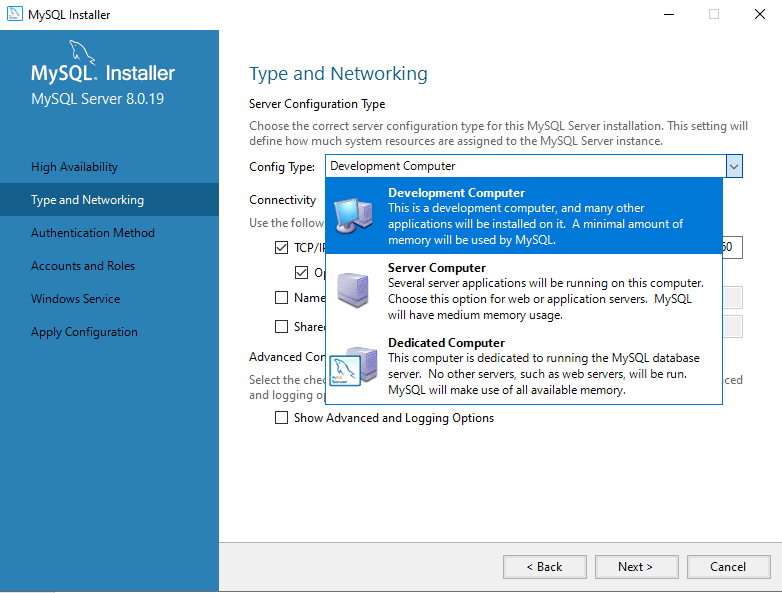
MySQL Config Type: Development Computer
Connectivity
This is still under the “Type and Networking” phase. In this section, the user can control how clients connect to MySQL databases. TCP/IP protocol, Named pipe, and Shared Memory are the configuration options available at this stage. To configure connectivity using “Shared Memory and Named Pipe,” you must provide the Memory Name and the Pipe Name.
However, while configuring using the TCP/IP option, you will be required to specify the default port used to connect to the database server. In addition, you can also allow the port number provided in the Port textbox in the firewall. This will enable MySQL to connect and allow users to connect to databases.
In this tutorial, we shall complete the configuration process using the TCP/IP option. After successful configuration, proceed to the “Authentication Mode” phase.
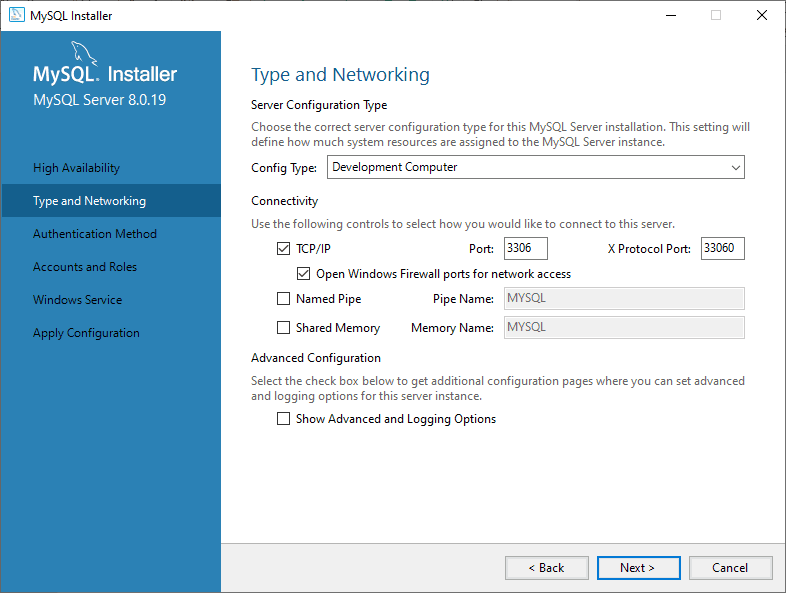
MySQL Type and Networking Screen: Connectivity
We shall use the SHA256 authentication password for strong passwords. While on the Authentication Method screen, you can either choose “Use Strong Password Encryption for Authentication (RECOMMENDED) or “Use Legacy Authentication Method (Retain MySQL 5.x Compatibility)”. Therefore, you can select the method that best suits you. However, for the sake of this tutorial, we shall select “Use Strong Password Encryption for Authentication (RECOMMENDED).”
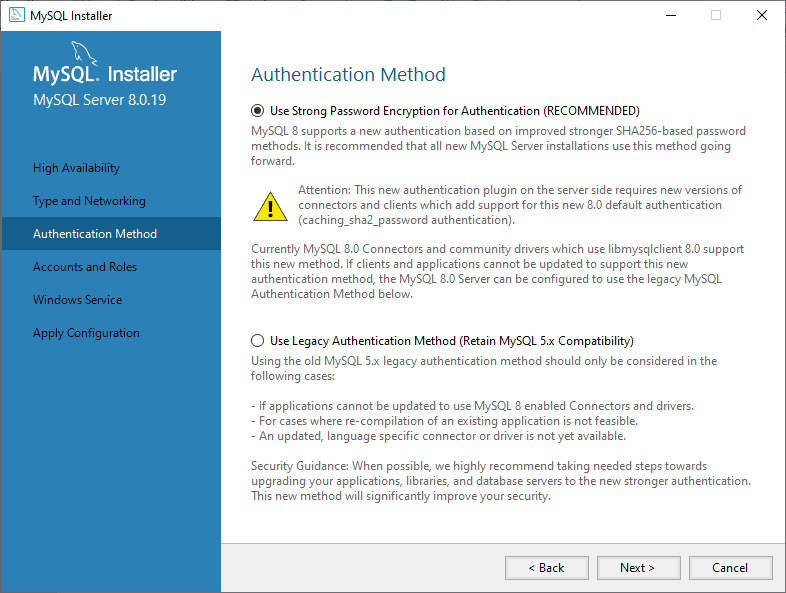
MySQL Authentication Method
Note: If you plan to use the strong password encryption method, ensure all the connectors are up to date, or this method will be a nuisance.
After selecting our preferred method mentioned above, click “Next.” Once complete, proceed to the next phase, which is the “Accounts and Roles.”
While on the “Accounts and Roles” screen, you will provide the MySQL root account password. The MySQL root account should be disabled as it is the sysadmin default account.
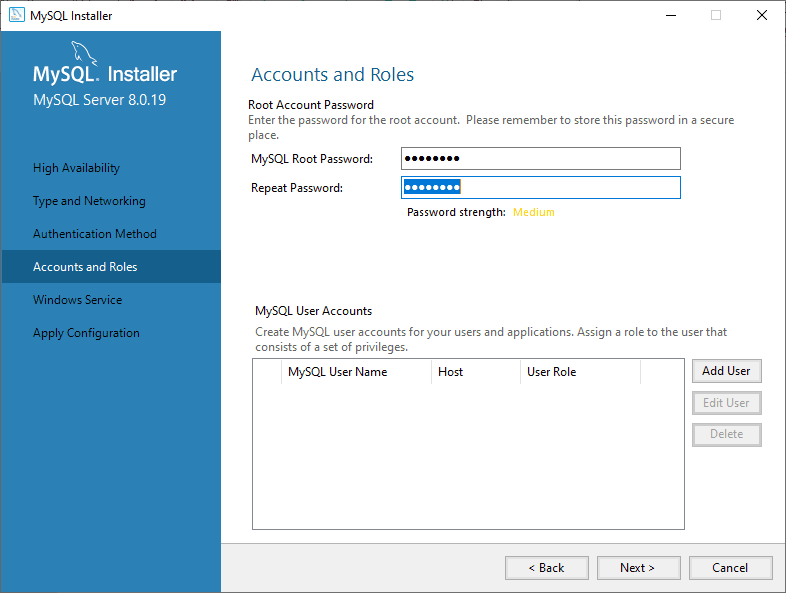
MySQL Account and Roles
Note: You can add additional users by clicking on “Add User.” A user account dialog box will pop up. Provide Hostname, username, user’s role, authentication type, and password. Fill in all the mentioned details to create a new user, then click “OK” to move to the next stage.
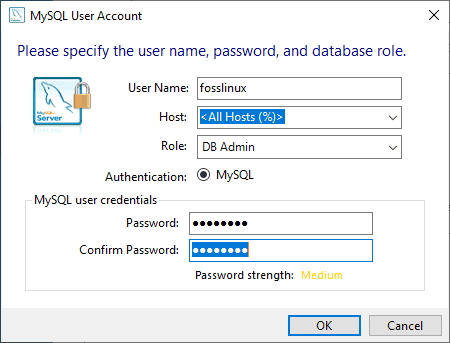
MySQL Add User
The next stage is the “Windows Service” screen, where we will configure the MySQL server. In this phase, the server is configured to run as a windows service. Please provide the correct details (desired name) and configure it to AutoStart whenever the system reboots. Additionally, provide credentials that will facilitate the running of the MySQL server. To the windows service, the user can either select a “Standard System Account” or “Custom User” as shown in the image below:
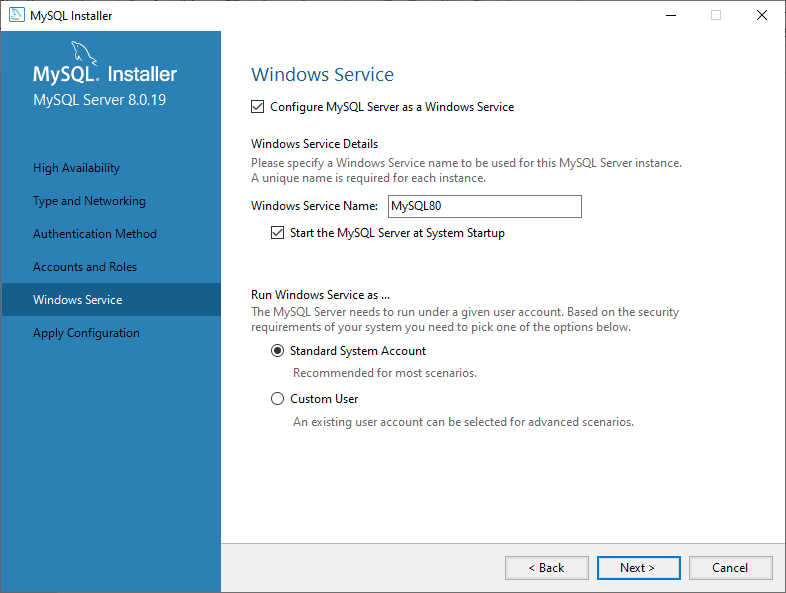
MySQL Windows Service Configuration
Click “Next” to move to the last configuration phase, which is “Apply Configuration.” While on this screen, you will see a list of various confirmation steps, as shown below. Once you are done with all the configuration settings, click on “Execute.”
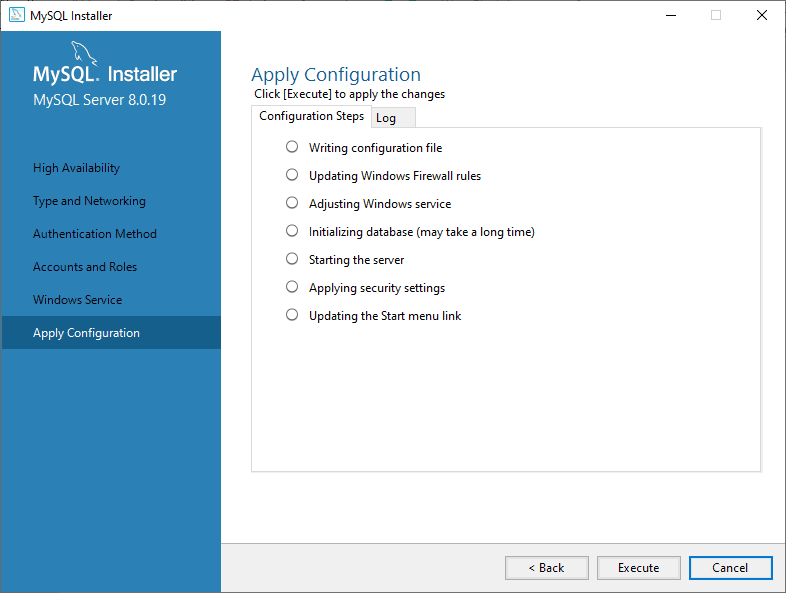
MySQL Apply Configuration Screen
The installation process will begin once the “Execute” button has been clicked. To view the installation process, click the “Log” tab. After a successful installation, click “Finish” to close the installer.
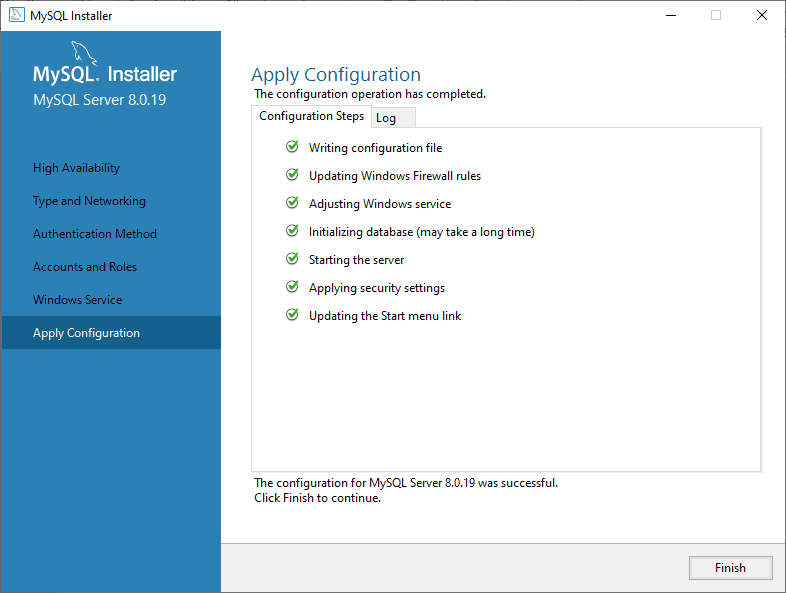
MySQL Apply Configuration Completed
Sample Database Installation
This option is triggered if you used the “Full” setup installation type. MySQL installer directly moves to the sample screen once the installation is complete. Once you are on this screen, you are required to provide your username and password that contains the sysadmin/root privileges and click “Check.”
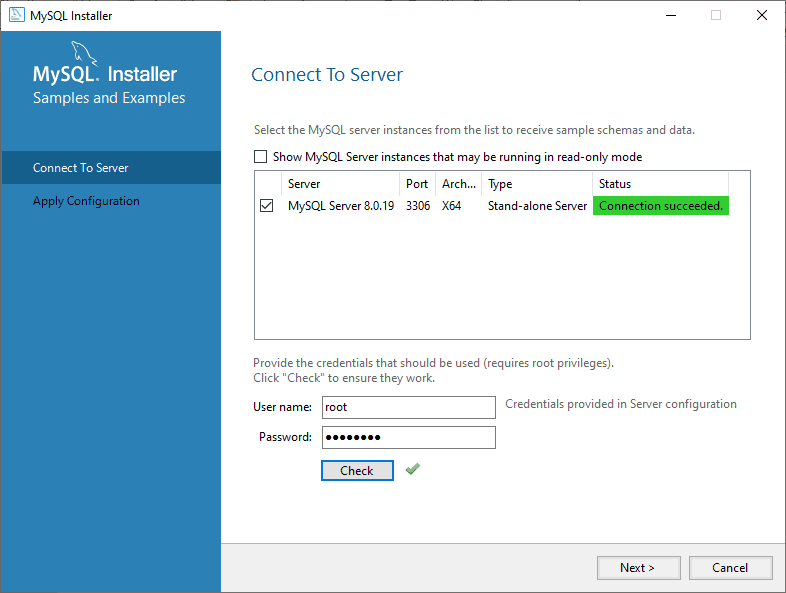
MySQL Connecting to Server
After that, click “Next,” and you will be redirected to the “Apply configuration” screen. While on this screen, click on “Execute” to begin the installation process of the sample database.
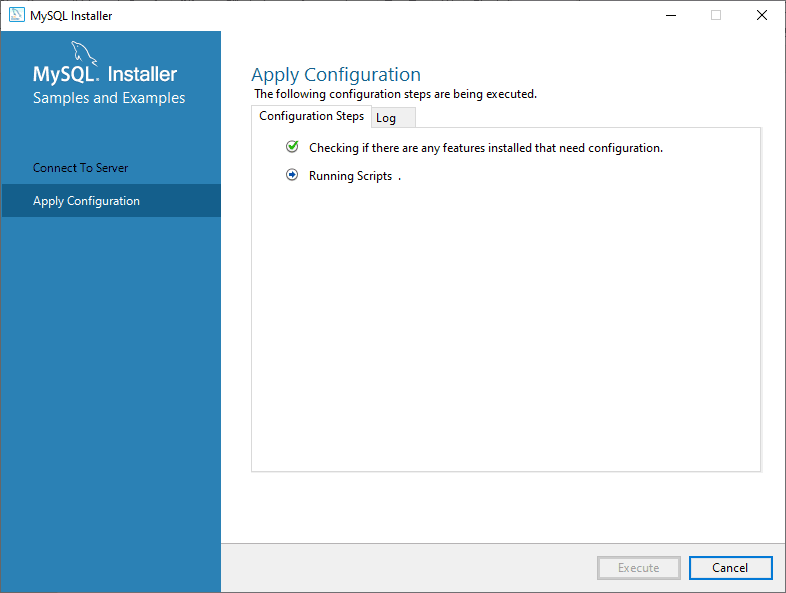
MySQL Configuring Server Connection
Note: You can click the “Log” button if you wish to see the progress of the installation process.
Click on the “Finish” button once the sample database installation has been completed.

MySQL Configuring Server Connection Successful
The installer then moves to the next stage, which is the “Product configuration” stage. While on this phase, you will see the installation progress of MySQL Server 8.0.25 and Sample and Example 8.0.25 via the status bar. Once complete, the status will change to configuration complete.
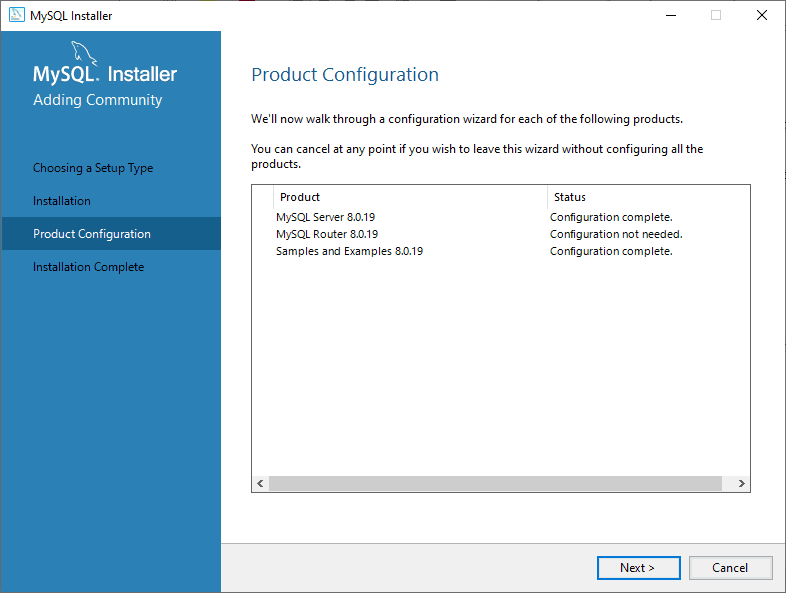
MySQL Sample Database Product Configuration Screen
The final stage in this phase is the “Installation Complete” stage. Here, you will see a Complete Installation screen that contains “Copy Log to Clipboard,” “Start MySQL Workbench after Setup,” and “Start MySQL Shell after Setup.” To start exploring your newly installed MySQL server, check the boxes next to “Start MySQL Workbench after Setup” and “Start MySQL Shell after Setup,” then click on “Finish” as shown below:
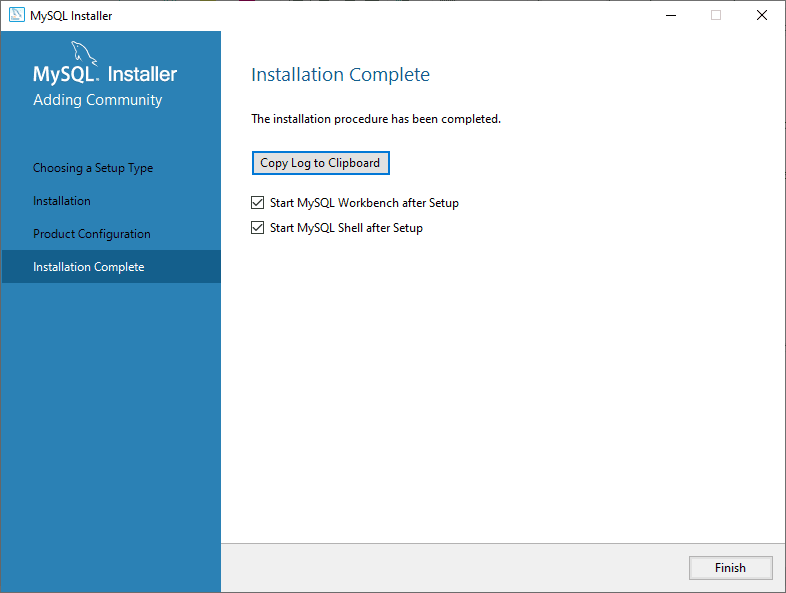
MySQL Sample Database Complete Installation Screen
Connecting MySQL Server
After a fruitful installation, it is now time to connect to the MySQL server and run the MySQL query. To do this, follow the steps mentioned correctly—open MySQL workbench (It is a development tool helpful in querying, creating, and editing database objects.
While on the MySQL workbench welcome screen, you will see a list of MySQL connections. In our case, you will only see “Local instance MySQLL80” since our MySQL server has not been configured to handle multiple connections. Now click on “Local instance MySQLL80” to open the query editor window.
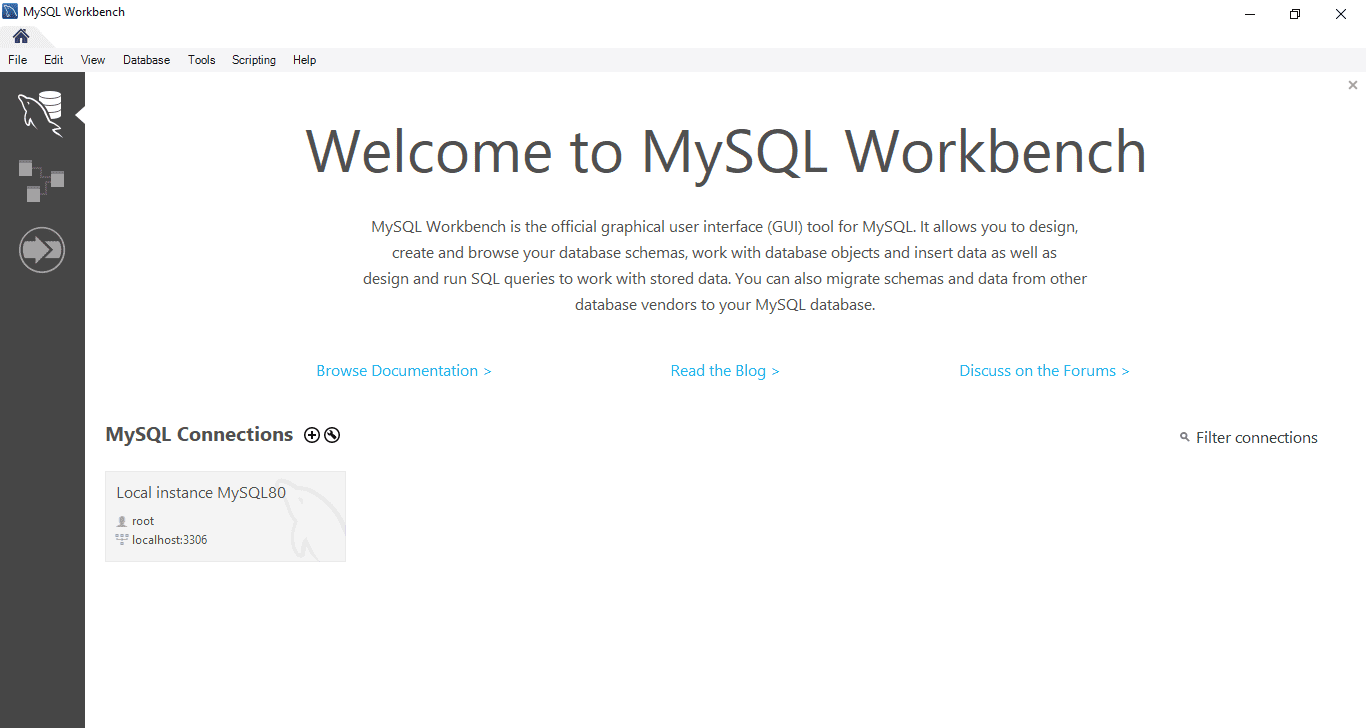
MySQL Home Screen Workbench
Note: You must enter the correct credentials created during the installation process before connecting to your MySQL database sample server.
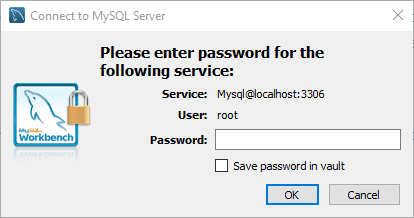
MySQL Enter Credentials to connect to Database Server
The next step is to create a database on MySQL Server. On the query editor, write the following query, then click on “Execute Query” (it is the first button with a flash icon on the query editor just after the save button)
Create database Fosslinuxtuts
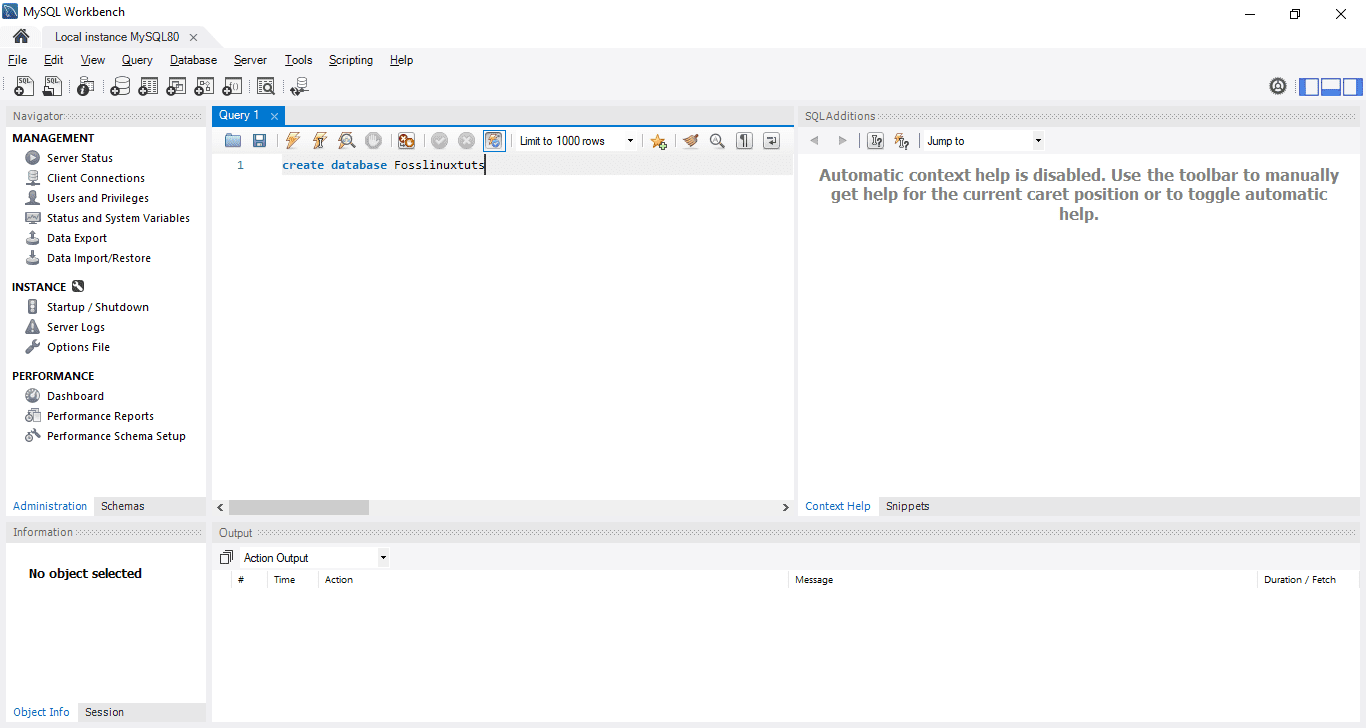
MySQL Create Database Fosslinuxtuts
Once the query execution is successful, you can access your newly created database from the “SCHEMAS” pan as indicated in the image below:
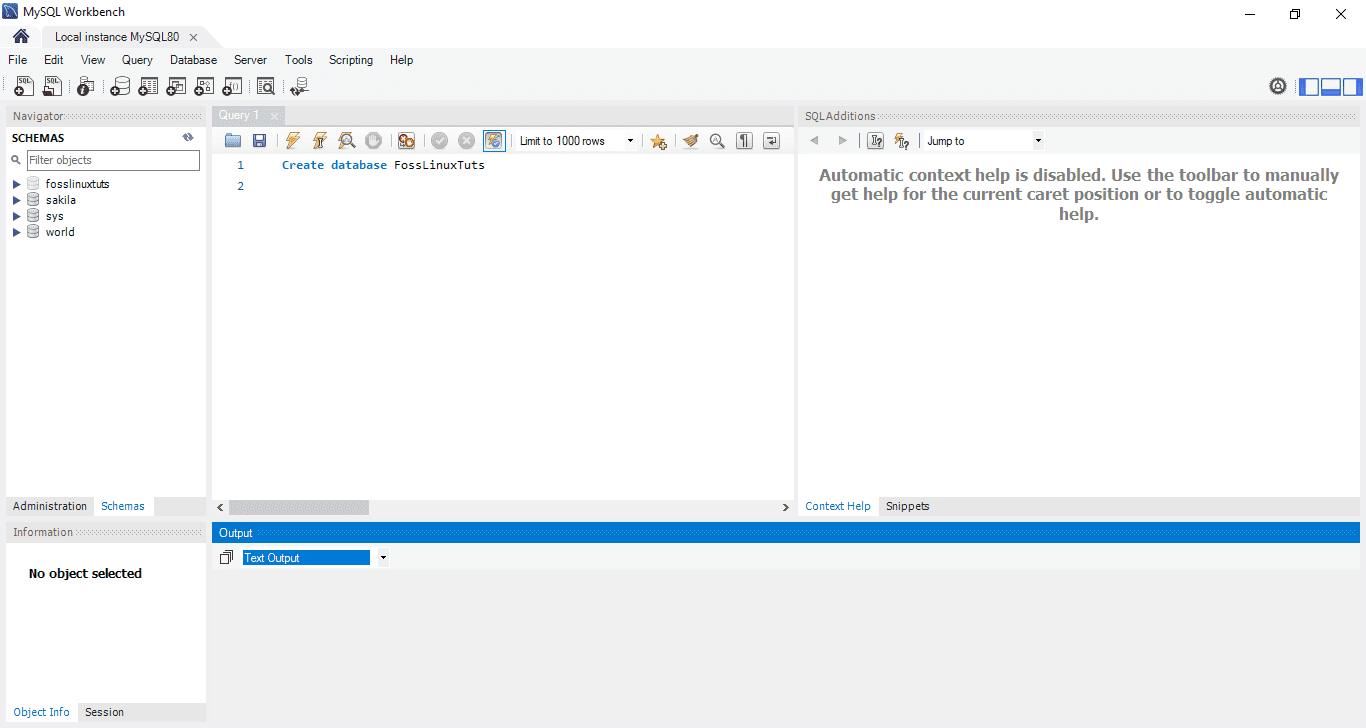
MySQL Database Successfully Created
Note: SCHEMAS is located in the left panel of the query editor.
That’s all you are done installing MySQL on your Windows operating system.
Conclusion
That was our comprehensive guide to MySQL installation guide on Windows operating systems. Are you a Linux user wondering about how to install and configure MySQL? Here is a comprehensive review on “How to install and configure MySQL on Ubuntu” to help you learn the installation and configuration process.