
A database is a collection of data that is stored electronically in a computer. Databases are controlled by Database Management Systems (DBMS). Therefore, the DBMS data and the applications used are referred to as a Database System.
Data in database systems are modeled in rows and columns in a series of tables to make the processing and querying of data efficient. Data in tables can be easily accessed, managed, modified, updated, and organized efficiently. Most database systems use Structured Query Language (SQL) for writing and querying data.
A structured Query language is a programming language used by most relational databases to query, manipulate and define data and provide access control. MySQL is a popular and open-source relational database application; hence many servers make use of MySQL. MySQL has powerful features, but it is simple to set up and use.
Connecting to MySQL using dbForge Studio for MYSQL
dbForge Studio for MySQL is an all-in-one GUI tool that allows you to develop, manage and administer MySQL databases in an environment rich in features. You can quickly and easily set up a remote database connection and connect to your local server.
Note: Remember dbForge is a premium application; hence, you have to pay a few bucks to use all its services.
The following steps show how you can connect to MySQL Server using Studio for MySQL:
- Open the database connection properties dialog box using one of the following ways;
Click New Connection on the “Database Explorer”
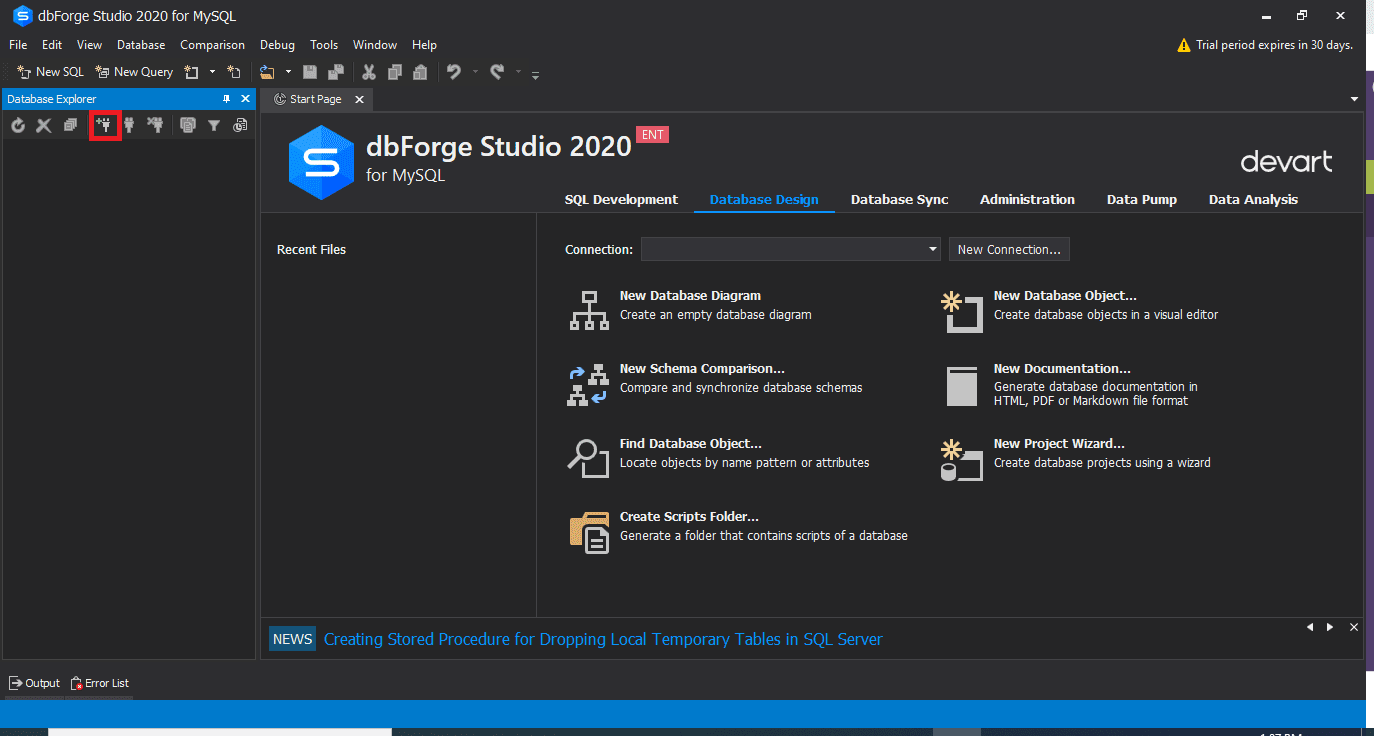
DBforge studio new connection
Click the New Connection button on the Connection toolbar.
- Choose a connection type in the Type box from the two types available, i.e., TCP/IP and Named pipe.
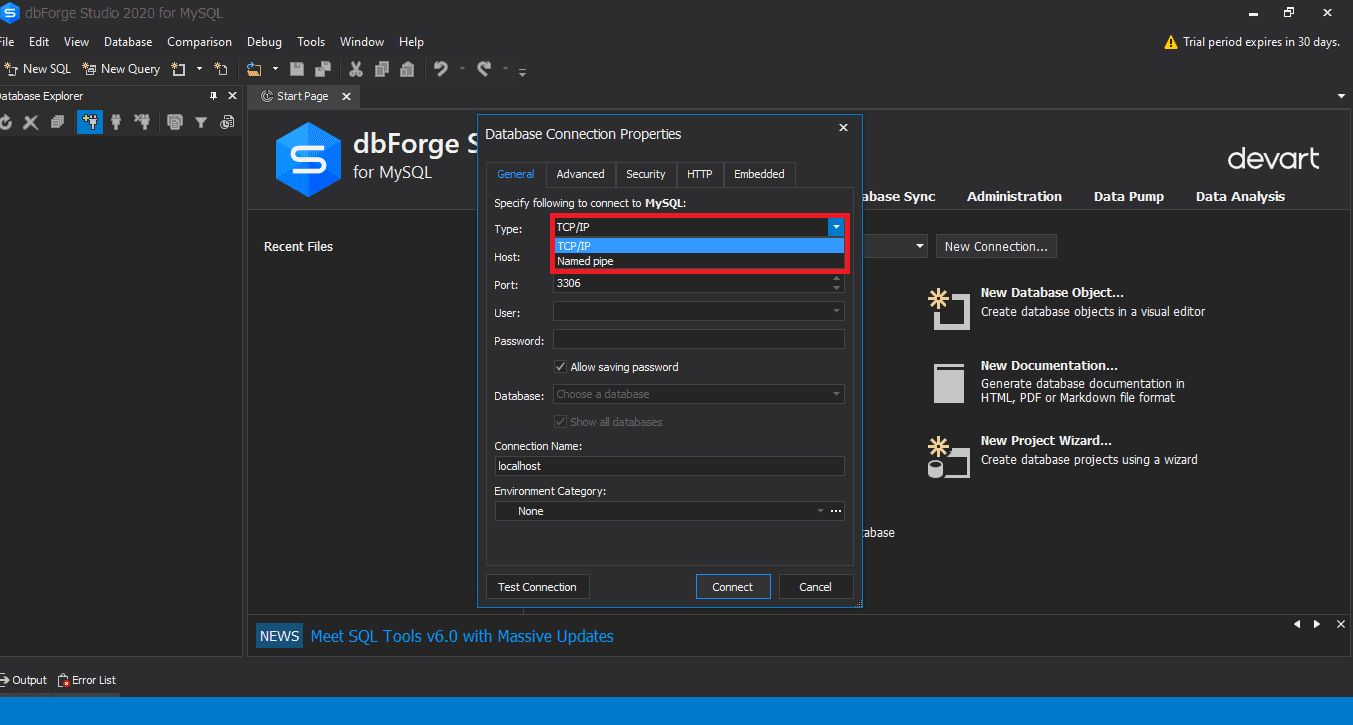
MySQL choose a new connection type
- Type the hostname in the Host box section
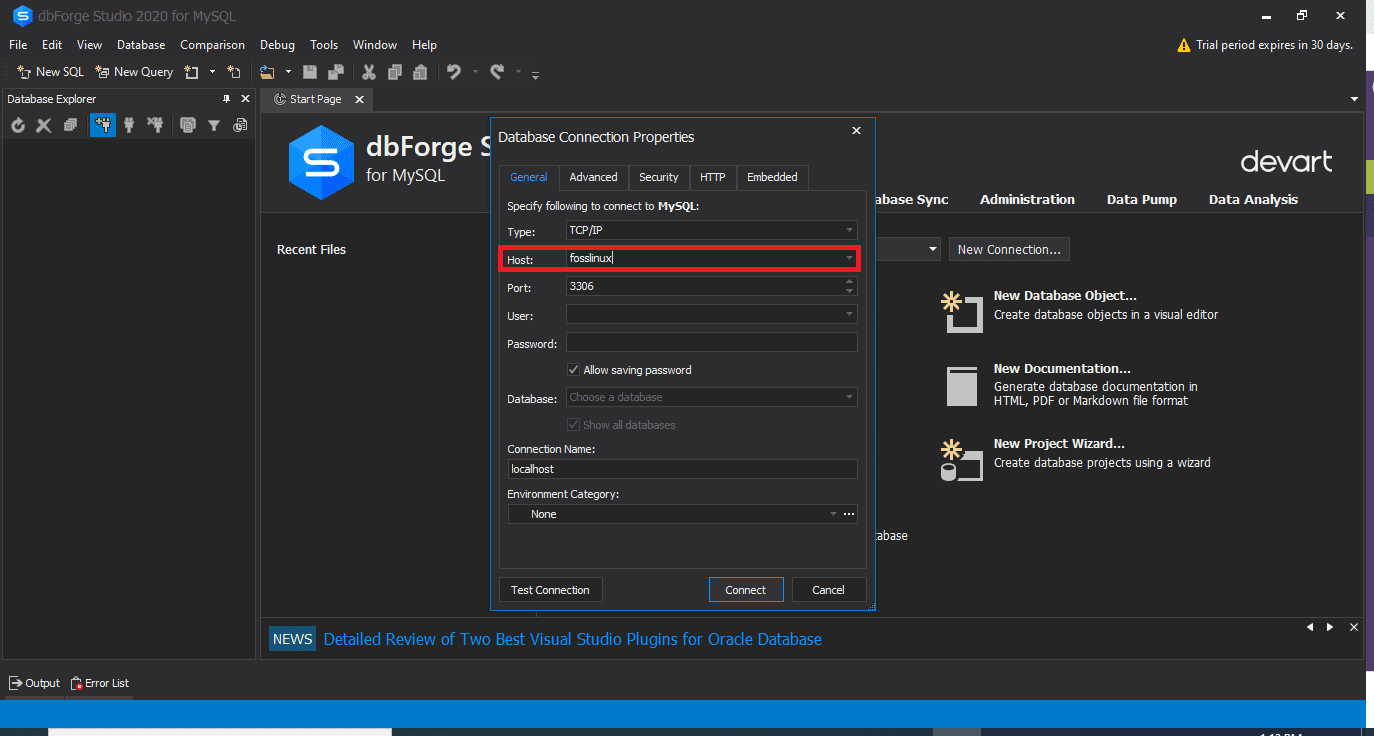
MySQL Hostname
- If you chose a TCP/IP connection, enter the port information in the Port box. The port box has a default port number of 3306.
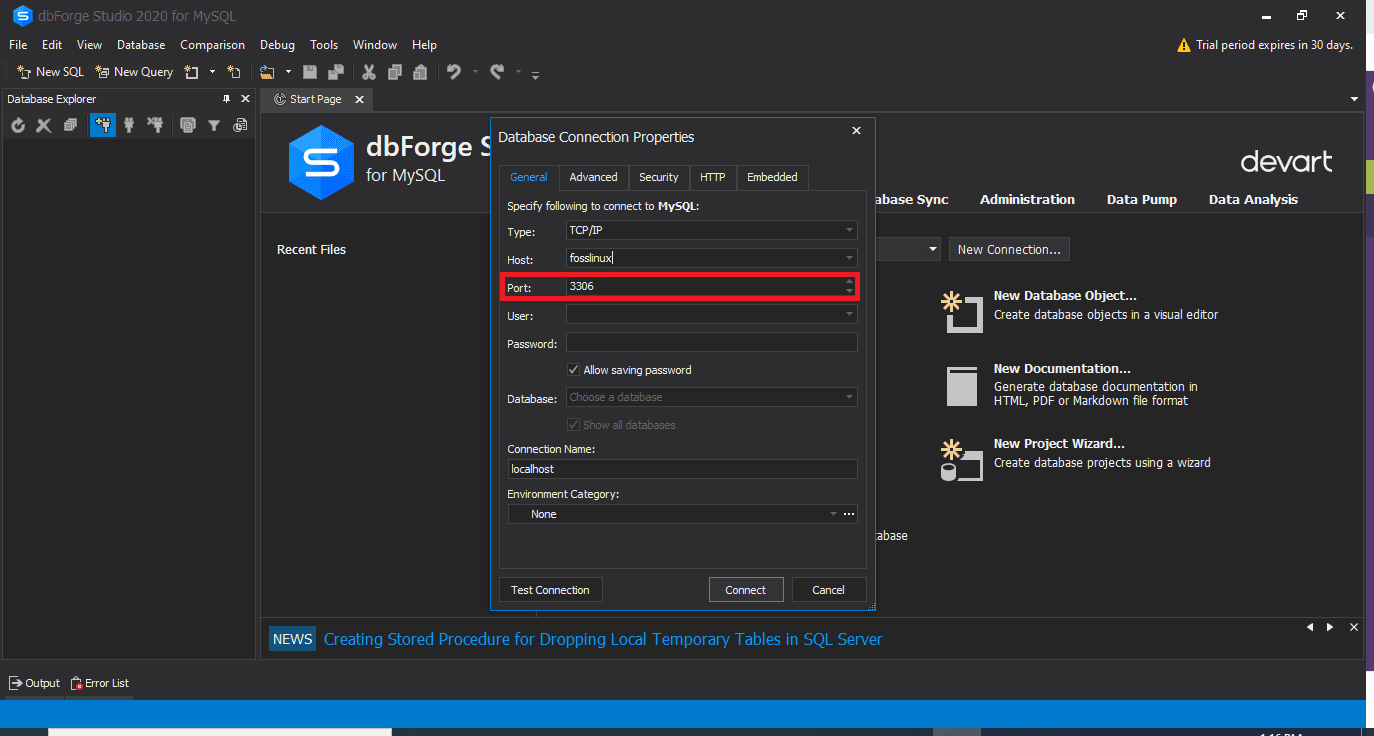
MySQL enter port
If you chose Named type connection, enter the pipe name in the Pipe box.
- In the User and Password fields, enter your login credentials.

MySQL enter user and password
- Type or choose a name for the database you want to use in the Database field.
- You can create a unique name for your new connection, or a connection name will be generated automatically from the hostname.
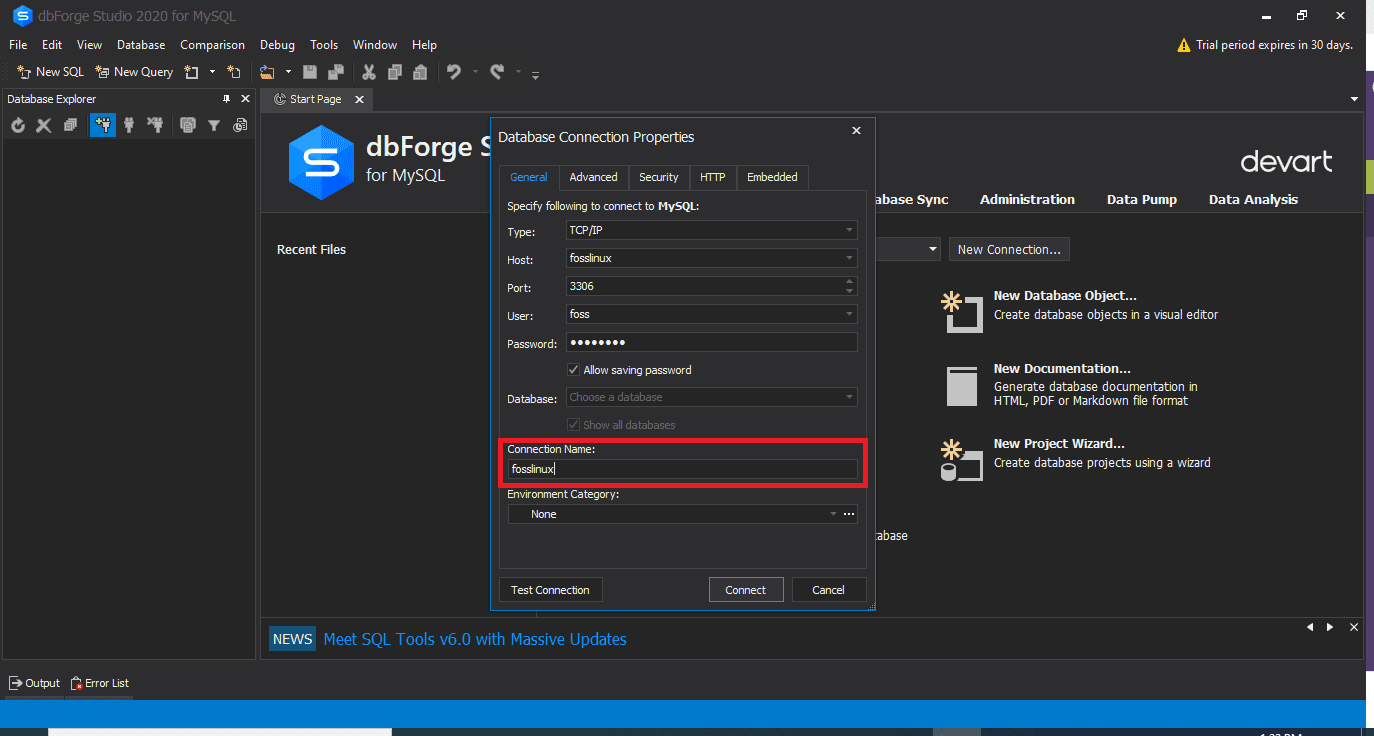
MySQL connection name
Optional Steps to connect to MySQL server using dbForge Studio
- Click on Advanced to configure advanced connection properties. On the advanced tab, you can specify Connection timeout and Execute timeout values in seconds.
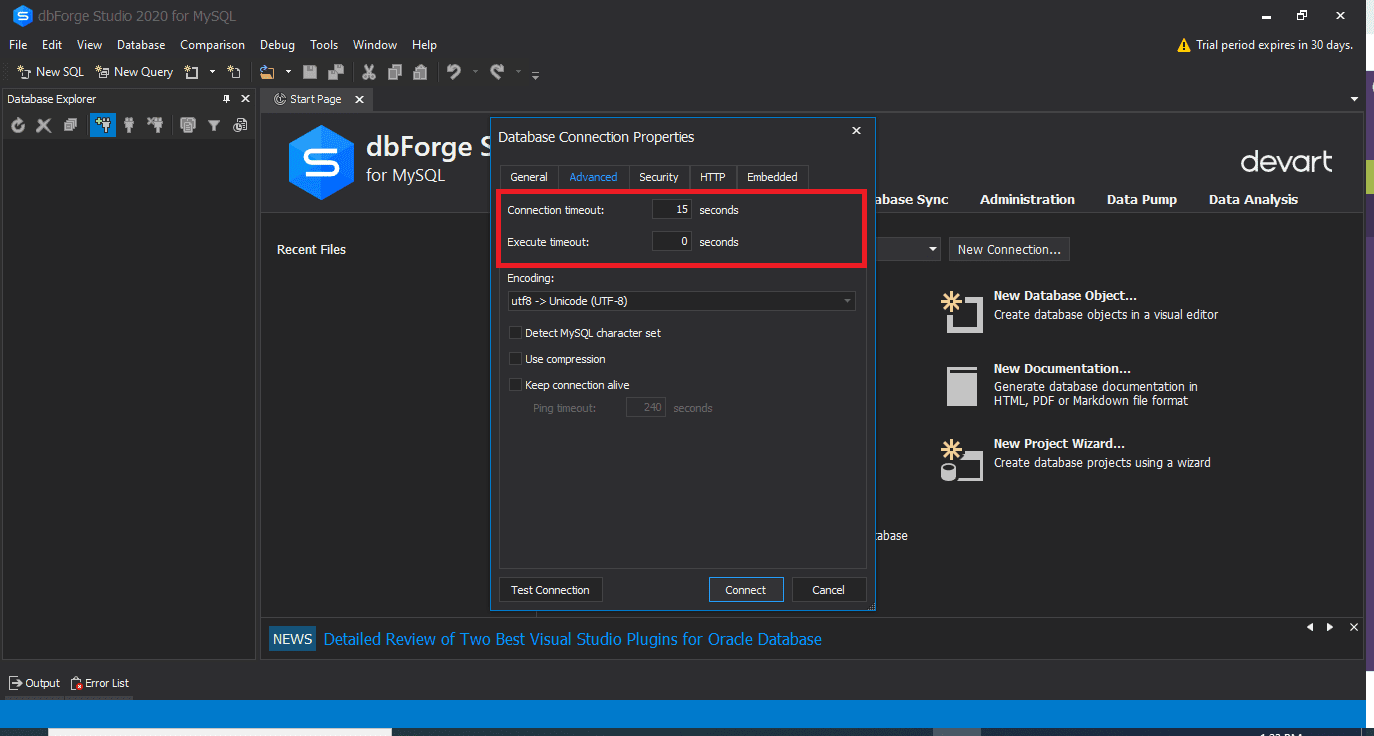
Database connection properties
- Click on the Security tab to configure security properties. For example, you can set up SSL or SSH security Properties.
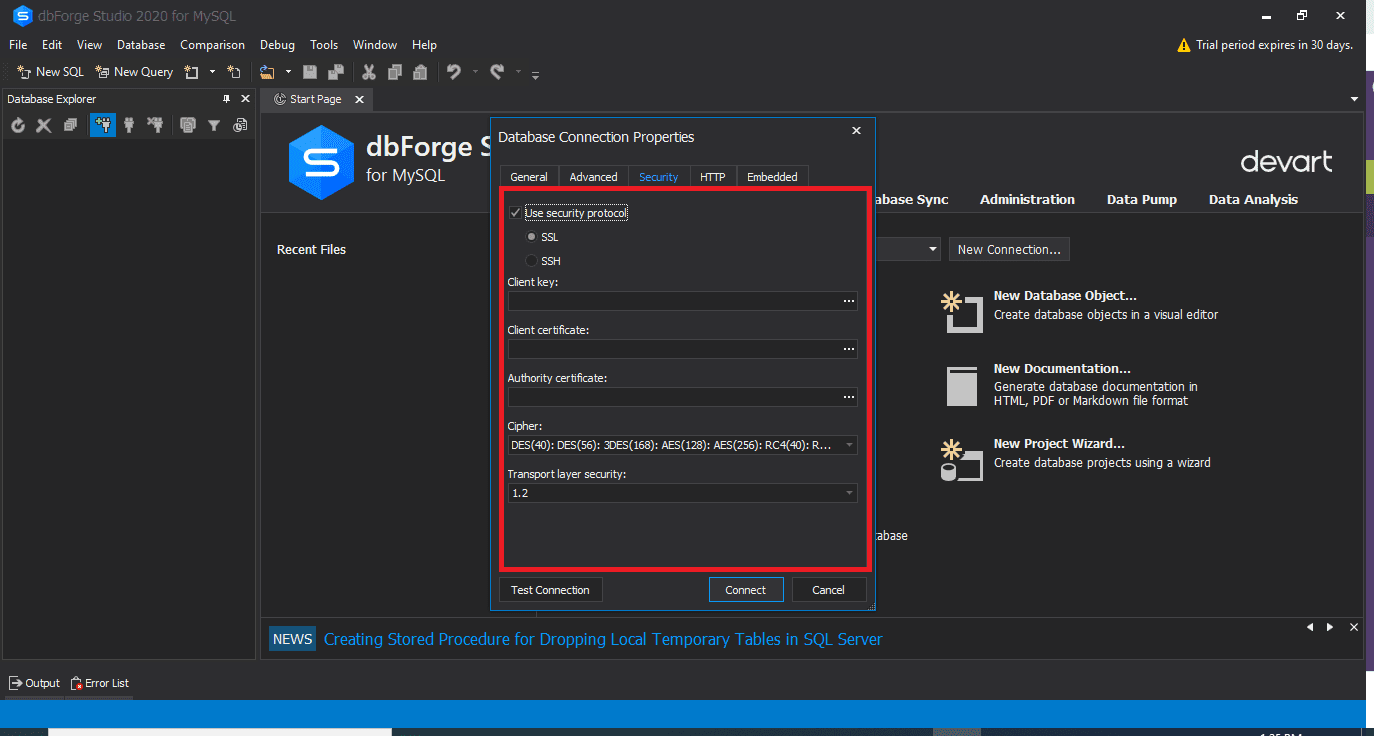
MySQL Security tab
- On the HTTP tab, you can configure HTTP tunnel properties.
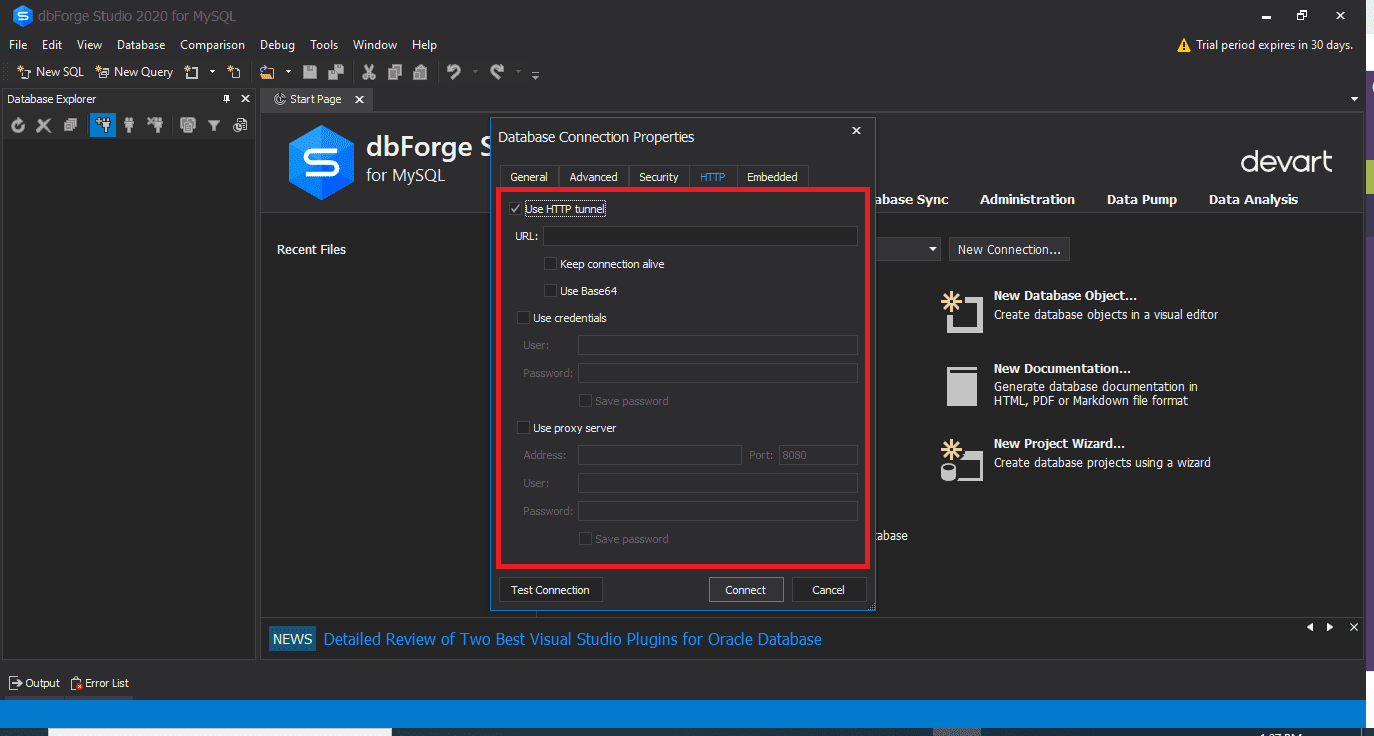
MySQL HTTP tab
- Click Test Connection to verify that you can access the MySQL server using the specified connection information.
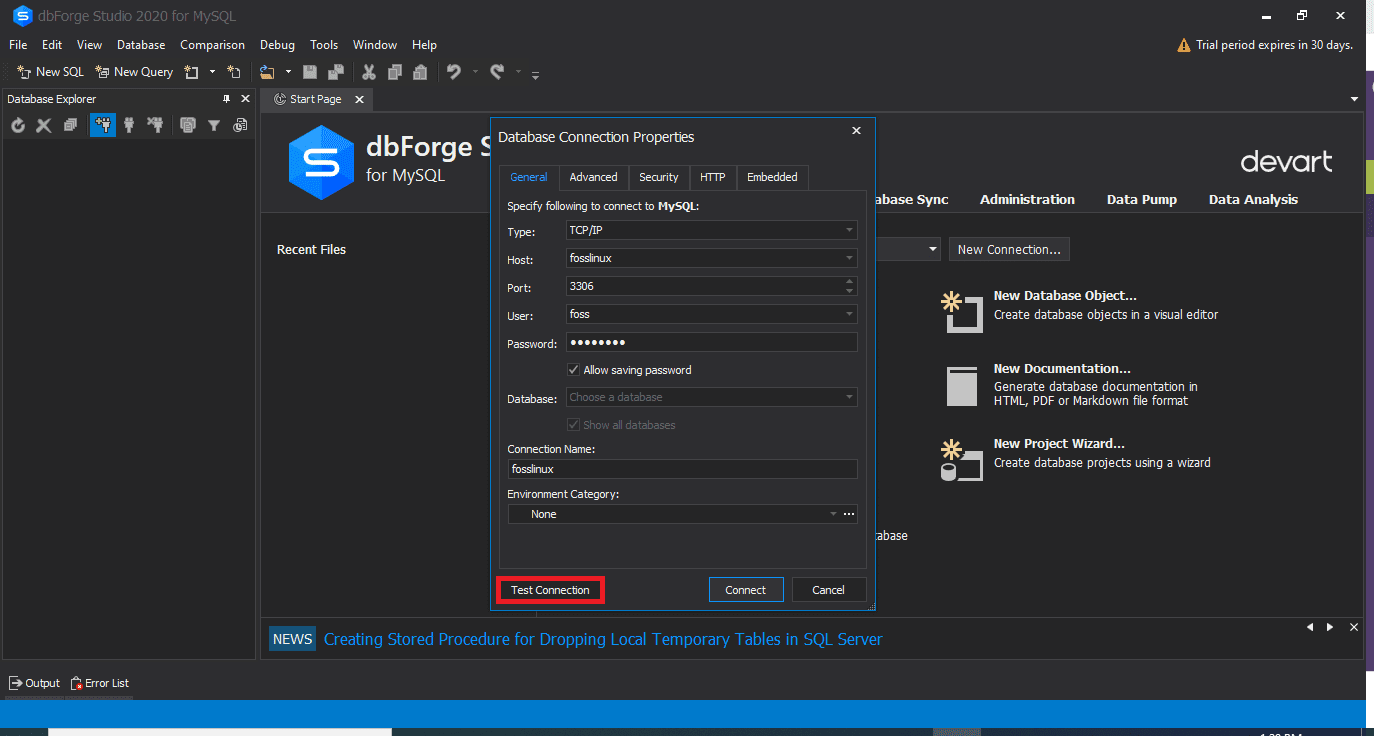
MySQL Test connection
After following all the mentioned steps, click “Connect” to create the connection using dbForge Studio.
Note: To successfully connect to your database, ensure you input your host as “localhost,” you can leave port as default, then enter the same user and password you created while installing MySQL into your windows operating system. Once done, you can select any database from the existing one and test the connection. If the connection is successful, you will see an output similar to the one shown below:
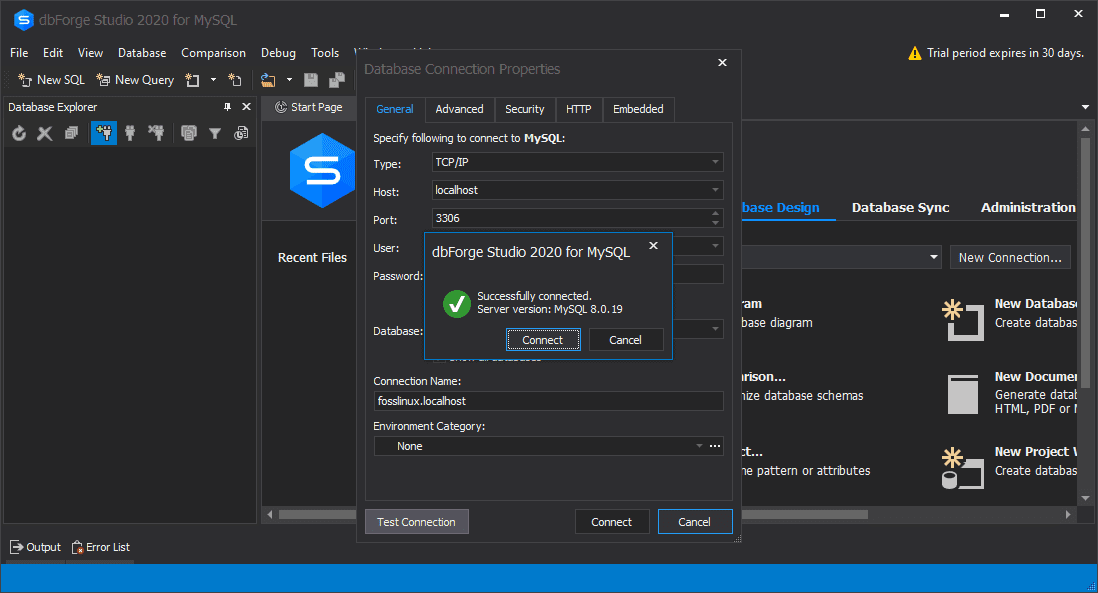
Successfully connected to MySQL database.
After successfully testing your connection, you can now click on “Connect” to connect to your database. You will see your database on dbForge Studion as shown below:
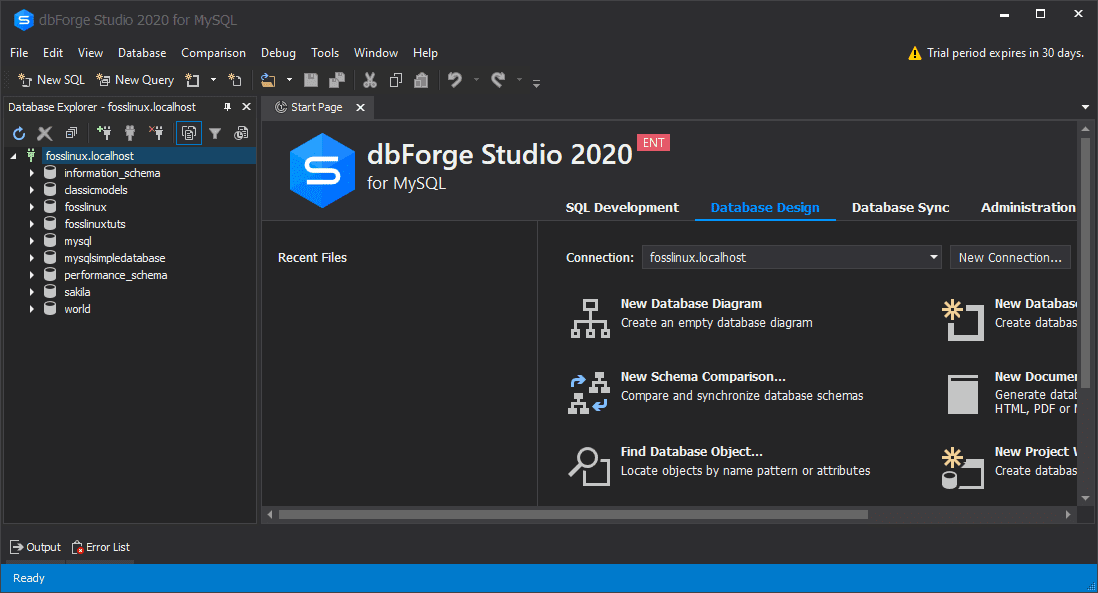
dbForge
Connecting to MySQL using MySQL Command-Line Client
The following steps show how to connect to MySQL server using MySQL command-line client:
Finding the MySQL Command-line client
The MySQL server is usually installed together with a console client for database working. The Command-line client is usually found in the Start Menu. Do note that the client is installed in two versions. One supports Unicode while the other does not. Open the start menu and locate MySQL command-line client.
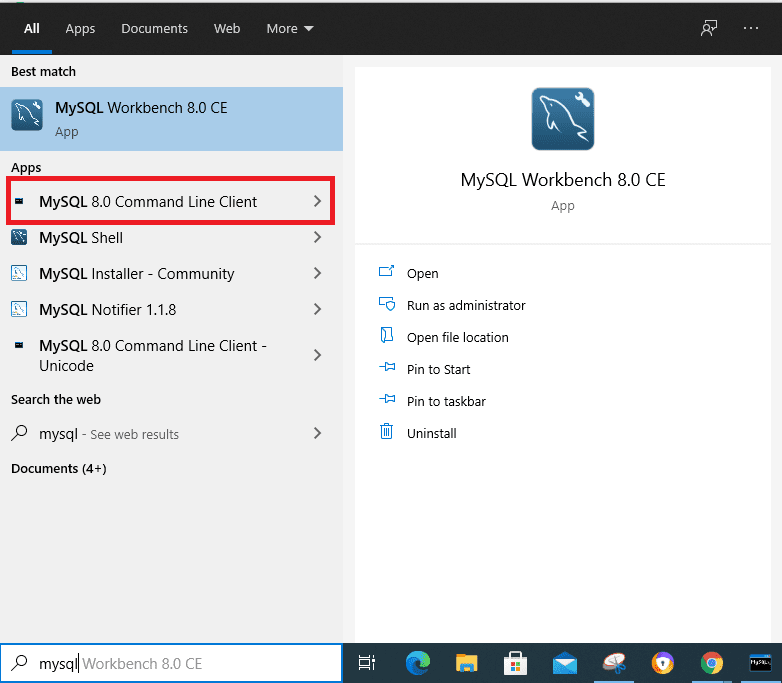
MySQL open and run MySQL command-line client
Running the Command-line client
After locating the MySQL Server Command-line Client, run it. Windows command prompt window will open, and you will be asked to enter a password. Enter the password you set for the root during the installation of the MySQL program and click “Enter” to start the client program
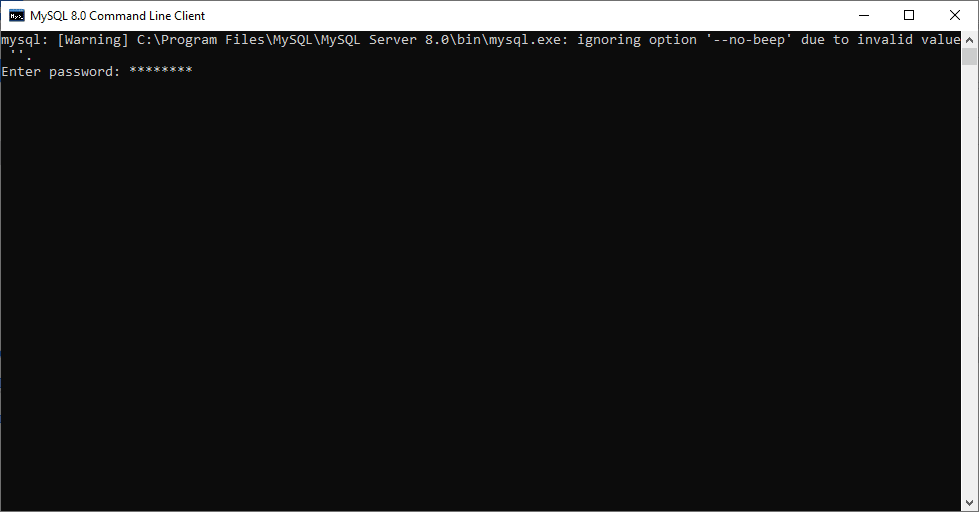
MySQL input credentials
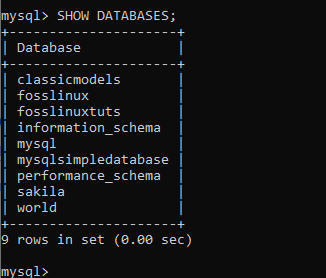
Getting the list of databases
Type the “SHOW DATABASES” command to get a list of databases already existing on your MySQL server.
Example:
SHOW DATABASES;
Show existing databases
Create a new Database
Use the “CREATE DATABASE” command shown previously to create a new database.
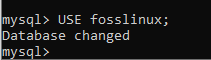
Select a database that you will use.
To connect to a specific database, use the “USE DATABASE” command and remember to specify the name of the database you want to use.
Example:
USE fosslinux;
Use statement
Create a table and Insert data.
Use the “CREATE TABLE” command shown earlier to create a table. To insert data, use the “INSERT INTO” command to add data into the table. If you have problems creating and inserting data into a table, you can refer to the basic concepts of understanding MySQL as it has been covered.
After finishing using MySQL client, type “quit” on the prompt, then click “Enter” to leave MySQL.
Connecting to MySQL using the MySQL Workbench
- To connect to MySQL using MySQL workbench, follow the following instructions:
- Run MySQL workbench from the start menu
- Click on Connect to Database on the Database menu. Alternatively, you can click on the plus icon next to the label of the MySQL connection.

MySQL Workbench
- The next window that opens (Connect to database window) specifies the connection name, hostname, port, and user values.
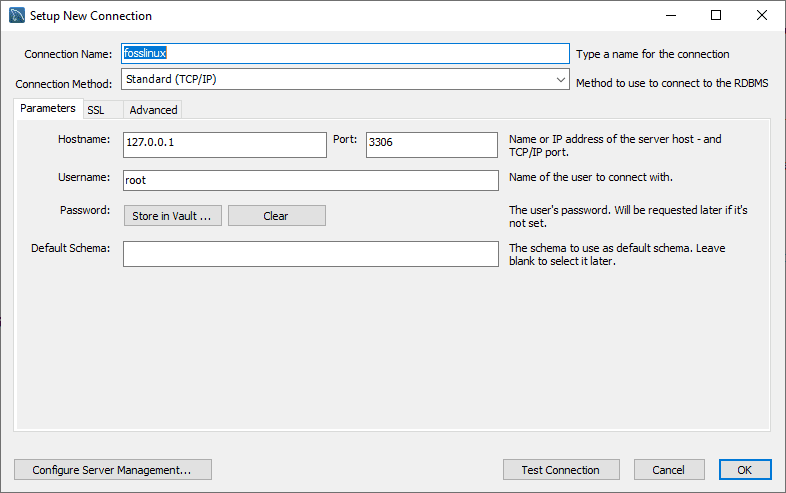
MySQL Workbench connection
Optional Steps
- On the SSL tab, configure the SSL connection settings.
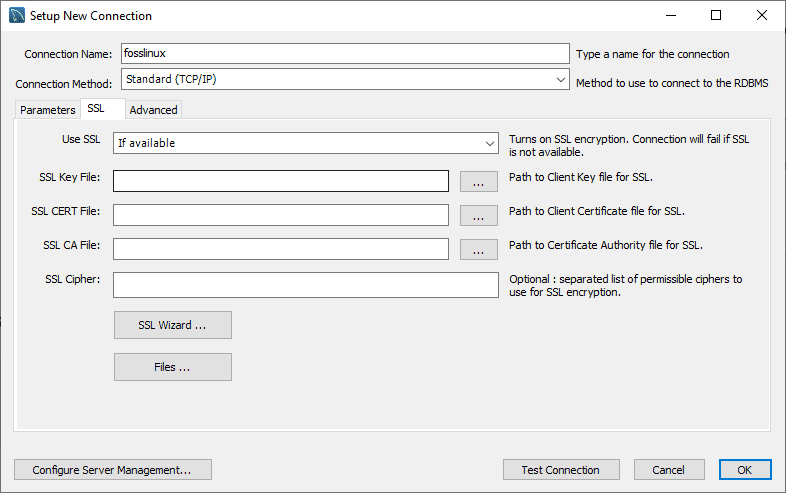
MySQL workbench SSL settings
- On the Advanced tab, configure advanced connection settings
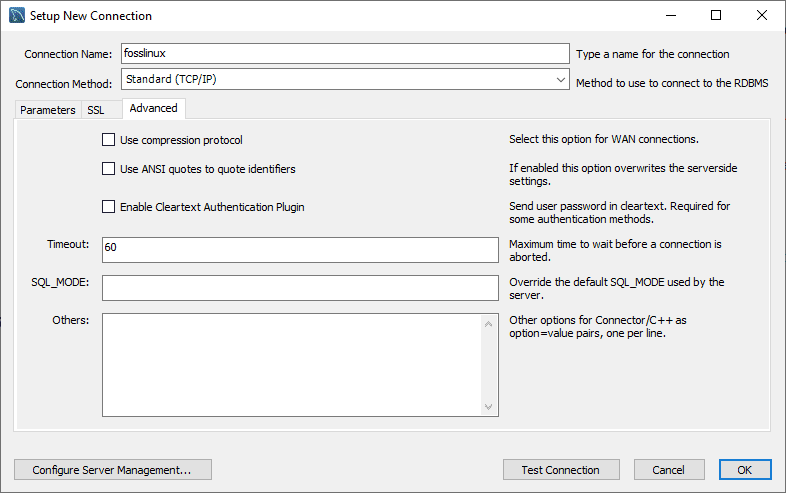
MySQL workbench advanced settings
- You can also click on Test Connection to check the parameters that you entered. Finally, click on OK if you are sure that all credentials are correct.
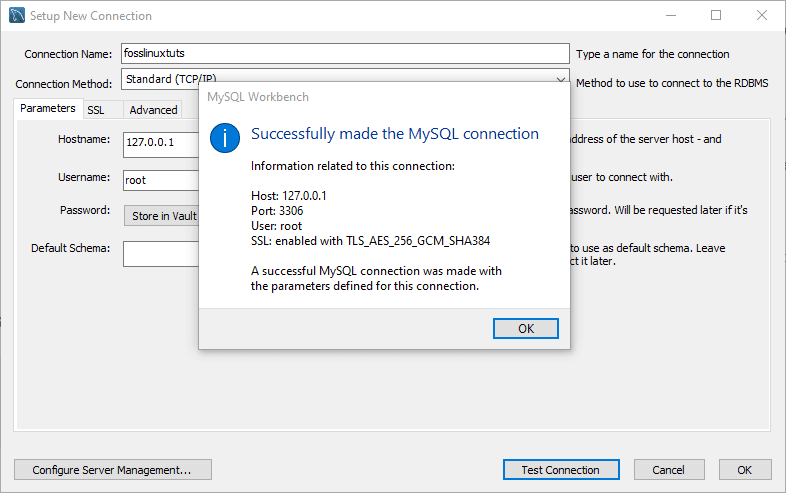
MySQL Workbench successful connection
Enter a password for the service. When you successfully connect to MySQL Server, you will see a list of all databases on the left of the screen.
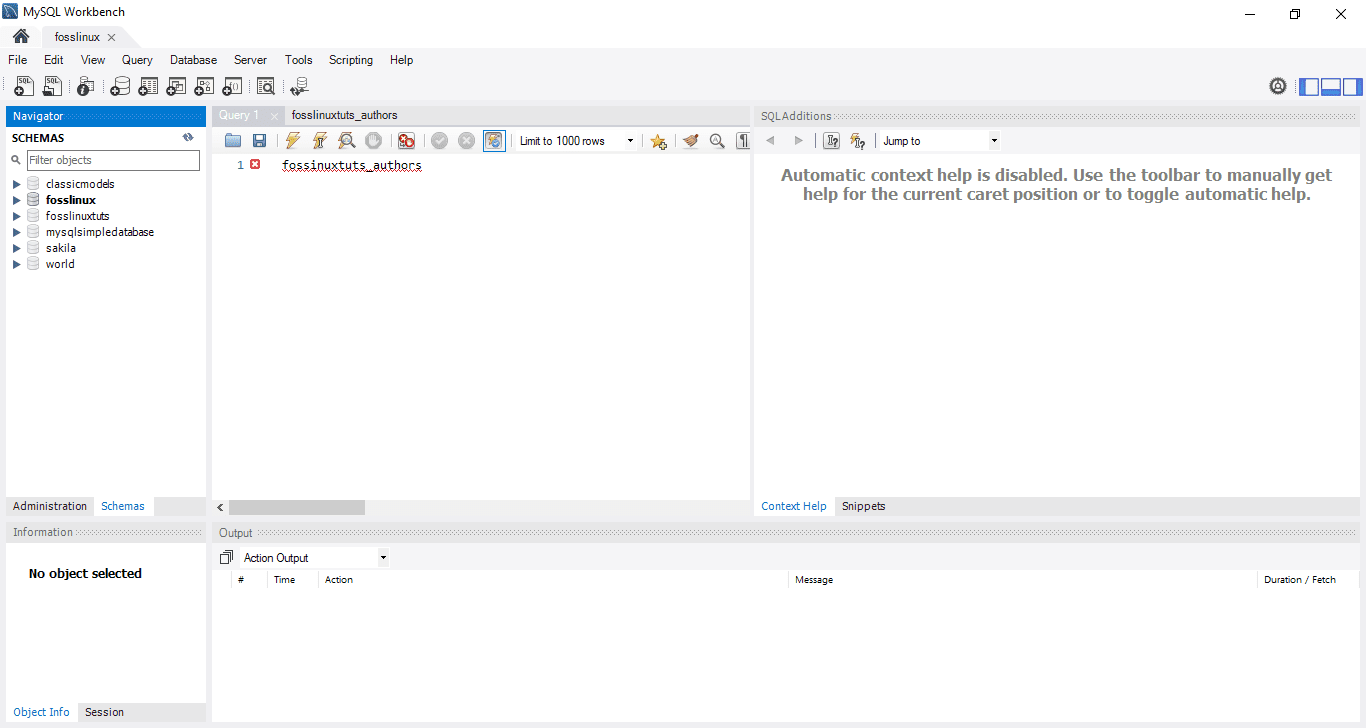
MySQL workbench Database’s list
Conclusion
The dbForge Studio for MySQL and MySQL Workbench boasts of visual and comprehensive connection wizards, enabling you to connect smoothly and quickly to MySQL Server.
Both solutions (dbForge Studio and Workbench) are capable of configuring advanced settings. Although MySQL Workbench is excellent and easy to use, dbForge is a worthy alternative due to its superior functionality. Together with dbForge Studio for MySQL, dbForge database tools have visual and user-friendly connection wizards that help connect to MySQL Server and specific databases quickly and easily.