
MariaDB is a divergence of the MySQL relational database system, which means that the original developers of MySQL created MariaDB after Oracle’s acquisition of MySQL raised some issues. The tool offers data processing capabilities for small and enterprise tasks.
Generally, MariaDB is an improved edition of MySQL. The database comes with several built-in features that offer straightforward usability, performance, and security enhancement that are not available in MySQL. Some of the outstanding features of this database include:
- Additional commands that aren’t available in MySQL.
- Another extraordinary measure made by MariaDB is replacing some of the MySQL features that negatively impacted the DBMS performance.
- The database operates under GPL, LGPL licenses, or BSD.
- It supports popular and standard querying language, not forgetting PHP, a popular web development language.
- It runs on almost all major OSs.
- It supports many programming languages.
Having gone through that, let us rush through the differences or instead compare MariaDB and MySQL.
| MariaDB | MySQL |
| MariaDB comes with an advanced thread pool that can run faster, thus supporting up to 200,000+ connections | MySQL’s thread pool supports up to 200,000 connections a single time. |
| The MariaDB replication process is safer and faster as it does the replication two times better than the traditional MySQL. | Exhibits a slower speed than MariaDB |
| It comes with new features and extensions like JSON, and kill statements. | MySQL does not support those new MariaDB features. |
| It has 12 new storage engines that aren’t in MySQL. | It has fewer options compared to MariaDB. |
| It has a boosted working speed as it comes with several features for speed optimization. Some of them are subquery, views/table, disk access, and optimizer control. | It has a reduced working speed compared to MariaDB. However, its speed enhancement is boosted by a few features such as has and indexes. |
| MariaDB has a shortage of features compared to those provided by the MySQL enterprise edition. However, to fix this issue, MariaDB offers alternative open-source plugins that aids users to enjoy the same functionalities as MySQL edition. | MySQL uses a proprietary code that only allows its users to access. |
Command Prompt Execution of the Database
After you have MariaDB installed on our PC, it is time for us to launch and start using it. All this can be done via the MariaDB command prompt. To attain this, follow the guidelines outlined below.
Step 1) On all the applications, look for MariaDB, then select the MariaDB command prompt.
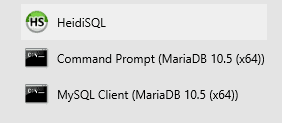
open the MariaDB command prompt
Step 2) After selecting MariaDB, the command prompt will be started. This means that it is time to log in. To get logged in to the database server, we will use the root password we generated during the database installation. Next, use the command written below to allow you to input your log-in credentials.
MySQL -u root –p
Step 3) After that, enter the password and click the “enter.” Button. By now, you should be logged in.
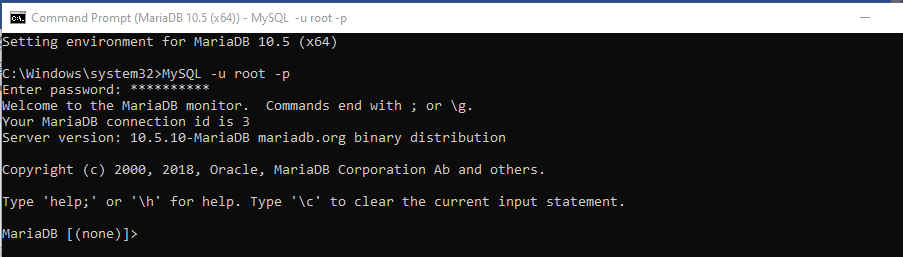
Enter the password to log in
Before creating a database in MariaDB, we will show you the data types supported by this database.
MariaDB supports the following list of data types:
- Numeric data types
- Date/time data types
- Large Object data types
- String data types
Let us now go through the meaning of each data type mentioned above for a clear understanding.
Numeric Data Types
Numeric data types comprise of the following samples:
- Float(m,d) – represents a floating number that has one precision
- Int(m) – shows a standard integer value.
- Double(m,d) – this is a floating-point with double precision.
- Bit – this is a minimal integer value, same as tinyInt(1).
- Float(p) – a floating-point number.
Date/Time Data Types
Date and time data types are data that represent both date and time in a database. Some of the Date/Time terms include:
Timestamp(m)– Timestamp generally shows the year, month, date, hour, minutes, and seconds in the ‘yyyy-mm-dd hh:mm:ss’ format.
Date – MariaDB displays the date data field in the ‘’yyyy-mm-dd” format.
Time – the time field is displayed in the ‘hh:mm:ss’ format.
Datetime – this field contains the combination of date and time fields in the “yyyy-mm-dd hh:mm:ss’ format.
Large Object Datatypes (LOB)
Examples of the large data type objects include the following:
blob (size) – it takes a maximum size of about 65,535 bytes.
tinyblob – this one here takes a maximum size of 255 bytes.
Mediumblob – has a maximum size of 16,777,215 bytes.
Longtext – has a maximum size of 4GB
String Data types
String data types include the following fields;
Text(size) – this indicates the number of characters to be stored. Generally, text stores a maximum of 255 characters—fixed-length strings.
Varchar(size) – the varchar symbolizes the 255 maximum characters to be stored by the database. (Variable-length strings).
Char(size) – the size denotes the number of characters stored, which is 255 characters. It is a Fixed-length string.
Binary – also stores a maximum of 255 characters. Fixed-size strings.
After looking at that key and crucial area you need to be aware of, let us dive into creating a Database and tables in MariaDB.
Database and Tables Creation
Before creating a new database in MariaDB, ensure that you log in as a root user admin to enjoy the special privileges that are only given to the root user and admin. To begin, type in the following command in your command line.
mysql -u root –p
After inputting that command, you will be prompted to enter the password. Here, you will use the password you created initially while setting up MariaDB, and then you will now be logged in.
The next step is to create the database using the “CREATE DATABASE” command, as shown by the syntax below.
CREATE DATABASE databasename;
Example:
Let us apply the above syntax in our case
CREATE DATABASE fosslinux;

create a database called fosslinux
Upon running that command, you will have created a database called fosslinux. Our next step will be to check whether the database was created successfully or not. We will attain this by running the following command, “SHOW DATABASES,” which will display all the available databases. You need not worry about the predefined databases you will find in the server since your database will not be affected by those preinstalled databases.
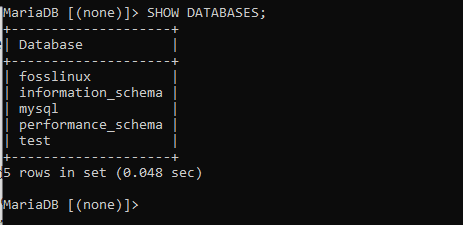
The screenshot shows fosslinux as part of the databases
Looking keenly, you will notice that the fosslinux database is also in the list together with the preinstalled databases, hence showing that our database was successfully created.
Selecting a Database
To work or use a particular database, you need to select it from the list of the available or rather displayed databases. This allows you to complete tasks such as table creation and other significant functions that we will look at within the database.
To attain this, use the “USE” command followed by the database name, for instance:
USE database_name;
In our case, we will select our database by typing the following command:
USE fosslinux;
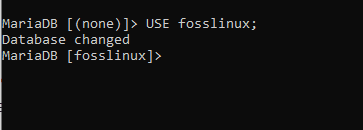
How to select a database
The screenshot displayed above shows a database change from none to the fosslinux database. After that, you can proceed to table creation within the fosslinux database.
Drop Database
To drop a database simply means to delete an existing database. For instance, you have several databases on your server, and you want to delete one of them. You will use the following query to achieve your desires: To help us achieve the DROP functionality, we will create two different databases (fosslinux2, fosslinux3) using the previously mentioned steps.
DROP DATABASE db_name;
DROP DATABASE fosslinux2;
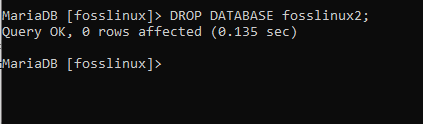
Drop a database
Subsequently, if you want to drop a database but you are not sure if it exists or not, then you can utilize the DROP IF EXISTS statement to do that. The statement follows the following syntax:
DROP DATABASE IF EXISTS db_name;
DROP DATABASE IF EXISTS fosslinux3;
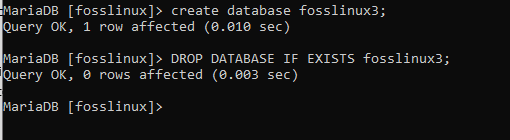
dropping a database that you are not sure if it exists
Creating a Table
Before creating a table, you first need to select the database. After that, you now have the green light to create the table using the “CREATE TABLE” statement, as shown below.
CREATE TABLE tableName (columnName, columnType);
Here, you can set one of the columns to hold the table’s primary key values. Hopefully, you know that the primary key column should never contain null values at all. Look at the example we did below for a better understanding.
We start by creating a database table called foss with two columns (name and account_id.) by running the following command.
CREATE TABLE foss(

account_id INT NOT NULL AUTO_INCREMENT,

Name VARCHAR(125) NOT NULL,

PRIMARY KEY (account_id));

creating the foss table
Let us now break down what is in the above created table. The PRIMARY KEY constraint has been utilized to set the account_id as the primary key for the entire table. The AUTO_INCREMENT key property will help in appending the values of the account_id column by 1 automatically for any newly inserted record in the table.
You can also create the second table, as shown below.
CREATE TABLE Payment(

Id INT NOT NULL AUTO_INCREMENT,

Payment float NOT NULL,

PRIMARY KEY (id));
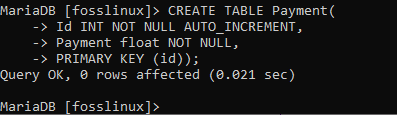
Create Payment table
Subsequently, you can try the above example and create several other tables without any limitation. That will act as a perfect example to keep you on your toes on table creation in MariaDB.
Showing Tables
Now that we have finished creating tables, it is always good to check whether they exist or not. Use the clause written below to check whether our tables were created or not. The command shown below will display any available table in the database.
SHOW TABLES;
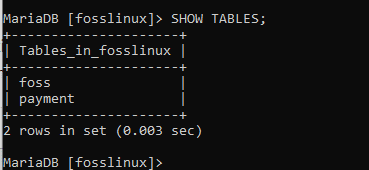
Displaying created tables
Upon running that command, you will realize that two tables were successfully created within the fosslinux database, which means that our table creation was successful.
How to show Table Structure
After creating a table in the database, you can look at the structure of that particular table to see if everything is up to the mark. Use the DESCRIBE command, popularly abbreviated as DESC, which takes the following syntax to accomplish this:
DESC TableName;
In our instance, we will look at the structure of the foss table by running the following command.
DESC foss;
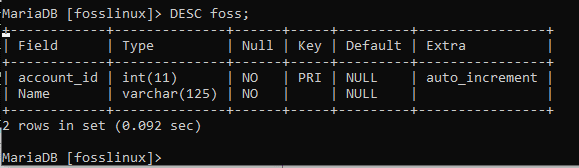
Describing the foss table
Alternatively, you can also view the payment table structure using the following command.
DESC Payment;
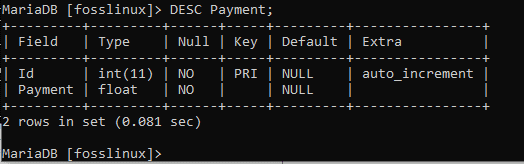
Describing the Payment table
CRUD and Clauses
Data insertion into a MariaDB table is achieved via the use of the INSERT INTO statement. Use the following guidelines to check out how you can insert data in your table. Additionally, you can follow the syntax below to help you insert data in your table by replacing the tableName with the correct value.
Sample:
INSERT INTO tableName

(column_1, column_2, …)

VALUES

(values1, value2, …),

(value1, value2, …)

…;
The syntax displayed above shows the procedural steps you need to carry out to use the Insert statement. First, you need to specify the columns into which you want to insert data and the data you need to be inserted.
Let us now apply that syntax in the foss table and look at the result.
INSERT INTO foss

(account_id, name)

VALUES (123, ‘MariaDB foss’);
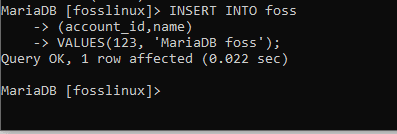
Insert into the foss table
The above screenshot shows a single record inserted into the foss table successfully. Now, should we try to insert a new record into the payment table? Of course, we will also try to run an example using the payment table for better understanding.
INSERT INTO Payment

(id, Payment)

VALUES(123, 5999);
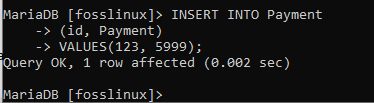
Insert a record in the payment table
Finally, you can see that the record has been created successfully.
How to use the SELECT Function
The select statement plays a significant role in allowing us to view the contents of the entire table. For instance, if we want to look at the contents from the payment table, we will run the following command into our terminal and wait for the execution process to be completed. Look at the example done below.
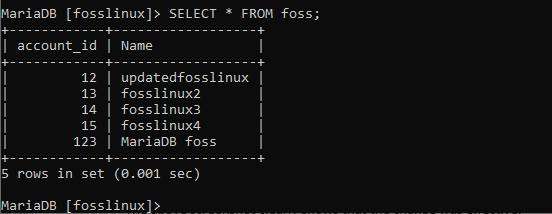
SELECT * from foss;
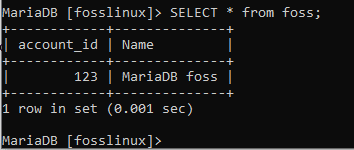
select from foss table
SELECT * from Payment;
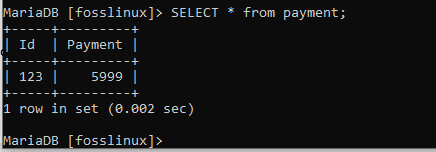
Select from payment table
The above screenshot displays the contents of the foss, payment tables, respectively.
How to Insert Multiple Records in a Database
MariaDB has diverse ways of records insertion to allow multiple records to be inserted at a go. Let us show you an example of such a scenario.
INSERT INTO foss

(account_id, name)

VALUES

(12, ‘fosslinux1’),

(13, ‘fosslinux2’),

(14, ‘fosslinux3’),

(15, ‘fosslinux4’);
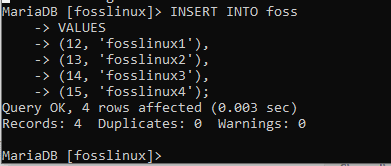
Inserting multiple records in a table
That is one of the many reasons why we love this great database. As seen in the example above, the multiple records were successfully inserted without raising any errors. Let us also try the same in the payment table by running the following example:
INSERT INTO Payment

(id, payment)

VALUES

(12, 2500),

(13, 2600),

(14, 2700),

(15, 2800);
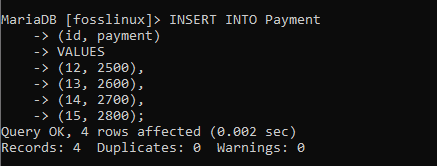
inserting multiple records in the payment table
After that, let us confirm if our records were successfully created using the SELECT * FROM formula:
SELECT * FROM Payment;
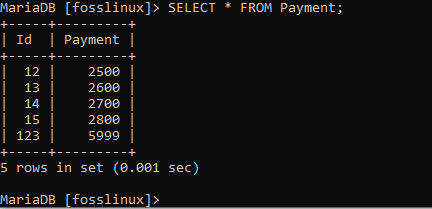
confirming if the records were created successfully in the payment table
How to Update
MariaDB has many outstanding features that make it much more user-friendly. One of them is the Update feature that we are going to look at in this section. This command allows us to modify or somewhat change records saved into a table. Additionally, you can combine it with the WHERE clause used to specify the record that is to be updated. To check this out, use the following syntax:
UPDATE tableName SET field=newValueX, field2=newValueY,… [WHERE…]
This UPDATE clause can also be combined with other existing clauses like LIMIT, ORDER BY, SET, and WHERE. To simplify this more, let us take an example of the payment table.
In this table, we will change the payment of user with id 13 from 2600 to 2650:
UPDATE Payment

SET payment = 2650

WHERE id = 13;
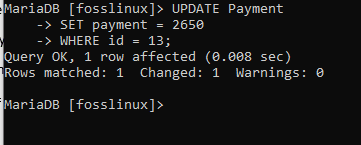
Updating payment of user 13
The above screenshot shows that the command ran successfully. We can now proceed to check the table to see whether our update was effective or not.
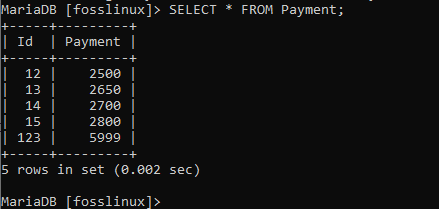
well updated Payment table for user 13
As seen above, user 13 data has been updated. This shows that change has been implemented. Consider trying the same in the foss table with the following records.

foss table display
Let us try changing the name of the user called ”fosslinux1 to updatedfosslinux.” Take note that the user has an account_id of 12. Below is the displayed command to help in carrying out this task.
UPDATE foss

SET name = “updatedfosslinux”

WHERE account_id = 12;
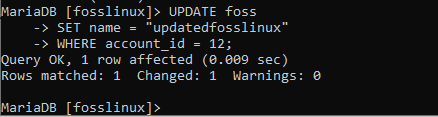
updating fosslinux1 to updatedfossslinux
Take a look to confirm whether the change has been applied or not.
updated foss table
The above screenshot clearly shows that the change was effective.
In all the above samples, we have only been trying to apply changes to one column at a time. However, MariaDB offers outstanding service by allowing us to change multiple columns at the same time. This is another crucial importance of this superb database. Below is a demonstration of the multiple changes example.
Let us use the Payment table with the following data:
payment table records.
Here, we will change both the id and the user’s payment of id 12. In the change, we will switch the id to 17 and the payment to 2900. To do this, run the following command:
UPDATE Payment

SET id = 17,

Payment = 2900

WHERE id = 12;
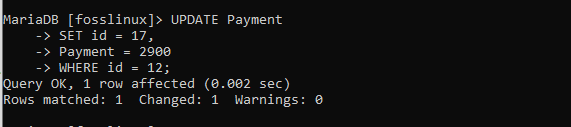
updating user 12 to 17 and payment amount in the Payment table
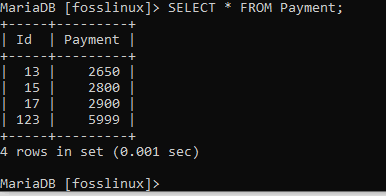
You can now check the table to see if the change was made successfully.

updated payment table with user 12 changed to 17 and change in the amount
The above screenshot shows that the change was successfully made.
The Delete command
To delete one or many records from a table, we recommend using the DELETE command. To achieve this command functionality, follow the following syntax.
DELETE FROM tableName

[WHERE condition(s)]

[ORDER BY exp [ASC | DESC ]]

[LIMIT numberRows];
Let us apply this to our example by deleting the third record from the payment table, which has an id of 14 and a payment amount of 2700. The syntax displayed below will help us delete the record.
DELETE FROM Payment

WHERE id = 14;
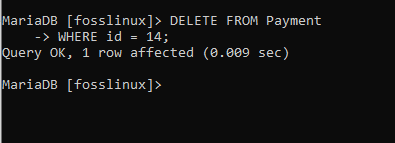
delete command
The command ran successfully, as you can see. To check it out, let us query the table to confirm whether the deletion was successful:
The screenshot confirms user 14 deleted
The output indicates that the record was deleted successfully.
The WHERE Clause
The WHERE clause helps us to clarify the exact location where change is to be made. The statement is used together with various clauses such as INSERT, UPDATE, SELECT, and DELETE. For example, consider the Payment table with the following info:
Presuming we need to view records with payment amount less than 2800, then we can effectively use the following command.
SELECT *

FROM Payment

WHERE Payment <2800;
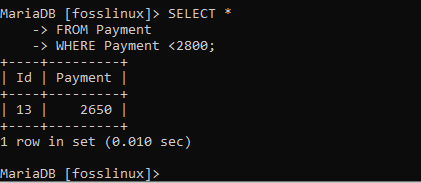
The where clause to confirm id 13 is the only one with less than 2800
The display above shows all the payments below 2800, which means we have achieved the functionality of this clause.
Additionally, the WHERE clause can be joined with the AND statement. For instance, we want to see all records in the Payment table with payment below 2800 and an id being above 13. To accomplish this, use the statements written below.
SELECT *

FROM Payment

WHERE id > 13

AND Payment < 2800;
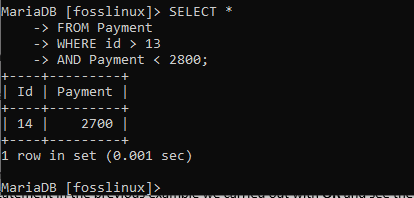
The where clause to check records with less than 2800 and have an id of above 13
From the above example, only one record has been returned. For a record to be returned, it must satisfy all the specified conditions, including payment of less than 2800 and an id above 13. If any of the above specifications have been violated, then the records will not be displayed.
Subsequently, the clause can also be combined with the OR statement. Let us try this out by replacing the AND statement in the previous example we carried out with OR and see the type of result we get.
SELECT *

FROM Payment

WHERE id > 13

OR Payment < 2800;
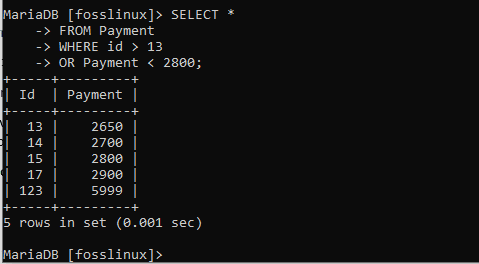
We got 5 records because the result was selecting an id that is either above 13 or an amount less than 2800
In this outcome, you can see that we received 5 records. But, again, this is because, for a record to qualify in the OR statement, it only has to meet one of the specified conditions, and that’s it.
The Like Command
This special clause specifies the data pattern when accessing data that has an exact match in the table. It can also be used together with INSERT, SELECT, DELETE, and UPDATE statements.
The like statement either returns a true or false upon passing the pattern data you are looking for in the clause. This command can also be used with the following clauses:
- _: this is used to match a single character.
- %: used to match either 0 or more characters.
To find out more on the LIKE clause, then follow the following syntax plus the example done below:
SELECT field_1, field_2, FROM tableNameX, tableNameY,…

WHERE fieldname LIKE condition;
Let us now move to the demonstration stage to see how we can apply the clause with the % wildcard character. Here, we will use the foss table with the following data:
foss table data
Follow the steps below in the following example set to view all records with names that begin with the letter f:
SELECT name

FROM foss

WHERE name LIKE 'f%';
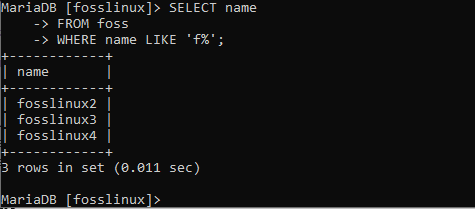
picking names that begin with f in the database
After executing that command, you realized that all the names beginning with the letter f were returned. To push this command to effectiveness, let us use it to see all names that end with the number 3. To attain this, run the following command in your command line.
SELECT name

FROM foss

WHERE name like '%3';
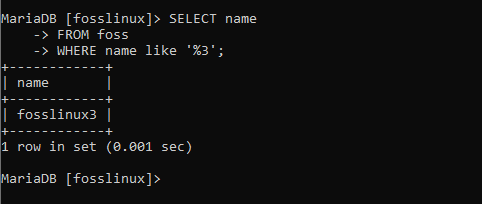
selecting a record with the number 3 at the end
The above screenshot shows a return of only one record. This is because it is the only one that met the specified conditions.
We can expand on our search pattern by the wildcard as shown below:
SELECT name

FROM foss

WHERE name like '%SS%';
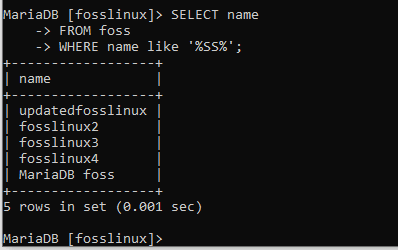
Screenshot containing records with the combination of ss letters
The clause, in this case, iterated through the table and returned names with a combination of the ‘ss’ strings.
Besides the % wildcard, the LIKE clause can also be used together with the _ wildcard. This _wildcard will only look for a single character, and that’s it. Let us try checking this out with the payment table that has the following records.
Payment table data.
Let us look for a record that has the 27_0 pattern. To achieve this, run the following command:
SELECT *

FROM Payment

WHERE Payment LIKE '27_0';
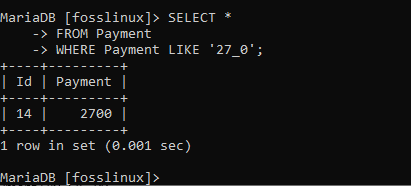
using the _ wildcard
The above screenshot shows a record with a payment of 2700. We can also try another pattern:
Here, we will use the insert function to add a record with id 10 and a payment of 220.
INSERT INTO Payment

(id, Payment)

VALUES(10, 220);
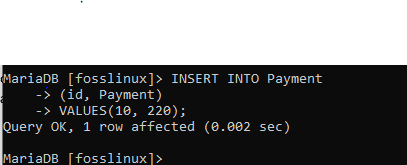
new user with id 10
After that, try the new pattern
SELECT *

FROM Payment

WHERE Payment LIKE '_2_';
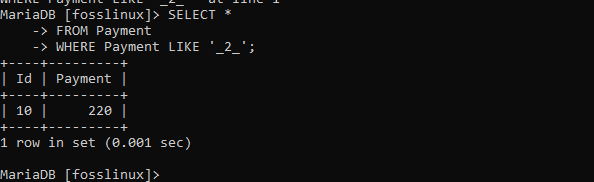
The new pattern of the wild card
The LIKE clause can alternatively be used with the NOT operator. This will, in turn, return all the records that don’t meet the specified pattern. For instance, let us use the Payment table with the records as shown below:
payment table records
Let us now find all the records that don’t follow the ’28…’ pattern using the NOT operator.
SELECT *

FROM Payment

WHERE Payment NOT LIKE '28%';
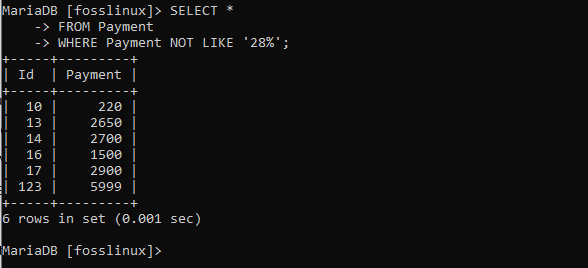
user 15 violates the protocol specified by the NOT LIKE clause
The table above shows the records that don’t follow the specified pattern.
Order By
Suppose you have been looking for a clause to aid in sorting out records, either ascending or descending, then Order By clause will get the job done for you. Here, we will use the clause with the SELECT statement as displayed below:
SELECT expression(s)

From TABLES

[WHERE condition(s)]

ORDER BY exp [ASC | DESC];
When trying to sort out data or records in ascending order, you can use this clause without adding the ASC conditional part at the end. To prove this, look at the following instance:
Here we will use the Payment table that has the following records:
SELECT * FROM Payment

WHERE Payment LIKE '2%'

ORDER BY Payment;
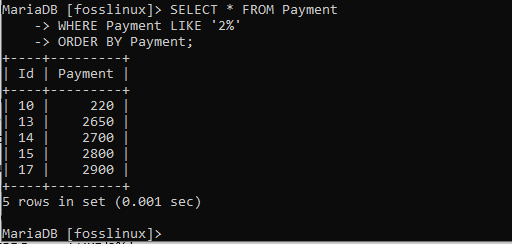
sorting payment table in ascending order without the ASC attributes
The final results show that the payment table has been rearranged, and the records have automatically been aligned in ascending order. Therefore, we need not specify the order when getting an ascending order of records since it is done by default.
Let us also try using the ORDER BY clause together with the ASC attribute to note the difference with the automatically allocated ascending format as performed above:
SELECT * FROM Payment

WHERE Payment LIKE '2%'

ORDER BY Payment ASC;
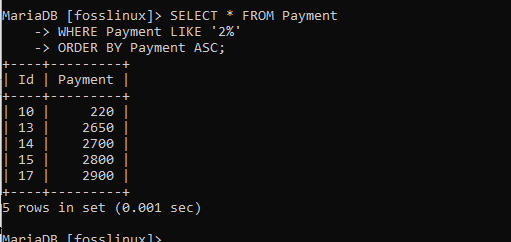
sorting payment table in ascending order using the ASC statement
You now realize that the records have been ordered in ascending order. This looks like the one we carried out using the ORDER BY clause without the ASC attributes.
Let us now try and run the clause with the DESC option to find the descending order of records:
SELECT * FROM Payment

WHERE Payment LIKE '2%'

ORDER BY Payment DESC;
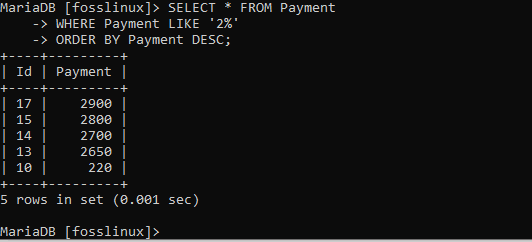
sorting payment table in descending order using the DESC statement
Looking at the table, you realize that the payment records have been sorted with the price in descending order as specified.
The Distinct attribute
In Many databases, you may find a table containing several look-alike records. To do away with such duplicate records in a table, we will use the DISTINCT clause. In short, this clause will allow us only to get unique records. Look at the following syntax:
SELECT DISTINCT expression(s)

FROM tableName

[WHERE condition(s)];
To put this into practice, let us use the Payment table with the following data:
Here, we will create a new table that contains a duplicate value to see if this attribute is effective. To do this, follow the guidelines:
CREATE TABLE Payment2(

Id INT NOT NULL AUTO_INCREMENT,

Payment float NOT NULL,

PRIMARY KEY (id));
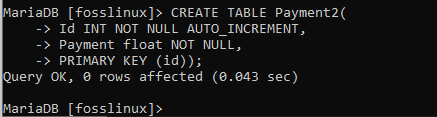
payment2 created table
After creating the payment2 table, we will refer to the previous section of the article. We inserted records in a table and replicated the same in inserting records in this table. To do this, use the following syntax:
INSERT INTO Payment2

(id, Payment)

VALUES

(1, 2900),

(2, 2900),

(3, 1500),

(4, 2200);
After that, we can select the payment column from the table, which gives the following results:
SELECT Payment from Payment2;
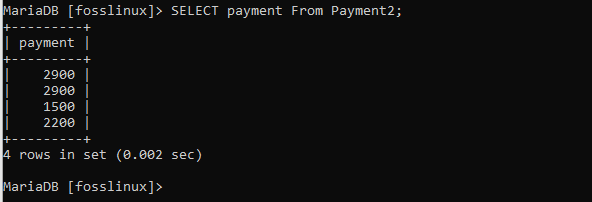
payment2 table
Here, we will have two records with the same payment record of 2900, which means it is a duplicate. So now, since we need to have a unique dataset, we will filter our records using the DISTINCT clause as shown below:
SELECT DISTINCT Payment FROM Payment2;
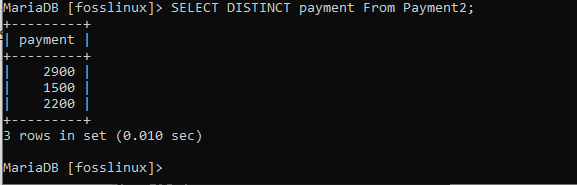
you can see that one record was deleted by the DISTINCT statement
In the output above, we can now see no duplicates.
The ‘FROM’ Clause
This is the final clause we are going to look at in this article. The FROM clause is used when fetching data from a database table. Alternatively, you can also utilize the same clause when joining tables in a database. Let us try out its functionality and see how it works in a database for a better and clear understanding. Below is the syntax for the command:
SELECT columnNames FROM tableName;
To prove the above syntax, let us replace it with the actual values from our Payment table. To do this, run the following command:
SELECT * FROM Payment2;
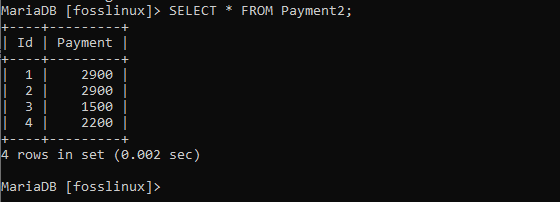
newly created payment2 table
So, in our case, we want only to fetch the payment column since the statement can also allow us to fetch one column from a database table. For example:
SELECT payment FROM Payment2;
payment column display using the FROM clause
Conclusion
To this extent, the article has extensively covered all the basics and startup skills you need to acquaint yourself with to get started with MariaDB.
We used the various MariaDB’s statements or rather commands to carry out the vital database steps including, starting up the database using the “MYSQL –u root –p,” creating a database, selecting the database, creating a table, displaying tables, showing table structures, Insert function, select function, insert Multiple records, update function, the delete command, Where command, the Like function, Order By function, the Distinct clause, From clause and the data types.