
MariaDB is an open-source relational database system built by the initial developers of MySQL. It is popularly known as an alternative for MySQL. Actually, the database is intended to be a long-term drop-in replacement for MySQL – with the guarantee of remaining open-source.
The database’s maintenance is done by the MariaDB Foundation that has some of the original developers of the MySQL DB.
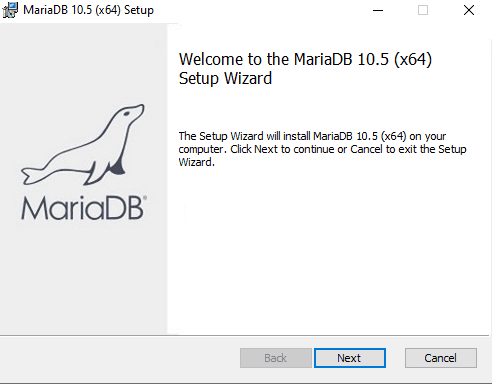
In this article, we will address how to install MariaDB into your local computer. Follow our guidelines, and you find installing MariaDB in either Windows or Linux enjoyable. But, first, go to the MariaDB official page and download the software file using the following link, MariaDB Official Download Page.
Installing MariaDB on Windows
After downloading the file on your PC, it is time to have it installed on your computer. Follow the steps listed below to complete the process:
MariaDB is no different from MySQL; you can also improve your knowledge by referring to this link to know more about installing MySQL on Windows.
Step 1). Begin the installation by double-clicking on the installer file to begin the installation process.
double click the installer
Step 2) Accept the end-user license agreement and click the “Next” button
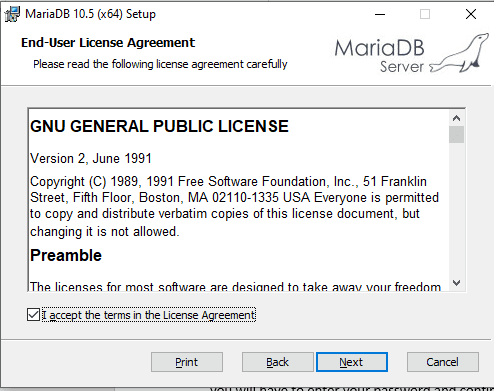
Accept the end-user license Agreement
Step 3) Feature’s selection
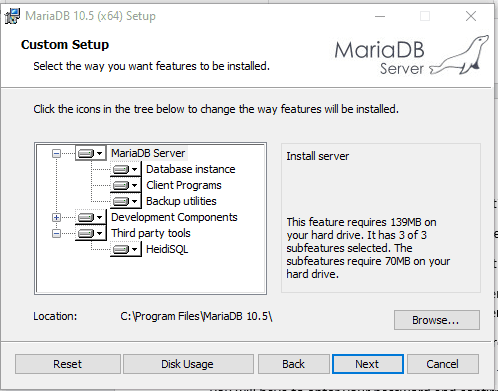
Features selection section
What you do here is to select the storage directory that stores the MariaDB files and click the “Next button upon completion. However, we advise you use the default storage location that is automatically selected.
Step 4) set the root user password.
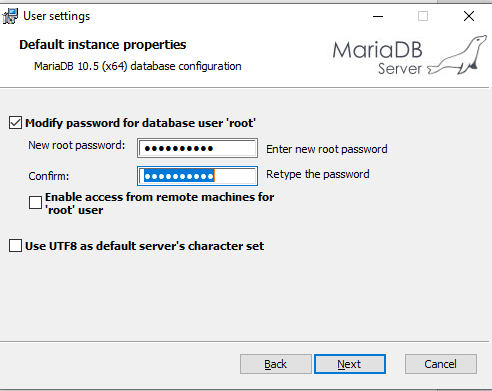
Setting the root user password
Here, you will type in the password you want your root user account to use. The same password you created will be the same password to help you connect to MariaDB later, so don’t forget it. An interesting aspect of this DB is that the root user is the default user of the database and has all privileges. This means that you don’t need to log in as a root user since it is the default.
Nonetheless, if you don’t want the root user to login from a remote machine, then you need to uncheck the button on the left of “Enable access from remote machines for ‘root’ user.
Additionally, you can use the “Use UTF8 as the default server’s character set “option to permit you to utilize the UTF8 as the default character set when creating new tables and databases.
Upon completing all the steps above, click the “Next” button.
Step 5) Database configuration.
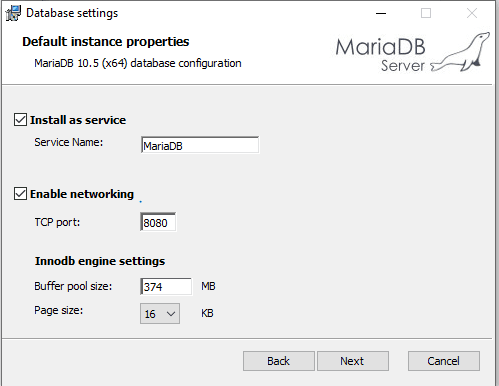
Type your service name, port, and engine settings
The first step in this section is installing the database as a service. To do this, check the checkbox labeled “install as service”. The database also allows you to rename it to your preferred name. In this case, we will maintain the default service name. In addition, also ensure that the “Enable networking” option is selected too.
The second step is to configure the database port. By default, the database uses port 3306. However, you may sometimes receive an alert error that the 3306 port is in use. This means that you need to change the port. Additionally, it is not a must to receive the alert for you to change. You can change the port whenever you want to.
The third step specifies the Innod engine settings parameter, which includes the page and pool size.
Finally, click the next button to proceed.
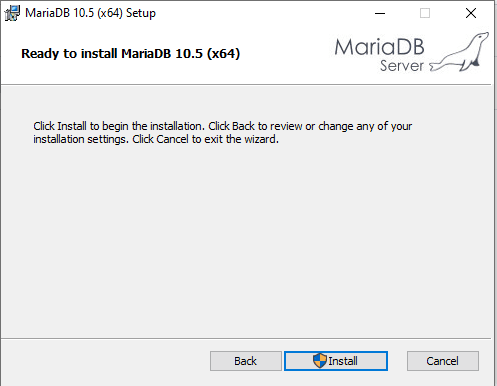
Step 6) Install the Database.
You are now ready to install the database. Click the install button to initiate the installation process of MariaDB.
Click the install button to start the installation process
Step 7) below is the progress bar showing the installation progress
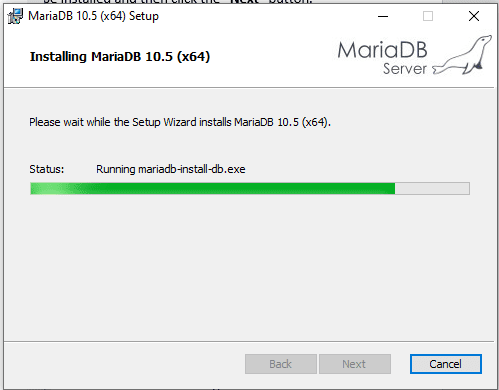
progress bar of the installation process
Step 8) Complete the MariaDB setup.
To complete the setup, click on the Finish button.

Click the Finish button to complete the process.
On the startup menu of your PC, you can find the MariaDB plus all its tools.
That completes the stage of MariaDB’s installation in the Windows Operating system. Next, we will explore how to install MariaDB in Linux.
Installing MariaDB on Linux
This section explores how to install MariaDB, and it consists of three critical steps, namely:
- Updating your package index using apt.
- Installing the mariadb-server package using apt. The server, in turn, comes with the relevant tools required to interact with MariaDB.
- Running the included mysql_secure_installation secured script to limit access to the server.
The three above mentioned steps can be summed up by the following:
sudo apt update
sudo apt install mariadb-server
sudo mysql_secure_installation
This article will focus mainly on MariaDB server installation on Ubuntu 20.04, ensure it is up and running. Also, finally, ensure that it is well configured.
Step 1) Installing MariaDB
To ignite MariaDB installation, we will first begin by updating our system server with apt. Copy the following command in your terminal to update the package index:
sudo apt update
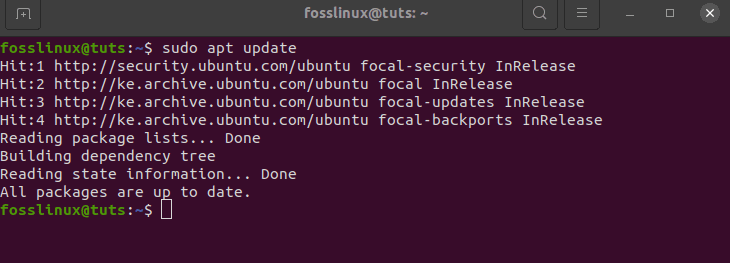
Running the update command
Thereafter, install the package using the following command:
sudo apt install mariadb-server

installing MariaDB-server
The above commands will install MariaDB but will not prompt you to set a password or carry out any configuration settings. This is so because the default MariaDB configuration leaves your installation insecure. Therefore, we will use a script that is shipped with the mariadb-server package. The script comes with restricted access to the server, and it additionally removes unused accounts.
Step 2 – Configuring MariaDB
This is a significant step for new MariaDB installations. If the DB is new, just like in our case, we need to run the included security script. This script aids in modifying some of the less secure defaulted options for stuff such as remote root logins and user samples.
To run the security script, use the following command:
sudo mysql_secure_installation
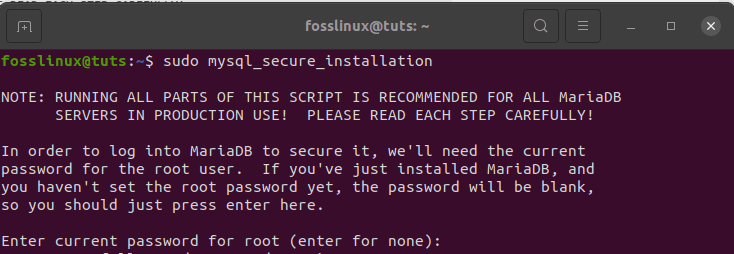
Enter to indicate None
The above command will run you through several prompts to do some alteration or rather modify your DB’s installation security options. To begin with, the first prompt will be requesting you to input the current database root password. But, since you have not set up one, you will have to click the “enter” button to indicate “None.”
Next, you will be urged to set up a root database password. You will not set up the password in this section since, in Ubuntu, the root account for MariaDB is closely interlinked to automated system maintenance. Therefore, we should not change the configured authentication methods for that account. Setting up the password in Ubuntu will highly risk and make it easy for a package update to break the database system by removing access to the administrative account. What you do here is type in “N,” then press Enter.
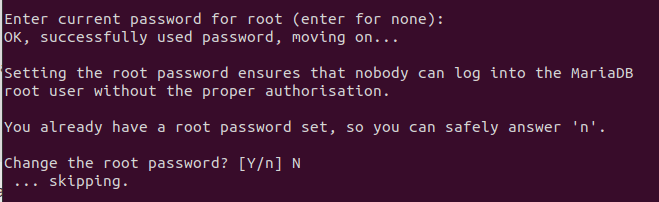
Enter N to skip
After completing that, the next question will require you to remove some anonymous users. Here, you will type “Y” and then press Enter to continue.
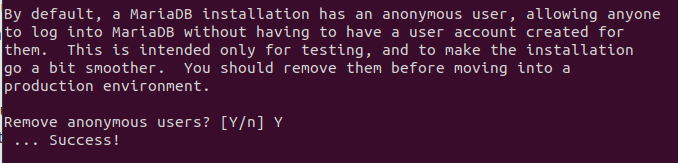
Removing anonymous users
The following step will disable the remote root logins. This is so because the root should only be permitted to connect from “localhost.” The latter ensures that someone else cannot guess the root password from the network. Here, you will type “Y” and click “enter” to proceed.

localhost network login
The following prompt will be optional, depending on your needs. You will be prompted to remove the default test database shipped with MariaDB. In this case, you can either do away with the DB or not. However, in our incident, we will not delete it. But if you are going into a production environment, you need to do away with the database.

Test_database
After that, the final stage will ensure that all the changes you made take effect immediately. So, in the Reload privilege tables now, type in “Y,” then press enter to clean up and complete the secure installation of the DB.
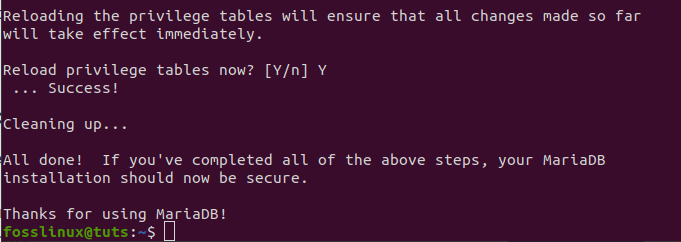
Reloading table privileges
Once that is over, you will be through with MariaDB’s initial security configuration. After that, the next step is noncompulsory. Nonetheless, we recommend that you follow or rather do it if you prefer to authenticate your MariaDB server with a password.
Step 3) Creating an Admin User that Requires Password authentication (Optional).
On the Ubuntu system running MariaDB version 10.3 like ours, the root MariaDB user can authenticate using the Unix socket plugin by default rather than with a password. This is because creating a password has some greater privileges, such as security and usability in many cases. Nevertheless, it can also complicate things when you want to allow external client programs admin rights such as phpMyAdmin.
It is best practice not to alter the root account’s credentials since the server uses the root account for log rotation, starting and stopping the server. Changing credentials in the /etc/mysql/debian.cnf configuration file may work at first, but the package could overwrite those alterations. Therefore, the Package maintainers always prefer creating another admin account instead of modifying the root account.
Creating another account with root user privileges is so simple; let us try one called fossadmin with the same root privileges as the root account. Better still, we will configure it with password authentication. First, open up the MariaDB prompt from your terminal using the following command:
sudo mariadb

MariaDB startup
Note: Ensure that you change the new user’s name plus the password to match your preferences.
GRANT ALL ON *.* TO 'fossadmin'@'localhost' IDENTIFIED BY 'password' WITH GRANT OPTION;

creating another user
Thereafter, we will flush the privileges to ensure that they are saved and available in the current session.
FLUSH PRIVILEGES;

Flushing the privileges
After that, you can now exit the MariaDB’s shell using the following command:
exit

Quitting the MariaDB
Step 4) Testing MariaDB
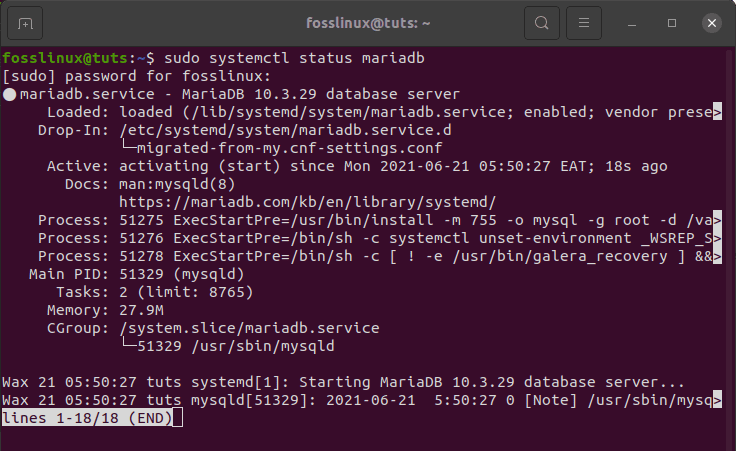
The final stretch is ensuring that we have correctly installed MariaDB from the default repos. When installed from the default repos, the database will automatically run. To test this, copy and paste the following command in your terminal:
sudo systemctl status mariadb
Upon running the above command, you will receive such an output.
active window status of MariaDB
However, there are instances where the database can refuse to start, like the snapshot shown below:
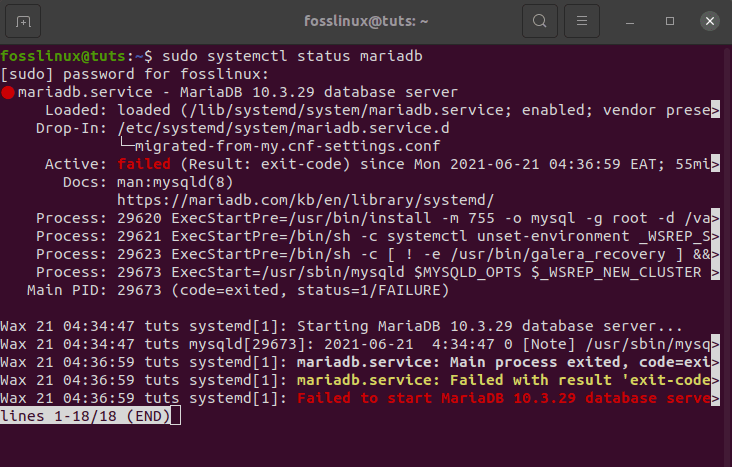
MariaDB failing to run
In such cases, you will run the following command to start it.
sudo systemctl start mariadb
To add on, you can try connecting to the database using the mysqladmin tool, a client that allows you to run administrative commands. For instance, let us try this command that connects MariaDB as root using the Unix socket. It also returns the version.
sudo mysqladmin version
You will receive such an output.
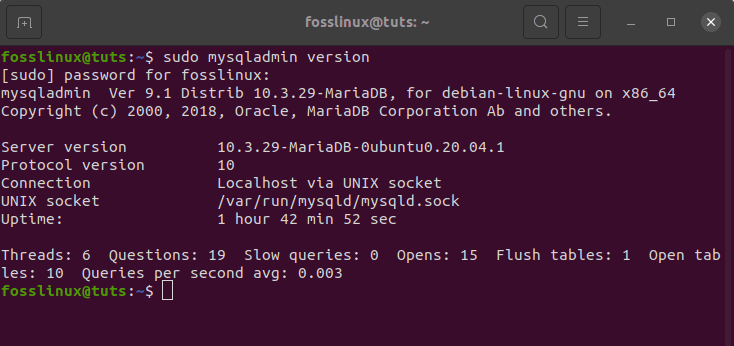
trying mysqladmin tool
If you, for example, configured a different administrative user with password authentication such as the fossadmin we created, then you could perform the same operation by typing:
mysqladmin -u fossadmin -p version
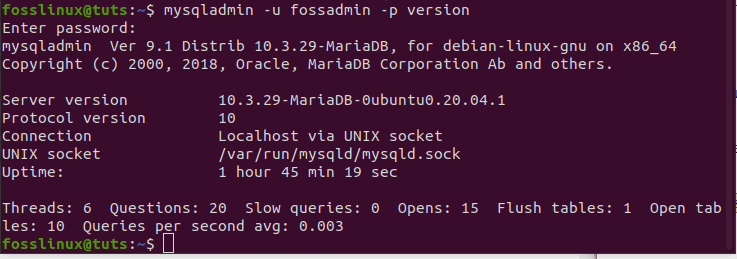
Creating a separate user
Wrapping Up
The article has distinctively gone through MariaDB installation in both Windows and Linux. In Windows, we began with downloading the database before going through the installation process. The installation guide included starting up the installer file, which led you to the end-user license agreement; we also saw the features selection part, setting up the root user password, database configuration, then finally completing the installation process.
To add on, the article went further to cover all you need to have MariaDB relational database management system in your Linux PC. This entailed all the installation commands before securing the database using the mysql_secure_installation script that is pre-installed. We also looked at all the global set privileges of MariaDB and how to start up MariaDB using the sudo mariadb command.
Finally, we tested the database to check if it was well configured. With all the basics covered, we are sure that you can now do anything you want with the database, such as importing and exporting the database, running queries, and many more. Thanks for reading!