
Apache Subversion (known commonly as SVN) is a very popular open source version control system. A version control system lets you record changes to a file or set of files over a period of time so that you can recall specific versions when there is a need.
In order to have version control for your project, you first need to install SVN server on your Ubuntu machine.
Installing SVN Server on Ubuntu 18.04 LTS
Here we are going to install and configure Apache subversion on Ubuntu 18.04 LTS.
Step 1. Install Apache
Before we go ahead with the installation, let us first update repository.
sudo apt-get update
sudo apt-get install apache2
Check apache status.
sudo systemctl status apache2
If service is not yet started, then .start Apache.
sudo systemctl start apache2
Enable Apache on system boot.
sudo systemctl enable apache2
Verify Apache Installation. Just open your web browser and type web server IP or hostname. If you can see the Apache default page, Apache installation is successful.
Step 2. Install Apache Subversion
Install subversion and required packages
sudo apt-get install subversion libapache2-mod-svn
After installation, it automatically enables the needed SVN modules (dav_module , dav_svn_module, authz_svn_module ).
List the enabled modules
sudo apachectl -M
If svn modules are not enabled. run below commands and enable it
sudo a2enmod dav
sudo a2enmod dav_svn
sudo a2enmod authz_svn
After enabling those modules, we need to restart the Apache service.
sudo service apache2 restart
Step 3. Configure Apache Subversion
Now we are going to create the SVN repository. Here we use “/opt” directory to create our repository.
Create svn directory.
sudo mkdir -p /opt/svn
Create svn repository. Here we create a repository called “fosslinuxrepo”
sudo svnadmin create /opt/svn/fosslinuxrepo
Changing ownership of the repository.
sudo chown -R www-data:www-data /opt/svn/fosslinuxrepo/
Changing permissions of the repository.
sudo chmod -R 775/ opt/svn/fosslinuxrepo
Add Subversion Users. Here we create a password file in the “/etc” directory.
sudo htpasswd -cm /etc/svn-auth-users fosslinux
Create the second user.
sudo htpasswd -m /etc/svn-auth-users fosslinux2
Create Apache virtual host file for SVN- in order to do this we first need to change directory to “/etc/apache2/sites-available/”
cd /etc/apache2/sites-available/
Create a virtual host file and here we create a file called “fosslinuxsvn.conf”.
sudo vim fosslinuxsvn.conf
Add following lines to file.
<VirtualHost *:80>
        ServerName svn.fosslinux.com
        ServerAlias svn.fosslinux.com
        <Location /svn>
     DAV svn
     SVNParentPath /opt/svn
     AuthType Basic
     AuthName "Subversion Repository"
     AuthUserFile /etc/svn-auth-users
     Require valid-user
</Location>
    ErrorLog ${APACHE_LOG_DIR}/svn.fosslinux.com-error.log
    CustomLog ${APACHE_LOG_DIR}/svn.fosslinux.com-access.log combined
</VirtualHost>
Change “svn.fosslinux.com” to your hostname.
Save and exit the file.
Disable default virtual host file.
sudo a2dissite 000-default.conf
Enable newly created virtual host file.
sudo a2ensite fosslinuxsvn.conf
Check apache syntax.
sudo apachectl -t
Then restart Apache.
sudo systemctl restart apache2
Step 4. Test Configured Apache Subversion
Open the web browser and type repo URL and hit enter.
http://svn.fosslinux.com/svn/fosslinuxrepo/
Replace sv.fosslinux.com with your hostname.
When you will get the Authentication popup screen, enter the already created Username and Password to access svn repository.
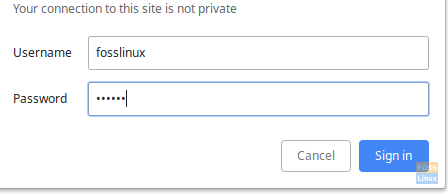
Authentication
Now you can see the created repository.
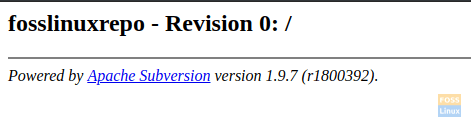
SVN-Repo
Let us now create a project called “RnD_works ” inside the repository.
svn mkdir file:///opt/svn/fosslinuxrepo/RnD_works -m "added RnD_works repository"
svn mkdir file:///opt/svn/fosslinuxrepo/RnD_works/trunk -m "added RnD_works trunk repository"
svn mkdir file:///opt/svn/fosslinuxrepo/RnD_works/branches -m "added RnD_works branches repository"
svn mkdir file:///opt/svn/fosslinuxrepo/RnD_works/tags -m "added RnD_works tags repository"
Let us check if this new project can be viewed inside the repository.

New Project
Click and Open “RnD_works”
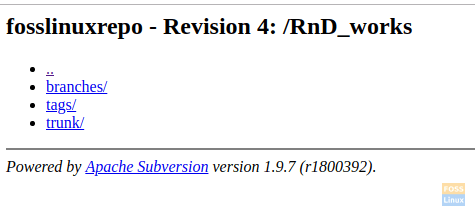
Inside Project
If you want to delete a created project you can use below command to delete it.
svn delete file:///opt/svn/fosslinuxrepo/RnD_works -m "delete RnD_works repository"
Step 5. Schedule Repository Backup
Create a backup folder.
sudo mkdir -p /etc/backcups
Change user to root user.
sudo su -
Edit crontab.
crontab -e
In the following command, we schedule svn backup midnight every day.
0 0 * * * svnadmin dump /opt/svn/fosslinuxrepo > /etc/backcups/svnbackups-$(date +%Y%m%d).dump

CronJob
Then save and exit.
Step 6. Restore Repository
If you need to restore svn repository from backup file use below commands.
Create a new repository.
svnadmin create /opt/svn/restorerepo
Restore backup:
svnadmin load /opt/svn/restorerepo < /etc/backups/svnbackups-20190204.dump
That’s all. We hope this article has helped you to configure subversion successfully. If you have any questions or comments, please visit the Comments section below.
3 comments
hello,
I like your documentation. I really need your help. I install apache svn on my server. I have 3 server and i would like to make synchronize repository to all my server. could please make a documentation about this.
Tried a lot of tutorials .
this is by far the best , thanks a lot
Excellent tutorial Darshana. Keep going!!. Thanks a lot.