The MX Linux is not as mainstream as its Debian-based distros. I just heard of it recently and was thrilled to check it out. It’s based on Debian, so at least user-friendly to a beginner. It is only intimidating when installing, but luckily in this article, we are reviewing post installation of the MX. So, relax, and let’s dive right into it.
You first notice how smooth and welcoming the desktop environment is. Users used to their taskbar positioned at the bottom will feel weird. If you feel funny, I got you; we will change the taskbar and make navigating the file system easier. Later in this article. Otherwise, I find it pretty neat at its default position.
MX Linux Desktop
MX Linux review
1. Adjusting the font size
The first thing you will notice is that the font size is pretty tiny, as most people are used to a font size of 11 or 12. If you wish to change the font size, navigate to the desktop and right-click on any empty location. Once you do that, you will see a menu appear. Go to “applications,” click on “settings,” and then choose “appearance.” You will be presented with a window as shown below. Click on the “Fonts” tab. Change the default font to your preference. That’s it! You’re good to go.
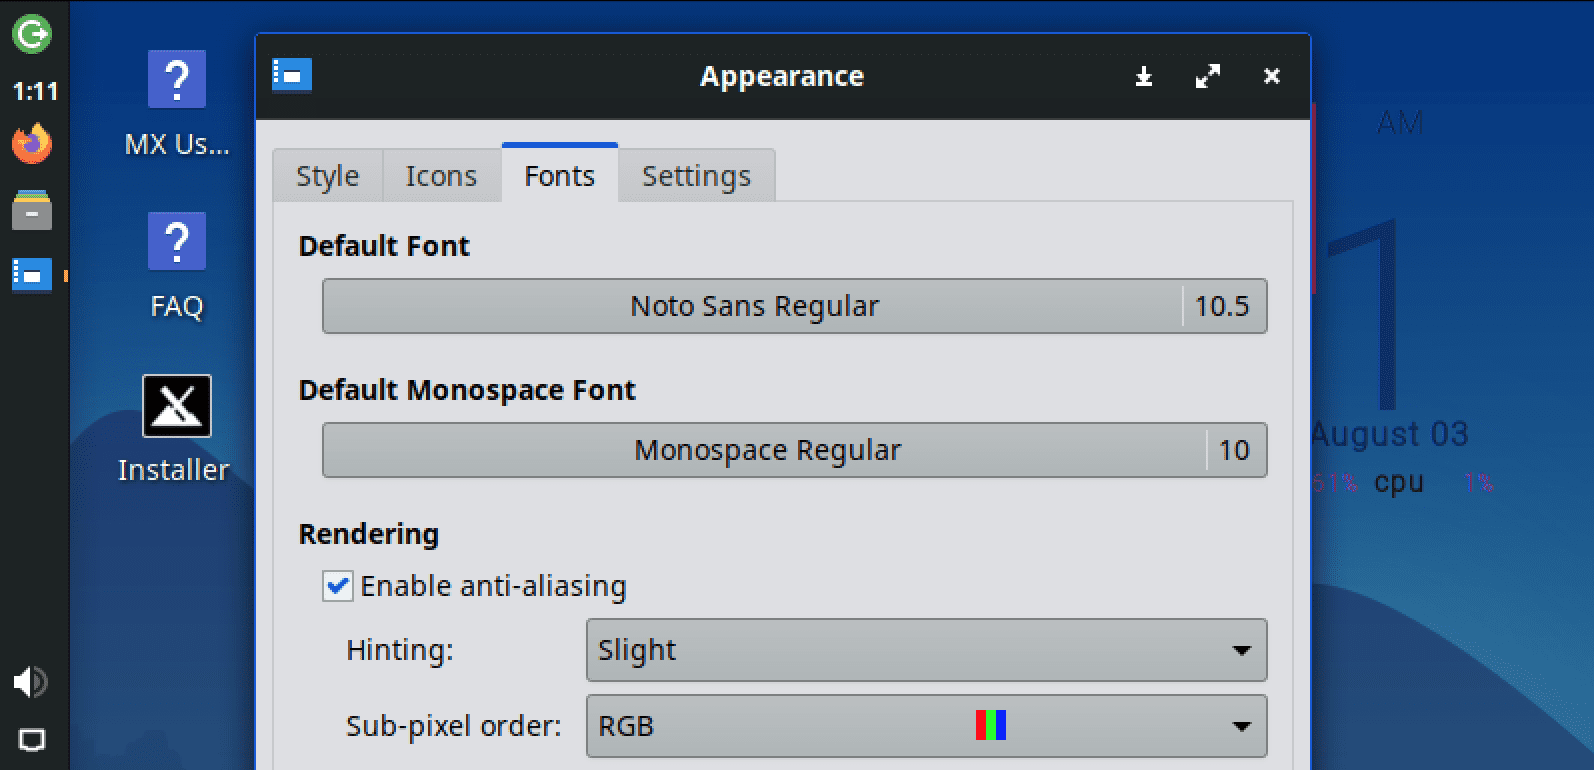
Adjust font size
2. Change Theme
While still working on appearance, changing the general system theme is another setting you can apply. Usually, most users fall into two main categories regarding system appearance. Some users prefer light themes, while others prefer dark themes for various reasons. MX Linux features the light theme by default. Fortunately, you can change this by following the steps below.
- Right-click on the Desktop
- Select Applications -> Settings -> Appearance
- That will open a configuration window with four tabs. Select the “Style” tab.
- Here, you have a variety of themes that you can select from. In our case, we will choose a dark theme – “Adwaita-dark.”
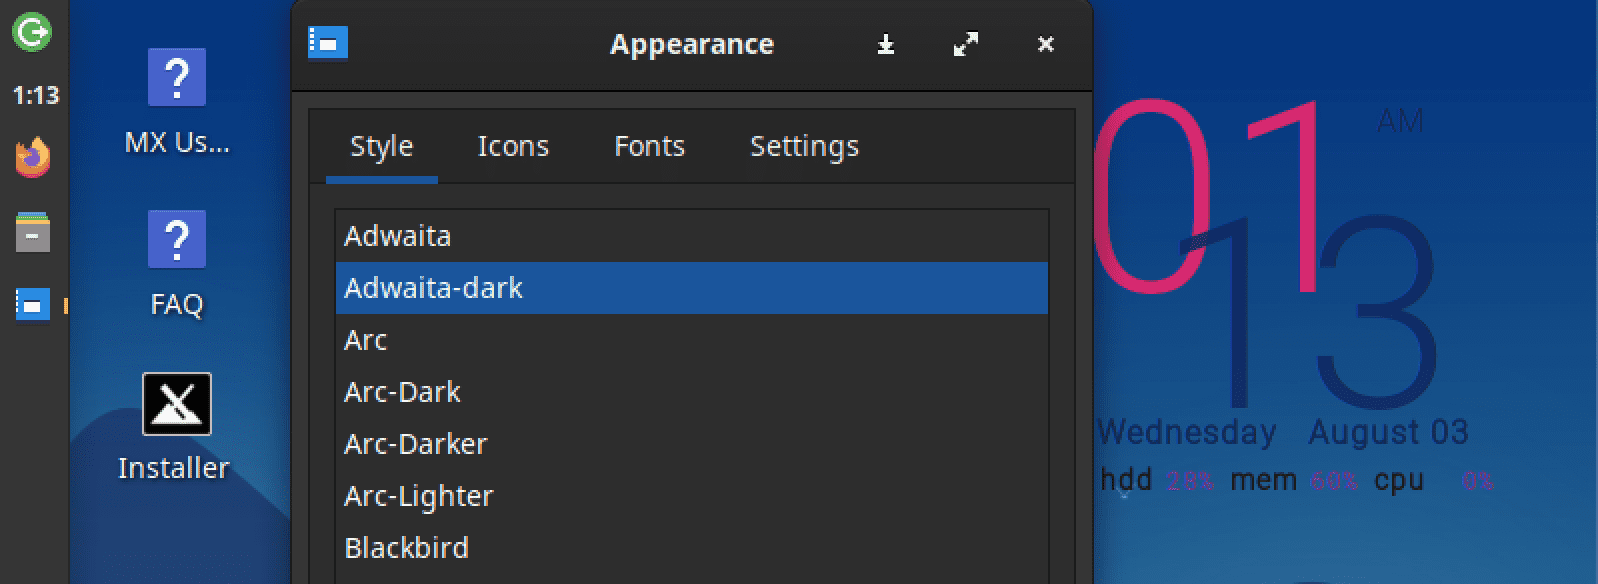
Change System Theme
3. Checking System Information
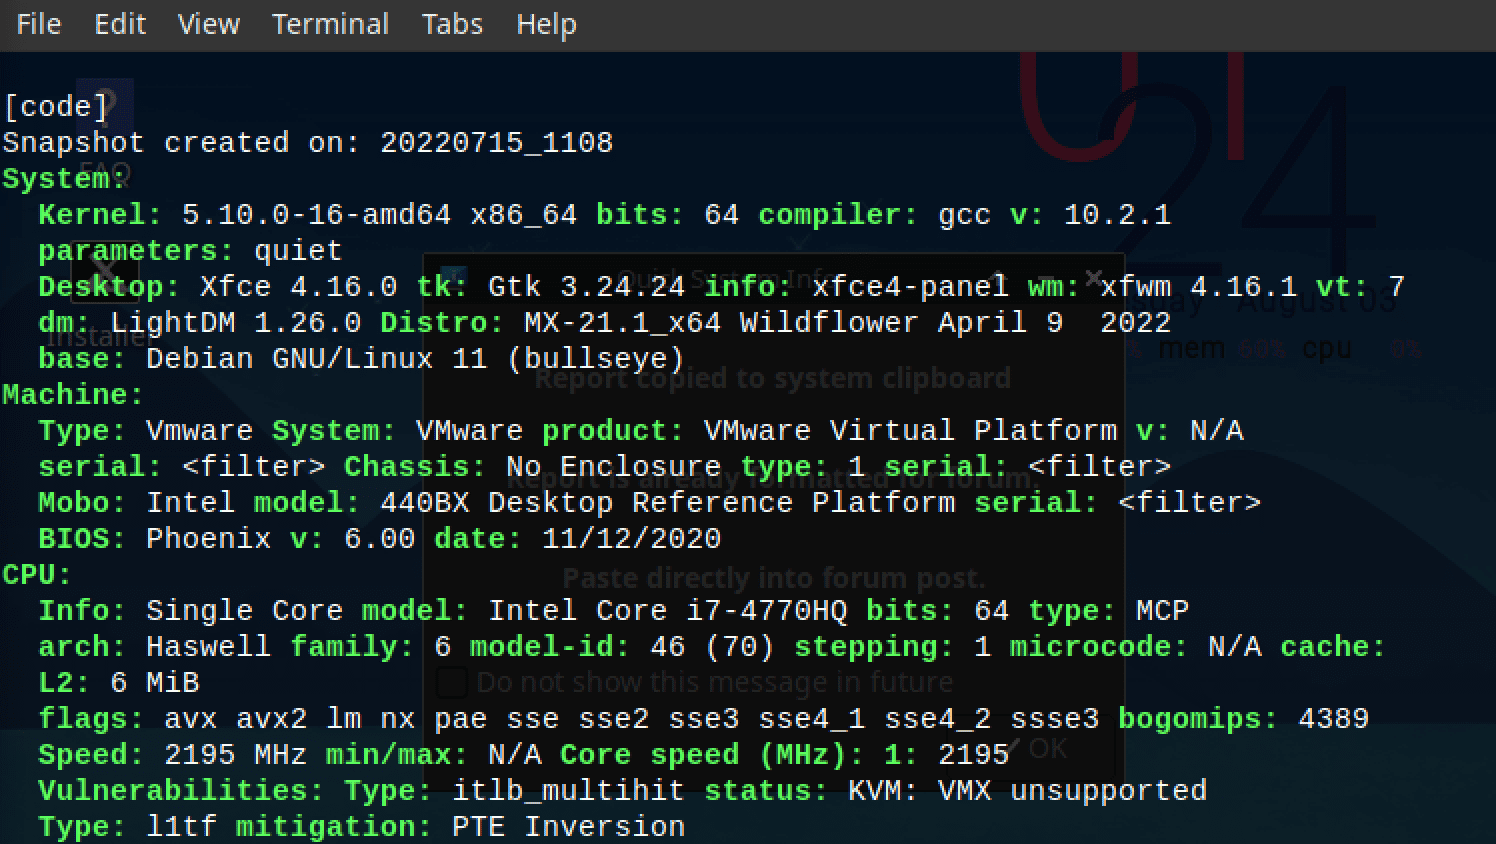
As an advanced Linux user, you should be able to know your system specifications for various reasons, such as being vast with the capability of a system and how much it can handle. Fortunately, MX Linux provides users a quick way to learn more about their system information. To check your system information, right-click on your mouse or touchpad and then go to Applications > MX Tools > Quick System Info.
Once you do that, a terminal window displays all the system’s information. Such information includes the system’s kernel, machine, graphics, network, and drives, among other things. In our case, the following system information was displayed:
Quick System Info
After clicking the “Quick System Info” option, you will also see another smaller window. It looks similar to the image below.
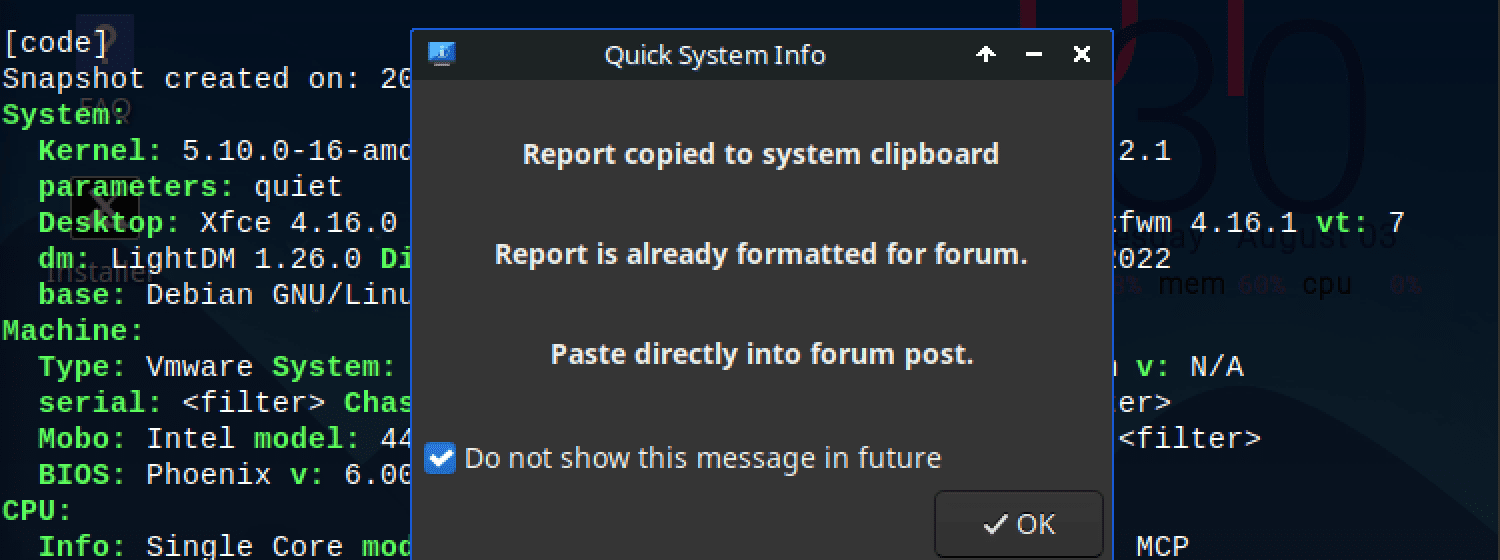
This window tells you that all the system information currently displayed on your Terminal is already copied to the clipboard in pre-formatted format. Therefore, if you are facing any issues with your system and need to ask a question on MX Linux forums or other forums like StackOverflow, this might be a quick way to get your system information.
Tip: A quick way to confirm this is to launch any available text editor and press the combination Ctrl + V on your keyboard. All the system information displayed on the Terminal will be ‘pasted’ on the editor.
4. Changing the wallpaper
The wallpaper is the image in the background of a computer desktop. Usually, an excellent desktop background increases the overall productivity of a user. A lovely wallpaper makes the working space brighter, inspires the user, and motivates you to do great things. So you might be wondering how to change your wallpaper on MX Linux. Follow the directions below to change your desktop wallpaper.
While still on your desktop, right-click and select “Desktop settings.” You will see three tabs on the desktop settings window (Background, Menus, and Icons). Choose the “background” tab and select the wallpaper of your choice. Close the window to apply the changes.
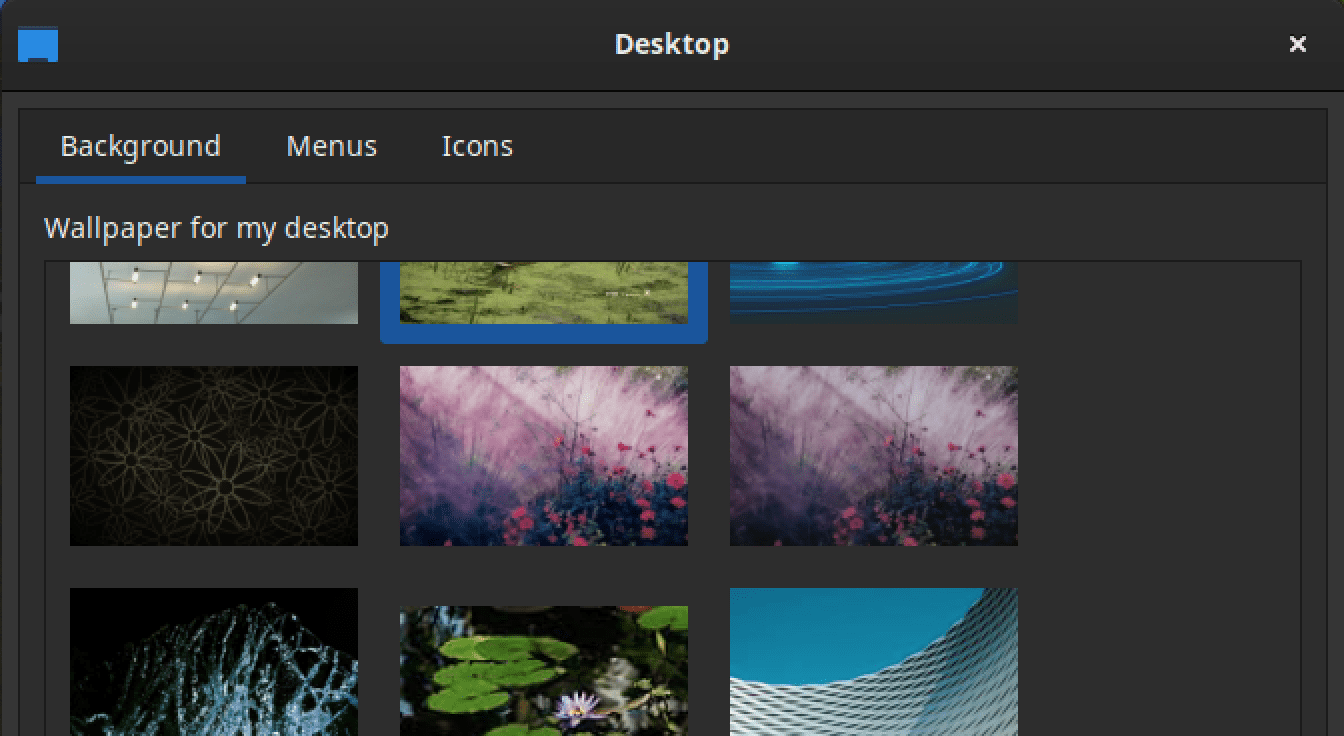
Change Background
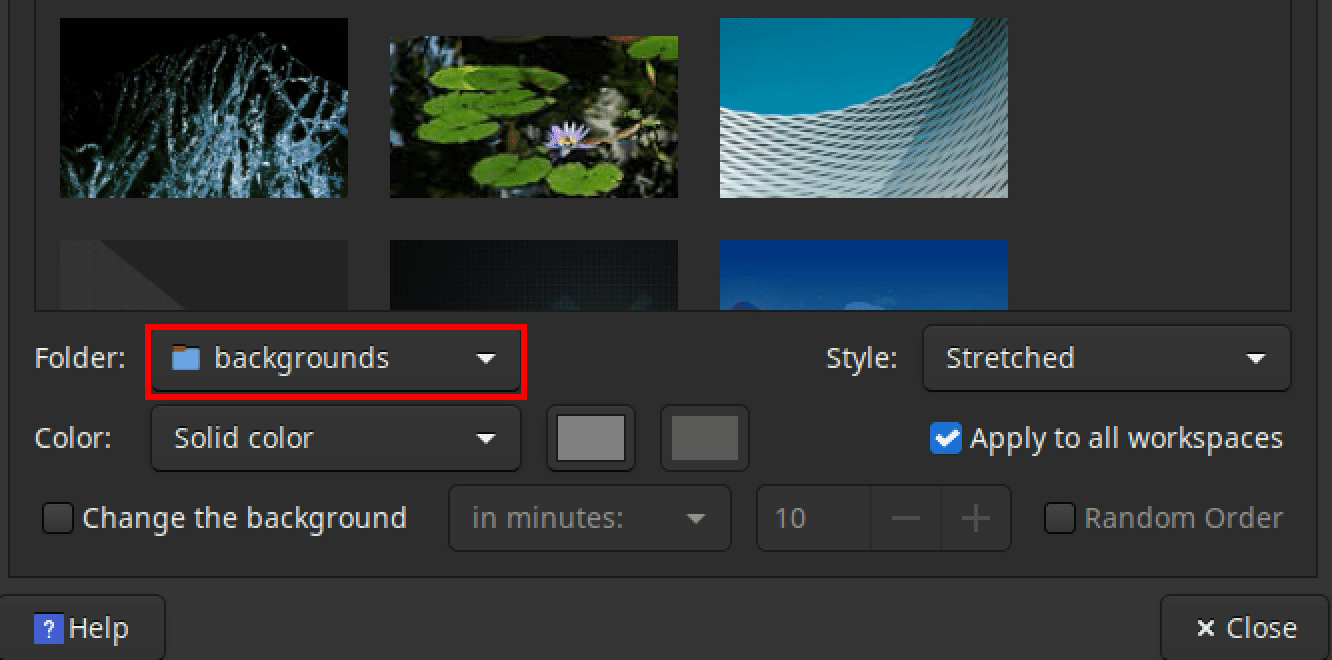
Alternatively, you can change the wallpaper by choosing the desired background image on your computer. At the bottom-left corner of the window, you will see a “Folder” option with a dropdown menu next to it. Click on this dropdown menu. You will see a list of various folders present on your system. Select the folder that contains your images.
If your target folder is not listed here, click on the “Other…” option at the bottom of the dropdown menu to open the file manager. Here, you can navigate any part of your system and select the folder containing your images.
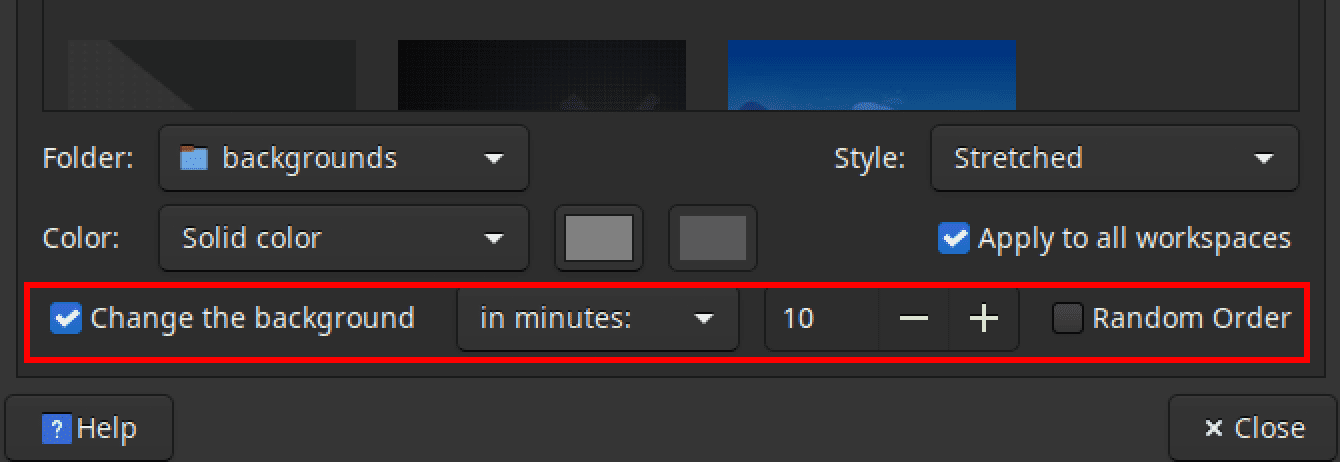
If you wish to make your Desktop even fancier, you can set the system to change the background image after a couple of minutes. Follow the instructions below.
At the bottom of the window, tick the checkbox next to the “Change the background” option. Next, select the duration you want the system to switch the background. In our case, we will set it to 10 minutes. You will also see a “Random Order” checkbox. If you tick this option, your system will select a random background every 10 minutes.
Switch backgrounds
Finally, MX Linux also gives you the privilege to change your wallpaper style to your liking. These styles include centered, tiled, stretched, scaled, or zoomed. The default option is ‘Stretched.’
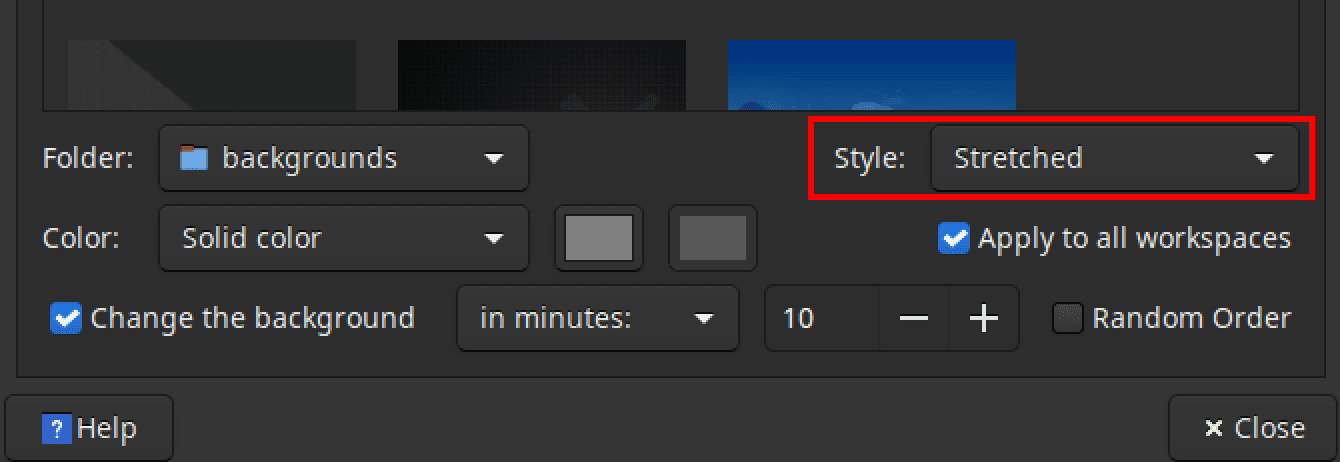
Set Background Style
5. Changing the position of the taskbar
The taskbar is the bar on a computer desktop that users utilize to launch and monitor
applications. It is usually found at the bottom of Windows OS. The taskbar makes it easy for a user to access frequently used apps while keeping the desktop neat with minimal icons.
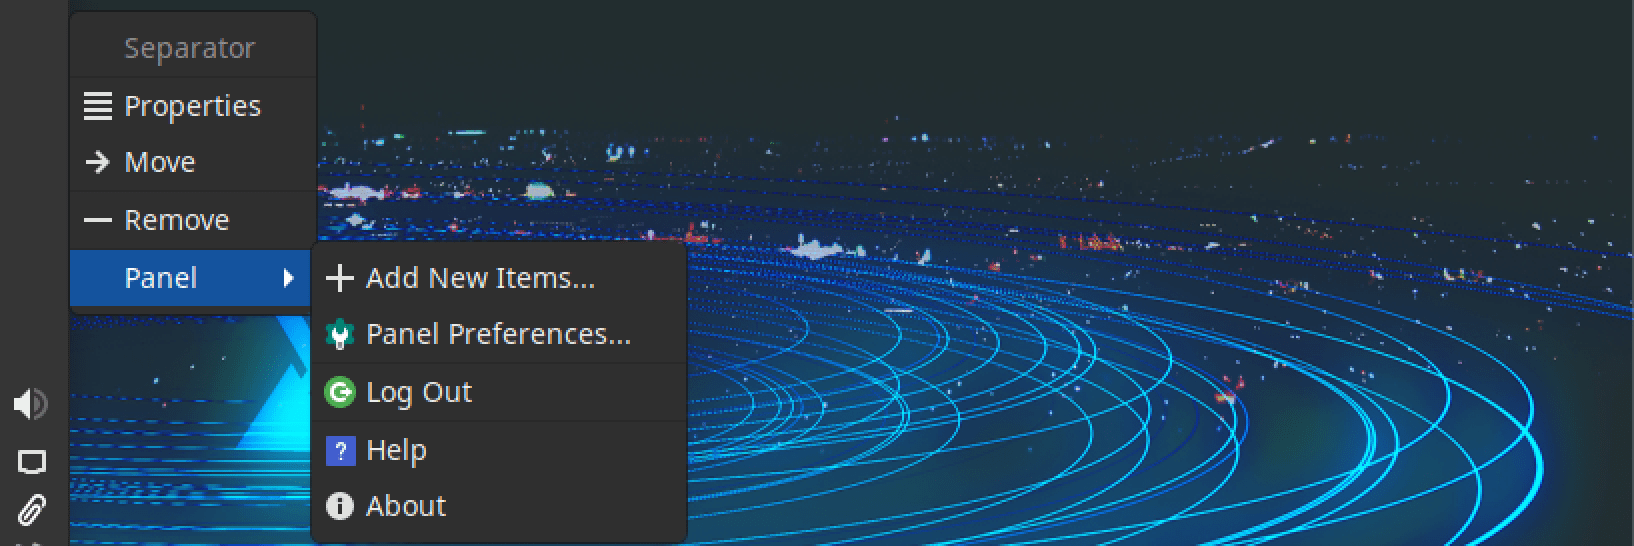
But because people have different preferences, the MX Linux makes it easy to change the taskbar’s position to your preferences. To do so, hover your mouse cursor on a space on the taskbar and right-click. That will open a small window next to the taskbar. Navigate to the “panel” and choose “panel preferences.” to adjust your preferences.
On the panel preferences, you will see three tabs; ‘Display,’ ‘Appearance,’ and ‘Items.’ To set your desired position on the taskbar, select the “Display” tab. Under the ‘General’ section, you will see the “Mode” dropdown menu. By default, it’s set to ‘Deskbar.’ You can decide to put it horizontal or vertical.
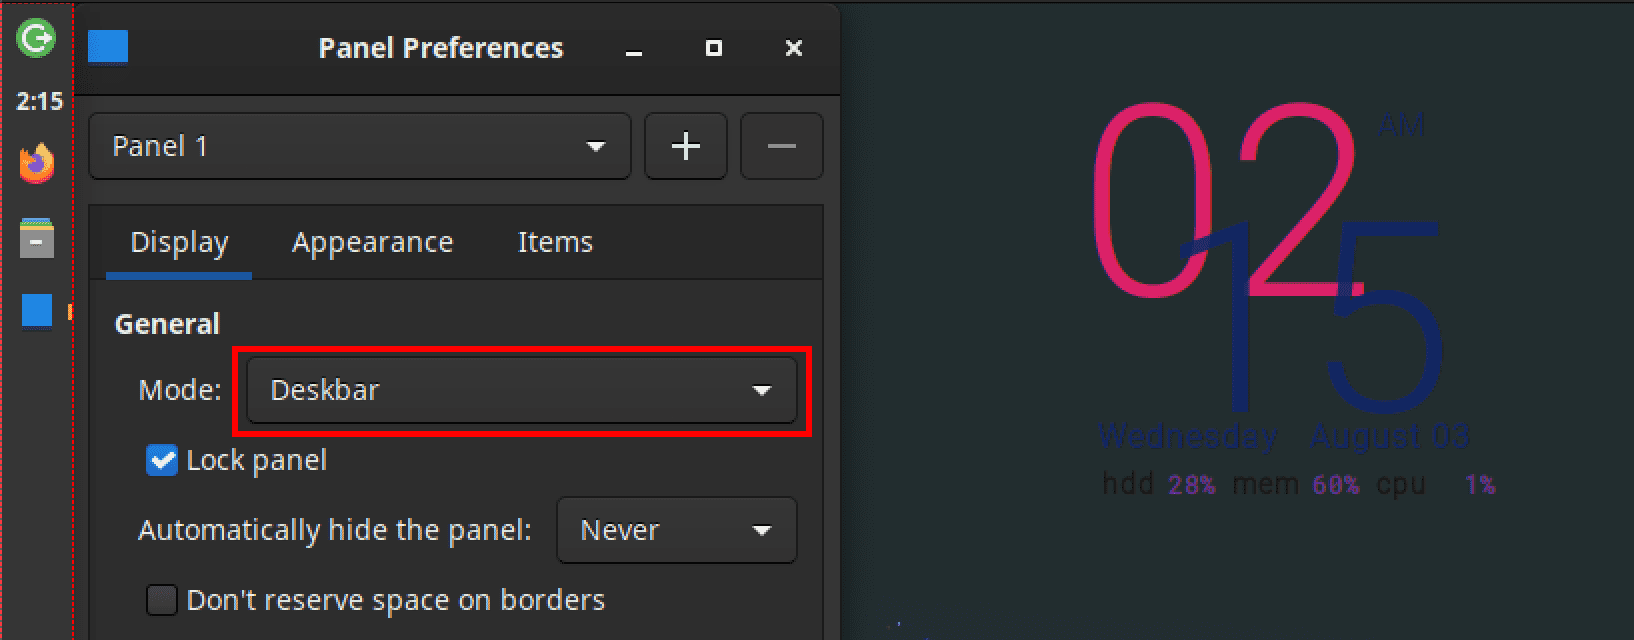
Set panel mode
While still on the panel preferences, you can also go to “measurements” to change the taskbar design by adding the row size, the number of rows, and the taskbar length as desired.
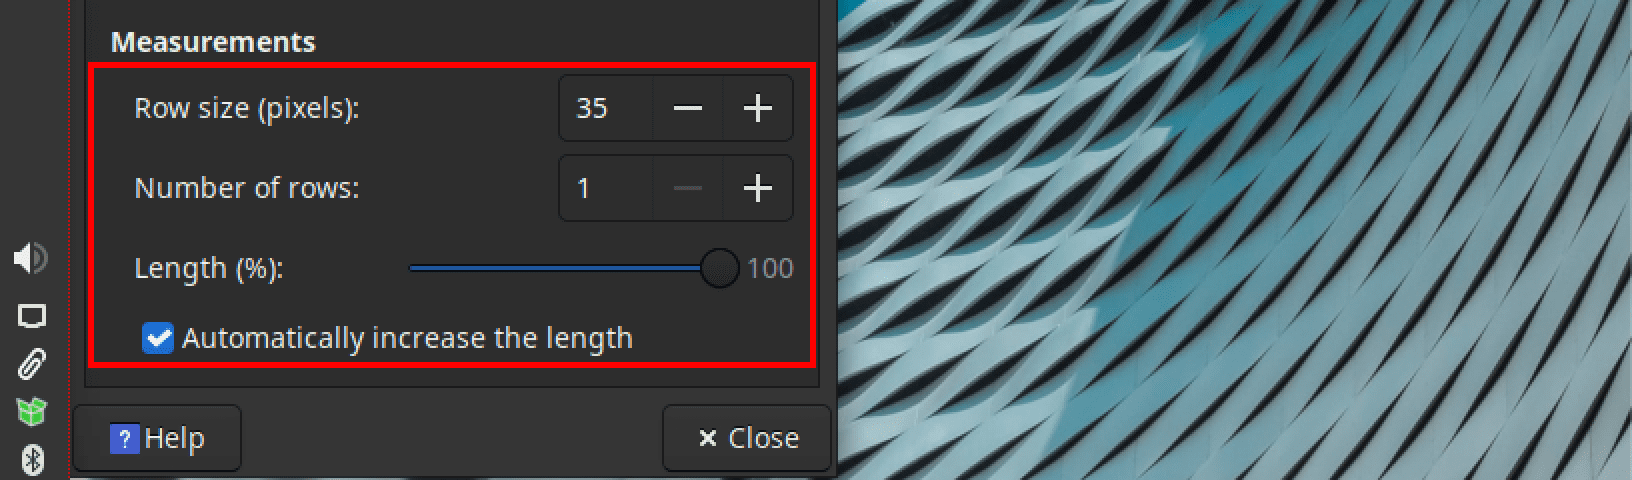
Change Taskbar Size
The panel preference also comes with a toggle button to change the theme to light or dark mode. To enable the dark mode, click the “appearance” tab and enable the dark mode by clicking the toggle button under the general settings.
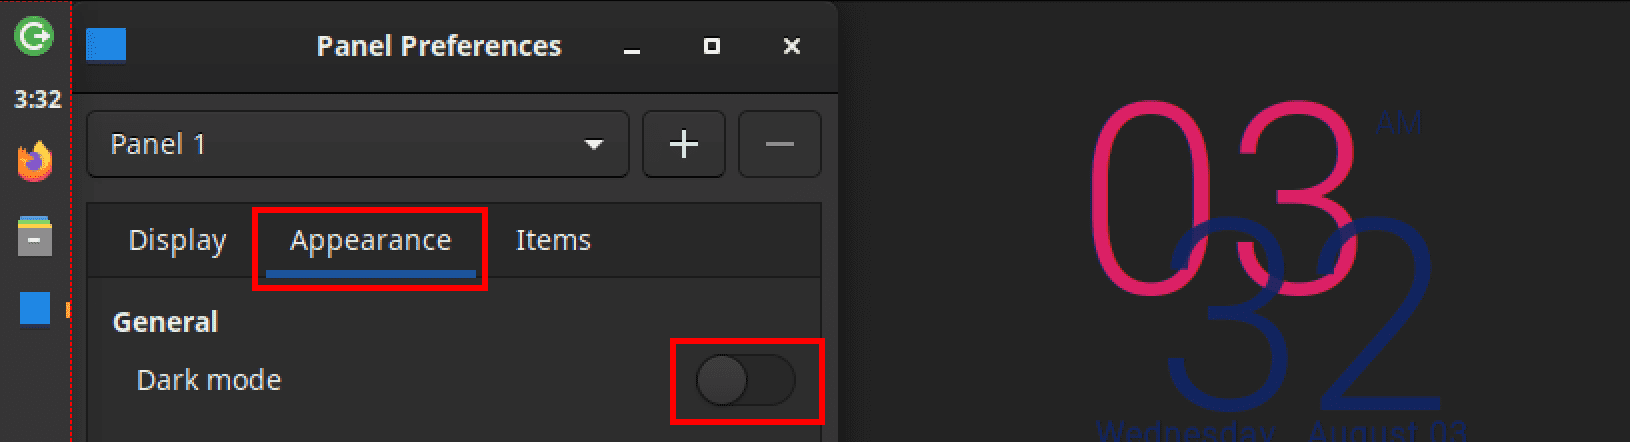
Set Panel Theme
You can also add items that you frequently use on the taskbar for convenience or remove them by selecting the “items” tab.
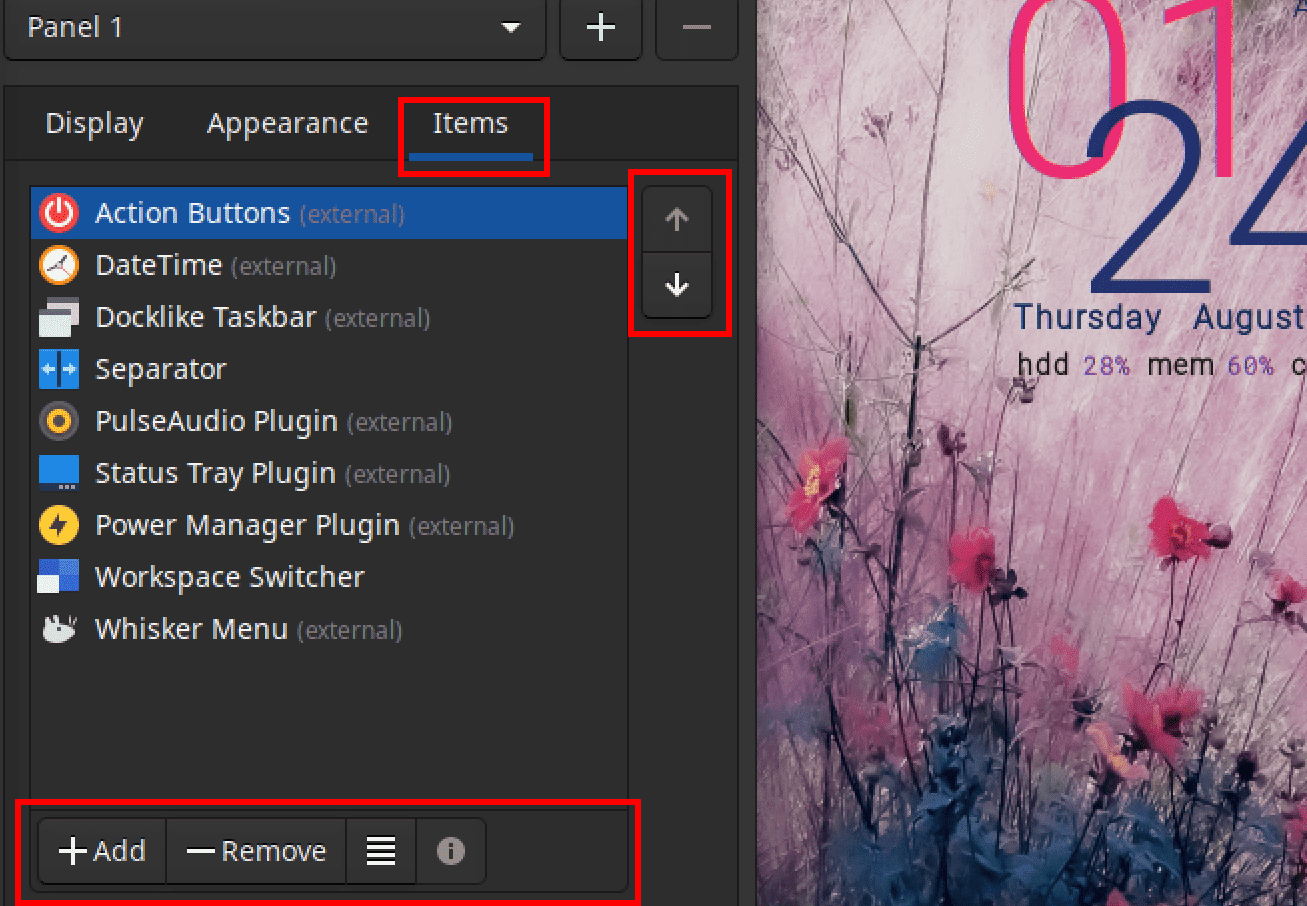
Manage panel items
6. Creating Launchers
A launcher is a shortcut to launch the actual application. Launchers can come in handy when you have applications requiring you to open them from the command line. Alternatively, you can create launchers for applications you use frequently. That way, you won’t have to go to the applications menu every time, as you can quickly launch the app from the Desktop.
So, let’s create a launcher and see it in action. To create a launcher, right-click on the desktop and select “Create launcher.” A window like the one below should appear.
Give your launcher a name (which should be precise and easy to recall), comment, and command to launch the application.
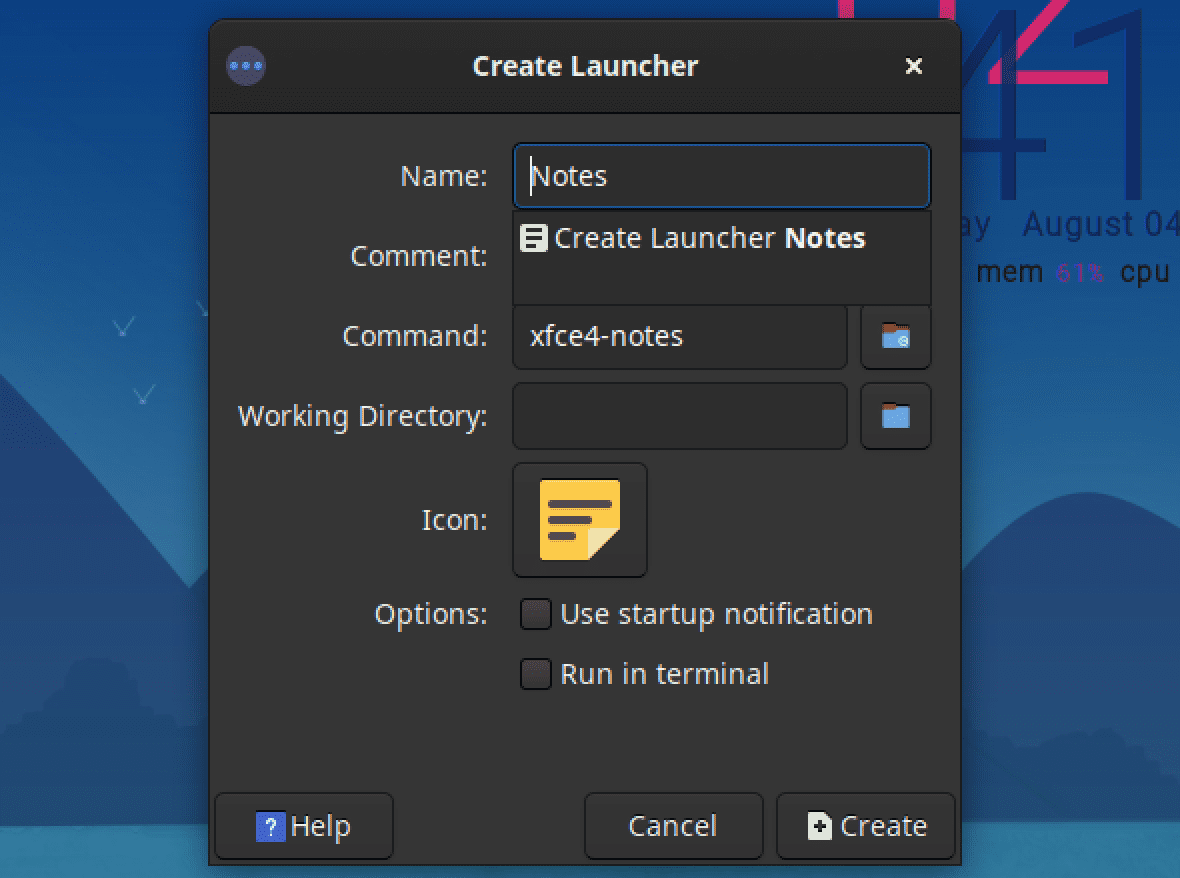
Create Launcher
If you are not sure of the command used to launch a particular application, don’t worry. Write the application’s name in the “Name:” field, and an autosuggestion dropdown menu will appear. Select the application for which you want to create a launcher from the dropdown.
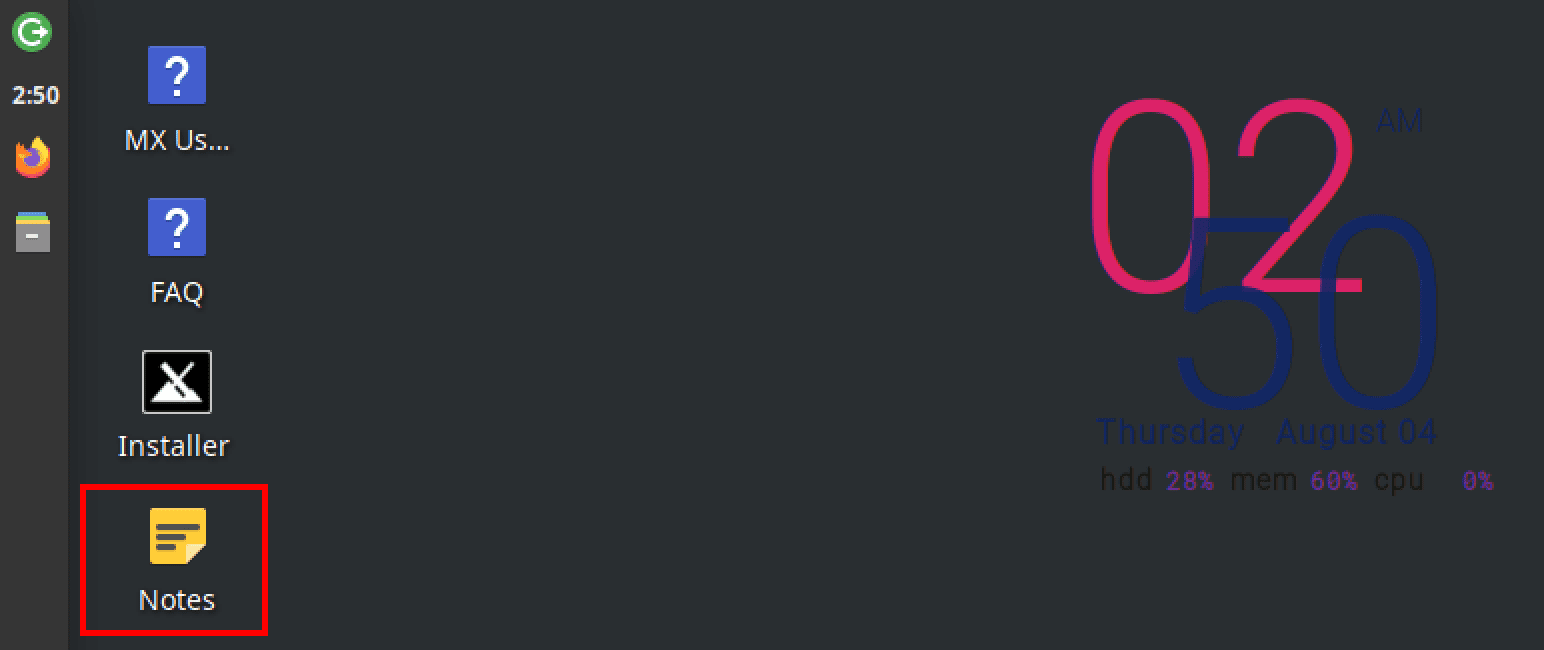
The system automatically assigns your launcher an icon and a command. That makes it easily recognizable on the desktop without hovering your mouse over it to know what an icon entails. Click “Create” to create your launcher. Once it is created it will appear on the desktop as shown:
Create Launcher
That’s it! We now have a quick and convenient way of launching the “Notes” app without the need to search for it in the applications menu.
So, for your convenience, you can create a launcher for any program you frequently use. It could be a game or a calculator, and how can we forget the terminal or the Quick System Info?
7. Creating Notes
A note is a brief remark on something. A note assists one in recalling and being aware of what they are expected to do at a specific time or day. To create a note, right-click on your mouse while still on your desktop and go to Applications => Accessories => Notes.
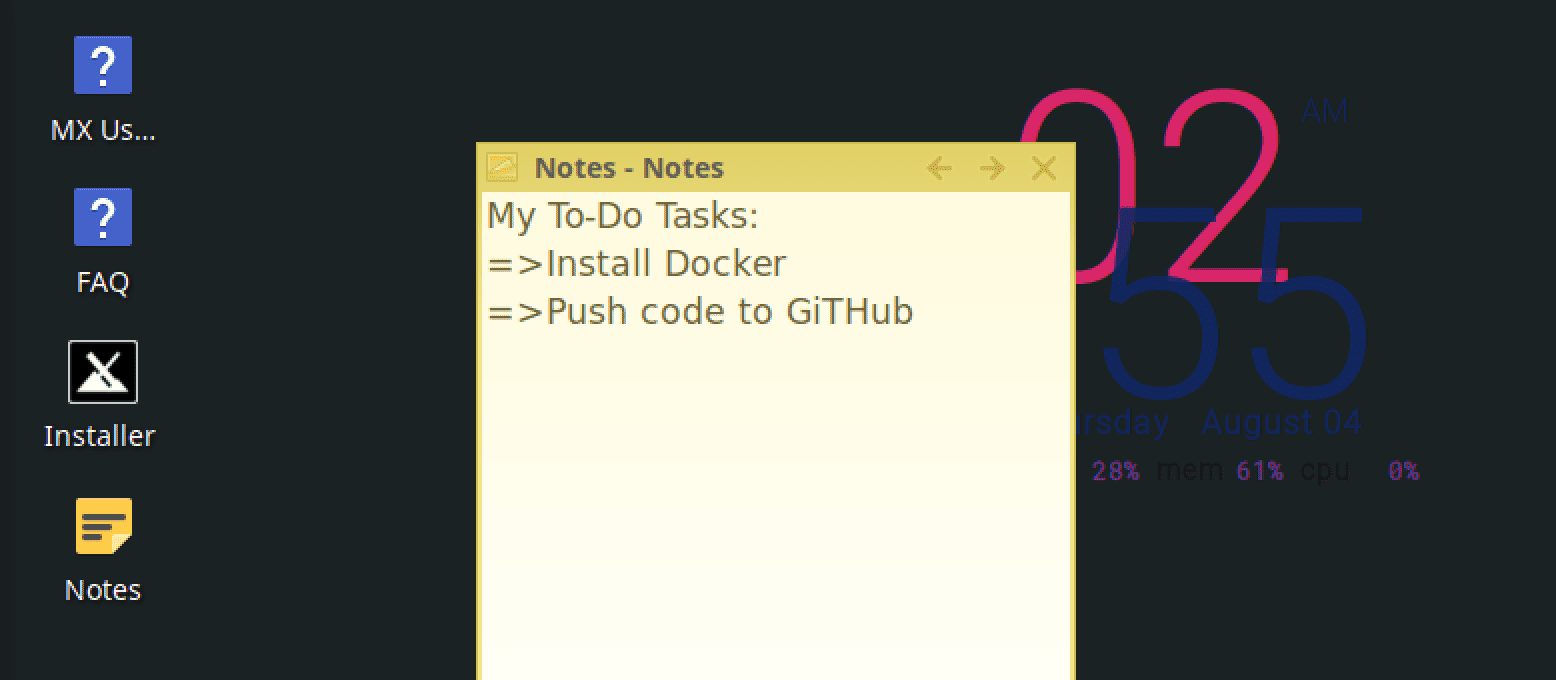
Create Notes
Now you can type anything to help you remember to work on it later. But before moving to the next, if you did not create a notes launcher earlier, you can do it now or even better by adding it as an item in your taskbar for easy access.
8. Searching for files and folders using the Catfish file search database
The MX Linux has a powerful database known as the Catfish for searching files. Think of Catfish as an equivalent to “File Explorer” in the Windows operating system. To access this catfish file, right-click anywhere empty on the Desktop and select “Find files here.”
That will launch the ‘Cat fish’ window as shown below. On the right side, you will see a panel that allows you to set various parameters for your ‘search’ query. For example, you can select the ‘Documents’ folder as your target search folder and set the target ‘time’ under the “Modified” section.
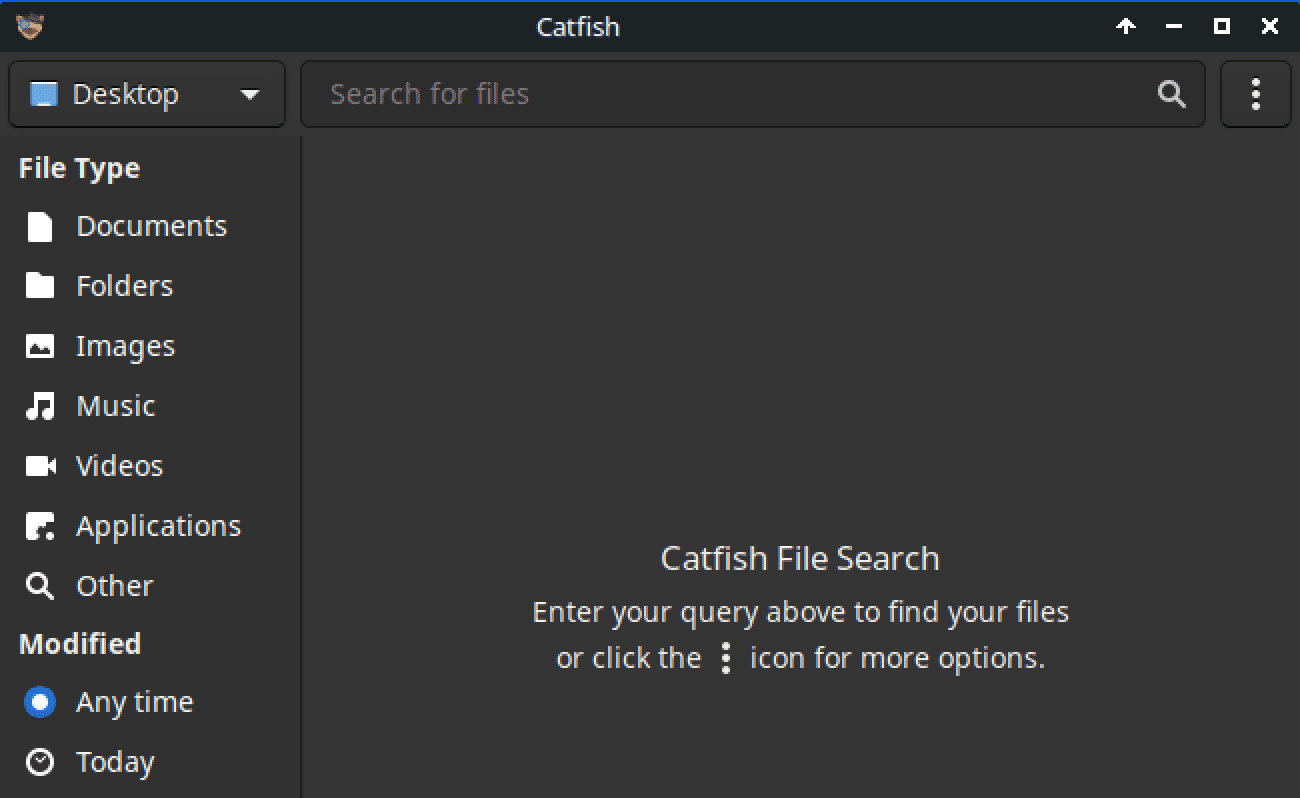
Cat Fish
9. GUI Updating and Upgrading your system
MX Linux features a GUI updating and upgrading system. This is especially great news for those users who are not fans of the terminal. You can update and perform a complete upgrade of your system using the GUI. Fortunately, a single click and password authentication are all required to get your upgrade up and running.
On your desktop, please hover your mouse cursor over the icon that looks like an open green box and select it. Then enter your password as prompted to initiate the upgrade process.
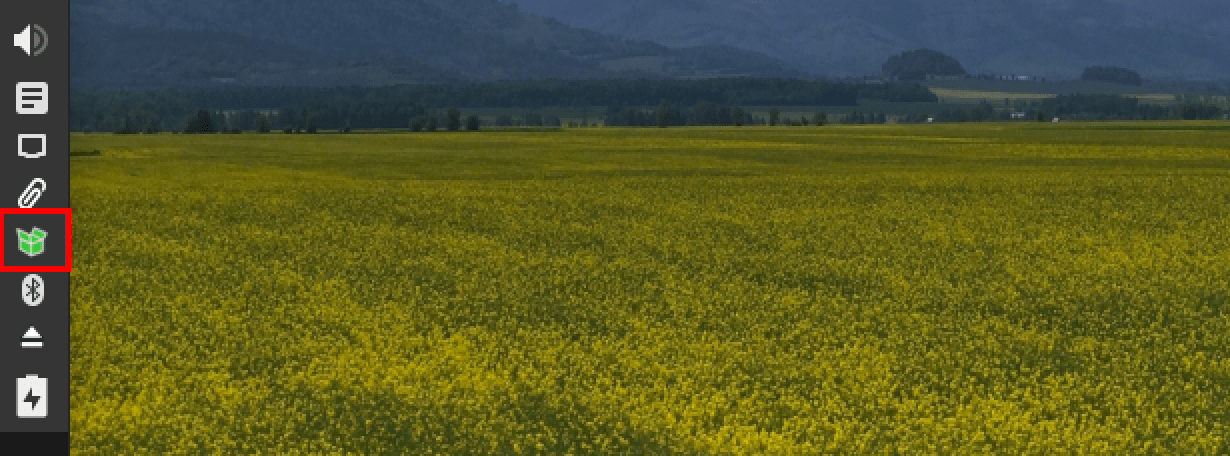
GUI Upgrade
10. MX Tweak Tool
If you have ever used the GNOME desktop, you have probably come across the gnome tweak tool that allows you to tweak or configure the appearance and functionality of your desktop. MX Linux also features a utility tweak tool that helps to configure different settings, such as displaying the panel horizontally at the top or bottom of your desktop or instead displaying it vertically on the left or right side of the desktop.
To get started with the MC Tweak tool, navigate to Applications => MX tools => MX Tweak. It can also help you to change the theme settings, window manager, and icons. Just click on the “theme” tab and select the preferred settings.
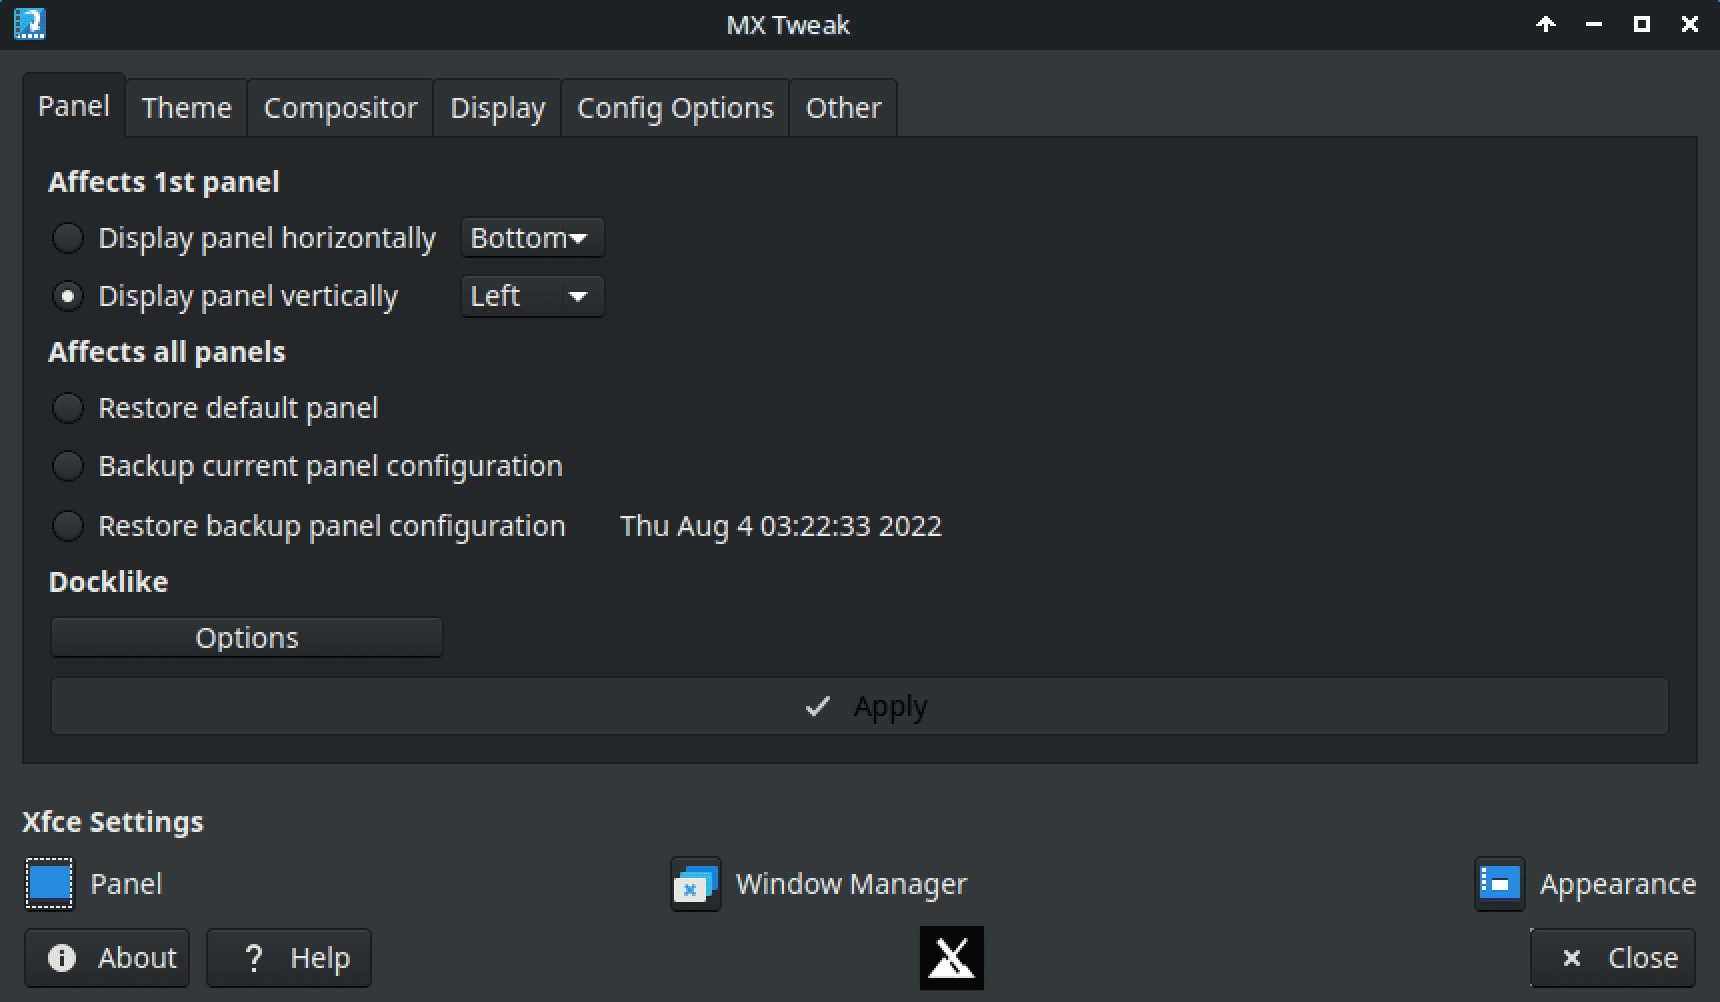
MX Tweak Tool
For more configurations, feel free to explore all tabs (compositor, display, config options, and others).
11. Configuring your bash
If you are a scripter or use bash as your default scripting language, you might be urged to configure and customize your bash to suit your preferences. Usually, we configure the “.bashrc” file to customize our terminal environment and sessions. And it is for this reason that the “.bashrc” is a hidden script file to prevent being configured by a regular user. The MX Linux provides an easier way to customize your bash using a GUI application known as the Bash Config.
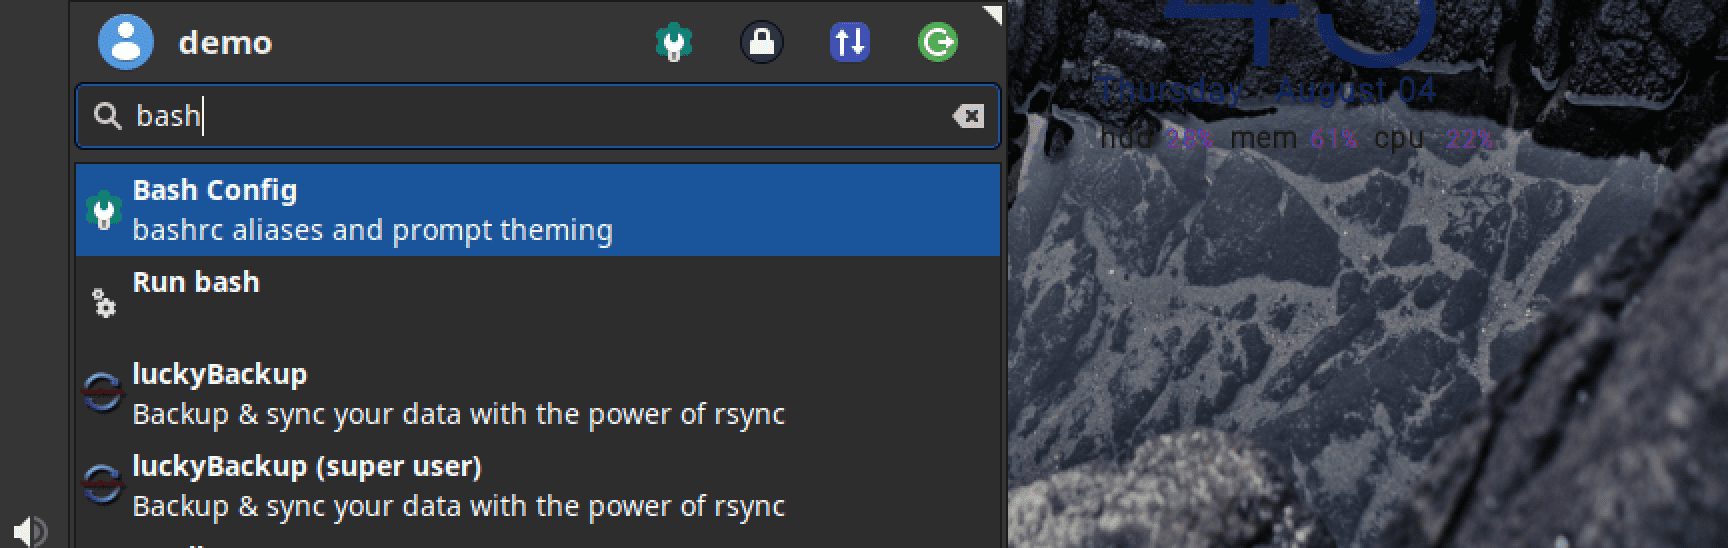
Bash Config
With this application, a user can customize a terminal session; by enabling coloring, and command completion, changing the prompt to have a fancy one, and making command aliases of your preference.
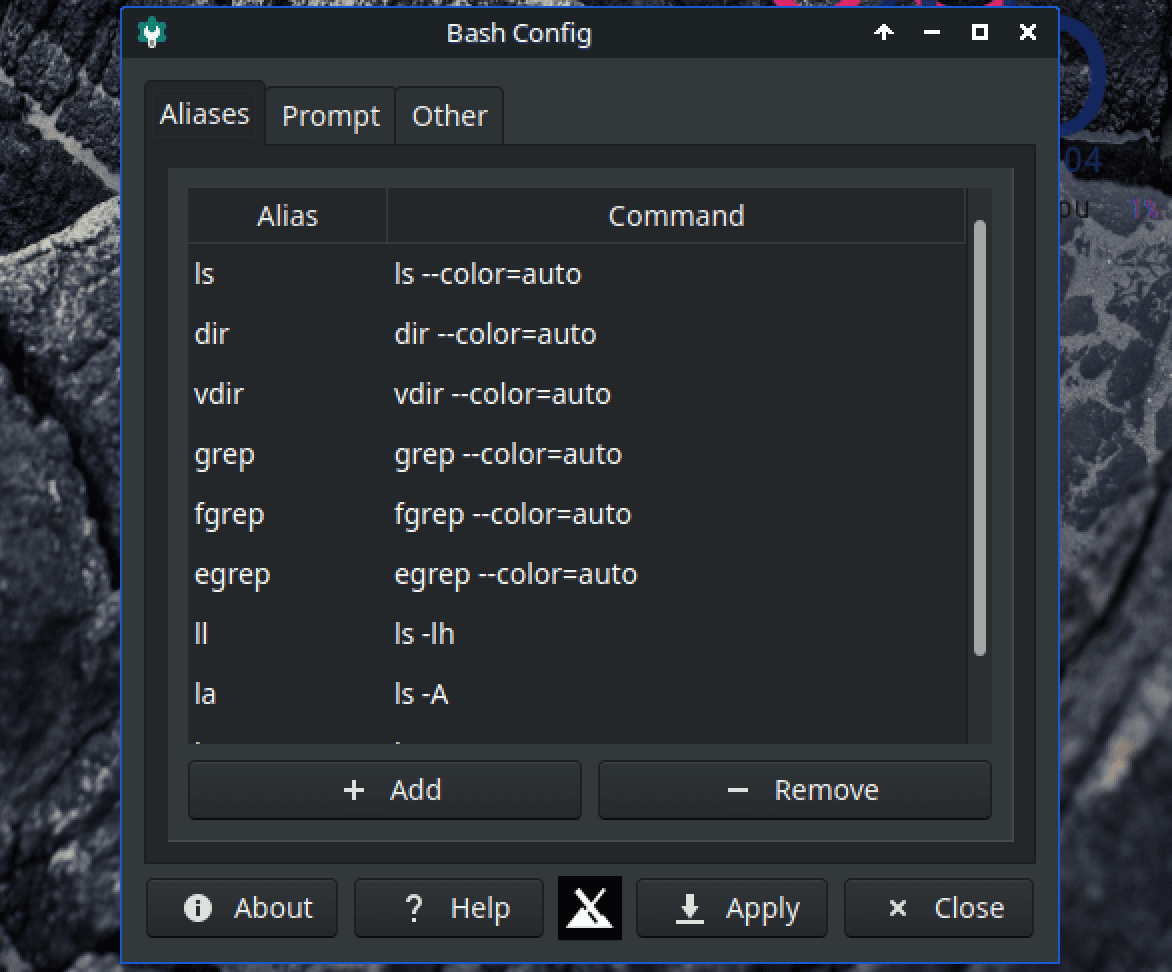
Bash Config Window
Conclusion
You have learned a few tricks to get you started with the MX Linux distro. My take on it is that it’s straightforward on the eyes once you log in but installing it is a little intimidating. The file manager(thunar file manager) is straightforward to use and navigate the file system. The Create launcher tool makes it easy to have your go-to programs at hand. MX Linux is a warm and attractive distribution to any user.
Did we leave anything behind? Please don’t hesitate to leave your comment or question below.