
VLC Media Player is one of the most popular media players in the software community that needs no introduction. It can play almost any media format thrown at it. It is free and open source application widely used across Linux, Windows, and Mac OS systems.
Apart from media playback, VLC Media Player can do a few exciting things. Today we are going to write about one of those features of VLC; one that allows users to stream, record and broadcast the video footage recorded by various recording devices.
VLC media player is available in almost all Linux app store. If not, head over to the official website to download VLC for your Linux distro.
How to stream a video from a camera using VLC media player
To stream video from a capturing device easily, follow these steps:
- Open up VLC Media Player
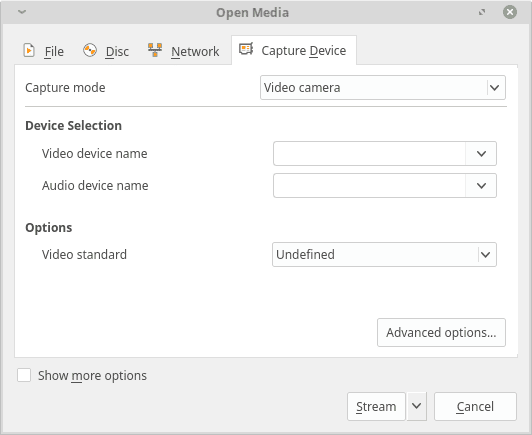
- Click on ‘Media‘ in the menu bar
- Click on ‘Open Capture Device‘
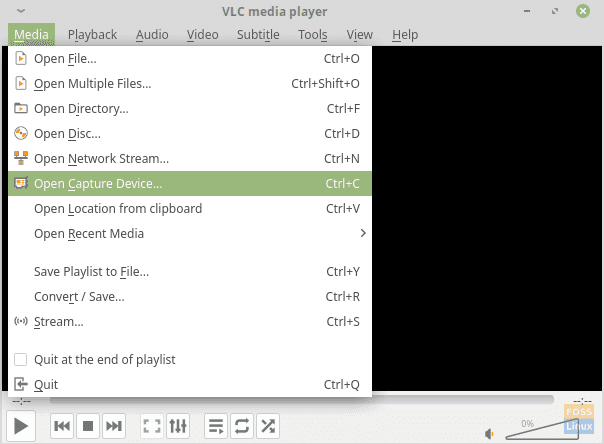
Opening a capture device
- Choose the desired video and audio device names:
If you’re on a laptop, the first video and audio device names will be of the inbuilt camera and microphone of your laptop (if you have them). If you want to choose an external device, make sure it is connected. It will also be listed there in the options, with the name ‘/dev/video1’. If you have more than one external camera, you will have to test each of the options to identify them.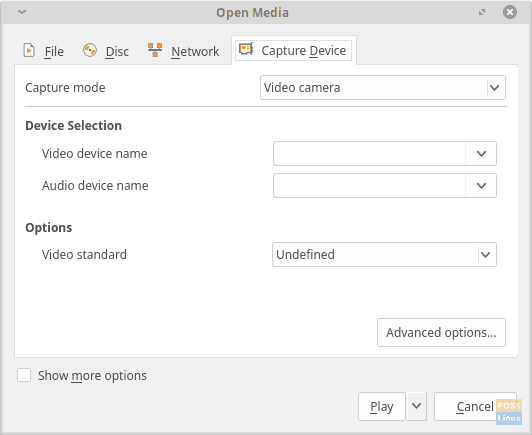
Selecting audio and video interfaces
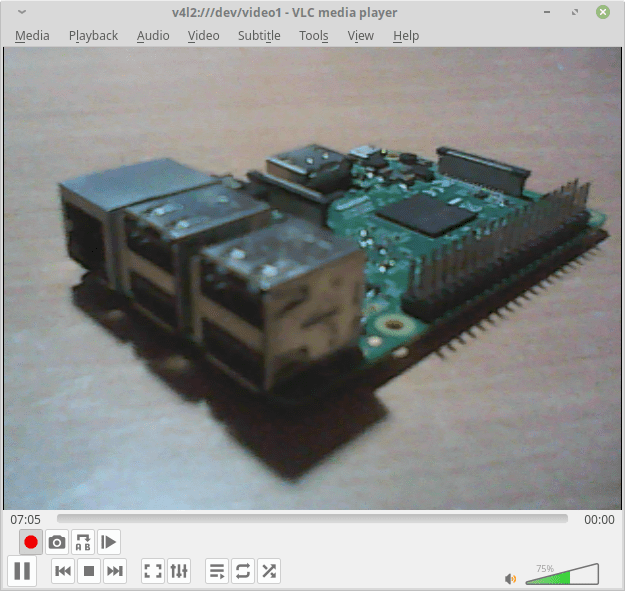
- Click on ‘Play‘.
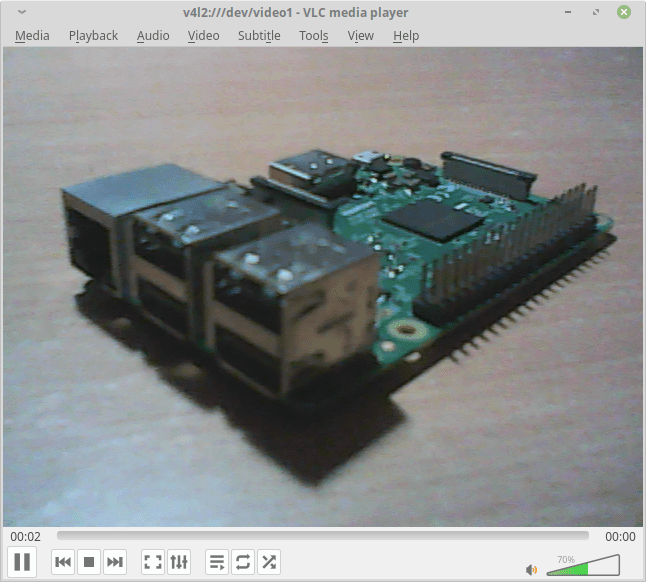
Streaming capture device
The streaming of the footage should start. Now that we finished streaming it, we can move to record it.
Recording Video from a Capture Device
Now use the following steps to begin recording of the streaming video.
- Click on ‘Playback‘ in the menu bar.
- Click on ‘Record‘.
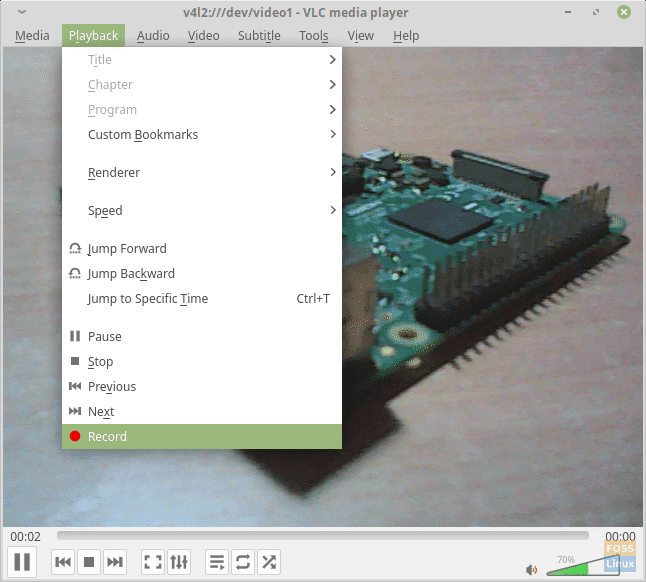
Starting recording
To end the recording, just perform the same steps again. The recorded video should get saved in the Video directory in the user’s home directory.
Alternatively, use the following steps for more easy operation:
- While playing, click on ‘View‘ in the menu bar, and check the box that says ‘Advanced Controls‘.

Enabling advanced controls
It will result in a new set of options appearing in the controls. There will be a red button, which represents recording.
- To start recording, click on the button, and it will appear dented in (darkened) so that you know that the video recording is in progress. When finished, just press that button again.
Recording in process
Broadcasting video from files or a capture device over a network
VLC can even broadcast the video over the network too. You only have to make sure that the system on the receiving end also has the VLC installed. To broadcast your capture device, follow these instructions.
- Click on ‘Media‘ in the menu bar, and choose ‘Stream‘.
- Go to the tab that says ‘Capture Device‘. Also, note that you can stream media files too instead of a capture device. To do that, simply select Media> Stream > File tab and then click the “Add” button to add the media folder location.
Choosing streaming devices
- Choose your camera and microphone, and click on ‘Stream‘.

Selected audio and video interfaces
- You’ll get the dialog box to set up your stream output.
- Click ‘Next’ on the source and type selection stage.
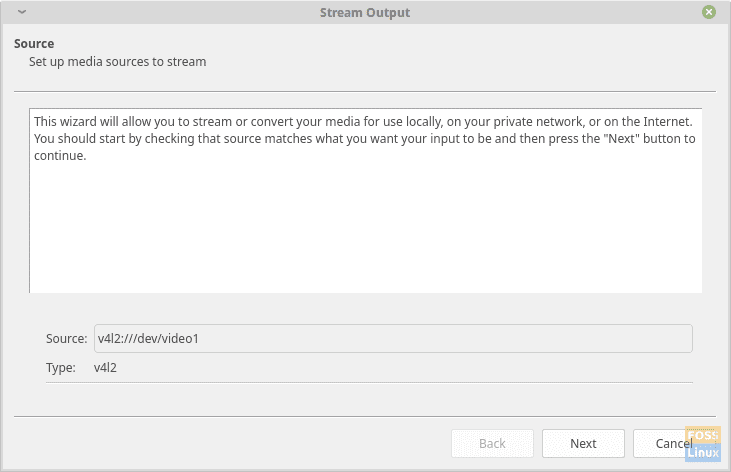
Source selection
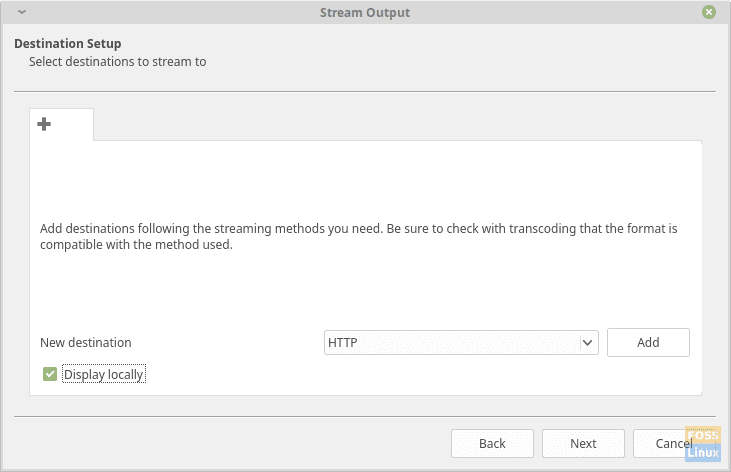
- Select ‘HTTP‘ from the ‘New destination‘ drop-down box (as we are going to use HTTP to stream the video), check ‘Display locally‘, and click on ‘Add‘. Go to the next stage.
Protocol selection
- You will get an option to change the default 8080 port, and replacing it is recommended for security purpose, especially if you require this stream for long-term and confidential purposes.
Let the path remain ‘/’ and proceed to the next stage.
Selecting path and port
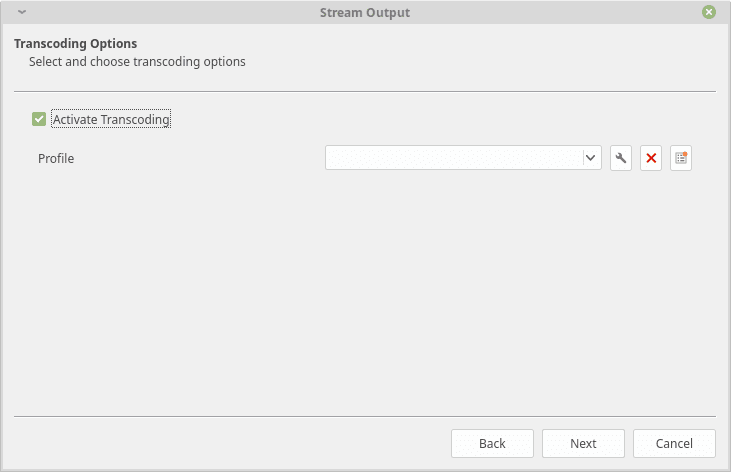
- Check ‘Active Transcoding‘ and click on ‘Next‘.
Transcoding stage
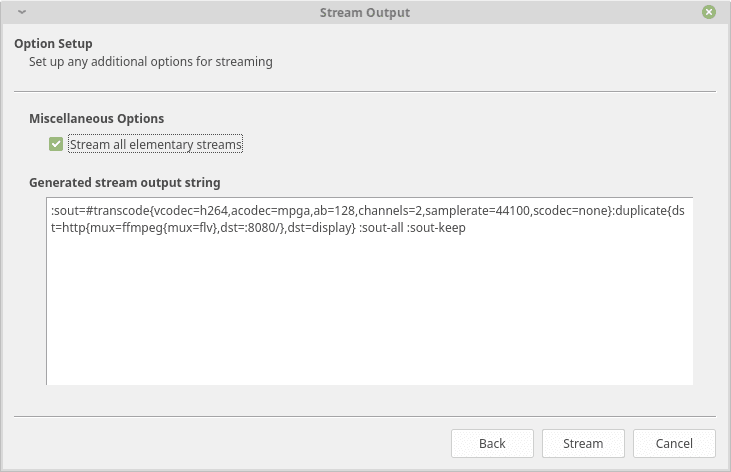
- Check ‘Stream all elementary streams‘ and click on ‘Stream‘.
Output configuration
- Click ‘Next’ on the source and type selection stage.
That is all that you need to do to set-up the broadcast. Now to open the broadcast in another system, follow these steps:
- Open up VLC Media Player.
- Click on ‘Media‘ in the menu bar, and choose ‘Open Network Stream…‘.
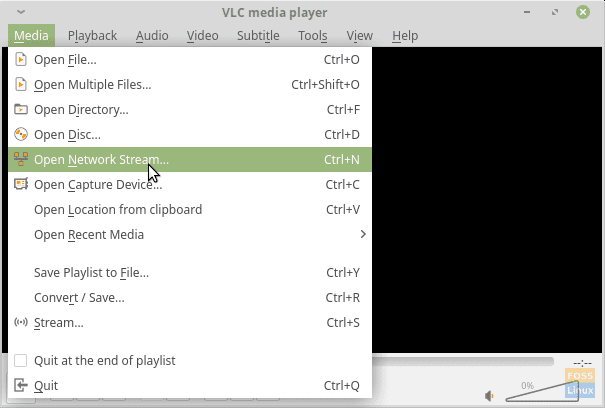
Opening network streaming
- Now for the source URL, enter it in the following format:
http://<IP of source>:<port number>
In my case it became:
http://192.168.1.3:8080
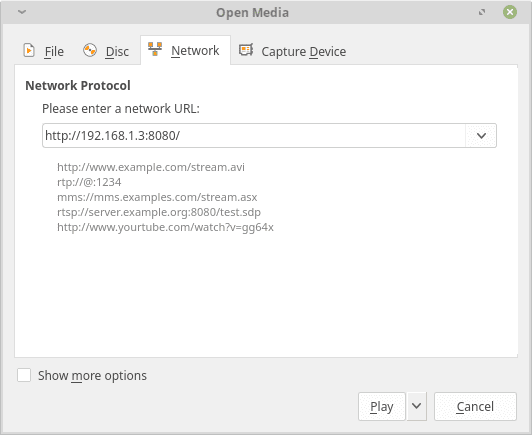
Streaming source URL
- To find the IP address of the source system, run this command on that system:
sudo ifconfig
You will see your IP address in the sub-section of the network interface you are using.
- Click on ‘Play‘
The stream should appear in your VLC Media Player window.
Conclusion
VLC Media Player is a preferred media player across the PC environment for a long time, and there is every reason for it. Its powerful media playback capability is hard to ignore, and even today there is no equivalent media player that can support so many media extensions. The streaming capability of VLC has some lag, but it is not bad at all. If you need to stream the video over the network neatly, getting an excellent high-speed router is a good choice. A low-speed router will cause more slowness and frame loss.
If you have any issues, or any questions, let us know in the comments. Cheers!