
Nginx (pronounced as ‘engine-x’) is a popular web server software known for its high performance and reliability. It is open-source software used by many popular websites, including Netflix, GitHub, and WordPress. Nginx can serve as a web server, load balancer, reverse proxy, and HTTP cache, among other things.
It is known for its high performance, stability, and scalability. It is an excellent choice for hosting websites, applications, and services that require fast and reliable web hosting. Following this guide, you can install and set up Nginx on your Ubuntu machine and serve web pages.
Installing Nginx on Ubuntu
Prerequisites
Before installing Nginx on Ubuntu, there are a few prerequisites that you need to fulfill:
- Access to Ubuntu server: You will need access to an Ubuntu server, either as a virtual machine or a dedicated server.
- Superuser access: You will need superuser access to the Ubuntu server. This can be achieved by logging in as the root user or using the
sudocommand.
Follow the steps below to install Apache on your Ubuntu system.
Step 1. Update Ubuntu
It is always recommended to update your Ubuntu server to the latest version before installing any new software. You can do this by running the following commands in the terminal:
sudo apt-get update
sudo apt-get upgrade
Step 2. Configure other existing web servers
If you have other web servers like Apache installed on your Ubuntu server, uninstall them before installing Nginx. This will avoid any conflicts or port-binding issues.
sudo apt-get remove apache2
Alternatively, if you want to run Nginx alongside Apache, you can choose to use Nginx as a reverse proxy to Apache. This configuration allows Nginx to handle incoming requests and forward them to Apache for processing. This setup can offer the benefits of both web servers.
Step 3. Install Nginx
Nginx is available in the Ubuntu repositories. Therefore, you don’t need to add any other third-party repositories. Instead, execute the command below on the terminal to install Nginx.
sudo apt install nginx

Install Nginx
Step 4. Start Nginx:
After installation, Nginx should start automatically. However, you can run the command below to start the service if it does not start after the installation.
sudo systemctl start nginx
Step 5. Check Nginx status:
You can check the status of Nginx using the following command:
sudo systemctl status nginx
This command will show the current status of Nginx.

Nginx service
From the image above, you can see that the Nginx service is running successfully on our system.
Tip: If you get an error when starting the Nginx service, there is a high probability that Port 80 is already in use. Nginx uses port 80 by default for HTTP traffic. If another service already uses port 80, Nginx will fail to start. To check if port 80 is in use, you can run the following command:
sudo lsof -i :80
If another service uses port 80, you can either stop that service or configure Nginx to use a different port.
Step 6. Configure firewall
If you have enabled the UFW firewall on your system, ensure it is appropriately configured to allow incoming traffic on the ports Nginx uses. The default port used by Nginx is 80 for HTTP and 443 for HTTPS. You can run the commands below to allow traffic to Nginx.
sudo ufw allow 'Nginx HTTP'
sudo ufw allow 'Nginx HTTPS'

Configure firewall
Step 7. Testing Nginx
To test if Nginx is working correctly, open a web browser and type the IP address of your Ubuntu server in the address bar. You can get the IP address of your system by running any of the commands below.
ifconfig

Or,

ip a s
If Nginx is installed correctly, you should see the default Nginx welcome page.
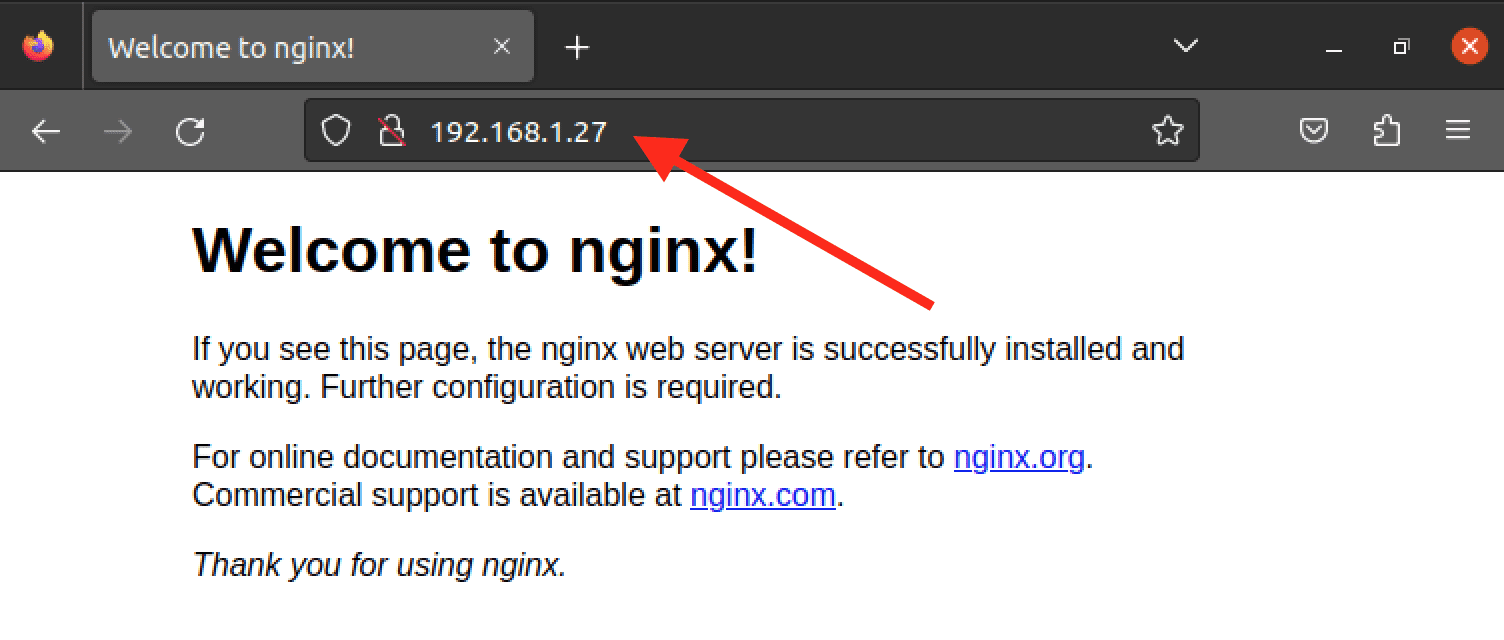
Nginx default page
Create your own website
The website you see when you type the IP address of your system on the browser is the default Nginx website and is located in the /var/www/html directory. If you want to host a static HTML site, you can delete the files inside the /var/www/html directory and add your custom files.
However, you must configure virtual hosts if you want to host multiple websites. A virtual host configuration allows you to run multiple websites or web applications on a single server. Each virtual host has its own set of configuration files, allowing you to customize the behavior of each website independently.
Follow the steps below.
Step 1. Create a directory for your website
Use the mkdir command to create a directory for your website files inside the /var/www folder. For example, we will create a directory called test-website.
sudo mkdir /var/www/test-website

Create a new directory
Step 2. Create a new HTML file for your website:
Now, you need to add your website files to this directory. For this post, we will create a simple HTML file called “index.html.” However, if you are working with WordPress or any other, you can extract the files to this new directory.
sudo nano index.html
Add some basic HTML code to the file, such as:
<html>
    <head>
        <title>How to Install and Use Nginx on Ubuntu (fosslinux.com)</title>
    </head>
<body bgcolor="skyblue">
    <h1>How to Install and Use Nginx on Ubuntu (fosslinux.com)</h1>
    <p>Lorem ipsum dolor sit amet, consectetur adipiscing elit. Sed et dolor quis ex posuere euismod. Sed pharetra vel odio in venenatis. Donec eget eros vel nisi varius rutrum. Aliquam efficitur lacus at purus dictum lobortis. Duis ut diam dignissim, dapibus turpis vel, consectetur orci. Aliquam erat volutpat. Nulla facilisi. Praesent ut sapien sapien.
</p>
<img src="https://www.fosslinux.com/wp-content/uploads/2021/02/nginx-logo.png" alt="Nginx Logo">
</body>
</html>
Save (Ctrl + O, then Enter) and close the file (Ctrl + X).
Step 3. Create a new Nginx configuration file for the Virtual Host
The next step is to create a configuration file for your new website. For this post, we will call it “test-website.conf.” Launch the terminal and execute the command below.
sudo nano /etc/nginx/sites-available/test-website.conf
Add the following configuration to the file:
server {
    listen 80;
    listen [::]:80;
    root /var/www/test_website;
    index index.html;

    server_name test-website.com www.test-website.com;

   location / {
      try_files $uri $uri/ =404;
  }
}
This configuration tells Nginx to listen on port 80 and serve files from the /var/www/test-website directory. It also sets the default index file to index.html and specifies the domain name for the virtual host.
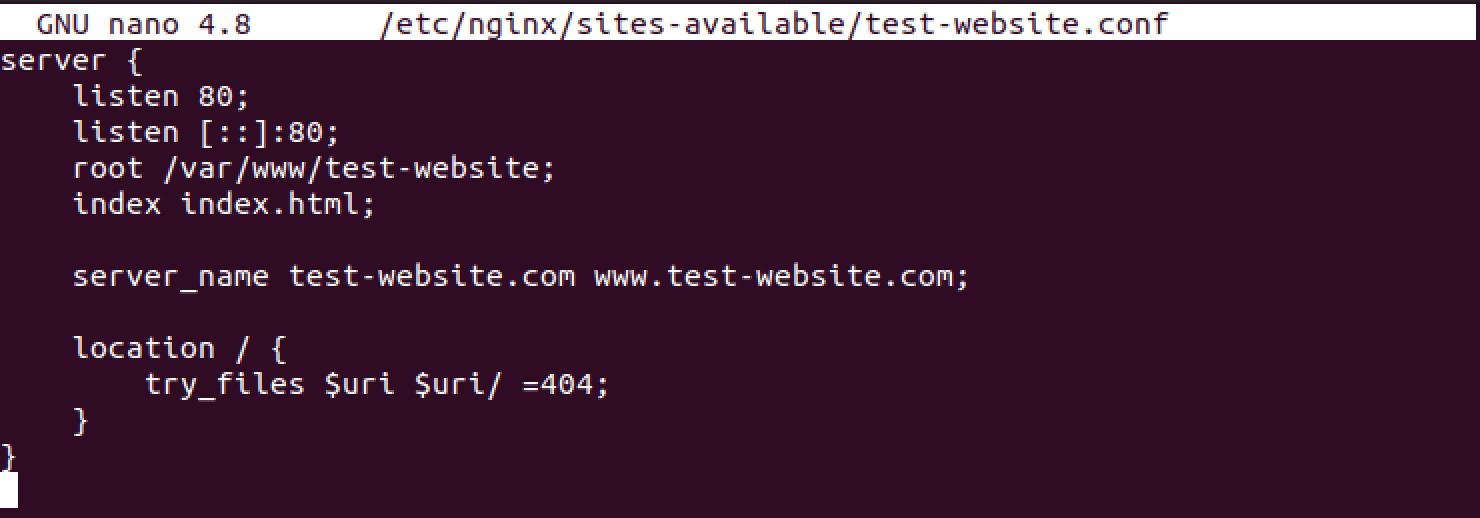
Nginx configuration
Save (Ctrl + O, then Enter) and close the file (Ctrl + X).
Step 4. Enable the Virtual Host
Next, you need to create a symbolic link to enable the virtual host:
sudo ln -s /etc/nginx/sites-available/test-website.conf /etc/nginx/sites-enabled/
Next, you need to run a test to confirm that your configurations and syntax are okay. Execute the command below.
sudo nginx -t
If the configuration is okay, you can proceed to Restart Nginx to apply the changes:
sudo systemctl restart nginx
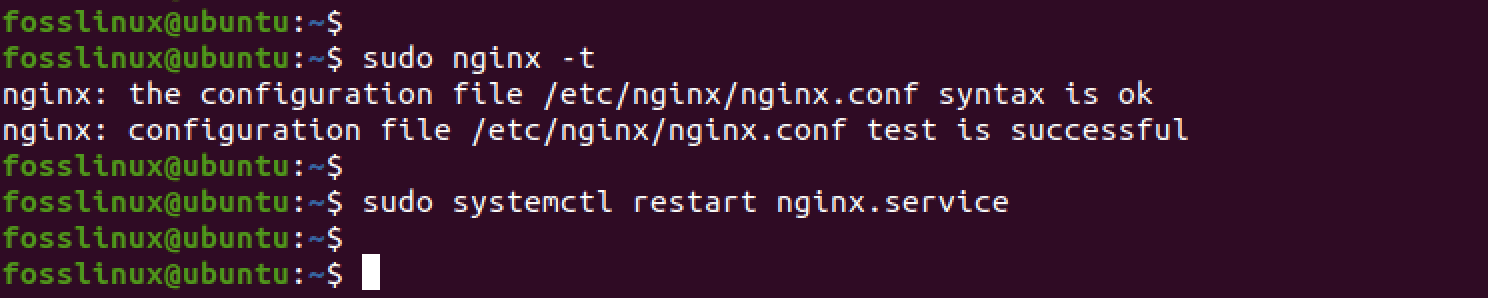
Restart nginx
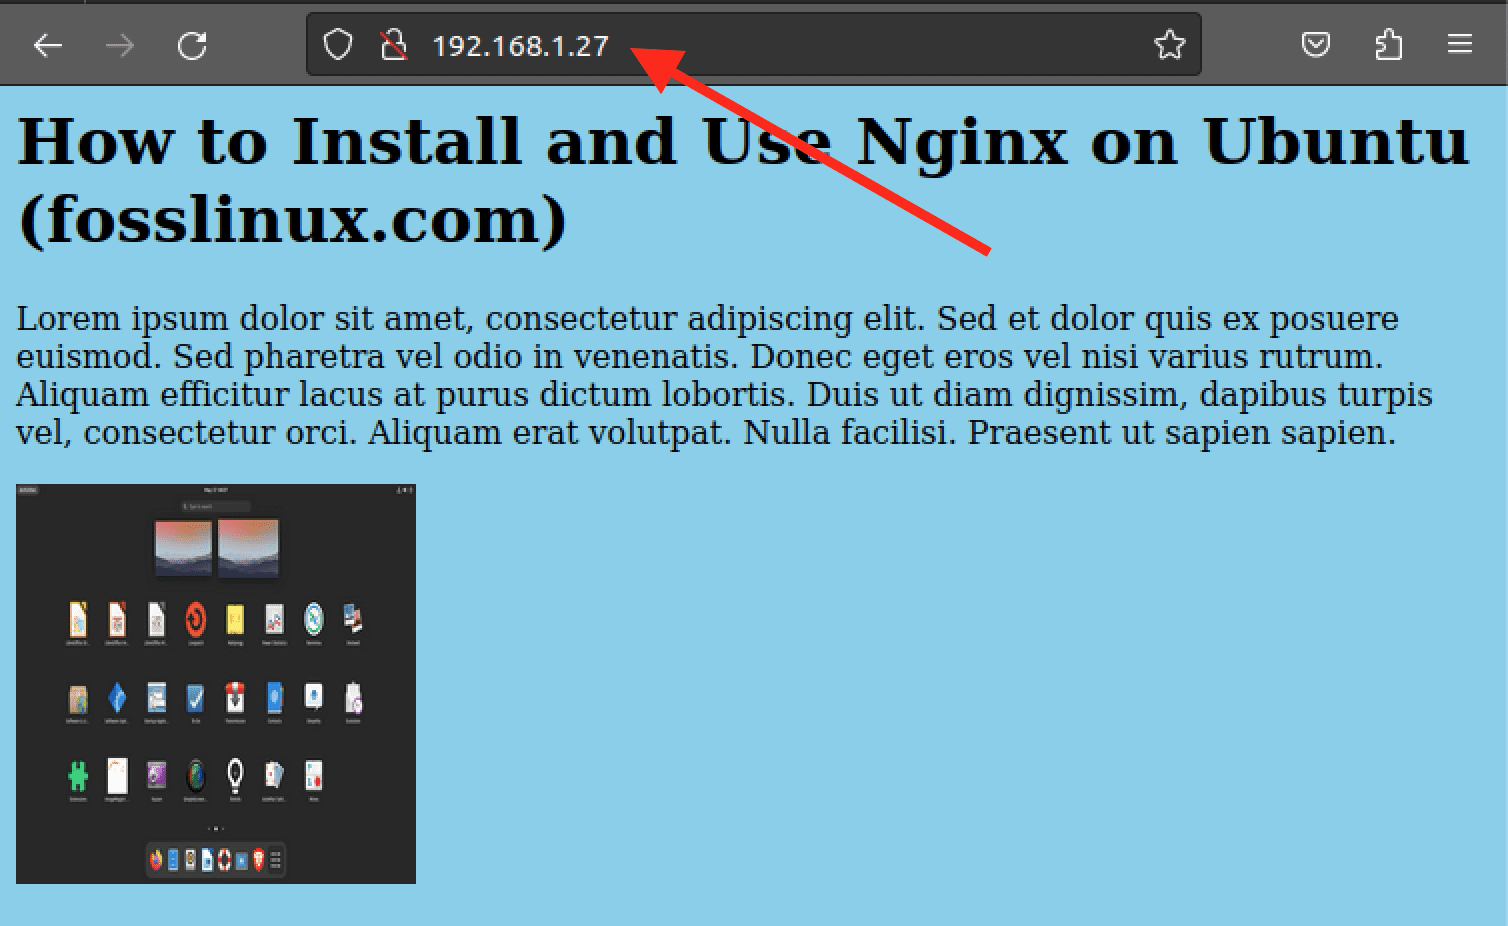
Congratulations, you have created your own website and set up a virtual host with Nginx. You can now access your website by entering your domain name or IP address in a web browser.
Step 5. Test your website
You can proceed to test your website by typing the IP address on your browser.
Test your site
If you used a different port number (e.g., 81), specify it in the IP address, as shown below.
192.168.1.27:81
Nginx vs. Apache
Nginx and Apache are two of the most popular web servers in the world. While both serve the same purpose, some key differences set them apart.
Performance
Nginx is known for its high performance and low resource consumption. It is designed to handle many concurrent connections with low memory usage. Apache, on the other hand, can be resource-intensive and may require more memory to handle the same amount of traffic.
Flexibility
Apache is a more flexible web server than Nginx. It supports many modules and can be easily customized to meet specific needs. On the other hand, Nginx has a more limited set of modules and is less flexible when it comes to customization.
Ease of use
Nginx is generally considered to be easier to configure and use than Apache. Its configuration files are more straightforward and intuitive and can be set up quickly and easily. However, Apache can be more complicated to set up and configure, especially for beginners.
Tip: Both Nginx and Apache have their strengths and weaknesses. The choice between the two depends on the specific needs of the website or application being served. Feel free to check out our post that will give you a comprehensive guide on Installing Apache Web Server on Ubuntu. Nginx is a good choice for high-performance web servers that require low resource consumption, while Apache is more flexible and can be customized to meet specific needs.
Conclusion
Nginx is an excellent choice for a high-performance and reliable web server. It is easy to install and configure on Ubuntu. With its ability to serve as a web server, load balancer, reverse proxy, and HTTP cache, among other things, it provides many benefits.
This post has shown you how to install and configure Nginx on Ubuntu, start and check its status, configure the firewall, and host a single static HTML site or multiple websites using virtual hosts. With this knowledge, you can confidently use Nginx to host your websites and applications.
1 comment
it’s 2023 and you didnt do anything for https with certbot or other solution