
Docker is an open-source containerization application that is designed to create, deploy, and run application processes in a container, like a virtual machine, but using the same kernel as the host operating system. Docker containers allow a developer to package all parts of the application, libraries, and its dependencies into one package and deploy it.
Docker has an image repository with a preconfigured Docker image for almost all famous open-source applications and operating systems. Docker has two editions, the Docker CE (Community Edition), which is a free and open-source version, and the other is Docker EE (Enterprise Edition), which comes with support, certification, etc. and is paid.
Installing Docker on CentOS
In this tutorial, we will show you step by step guide to install Docker CE on CentOS 7 and CentOS 8.
Prerequisites
- A maintained version of CentOS (Docker does not support outdated versions)
- A user account with ‘sudo’ privileges.
Step 1: Install Yum Utils
First of all, we need to install ‘yum utils’ package for using yum-config-manager to enable CentOS extras. Use the following command:
$ sudo yum install yum-utils -y
Output:
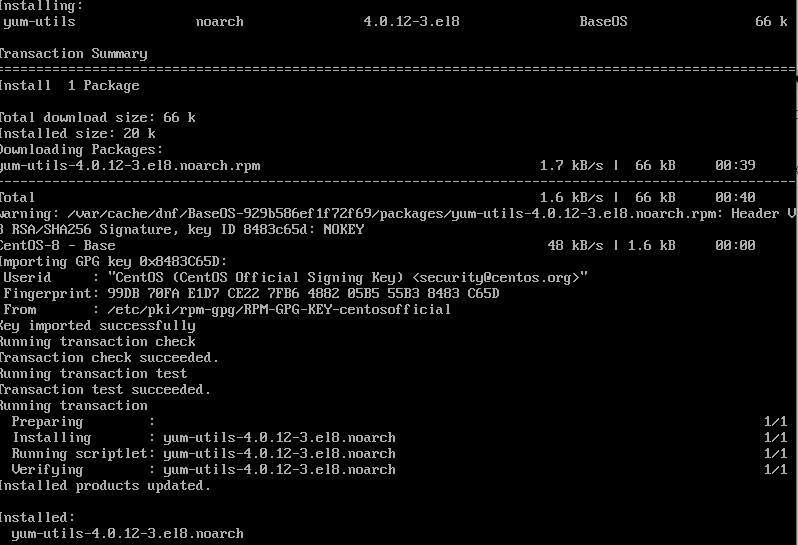
installing yum-utils package
As you can see from the above screenshot, yum-utils are installed.
Step 2: Enable CentOS extras
To enable CentOS extras, use the yum-config-manager command:
$ sudo yum-config-manager --enable extras
To confirm whether extras are enabled use following command:
$ sudo yum repolist
Output:

centos extra repo enabled
Step 3: Install Docker Dependencies
Now we need to install device-mapper-persistent-data, and lvm2 package as Docker depends on these two packages. Use the below command:
$ sudo yum install device-mapper-persistent-data lvm2
Output:

installing data-mapper and lvm2 package
From the above screenshot, you can see these packages were already installed.
Step 4: Add Docker Official Repo
We shall now add Docker official repository to CentOS using yum-config-manager:
$ sudo yum-config-manager --add-repo https://download.docker.com/linux/centos/docker-ce.repo
Output:

adding docker repo into centos
Docker repository should be added by now.
Step 5: Only for CentOS 8 and above
If you are installing Docker on CentOS 7 or lower, you can skip this step, but for CentOS 8, we need to correct Docker compatibility with the containerd.io package. We have to manually download the package and then have to install it using yum.
First, we navigate to /tmp directory:
$ cd /tmp
We shall download the latest package from the official CentOS 7 package repository of Docker CE with the following command:
$ wget https://download.docker.com/linux/centos/7/x86_64/stable/Packages/
containerd.io-1.2.13-3.2.el7.x86_64.rpm
Output:

download containerd.io package
Remember to replace the link in the above command with the latest link from the official webpage. Once the latest containerd.io package is downloaded, we will install it from /tmp using the following command:
$ sudo yum install ./containerd.io-1.2.13-3.2.el7.x86_64.rpm
Output:
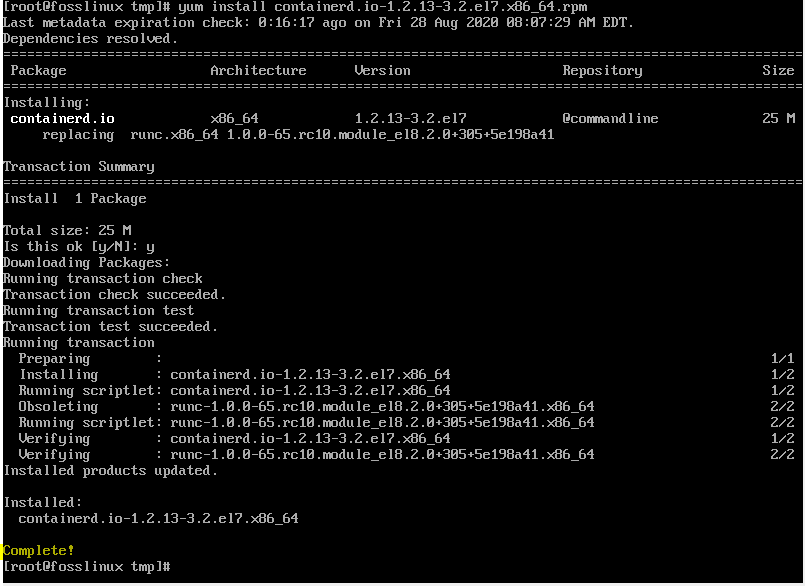
There you go, you have the newest version of containerd.io installed.
Step 6: Install Docker!
With everything set, we can finally install Docker using below command:
sudo yum install docker-ceOutput:
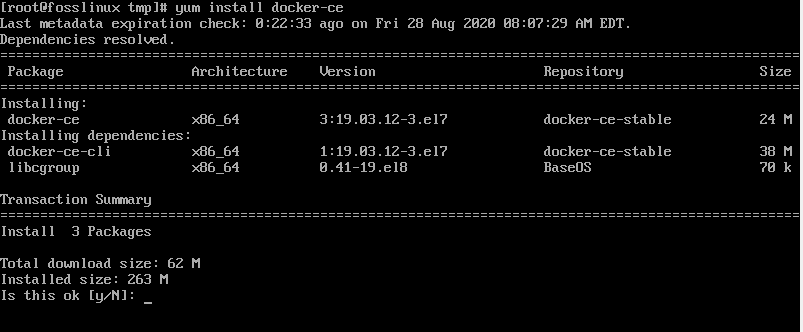
installing docker-ce packages confirmation prompt
To confirm the installation, press Y and then press <Enter>. Yum package manager will start downloading packages.
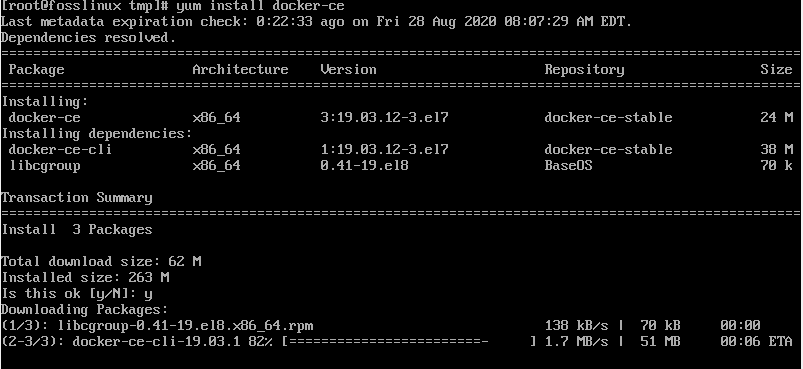
downloading docker-ce packages during installation
It may take a while to complete, and at some point, you may be asked to accept GPG Key of Docker.
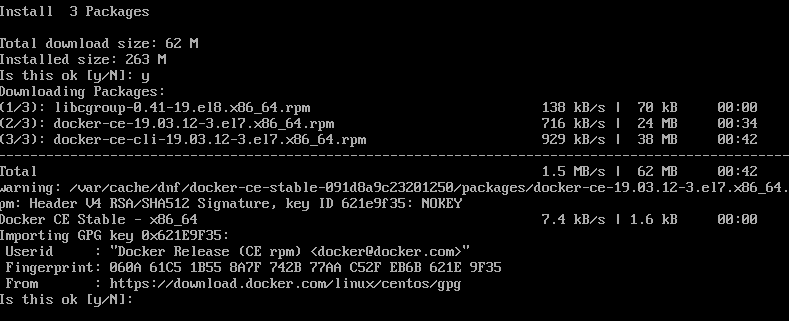
accepting docker gpg key
Press ‘y’ and than <Enter> to continue and after a short time docker will be installed.
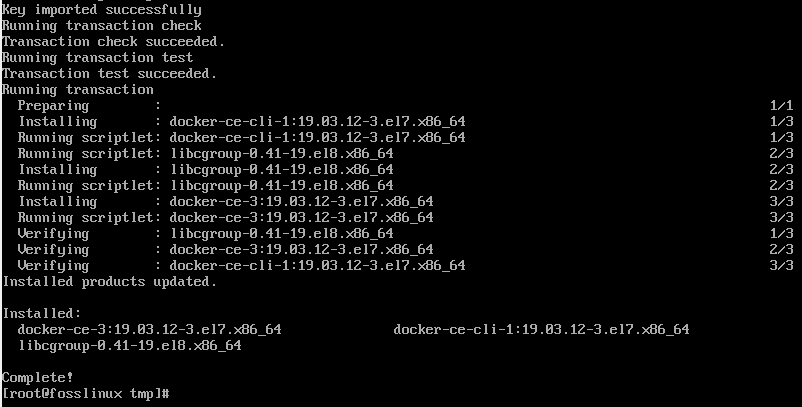
docker installation completed
You can see in the above screenshot that our docker installation on CentOS is completed successfully.
Step 6: Now, we will verify the Docker installation:
docker -v
Output:

docker installation confirmation
Docker is installed in our test system; you can notice the Docker version in the above screenshot.
Configuring Docker on CentOS
First of all, we will see the Docker service status using:
$ sudo systemctl status docker
Output:

checking docker service status
You might have noticed, by default, Docker is disabled after installation. To enable it, use the below command:
$ sudo systemctl start docker
To start docker service on system boot:
$ sudo systemctl enable docker
After that, we will recheck the status using the command:
$ sudo systemctl status docker
Output:
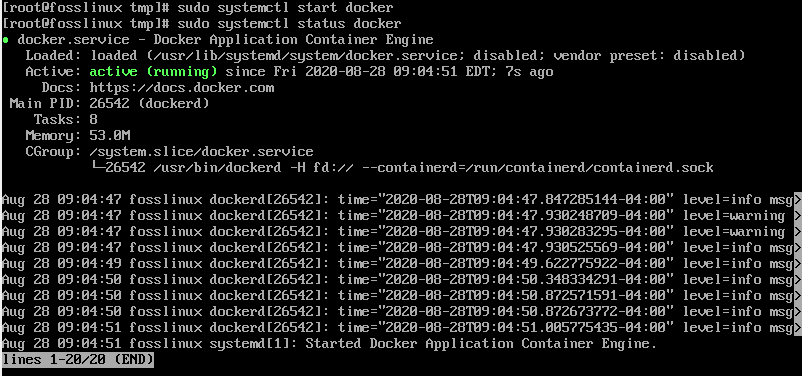
start docker service
You can see the Docker service is active and running now. It will auto-start on system boot as well.
If you were able to come this far, you should have successfully installed Docker on your CentOS 7 or CentOS 8 machine. You can now explore Docker further.
Tip! If you’re going to use Docker on a production machine, then we will recommend you not to upgrade to CentOS 8. Try to keep using CentOS 7 until Docker has official support for CentOS 8.