
External storage devices, such as USB drives, external hard drives, and SD cards, are convenient for storing and transporting large amounts of data. These devices come in different shapes and sizes, from small and portable USB drives to larger external hard drives that can store terabytes of data.
One of the main benefits of using external storage devices is the ability to transfer data between different computers and devices quickly. For example, you might use an external hard drive to move large files between your work computer and home computer or a USB drive to share files with friends and colleagues.
Using external storage devices with Ubuntu allows you to quickly expand your storage capacity, back up important files, and transfer data between different devices.
In this article, we’ll show you how to mount and manage external storage devices on Ubuntu so that you can take advantage of all their benefits. Whether you’re new to Ubuntu or a seasoned user, you’ll learn everything you need to know to safely and efficiently use external storage devices with your Ubuntu system.
Understanding device file names (/dev/sda, /dev/sdb, etc)
Before we dive into the process of mounting external storage devices in Ubuntu, it’s important to understand how these devices are identified within the system.
In Ubuntu (and other Linux-based operating systems), each storage device is represented by a device file in the /dev directory. These files are named based on the type of device and the order in which the system detected them. The first device is typically named /dev/sda; the second is named /dev/sdb, and so on.
The/dev/sda device usually refers to the internal hard drive where Ubuntu is installed. This device is typically partitioned into several smaller devices, each with its file system and mount point. Connecting an external storage device will usually be assigned the following available device file (e.g., /dev/sdb, /dev/sdc, etc.).
It’s important to note that the exact device file name of an external storage device may vary depending on several factors, such as the type of device, the order in which it was connected, and any other devices currently connected to the system. To find the device file name of a specific device, you can use the “lsblk” command in the terminal, which will show you a list of all detected storage devices along with their device file names and mount points.
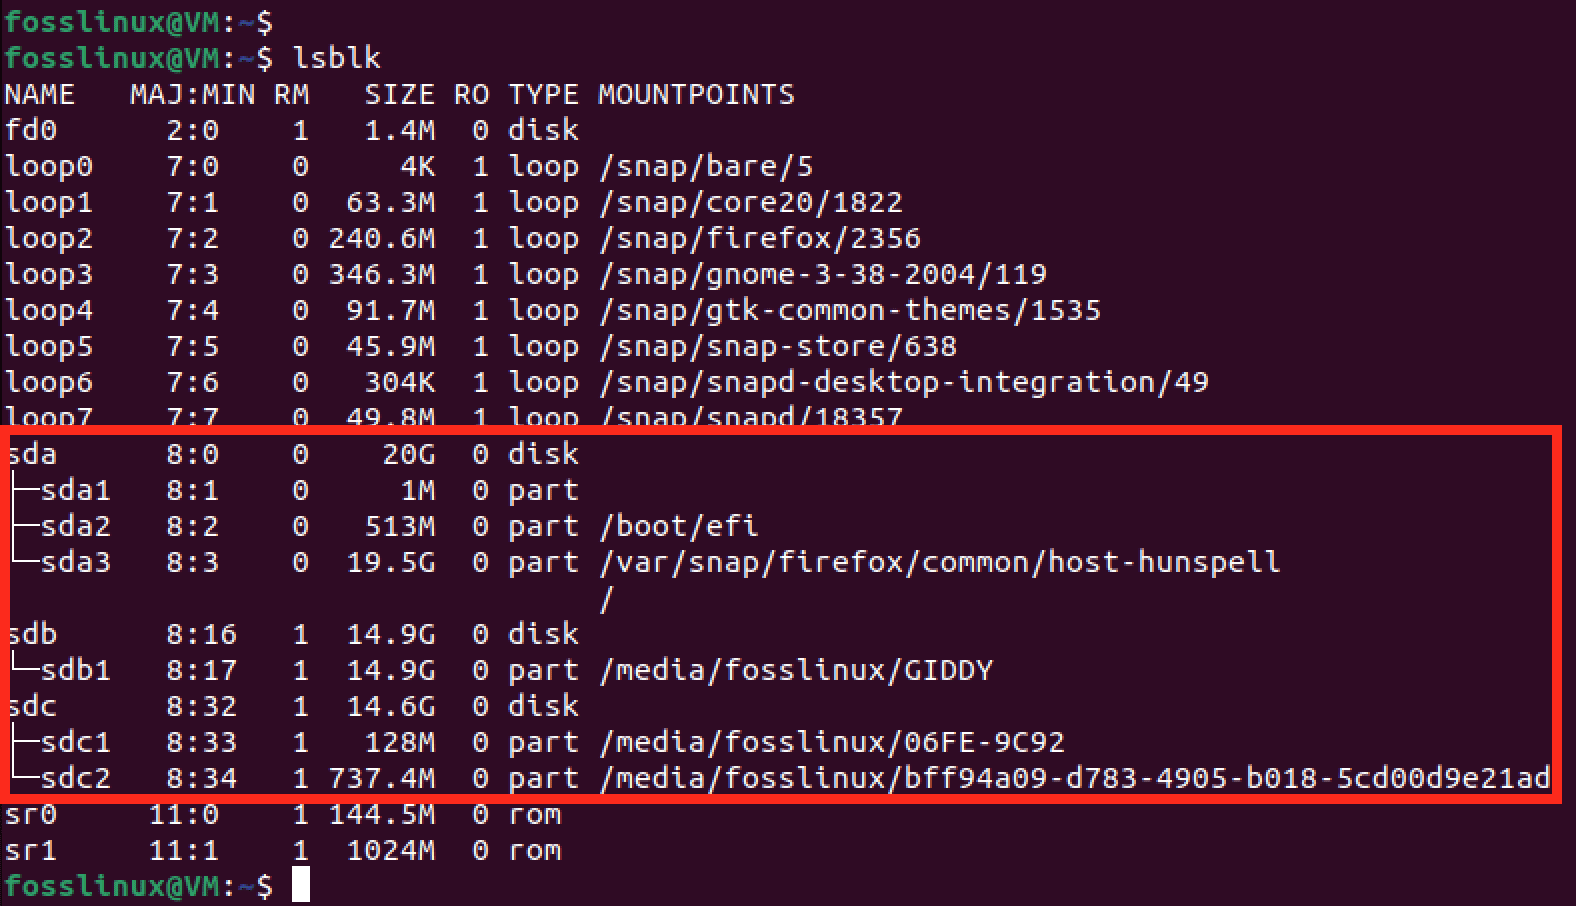
LSBLK command
Mounting external storage devices on Ubuntu
Depending on your preferences and the device you’re using, there are a few different methods of mounting external storage devices on Ubuntu. Here are some of the most common methods:
Method 1: Using the file manager to mount on Ubuntu
The file manager in Ubuntu (Nautilus) provides a convenient way to mount external storage devices.
Step 1. Connect your external storage device to your Ubuntu system via USB or another connection, such as an SD card port.
Step 2. Open the file manager (Nautilus) by clicking on the “Files” icon in the dock or by using the search function in the Activities Overview. Your external storage device should automatically appear in the file manager’s sidebar under “Devices”. If it doesn’t appear, click on “Other Locations” in the sidebar and look for the device under “Devices” or “Removable Devices”.
Step 3. Click on the device in the sidebar to mount it. If prompted, enter your password to authenticate the mount.
Once the device is mounted, you can access its contents by clicking on it in the sidebar. The device’s contents should be displayed in the main area of the file manager window.
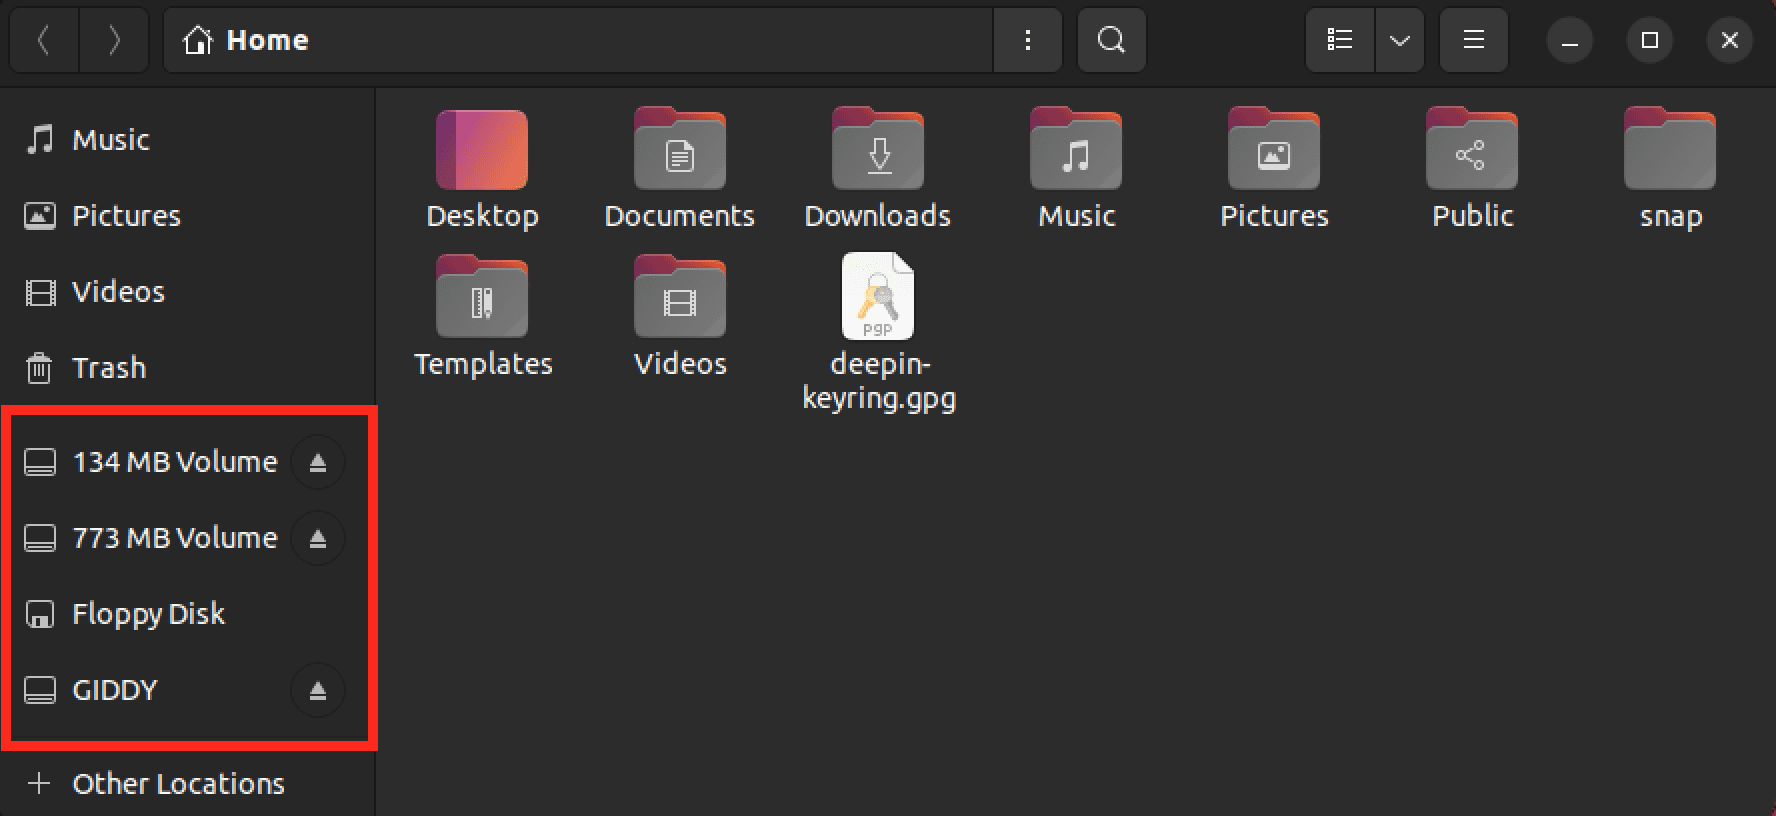
Mount external storage drives
Step 4. To unmount the device, right-click on the device in the sidebar and select “Eject” or “Unmount”. Alternatively, you can unplug the device from your Ubuntu system (after ensuring that any files you worked on are saved and closed).
Method 2. Using the terminal to mount external storage devices on Ubuntu
step 1. Connect your external storage device to your Ubuntu system via USB or another connection.
Step 2. Open the terminal by pressing Ctrl + Alt + T or by using the search function in the Activities overview.
Step 3. Type the command below in the terminal and press Enter.
sudo fdisk -l
This will list all the available storage devices on your system, including your external storage device. Look for your external storage device in the list and take note of its device name, which should be something like /dev/sdb1.
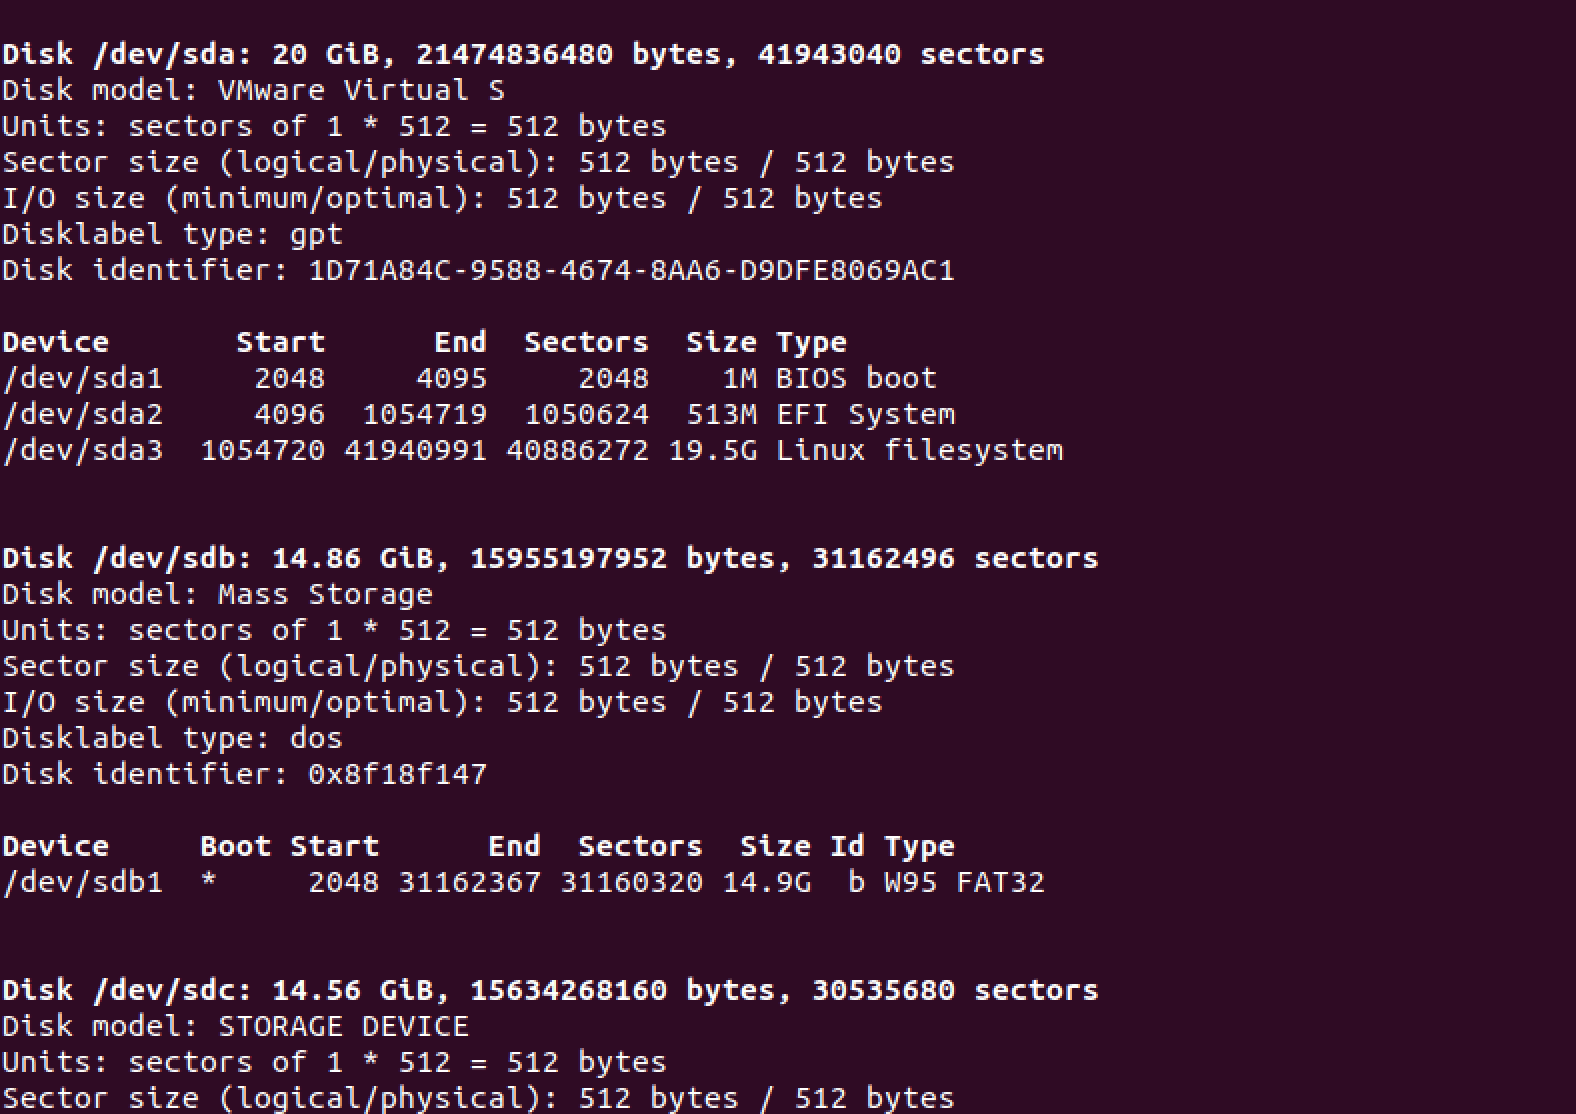
FDISK command
Tip: We have connected two external drives to our Ubuntu system. That is why you can see the paths – /dev/sdb and /dev/sdc. We will mount the /dev/sdb device, a 16GB flash drive.
Step 3. Create a directory where you want to mount the external storage device. For example, you can create a directory called “my_external_drive” in your home directory by typing the command below in the terminal and pressing Enter.
mkdir ~/my_external_drive

Create a mount directory
Step 4. Type the following command in the terminal to mount the external storage device:
sudo mount /dev/sdb1 ~/my_external_drive
Replace /dev/sdb1 with the device name of your external storage device and ~/my_external_drive with the path to the directory you created in the previous step. If prompted, enter your password to authenticate the mount.
Tip: From the image above, you will notice that we have /dev/sdb and /dev/sdb1. /dev/sdb refers to the entire disk device, which may have multiple partitions, while /dev/sdb1 refers to the first partition on the disk. When working with the mount command on Ubuntu (or any other Linux distribution), you typically mount a partition rather than the entire device. So, it would be best if you mounted/dev/sdb1 instead of /dev/sdb.
Step 5. Once the device is mounted, you should be able to access its contents by navigating to the directory where you mounted it, in this case, ~/my_external_drive.
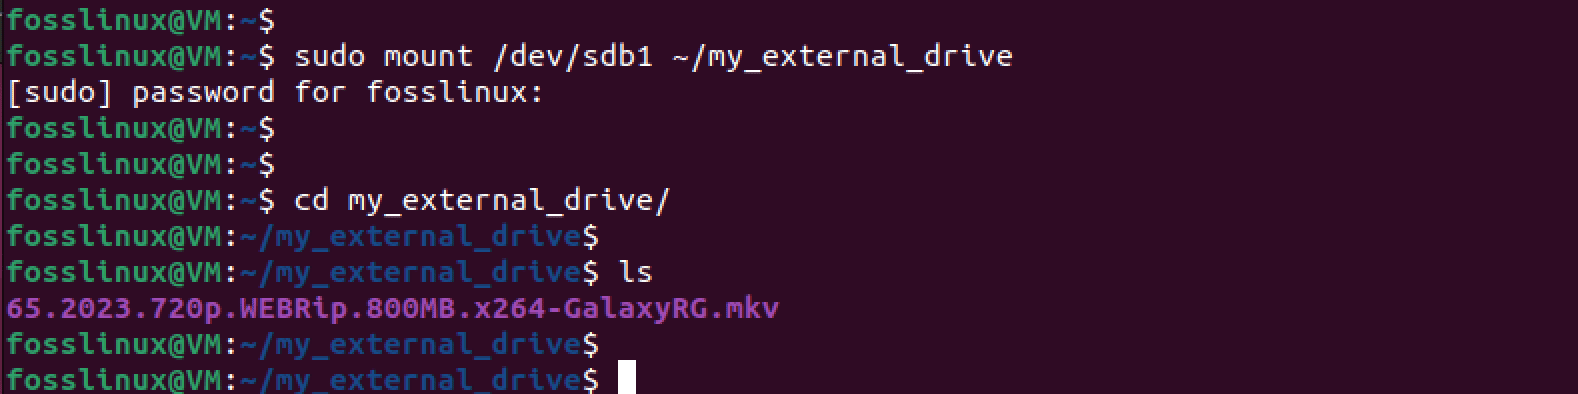
Mount drive to a directory
Step 6. To unmount the device, type the command below in the terminal and press Enter.
sudo umount ~/my_external_drive
Alternatively, open the file manager and click the “up arrow” button next to your device.
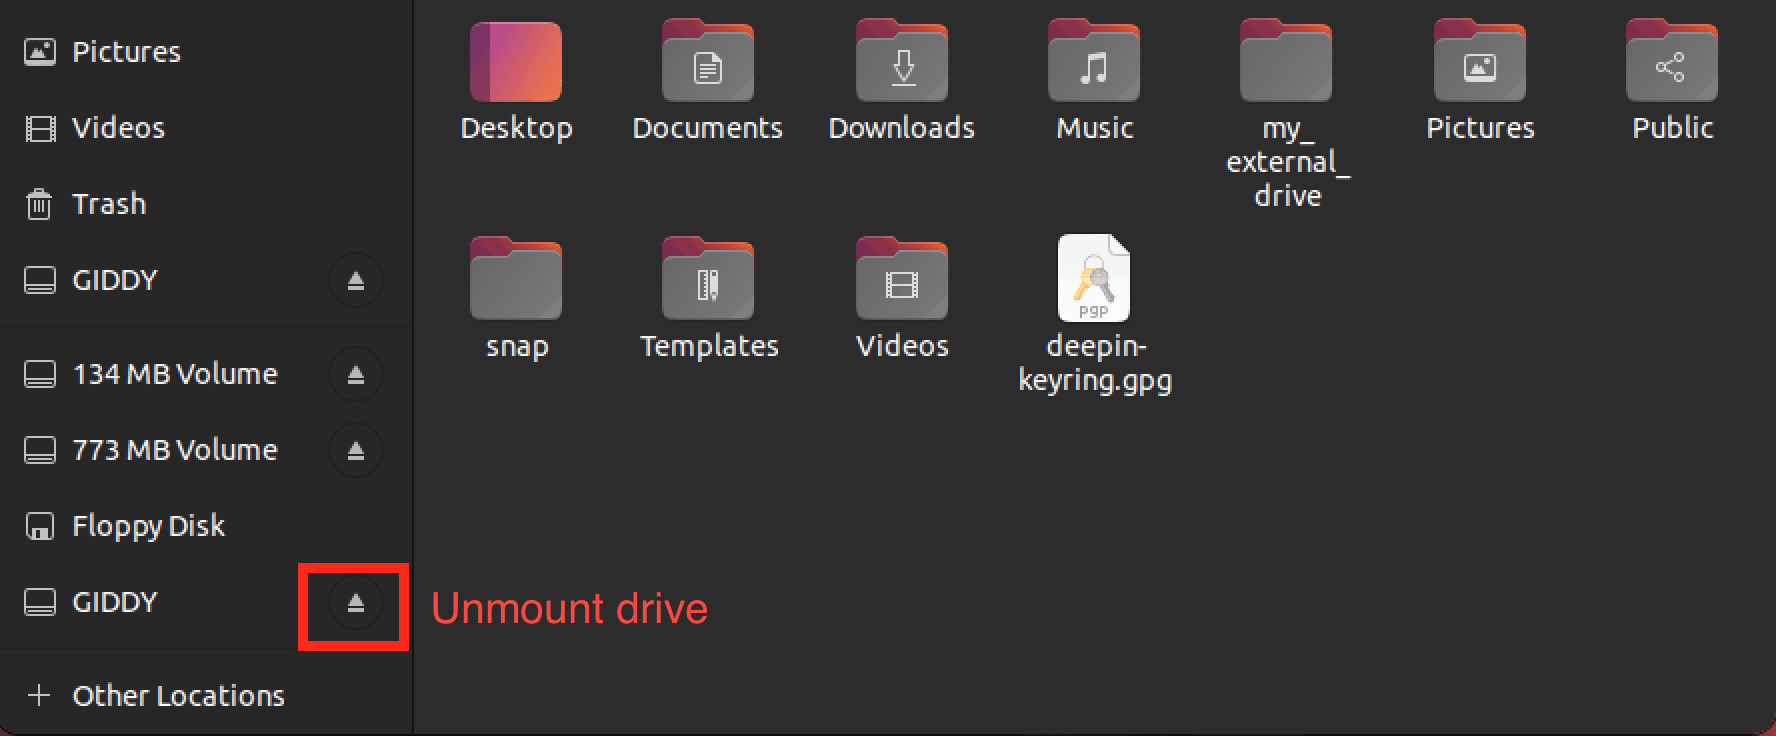
Unmount drive
Tip: Keep in mind that the mount command may require additional options or parameters depending on the type of file system on the external storage device, such as specifying the file system type (-t) or mounting the device as read-only (-o to). You can also use the man mount command to get more information about the mount command and its options.
Method 3. Permanently mount external storage on Ubuntu
When you want to use an external storage device regularly, it can be helpful to configure Ubuntu to mount it every time you start up your computer automatically. This can be accomplished by editing the /etc/fstab file. Follow the steps below.
Step 1. Find the UUID of the device
Type sudo blkid in the Terminal to display a list of connected storage devices and their UUIDs. We will work with the /dev/sdb device in this section.
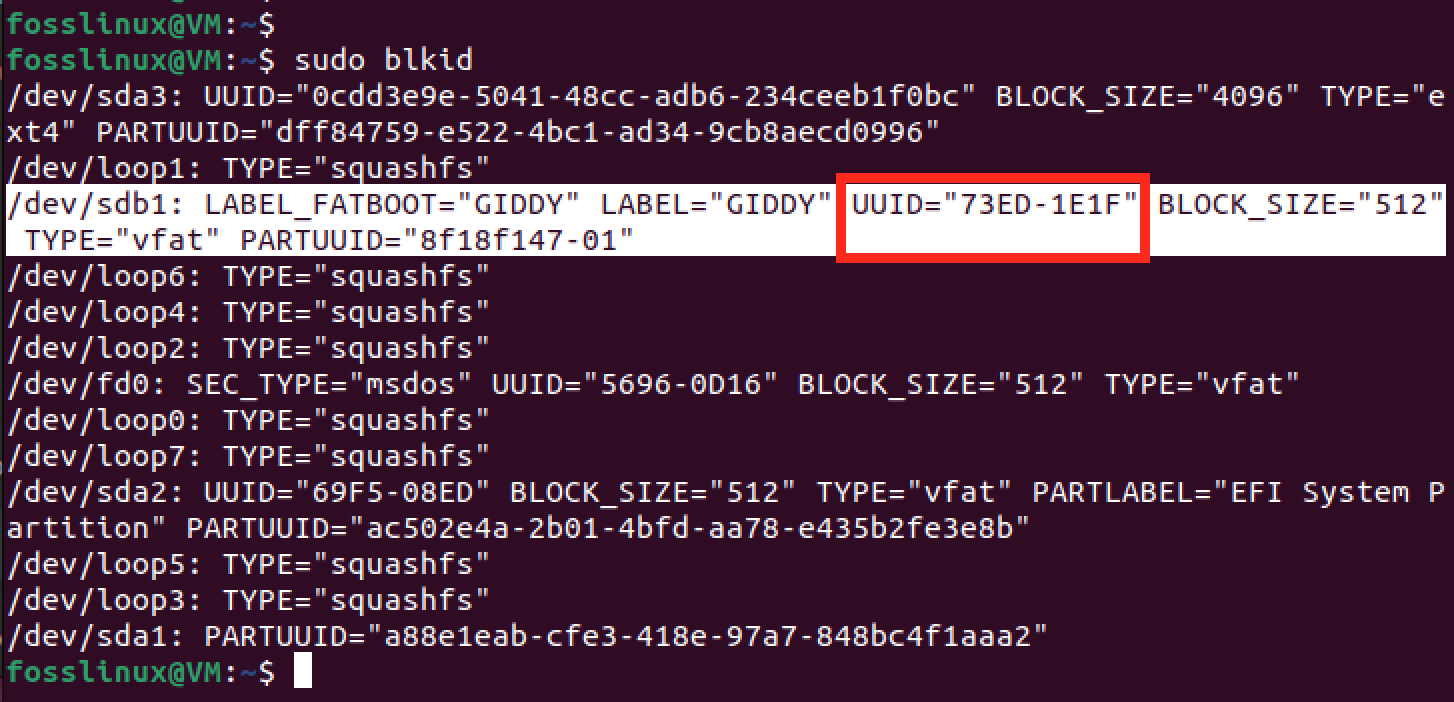
Device UUID
Step 2. Create a mount point
Decide where to mount the device (e.g. /media/mydrive). Create a directory at that location using the mkdir command
sudo mkdir /media/mydrive
Step 3. Edit the /etc/fstab file
Open the file with superuser privileges (e.g. sudo nano /etc/fstab). Add a new line at the end of the file in the following format:
UUID=<device UUID> <mount point> <file system type> <mount options> <dump> <pass>
- Replace <device UUID> with the UUID of the device you want to mount
- Replace <mount point> with the location of the mount point you created in Step 2
- Replace <file system type> with the file system type of the device (e.g. ntfs, ext4)
- Replace <mount options> with any additional options you want to specify, separated by commas (e.g. rw,noatime)
- Leave <dump> and <pass> as 0 for most cases
You should have a command similar to the line below.
UUID=73ED-1E1F /media/mydrive FAT32 defaults 0 2
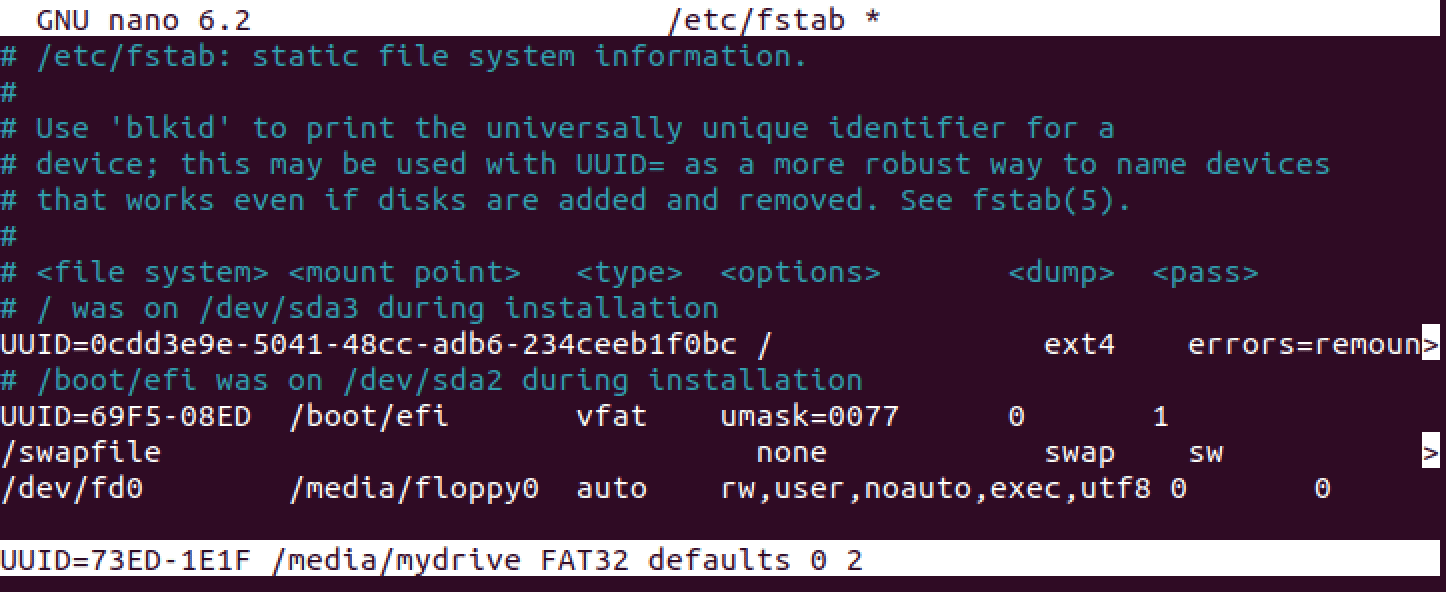
Permanently mount drive
Step 4. Save and exit the file
Press Ctrl+X, then Y to save, and Enter to exit
Step 5. Test the mount
To test the mount, execute the command below.
sudo mount -a
If there are no errors, the device should be mounted at the specified location.
Tip: If you are working with a filesystem like FAT32, you might encounter the error: “mount: /media/mydrive: unknown filesystem type ‘FAT32′”.
You need to install the file system package to mount a FAT32 file system on Ubuntu. To do so, run the following command:
sudo apt-get install dosfstools
Once the package is installed, you can try mounting the device again by running the sudo mount -a command. If the device is still not mounted, you can try specifying the file system type explicitly using the -t option, like this:
sudo mount -t vfat /dev/sdb1 /media/mydrive
Configure permissions for mounted devices
After mounting an external storage device on Ubuntu, you may need to adjust the file permissions to control who can access the files on the device. By default, the owner of the files is the user who mounted the device, and other users may not have permission to access them.
To configure permissions for a mounted device, you can use the “chmod” command followed by the desired permission settings. For example, to grant read and write permission to all users, you can use the command:
sudo chmod a+rw /mnt/mydrive
This command gives read and write permission to all users for the “/mnt/mydrive” directory (replace “/mnt/mydrive” with the actual mount point of your device).
You can also use the “chown” command to change the owner and group of the mounted device and the “chgrp” command to change the group. For example, to change the owner of “/mnt/mydrive” to the user “alice” and the group to “users”, you can use the command:
sudo chown alice:users /mnt/mydrive
How to use external drives with Ubuntu Server
Using external storage devices with Ubuntu Server is similar to using them with the desktop version of Ubuntu, but there are a few differences to be aware of.
To mount an external storage device on Ubuntu Server, you must follow the steps outlined above for the desktop version of Ubuntu. However, since Ubuntu Server doesn’t come with a graphical file manager, you’ll need to mount the device using the command line as discussed in “Method 2” above.
Once you’ve mounted the device, you can access it like any other directory on the server. However, if you want to configure the permissions for the mounted device, you’ll need to use the “chmod” command. This allows you to change the permissions for specific users or groups and set read, write, and execute permissions.
It’s also worth noting that if you plan on using external storage devices with Ubuntu Server regularly, you may want to consider automating the mounting process. This can be done by editing the “/etc/fstab” file, which allows you to automatically specify the settings for each external device you want to mount. That has been discussed in “Method 3” above.
Conclusion
This post has given you a comprehensive guide on how to work with external storage devices on Ubuntu. Following the steps outlined above, you can easily mount and manage your external storage devices on Ubuntu, making it simple to transfer large files between computers, share files with colleagues, and ensure your important data is safely backed up.