
Welcome to the intriguing world of web servers! In this blog, we’re diving into the basics of setting up a web server on Ubuntu, a task that might seem daunting at first but is quite achievable with a bit of guidance. Ubuntu stands out as a fantastic choice for this endeavor due to its user-friendliness, stability, and strong community support.
We’ll explore the installation of the essential LAMP stack, differentiate a basic server from a professional setup, and address common queries you might encounter along the way. By the end of this journey, you’ll have a functioning web server and a solid foundation to build upon in your tech adventures!
Why Ubuntu?
When I first ventured into the world of servers, choosing an operating system was like standing at a crossroads. I ultimately went down the Ubuntu path, and here’s why I think it’s a great choice, especially for beginners and even for professionals:
- Accessibility
Ubuntu is renowned for its user-friendliness. It’s designed to be accessible for beginners, making it an excellent choice for those who are new to server management or Linux in general. The community support is fantastic – whenever I’ve been stuck, a quick search has often led me to a solution posted by another Ubuntu user.
- Stability and reliability
Ubuntu is based on Debian, one of the most stable Linux distributions available. This stability is crucial when running a server because you want your server to be up and running without unexpected hiccups. In my experience, Ubuntu’s reliability has been nothing short of impressive.
- Regular updates and Long-Term Support (LTS)
One thing I particularly appreciate about Ubuntu is its release cycle. Every two years, an LTS (Long Term Support) version is released, which is supported for five years. This means you get regular updates, security patches, and support, which is vital for a web server environment.
- Extensive Documentation and Community Support
Whether you’re a beginner or a seasoned pro, at some point, you’ll likely need help. Ubuntu has an extensive repository of documentation, forums, and Q&A sites. I’ve often found answers to my questions in the Ubuntu community forums, where the spirit of sharing knowledge is truly alive.
- Compatibility and Software Availability
Almost all popular software and server-related tools are compatible with Ubuntu. This means you can run most of the applications you need without worrying about compatibility issues. The apt package manager makes installing and managing software a breeze.
- Security
Ubuntu is known for being secure out of the box. The Ubuntu team provides timely security patches and updates. While no system is impervious to attacks, Ubuntu’s focus on security gives me peace of mind, especially when dealing with sensitive data on a web server.
- Versatility
Finally, Ubuntu’s versatility shouldn’t be overlooked. It’s not just for beginners. Many professionals and enterprises prefer Ubuntu for their servers due to its robustness, support, and scalability. Whether you’re hosting a small personal project or a large-scale commercial site, Ubuntu can handle it.
Setting up a basic web server on Ubuntu
Before we start, ensure you have:
Prerequisites
- A machine with Ubuntu installed (I’m using Ubuntu 20.04 LTS)
- A stable internet connection
- Basic knowledge of using the terminal
Installing the LAMP stack
What is the LAMP stack?
The LAMP stack – Linux, Apache, MySQL, and PHP – is a popular set of open-source software used for web servers. Each component plays a crucial role:
- Linux: The operating system (that’s our Ubuntu!)
- Apache: The web server software
- MySQL: The database management system
- PHP: The scripting language (you could also use Python or Perl)
Installing Apache
- Open your terminal. You can find it in your applications or simply use the shortcut
Ctrl+Alt+T. - Update your package list. This ensures you get the latest version of the software.
sudo apt update
- Install Apache.
sudo apt install apache2
After the installation, Apache should start automatically.
Reading package lists... Done
Building dependency tree
Reading state information... Done
The following additional packages will be installed:
apache2-bin apache2-data apache2-utils
Suggested packages:
www-browser apache2-doc apache2-suexec-pristine | apache2-suexec-custom
The following NEW packages will be installed:
apache2 apache2-bin apache2-data apache2-utils
0 upgraded, 4 newly installed, 0 to remove and 31 not upgraded.
Need to get 1,534 kB of archives.
After this operation, 6,481 kB of additional disk space will be used.
Do you want to continue? [Y/n] Y
...
Setting up apache2 (2.4.41-4ubuntu3.1) ...
Processing triggers for man-db (2.9.1-1) ...
- Check if Apache is running.
sudo systemctl status apache2
You should see an output indicating that Apache is active and running.
apache2.service - The Apache HTTP Server
Loaded: loaded (/lib/systemd/system/apache2.service; enabled; vendor preset: enabled)
Active: active (running) since Sun 2023-11-27 12:00:00 UTC; 10s ago
Docs: https://httpd.apache.org/docs/2.4/
Main PID: 1234 (apache2)
Tasks: 55 (limit: 4657)
Memory: 5.3M
CGroup: /system.slice/apache2.service
├─1234 /usr/sbin/apache2 -k start
├─1235 /usr/sbin/apache2 -k start
└─1236 /usr/sbin/apache2 -k start
...
- Access your server. Just open a web browser and type
http://localhostorhttp://your_server_ip. You should see the default Ubuntu Apache web page. It’s a rather plain page, but always gives me a sense of achievement seeing it!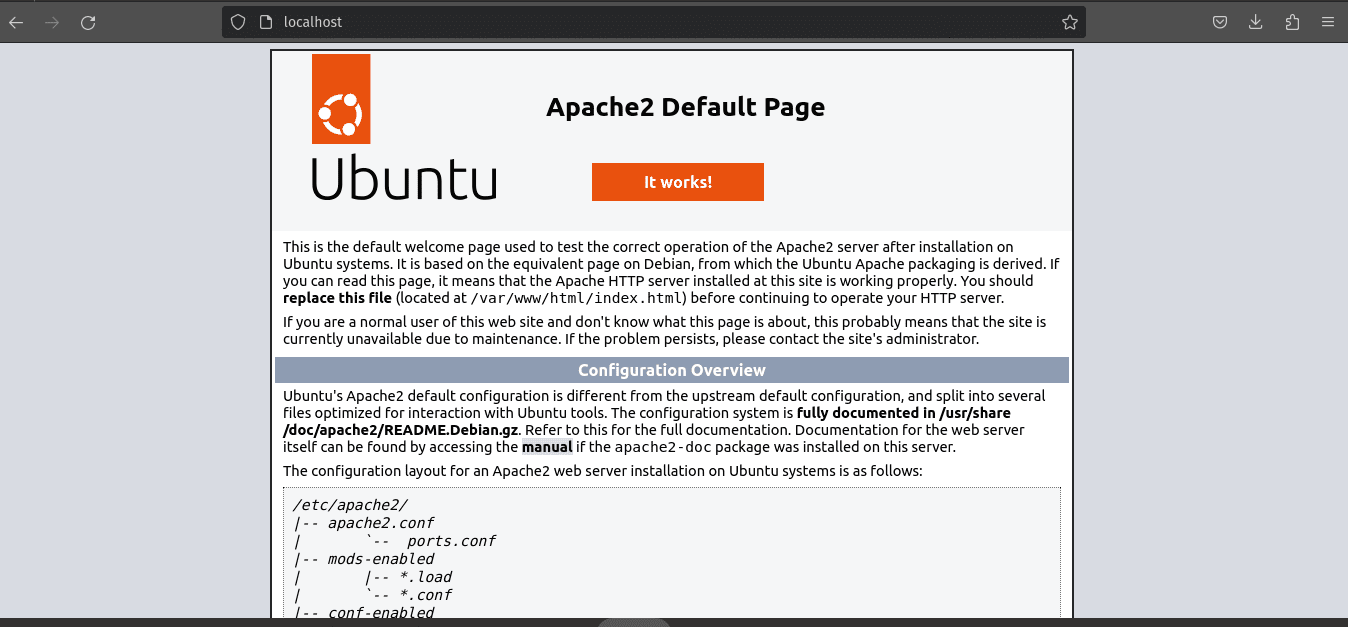
Apache2 default landing page
Installing MySQL
- Install MySQL.
sudo apt install mysql-server
Output:
Reading package lists... Done
Building dependency tree
Reading state information... Done
The following additional packages will be installed:
mysql-client-core-8.0 mysql-common mysql-server-core-8.0
Suggested packages:
tinyca
The following NEW packages will be installed:
mysql-common mysql-server mysql-server-core-8.0
0 upgraded, 3 newly installed, 0 to remove and 31 not upgraded.
Need to get 22.3 MB of archives.
After this operation, 172 MB of additional disk space will be used.
Do you want to continue? [Y/n] Y
...
Setting up mysql-server (8.0.23-0ubuntu0.20.04.1) ...
- Secure your installation. This step involves setting a root password and removing some default settings.
sudo mysql_secure_installation
Output:
Securing the MySQL server deployment.

Enter password for user root:

VALIDATE PASSWORD COMPONENT can be used to test passwords...
Press y|Y for Yes, any other key for No: Y

Please set the password for root here.
New password:
Re-enter new password:

Estimated strength of the password: 100
Do you wish to continue with the password provided?(Press y|Y for Yes, any other key for No) : y
...
You’ll be prompted to configure your MySQL installation. As a rule of thumb, I always say yes to all prompts here as shown above. But wait, what about MySQL workbench? Is it not needed?
I didn’t include the installation of MySQL Workbench in the initial steps, and there’s a good reason for that. Whether or not you need MySQL Workbench depends on your specific requirements and preferences for managing your MySQL databases.
Installing MySQL Workbench (optional):
If you decide that MySQL Workbench is a tool you’d like to use, here’s how you can install it on Ubuntu:
- Update package list:
sudo apt update
- Install MySQL Workbench:
sudo apt install mysql-workbench
- Launch MySQL Workbench: You can start MySQL Workbench from your application menu or by running
mysql-workbenchfrom the command line.
Installing PHP
- Install PHP. We also include PHP module for Apache and MySQL in case you want to run PHP scripts that interact with a database.
sudo apt install php libapache2-mod-php php-mysql
Output:
Reading package lists... Done
Building dependency tree
Reading state information... Done
The following additional packages will be installed:
libapache2-mod-php7.4 php7.4 php7.4-cli php7.4-common php7.4-json php7.4-mysql php7.4-opcache php7.4-readline
Suggested packages:
php-pear
The following NEW packages will be installed:
libapache2-mod-php libapache2-mod-php7.4 php php-mysql php7.4 php7.4-cli php7.4-common php7.4-json php7.4-mysql php7.4-opcache php7.4-readline
0 upgraded, 11 newly installed, 0 to remove and 31 not upgraded.
Need to get 3,746 kB of archives.
After this operation, 16.5 MB of additional disk space will be used.
Do you want to continue? [Y/n] Y
...
- Verify the installation. Create a simple PHP file in Apache’s root directory.
echo "<?php phpinfo(); ?>" | sudo tee /var/www/html/info.php
- Access the file via your browser. Navigate to
http://localhost/info.php. You’ll see a page displaying information about your PHP configuration.
Customizing your server
Changing the document root (optional)
I like to organize my web projects in a specific folder. Let’s say you want to do the same:
- Edit the Apache configuration file.
sudo nano /etc/apache2/sites-available/000-default.conf
- Change the
DocumentRootto your desired directory. For example:DocumentRoot /var/www/my_projects
- Restart Apache.
sudo systemctl restart apache2
Testing your server
Finally, let’s put our server to test:
- Create a sample HTML file in your document root.
cd /var/www/my_projects
echo "<html><body><h1>It works!</h1></body></html>" | sudo tee /var/www/html/index.html
- Access
http://localhostor your server’s IP. You should see a simple page saying “It works!”. For example, if your server’s IP address is 192.168.1.100, you would enter:http://192.168.1.100/webThis should display the test web page you created.
Why is this a basic web server? How does it differ from a professional setup?
What we’ve set up here is a fundamental version of a web server, perfect for learning, experimenting, or hosting small projects. However, it’s essential to understand how this differs from a professional or production-grade web server.
Simplicity and scale
Our setup is straightforward – we’ve installed the minimum components to get a web server up and running. In a professional environment, you’d likely deal with:
- Enhanced security measures (firewalls, SSL certificates for HTTPS, regular security audits)
- Load balancing to handle high traffic
- Redundant systems for backup and failover
- More complex database setups, possibly with replication and clustering
Performance optimization
In our basic setup, we haven’t delved into performance tuning. A professional setup would involve:
- Configuring Apache and MySQL for optimal performance based on traffic and server resources
- Implementing caching mechanisms
- Possibly using a more performance-optimized web server like Nginx for heavy traffic sites
Security
While we’ve touched on security with mysql_secure_installation, there’s much more to it:
- Regularly updating software to patch security vulnerabilities
- Implementing strict access controls and permissions
- Monitoring and logging to detect and prevent unauthorized access
Scalability and reliability
In a professional setting, ensuring the server can handle increased loads and remain reliable is crucial. This might include:
- Using cloud services or virtualization for easy scaling
- Setting up a cluster of servers rather than a single server
- Regular backups and a disaster recovery plan
Regular maintenance
A professional web server requires continuous monitoring, updates, and optimizations. This often involves a dedicated team to ensure smooth operation.
Frequently Asked Questions (FAQs) about setting up a web Server on Ubuntu
Q1: Can I use a different Linux distribution instead of Ubuntu?
A: Absolutely! While I prefer Ubuntu for its user-friendliness and community support, you can set up a web server on other distributions like CentOS, Debian, or Fedora. The steps might vary slightly, especially with package management.
Q2: Do I need a dedicated machine to run a web server?
A: Not necessarily. You can set up a web server on your personal computer for learning and testing purposes. However, for a production environment, especially for handling real traffic, a dedicated machine or cloud-based server is recommended for better performance and security.
Q3: How can I make my web server accessible from the internet?
A: To make your server accessible from the internet, you’ll need a public IP address and possibly a domain name. You’ll also need to configure your router to forward web traffic to your server. However, be cautious about exposing your server to the internet, as it can attract security threats.
Q4: Is it necessary to learn command-line operations for server management?
A: While graphical interfaces exist for server management, knowing how to operate via the command line is highly beneficial. It gives you more control and is often more efficient for server administration tasks.
Q5: How do I keep my web server secure?
A: Regularly update your software, use strong passwords, configure firewalls, and implement security best practices like using SSL/TLS for data encryption. Regularly monitor your server for unusual activities and consider using security tools for additional protection.
Q6: Can I host multiple websites on a single server?
A: Yes, you can host multiple websites on a single server using virtual hosts in Apache. Each site can have its own domain and content, but they share the server’s resources.
Q7: How do I troubleshoot problems on my web server?
A: Check log files in /var/log/apache2/ for Apache and /var/log/mysql/ for MySQL for any errors or issues. Understanding log messages can be invaluable in diagnosing and fixing problems.
Q8: Is setting up a web server on Ubuntu a good way to learn about web hosting?
A: Absolutely! Setting up and managing a web server is an excellent learning experience. It provides hands-on knowledge of web hosting, server management, and networking basics.
Q9: Can I install a content management system (CMS) like WordPress on this server?
A: Yes, once you have Apache, MySQL, and PHP installed, you can install a CMS like WordPress. You’ll need to create a database for it and follow the installation instructions provided by the CMS.
Q10: What should I do if I can’t access my server from my browser?
A: Check if Apache is running (sudo systemctl status apache2). If it’s running and you still can’t access it, check your firewall settings and ensure that port 80 (HTTP) is open. Also, verify your server’s IP address or domain name is correctly entered in the browser.
Wrapping up
Setting up a basic web server on Ubuntu is a rewarding and educational journey that lays the foundation for understanding web hosting and server management. Through this step-by-step guide, we’ve covered the installation of the LAMP stack (Linux, Apache, MySQL, PHP), key differences between a basic and a professional server setup, and answered some common questions to ease the process.
This setup is ideal for beginners and those looking to host small projects or learn the ropes of web server management. While it’s simple enough for newbies, it also offers a glimpse into the more complex world of professional server administration. Happy hosting!