
Traceroute is a useful command as it lets you understand the routing of a connection. The utility can help you figure out your network better and also find out issues if there is any. In simple words, Traceroute, when used, prints out the complete routing of a request from origin to destination.
In this tutorial, we shall learn how to use the traceroute command with examples. But, before we run the Traceroute command, let’s learn how it works.
How Traceroute works
Traceroute might seem simple from the outside but works in a sophisticated way. The IP header’s TTL field is utilized by traceroute utility to make all the magic happen. The TTL field determines the number of hops a packet can take in a network before it is discarded. In simple terms, it establishes a packet’s lifetime.
The default value of the TTL field is either 64 or 32. Every time an intermediate router held the packet, its value decreased by 1. When the final router receives the package at a TTL value of 1, the packet is discarded. Once discarded, an ICMP error message is generated by the router and sent to the origin of the packet along with the IP address of the router.
This behavior is used by traceroute. It begins by sending a packet with a TTL value of 1 and then increases it incrementally. Whenever an intermediatory router receives a packet with a TTL value of 1, it discards it and sends the ICMP error message along with with IP address. This way, the package routing is determined from its source to destination.
Traceroute in action
Let’s see how to use traceroute in Linux. For simplicity, we are going to use Ubuntu.
Syntax
The syntax of the traceroute utility command is as below.
traceroute [options] address [path-length]
Generally, Linux operating systems come with traceroute pre-installed. However, if it is not present, then you can install it using any of the following commands.
sudo apt install inetutils-traceroute
sudo apt install traceroute
Let’s try to use traceroute on Google.com with no options and path-length.
traceroute google.com
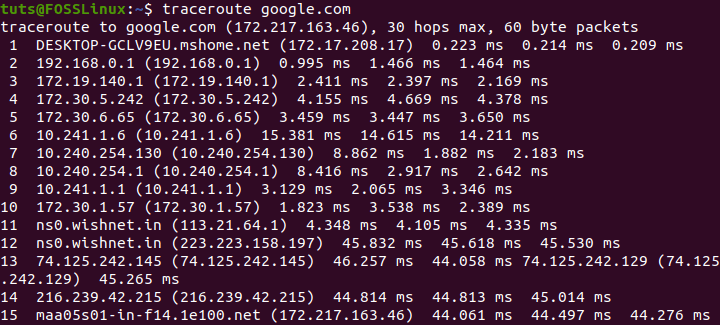
Running traceroute command on Google.com
Alternatively, you can also provide the IP address of Google.com or the server you want to trace packages to.
Let’s try to understand the response or output of the traceroute command below.
- The first line of the output tells you the IP-address(172.217.163.46 in the above case) and the hostname(google.com) of the server you are tracing. It also tells you the number of hops(30) and the packet size in bytes(60 bytes).
- All the next lines are about each hop that leads to the destination. Each hop name and address is given at first. Then, the roundtrip time is showed, which is the time it requires for the package to hop and return to the origin.
The three round trip response times are for three packets that are sent by traceroute.
You can also set the number of packets to send using the -q option.
traceroute google.com -q 4
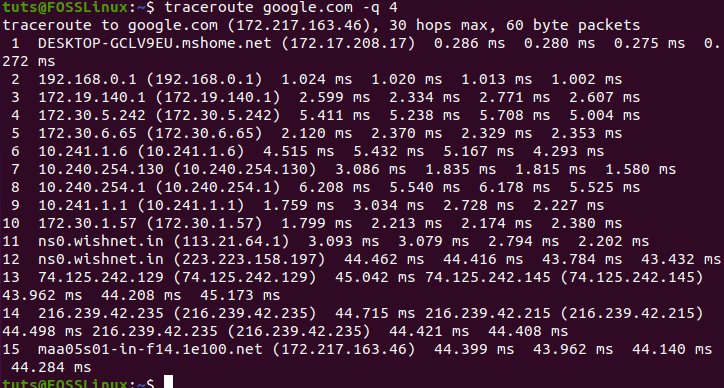
Changing the number of packets sent by traceroute command
In the above example, the traceroute reached its destination(check the google.com server IP address and the IP address mention in the last line — both of them should match). However, that’s might not always be the case. If the server is not reachable, it will output in the form of * * *.
Traceroute using options
Traceroute does come with some useful options. Let’s explore them below.
Traceroute with IPv6
You can traceroute using the IPv6 protocol. To do so, you need to use the -6 option.
traceroute -6 google.com
Traceroute with IPv4
To do tracerouting using IPv4 protocol, use the command as below.
traceroute -4 google.com
Hide hostname and IP address
You can also hide the IP address and hostname in the output. To do so, use the traceroute command with -n option.
traceroute -n google.com
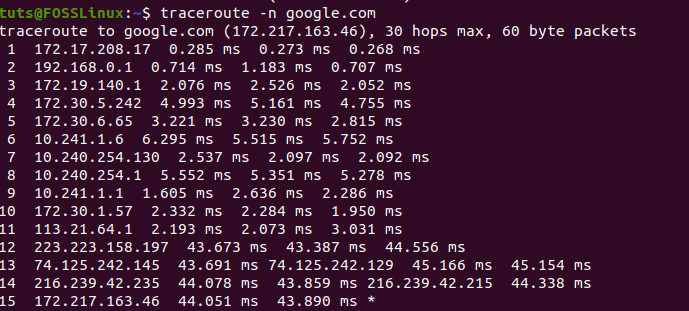
Traceroute with -n option to hide hostname and IP address
Setting wait response time
To set a wait response time, you need to use -w option. The wait option determines how long it should wait before a probe is sent out.
Let’s see the wait response time to 2 seconds below.
traceroute -w 2 google.com
Specifying interface to use
If you are using more than one network interface to connect to the internet, you can specify the interface to use while doing traceroute. You need to use -i option for this.
traceroute -i interface-name address
Conclusion
This leads us to the end of our traceroute tutorial. Are you now comfortable using it? What are the instances you are using it for? Share with your fellow FOSS Linux users in the comments below.