
To connect to a Wi-Fi network, one would go to the top bar and click on the Wireless icon and then select the Wireless network from the list of displayed SSIDs. It follows with entering the security credentials, if any.
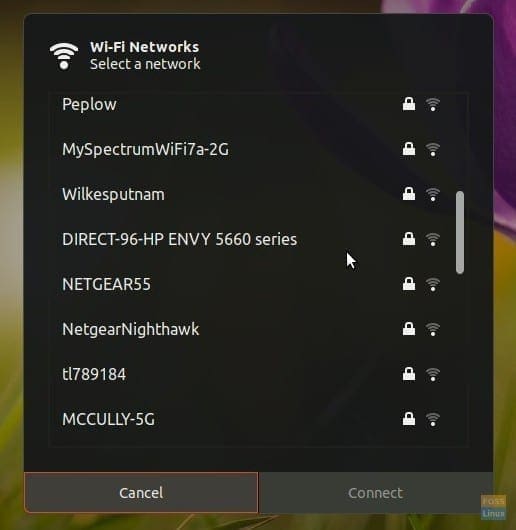
Default Wi-Fi Networks DIalog box in Ubuntu 18.04
Being an Ubuntu user, you may have figured out that you won’t find a refresh option in the Wi-Fi Networks dialog box.
I think a refresh button or something could help a user quickly see the wireless network name without leaving the dialog box.
This is especially useful when the wireless network is activated while in the Wi-Fi Networks dialog box. A typical example is enabling the Wi-Fi hotspot from your smartphone to share the internet with your PC.
Adding “Refresh” to the Wi-Fi Networks dialog box in Ubuntu GNOME
In this article, I will show you how to add this convenient feature, “Refresh.” This guide is tested on Ubuntu 18.04 LTS but should work on lower Ubuntu versions with a GNOME desktop environment.
Step 1) Install GNOME Extensions
One of the perks associated with the GNOME desktop environment is access to the world of GNOME extensions. Thousands of extensions will help you tweak your desktop to your needs, including productivity, eye-candy effects, and user experience.
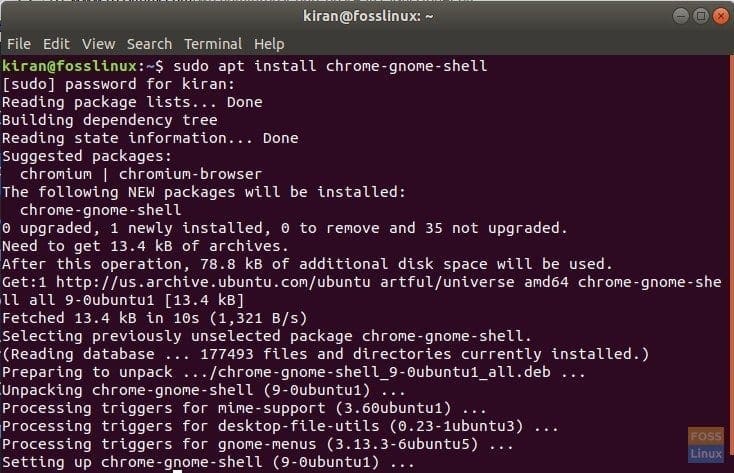
“Refresh Wi-Fi connections” is a GNOME extension that helps in adding the refresh icon to the Wi-Fi networks dialog box. Before you can install this extension, you first need to install GNOME extensions on your Ubuntu PC. If you have done it already in the past, you can skip this step.
Prerequisite: You must have Firefox or Chrome/Chromium Browser installed.
Step 1.a) Launch ‘Terminal’.
sudo apt install chrome-gnome-shell
GNOME Shell Integration in Ubuntu 17.10
Step 1.b) Next, click on the below link on Firefox or Chrome browser.
Add GNOME Shell extensions to your Browser
Step 1.c) Click on the link that says, “Click here to install Browser extension.” You can open it on Firefox or Chrome Browser.
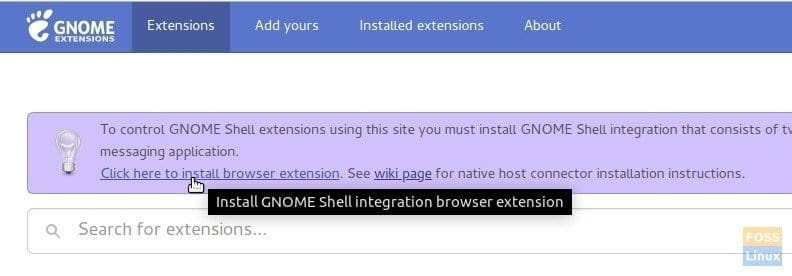
GNOME Shell Integration Browser Extension
Step 1.d) Click “Add extension”.

Add extension
That’s it! Your system is now ready to install the GNOME extensions!
Step 2) Go to this URL: https://extensions.gnome.org/extension/905/refresh-wifi-connections/
Step 3) Toggle the button to “ON” and install it.
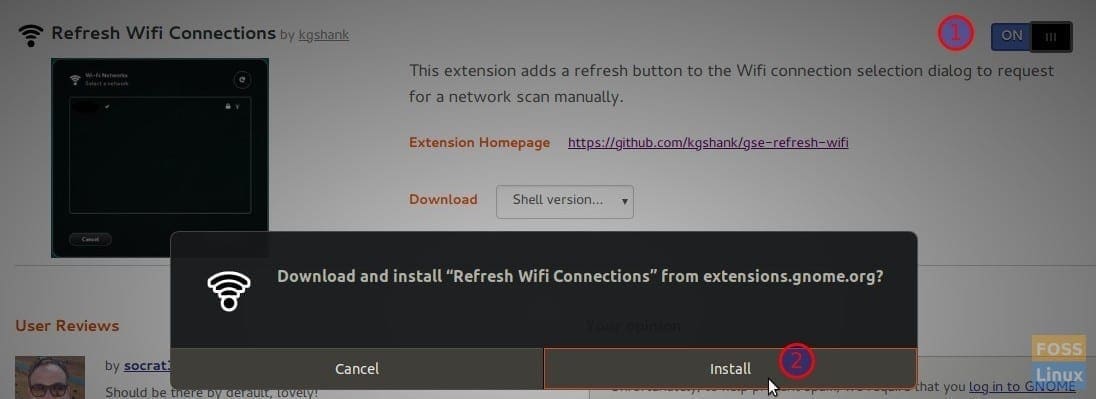
Refresh Wi-Fi Networks
Step 4) The new feature should be added. To check it, click on the wireless icon on the top bar > Your Wi-Fi network name > “Select Network.” You should see the new refresh icon.
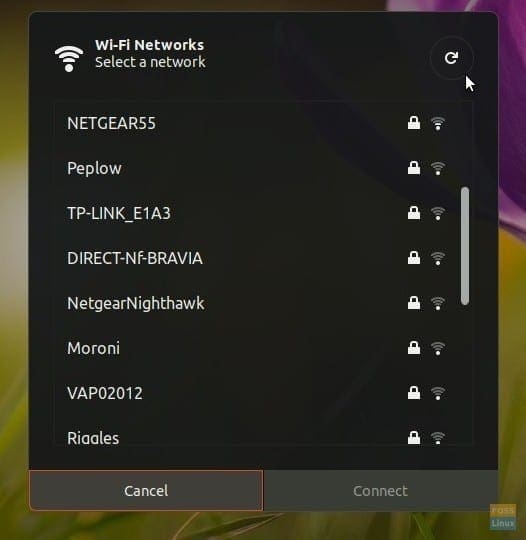
Refresh Feature Added
1 comment
I think this extension is now removed from extensions.gnome.org and doesn’t exist anymore