
OpenVPN is one of the simplest ways to connect to a VPN service, especially when your VPN service provider didn’t provide a Linux desktop client. NordVPN is no exception – they don’t have Linux client.
NordVPN is immensely popular VPN service provider. Every now and then they offer 3 years unlimited bandwidth for as low as $99. That’s as little as $2.75 per month. They boast to have 4,875 servers worldwide. They guarantee no logs policy and can connect 6 devices at the same time.
NordVPN have dedicated apps for Windows, Mac OS, Android, and iOS. As mentioned earlier, the only saddest part is no client for Linux. Although they do provide Chrome extension which works flawlessly within the browser, a system level client is more valuable so that you are not bound to masking only the internet browsing stuff. Nevertheless, there is still a rock solid and easier way to connect to NordVPN using OpenVPN.
OpenVPN is an open-source software application that implements VPN to create secure point-to-point connections. It utilizes SSL/TLS for key exchange and is capable of traversing network address translators (NATs) and firewalls.
Installing OpenVPN in Ubuntu
This guide is tested to be working in Ubuntu 18.04 but should also work on Ubuntu 16.04 and above as well as in Linux Mint and elementary OS.
Step 1) Launch the Terminal.
Step 2) Enter the following command to add the universe repository to your computer:
sudo add-apt-repository universe
Step 3) Update:
sudo apt-get update
Pay attention to the progress in the terminal and enter Y when prompted.
Step 4) Enter the following commands one at a time followed by pressing the enter key.
sudo apt-get install network-manager-openvpn-gnome
sudo apt-get install network-manager-openvpn
sudo apt-get install network-manager-pptp
sudo apt-get install network-manager-vpnc
Step 5) Next command will restart network services. Note that this command will interrupt the internet for a moment. Therefore, make sure you are not downloading something big which may get broken.
sudo systemctl restart NetworkManager
Configuring NordVPN Settings
Step 6) Go to NordVPN webpage and download their OpenVPN TCP configuration file. Each server has its own file. You can download the recommended server based on your location. You can download other countries config files too if you are using VPN for accessing restricted content based on region.
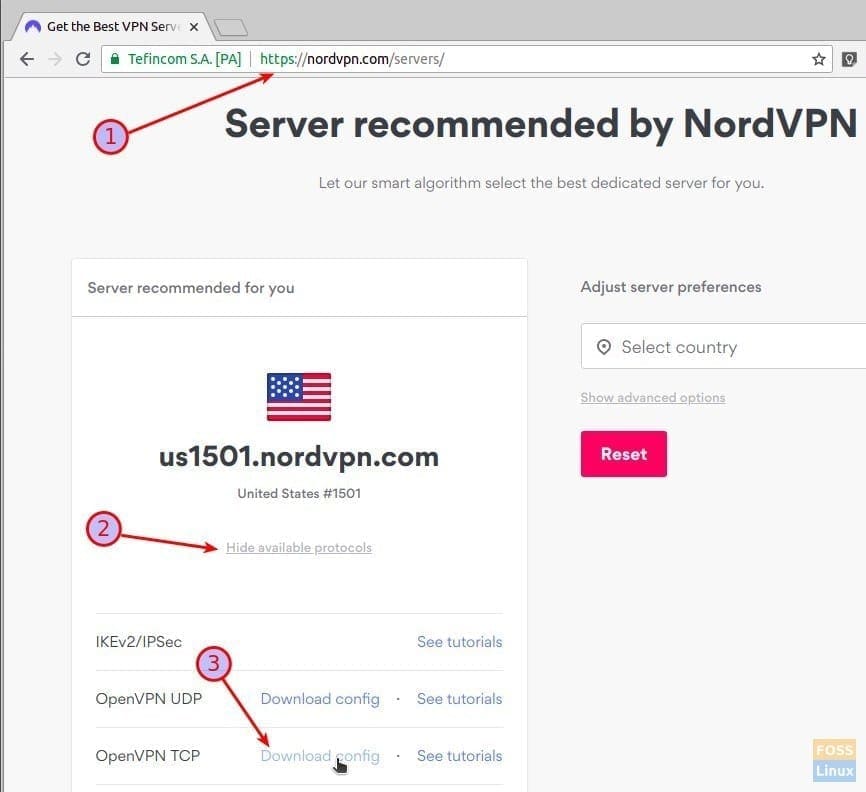
NordVPN OpenVPN Config file download
Step 7) Go to “Settings”> “Network”.
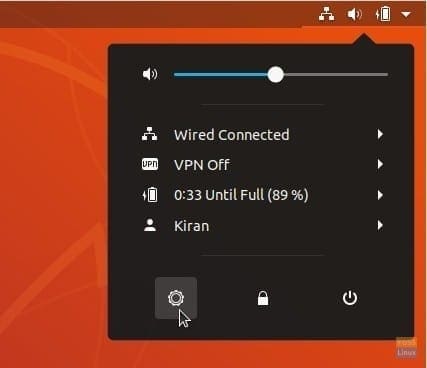
Launching the Settings App
Step 8) Click on + sign in the VPN section.
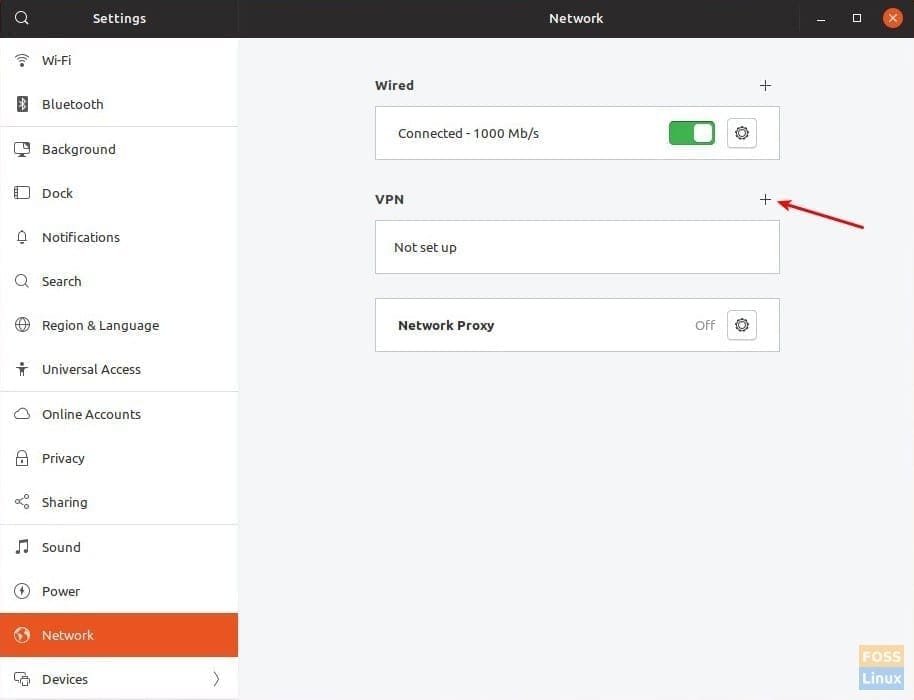
Add VPN Connection
Step 9) Click “Import from file” and select the config file that you downloaded.
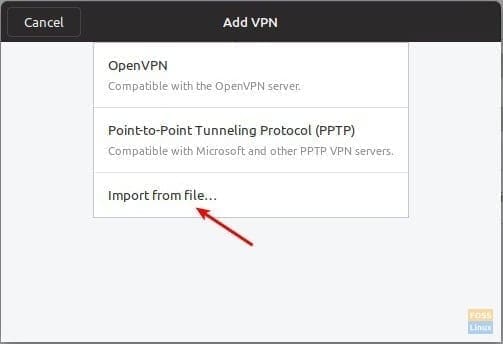
If you get an error that the file could not be read or doesn’t contain recognized VPN connection information, you might have missed Step (4) in which OpenVPN in installed. Make sure you complete all the steps.

Error selecting the NordVPN Config file
Gateway settings will be automatically populated. You can rename the “Name” like, for instance, I renamed it to VPN-US, VPN-India, etc. for easier identification. Enter the NordVPN account login details. When done, click “Add”.
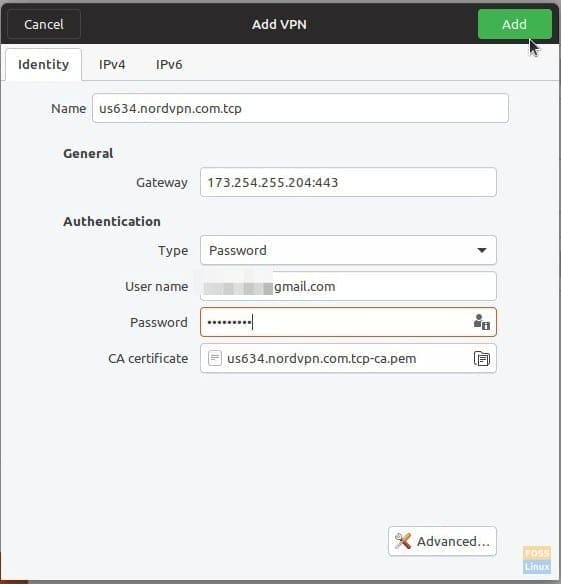
Configuring NordVPN settings in OpenVPN
Step 10) Repeat steps 6 through 9 for each NordVPN config file. You should see all the connections in the Network settings. For example, here is my test PC with VPN-US and VPN-India added.
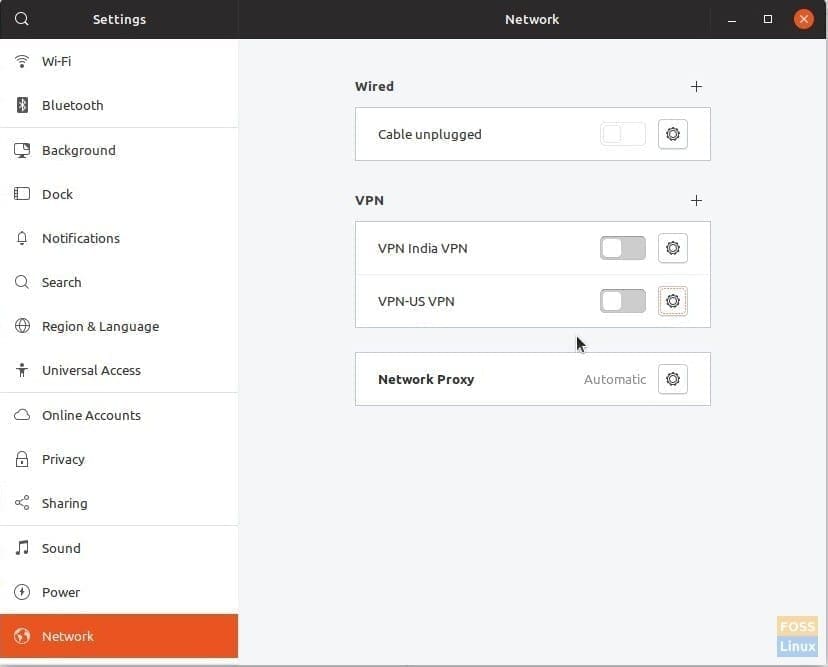
Network Connections showing configured VPN connections in Ubuntu 18.04
Step 11) That’s it! You can quickly access the VPN settings from the top panel and connect to the desired connection. After successful connection, you should see VPN in the top panel.
IMPORTANT: Make sure to look for DNS leak in your PC. If that’s happening, you will have to tweak some settings for 100% VPN internet browsing.
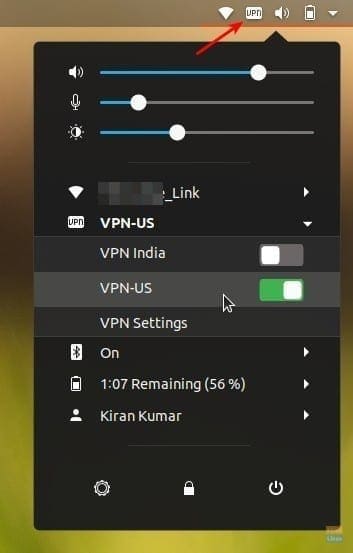
Enable VPN from Top Bar in Ubuntu 18.04
11 comments
Thanks Kiran for a really easy to follow tutorial. I am now up and running on Ubuntu 18.10.
I was getting nowhere with Nord’s installation instructions.
Thanks again.
good tutorial and it works!
Yes fantastic tut it made me crazy activating each time thru rhe FF browser.
Thanks so much for making this easy to understand tut
Have send it to a friend he will love it too
Keep up the good work
At last! A tutorial that works! I’ve looked at many, failed dozens of times but this works. I’m delighted, many thanks.
I tried to type that into my terminal on ubuntu 18.04.2 and it said that
sudo-apt-repository command was not found.
Thank you so much, the NordVPN site couldn’t help me setting-up VPN like you did.
Marc
It doesn`t work for me on Ubuntu 20.04 🙁
Sorry, it was a reply to another topic – about Hot corners
Kiran, I recently switched to NordVPN from PrivateInternetAccess who had clients for Windows and Linux-Ubuntu. They upgraded from OpenVPN to include Wireguard option. I was wondering if you have a similar set of instructions for their NordLynx (wireguard) to use with Ubunutu 20.04 VPN setting? Basically I want simpler (canned icon) approach. I’m not a Linux advanced person at CLI specifically but can follow any instructions well.
Thank you Kiran
You have solved some problems for me that I had been working on for months. I am most grateful. Your tutorials have worked in every instance.
Thank you Kiran, I installed nordvpn and it got hung up when connecting, after I followed their install instructions. With your tutorial it is up and running! This is a tutorial easy to follow and well explained. thank you so much!