
A Cron or Cron job is a time-based scheduler common in Linux/Unix systems. It schedules specified user tasks to run periodically in fixed date, time, or intervals. Most of these tasks are scripts to perform functions like backups and more. To create these cron jobs, we use the crontab commands. A crontab is a UNIX command/utility used to create and manage cron jobs.
As you will see below, creating and editing a cron job is quite simple. The most amazing part is that you don’t need to restart cron or even your PC after creating or editing a cron job. Just save the file, and you are good to go.
Common uses of Cron Jobs
- Setting the hardware time: The Network Time Protocol is used by many computers to set the system time but does not set the hardware time. With cron, you can set the hardware time based on the system time.
- Scheduling tasks and running programs running daily programs: With the cron service, you can run many system services that need daily prompt like Logwatch.
- Cleaning of directory automatically, running the back-up programs, and much more.
Basic parts of a cron command
The standard syntax of the crontab is as below:
a b c d e USERNAME /path/to/script output
1.The time and date together with how repetitive the job will be are specified by the five fields:
-
- a: Minutes: (Ranging from 0 – 59)
- b: Hours: (Ranging from 0 – 23 )
- c: Days: (Ranging from 0 – 31 )
- d: Months: (Ranging from 0 – 12 )
- e: Days of the week: (Ranging from 0 – 7. )
- a: Minutes: (Ranging from 0 – 59)
Note: The Days start with Monday. 0 and 7 represent Sunday
2. USERNAME: Remember to replace this with your username
3. The specific location and script to be executed by cron are specified by the third segment:
/path/to/script
4. The last section defines the notification to the user upon job completion as a way of keeping track of tasks:
output
However, your inbox may be full of minor tasks that are frequently channeled. To avoid this, you can disable the automatic email output by adding the string below to your cron command:
>/dev/null 2>&1
e.g
a b c d e USERNAME /path/to/script>/dev/null 2>&1
Additionally, cron uses four more values used in specifying multiple values in a field. They are:
- Asterisk (*): Refers to all values in a field.
- The comma (,): Use to separate a list of values in cron command.
- Dash (-): Specify a range of values.
- Forward slash (/): divides a value into different steps.
Setting up the cron jobs
The crontab commands are responsible for creating and editing cron jobs because the cron files should not be edited directly. The crontab defines how you can create, edit, list, debug, install, and uninstall the cron tasks.
Before getting started with cron jobs, it is essential to ensure your Linux Desktop or Server is up to date by executing the commands below:
sudo apt update
sudo apt upgrade
If you don’t have the cron package installed on your system, install it with the command below:
sudo apt-get install cron
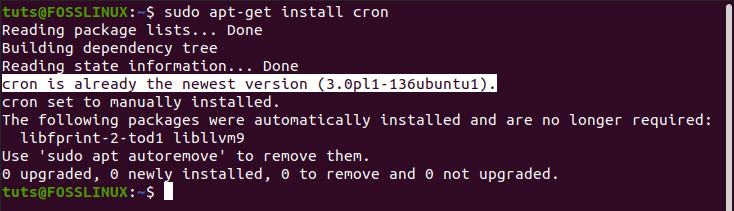
Install cron
How to edit the crontab file?
To complete the process, you will have to configure the cron job. The user logged in when a cron job is created automatically becomes the owner. That can be changed by creating a job owner who will be in charge of managing the cron job, as we will see in this post.
To open the crontab configuration file for the user currently logged in, execute the command below:
crontab -e
You will be prompted by the system to choose a suitable editor. In our case, we will choose the first option (nano editor).
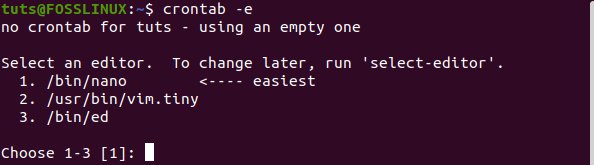
crontab -e
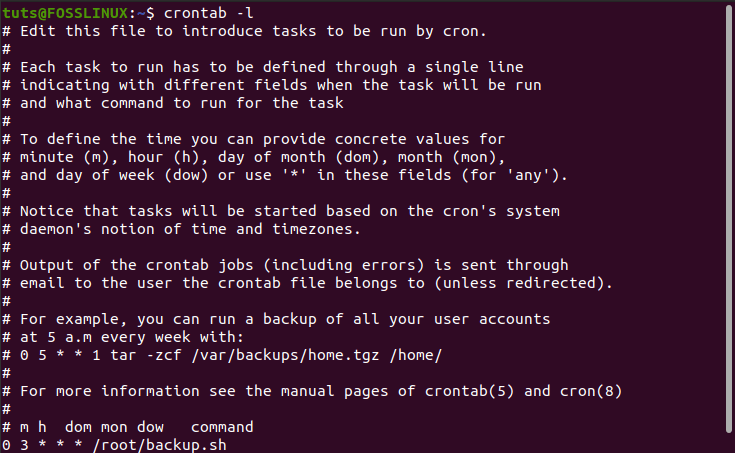
You can add one scheduled task per line according to your preferences.

crontab file
Upon adding the tasks, finish up by saving the file and exit. All the instructions provided will be read and executed by the cron daemon. The changes will be applied even without restarting your system as the repository is updated automatically.
Edit crontab for a Different User
Crontab can be edited for different users using a command in the syntax below:
crontab –u other_username –e
How to use special characters in crontab commands
Characters and operators dictate more customization of your system as they extend the capabilities of a cron task.
- The Slash is used to divide a time string into specified steps. For instance, to run a back up every 30 minutes, We can use:
*/30 * * * * - The asterisk(*) is used to execute all the values to be executed. For instance:
*/15***
- The dash(-) is used to determine the range of activities, such as the number of days. For
instance, running the code at 6 am every weekday, we will use;
0 6* * 1-5 /root/backup.sh
Here,06 stands for 6 am 1-5 stands for the number of days (Monday to Friday).
- A comma specifies the individual instances when the code should run:
0 4 * * 2,4 /root/backup.sh
The command above would execute your script code at 4 am on Tuesday and Thursday.
- You can also combine various wildcards to customize your commands even more. For example, to execute our script every other day at 35 minutes past the hour, we can use the command below:
35 1-23/2 * * * /path/to/script/script.sh1-23 specifies the range of hours, /2 sets the interval to every other hour.
Cron Options
- List all cron jobs
You may want to list the cron jobs in your system without unlocking the crontab configuration file. This can be done by launching your terminal and typing the command below:
crontab –l
list cron jobs
That command lists all the cron jobs present in your system.
- Delete all crontab jobs
To delete all crontab commands, you can use the command below:
crontab -r
- Delete a cron job for another user.
crontab -r -u other-username
Use Strings in Crontab
Strings are immensely useful tools for developers as they avoid repetitive writing of code segments. Luckily, crontabs support various strings values. They include:
@hourly: -same as – “0 * * * *“ ( Executes once every hour)
@midnight: -same as – “0 0 * * *“ ( Executes once every day)
@daily: same as midnight
@weekly: -same as – “0 0 * * 0“ ( Executes once every week)
@monthly: -same as – “0 0 1 * *“ ( Executes once every month)
@annually: -same as – “0 0 1 1 *“ ( Executes once every year)
@yearly: similar to @annually
@reboot: Executed once after every reboot/restart/startup.
A good example; if you have a backup script that you want to run every day, use the command below:
@daily /path/to/backup_script.sh
Examples of cron jobs
Here is a list of basic cron jobs that can be used when getting started:
-
- To run a script each minute:
* * * * * /your/script/path.sh
- To run a script every 40 minutes:
40 * * * * /your/script/path.sh
- To run a script each hour:
0 * * * * /your/script/path.sh
- To run a script each midnight:
0 0 * * * /your/script/path.sh
- To run a script every 23 minutes after midnight, 2 am, and 4 am every day:
23 0-23/2 * * * /your/script/path.sh
- To run a script at 4.05 every Sunday.
5 4 * * sun /your/script/path.sh
- To run a script at 10 pm during the week.
0 22 * * 1-5 /your/script/path.sh
- To run a script on December 1st – Midnight.
0 0 0 12 * /your/script/path.sh
- To run a script on Saturday at Midnight.
0 0 * * 6 /your/script/path.sh
- To run a script Every Hour.
0 * * * * /your/script/path.sh
- To run a script each minute:
With these basic examples, you will get into a deeper understanding of the sequence and how it can be modified.
Limiting Cron access
We see that cron jobs can come quite in handy, especially when you want to automate your tasks. However, it can also be risky if the system allows any user to create a cron job. Even if it doesn’t impact personal data, some cron jobs may take quite a fair amount of system resources, thus lagging the PC. To avoid such scenarios, the system admin (root user) can create an /etc/cron.allow or /etc/cron.deny the file that contains only users who can ‘create/not-create’ a cron job.
The /etc/cron.allow the file contains users who can create, edit, display, or remove crontab files. If this file doesn’t exist, all users can create and manage cron jobs other than those in the /etc/cron.deny file. If none of these files is present, superuser privileges are required to run the crontab command.
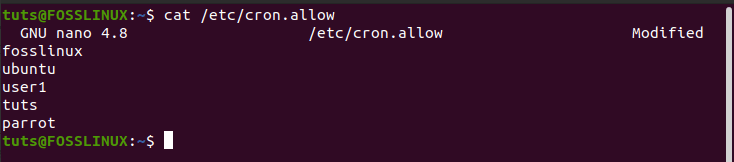
cron allow file
Now that you have prevented non-root users from creating cron jobs if they already had any, you might consider adding their cron jobs in the root crontab file. But here is a puzzle – By adding their cron jobs to the root crontab, doesn’t that run their cron jobs as root? Well, here comes the importance of the USERNAME field we discussed above in the cron command syntax. For example, the command below:
0 * * * * fosslinux /path/to/script.sh
Will run as user “fosslinux” cron job and not as the root user.
Conclusion
You now have a clear guide on using Cron jobs to automate various tasks on your system. That shouldn’t confuse you with Startup applications. Use the examples above to try and automate simple scripts. With time, you can combine special characters and wild cards to perform a lot more mundane tasks. If you are just getting started, it would be great to read our post on the bash scripting tutorial with examples that will help you create your first script.