
Linux, in its numerous distributions, is a powerful and versatile operating system. One of the first things you might need to do, especially when managing a server or a multi-user computer, is to add or delete user accounts. In this article, I’ll be taking you through the process of deleting a user in Linux. I remember my initial days with Linux; the command line felt confusing. However, over time, it became a beloved tool in my arsenal. Let’s dive into user management.
Understanding Users in Linux
Before jumping into the removal process, it’s good to get a brief understanding of how Linux views and manages users.
Every user in Linux is associated with:
- A unique username
- A user ID (UID)
- A primary group ID
- A home directory
- A default shell
These details are stored in the /etc/passwd file, which can be viewed using the cat command. For instance:
cat /etc/passwd
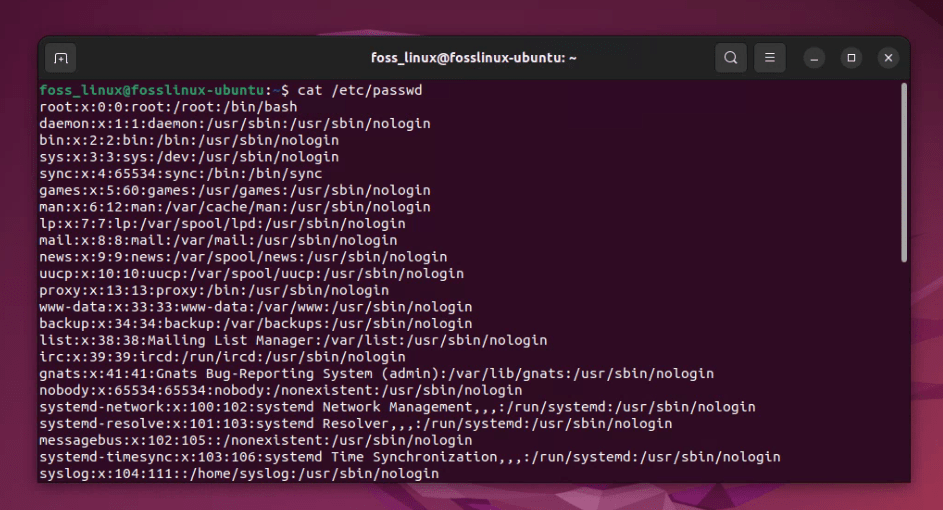
Listing all usernames from etc-passwd file
I’ve spent countless hours fiddling in this file in my early days. The /etc/passwd file contains entries for each user on the system, but its format might appear a bit “garbage-like” if you’re not familiar with its structure. Let’s break it down.
Each line in the /etc/passwd file corresponds to one user account and is structured as a series of fields separated by colons (:). The fields, in order, are:
- Username: The user’s login name.
- Password: Historically, this was the user’s encrypted password. Nowadays, for security reasons, this field usually just
- contains an ‘x’. The actual hashed passwords are stored in /etc/shadow.
- User ID (UID): A unique numerical ID assigned to the user.
- Group ID (GID): The primary group ID for the user.
- User Info: This field, also known as the GECOS field, often contains the full name of the user and can also include
- other comma-separated info like phone number, office number, etc. (although these are rare nowadays).
- Home Directory: The path to the user’s home directory.
- Shell: The user’s default shell, typically /bin/bash for bash users.
Given this, if you want to see a list of usernames and their respective home directories from /etc/passwd, you can use the cut command:
cut -d: -f1,6 /etc/passwd
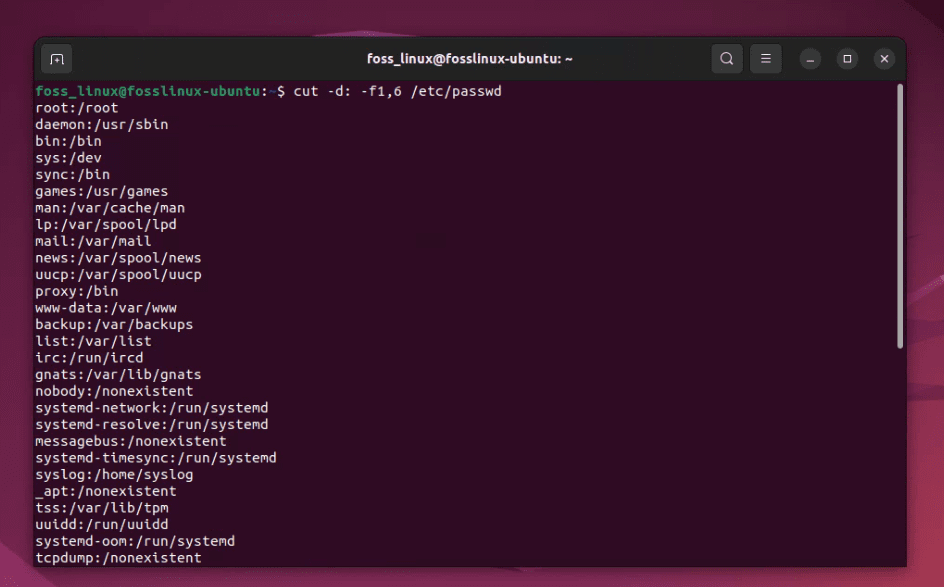
List of usernames and their respective home directories
As you can see in the above example screenshot, this will display just the usernames and their respective home directories, making it much more readable.
How to see only the ‘real’ users?
When we refer to “real” users, we usually mean regular user accounts that are not system or service accounts. These are the accounts that real people would log into and work with.
System or service accounts are created for running specific daemons or services in the background, and they typically have UIDs below 1000. On the other hand, real users usually have UIDs starting from 1000 onwards (in most distributions).
You can use the awk tool to filter and show only these real users:
awk -F: '$3 >= 1000 && $3 < 65534 {print $1}' /etc/passwd
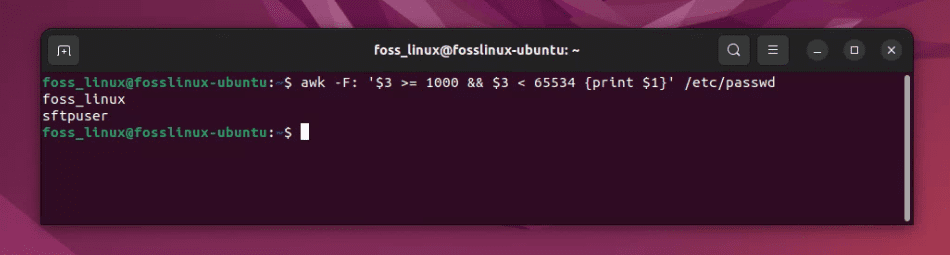
Filtering only the user created usernames using awk command
Here’s a breakdown of what this command does:
-F:: This tellsawkthat the delimiter for the fields in the file is the colon:character.$3 >= 1000 && $3 < 65534: This filters the lines where the third field (the UID) is between 1000 and 65534. UIDs from 1000 onwards are typically regular users, and 65534 is a special UID often reserved for thenobodyuser, which we exclude.{print $1}: This instructsawkto print the first field (the username) of the filtered lines.
After running this command, you’ll get a list of usernames that correspond to real, non-system users on the system. Remember, the starting UID for regular users may vary across different Linux distributions, but 1000 is a common starting point in many popular distributions like Ubuntu, Debian, and CentOS.
Removing a User
There are two primary commands for user removal:
userdeldeluser(on Debian-based systems like Ubuntu)
Both userdel and deluser are commands used to delete user accounts on Linux systems, but they come from different origins and have some variations in terms of options and underlying methods.
Let’s go through the differences:
Origin & Default Availability:
- userdel: This command is a part of the
shadowutilities, which are a standard on many Linux distributions. It’s a low-level utility that directly interacts with system configuration files like/etc/passwdand/etc/shadow. - deluser: This command is more Debian-specific and comes from the
adduserpackage. It’s a higher-level script that might be more user-friendly and can handle additional tasks thatuserdeldoesn’t. While primarily found on Debian and its derivatives (like Ubuntu), it’s not standard on other distributions like Red Hat or CentOS.
Usability:
- userdel: Being a low-level utility, it is more straightforward and might require manual interventions for comprehensive user removal. For example, to remove the user’s home directory, you’d use the
-rflag. - deluser: Being a script, it offers more automated tasks. For instance,
delusercan remove a user from all groups they’re part of without additional flags. If you want to remove the home directory usingdeluser, you can use--remove-home.
Additional Features:
- userdel: This command focuses primarily on user deletion. You’d have to use other commands from the
shadowpackage, likegroupdel, to remove associated groups. - deluser: It can remove both users and groups (acting similarly to
groupdelwhen removing groups). Additionally, it can remove a user from a specific group without deleting the user completely.
System Impact:
- userdel: Since it’s a direct utility, it might be more risky in terms of causing unintended changes if not used carefully.
- deluser: The higher-level nature of the command makes it somewhat safer for regular users. It provides warnings and often does more checks before performing actions.
Configuration:
- userdel: Does not use an external configuration.
- deluser: Utilizes configurations from
/etc/deluser.confwhich allows for a more customizable behavior.
While both commands essentially perform the same primary task (deleting users), the method and additional features vary. If you’re on a Debian-based system, you might find deluser more convenient due to its additional features. On the other hand, for direct, manual control, userdel is the go-to command on most distributions. Always make sure to check the man pages (man userdel or man deluser) for detailed options and explanations.
Using userdel
The basic syntax is:
sudo userdel [options] username
For a practical example, let’s say you want to remove a user named “john”:
sudo userdel john
Upon executing this, the user “john” will be removed but the home directory and mail spool of the user will remain.
If you want to remove the home directory as well (which I often prefer for a clean slate), you can use the -r option:
sudo userdel -r john
The above command will delete the user “sftpuser” along with his home directory.
Using deluser
For Debian and its derivatives, the deluser command might be more familiar. Here’s how to use it:
sudo deluser --remove-home sftpuser
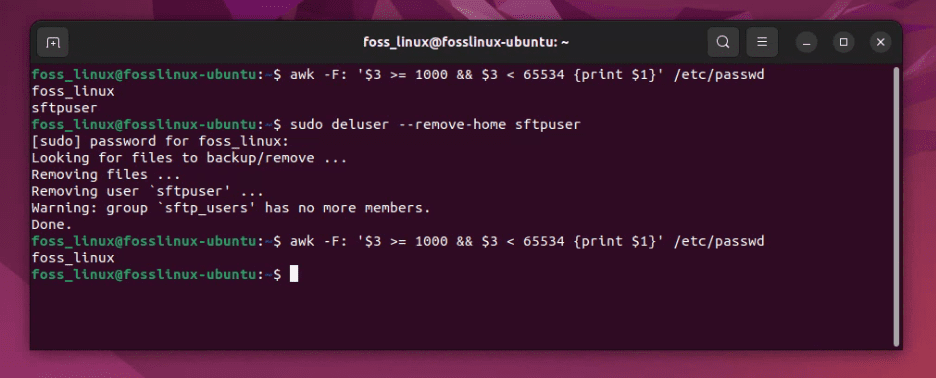
Listing and deleting a user
Pro Tips
- Backup: Before removing any user, always ensure to backup any crucial data. I remember this one time, in my excitement to declutter my Linux system, I removed a user without backing up and lost some critical project files. It’s a mistake you don’t want to make.
- Check before deleting: Use the
idcommand to ensure you’re deleting the correct user. For instance,id johnwould give you all the details about “john”. Cross-check these details before proceeding with the deletion. - Clean up additional files: Sometimes, merely deleting a user and their home directory isn’t enough. They might have files sprinkled around in temporary folders or even in system directories. Use the
findcommand to locate these files:
sudo find / -user john
This will display all files owned by “john”. Review the list and decide what to do with each file.
Managing Groups
When you delete a user, it’s essential to remember the groups they belonged to. Often, when I create users, I assign them to specific groups for shared folder access. If you merely delete the user without considering these, you might end up with unintended permissions.
To see which groups a user belongs to, use:
groups john
After removing the user, if you want to delete the group too (assuming it was created only for that user), use the groupdel command:
sudo groupdel groupname
Things I Don’t Like
I’ve been a Linux enthusiast for years, but like any relationship, there are a few quirks. When it comes to user management, one thing I’m not a fan of is that, by default, some distributions don’t remove the user’s home directory. This has led to clutter in my file system on several occasions.
Conclusion
User management, like many administrative tasks in Linux, is a dance of commands, options, and files. But once you get the hang of it, it becomes second nature. Whether you’re using userdel or deluser, it’s good to understand the intricacies of each tool and its associated processes. Linux offers powerful control over its operations, but with that power comes responsibility. Removing a user in Linux is straightforward. It’s crucial to approach the process with caution and awareness. Linux won’t stop you from shooting yourself in the foot, so double-checking is always a good idea.